How Do You Deep Clean a Vacuum Cleaner?

Quick Answer
To deep clean a vacuum cleaner, disconnect it from power, empty the dirt container, clear the brush roll and airflow path, clean approved filters and attachments, wipe the housing, and let every washed part dry completely before reassembly. This approach also matches the basic maintenance principles in Consumer Reports’ vacuum maintenance guidance.
Deep-clean your vacuum in this order
- Disconnect power: Unplug the machine or remove its battery when your model permits.
- Empty the dirt: Remove the bag or empty the dust bin before opening other sections.
- Clear the brush: Cut away wrapped hair, thread, pet fur, and carpet fibers.
- Check airflow: Inspect the floorhead, hose, wand, intake, and connectors for blockages.
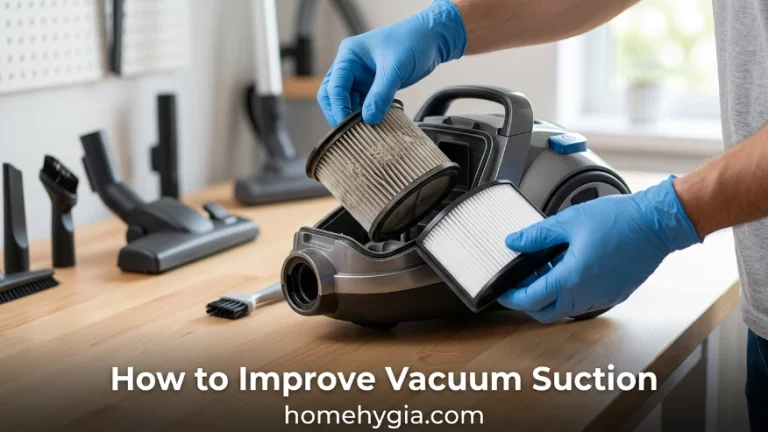
- Clean filters: Wash only filters that your manufacturer specifically identifies as washable.
- Dry completely: Never reinstall a wet filter or damp washable component.
A vacuum collects dust, hair, crumbs, pollen, pet debris, and fine particles every time you use it. Eventually, the machine doing the cleaning needs a thorough cleaning of its own.
I prefer working through the vacuum in airflow order instead of taking everything apart randomly. It makes hidden clogs easier to spot and reduces the chance of forgetting a filter or seal during reassembly.
In This Guide
- What Does Deep Cleaning a Vacuum Cleaner Mean?
- What Should You Do Before Deep Cleaning a Vacuum?
- How Do You Deep Clean a Vacuum Cleaner Step by Step?
- How Should You Clean Each Vacuum Part Safely?
- Does Deep Cleaning Change by Vacuum Type?
- How Often Should You Deep Clean a Vacuum Cleaner?
- Vacuum Deep Cleaning FAQ
What Does Deep Cleaning a Vacuum Cleaner Mean?
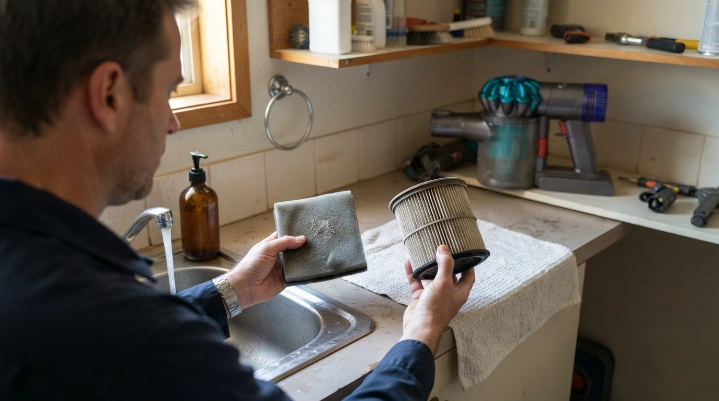
Deep cleaning means cleaning more than the visible dust bin. You inspect the complete dirt and airflow path, including filters, hoses, brush rolls, tools, seals, and removable components.
A vacuum deep clean is a detailed maintenance process that removes accumulated debris from accessible parts without opening the motor or electrical system.
- Routine cleaning: Emptying the bin, replacing a full bag, or pulling visible hair from the roller.
- Deep cleaning: Inspecting and cleaning the entire accessible airflow path.
- Repair work: Opening motors, replacing electrical components, or diagnosing internal wiring problems.
That distinction matters because more disassembly isn’t always better. Vacuum cleaners contain bearings, electrical contacts, motors, seals, and filter materials that may be damaged by water.
Why does a vacuum need deep cleaning?
Dirt doesn’t stay neatly inside the collection bin. Fine dust can settle on filters, while hair collects around rollers and larger debris can become lodged inside narrow air passages.
A dirty filter or blockage can restrict airflow even when the outside of the vacuum looks clean. Brush-roll tangles can also interfere with normal roller movement.
Deep cleaning gives you a chance to inspect several common trouble spots at once:
- Dust packed around bin inlets and cyclone openings
- Hair wrapped around brush-roll ends
- Debris trapped inside hoses and wands
- Dirty or incorrectly seated filters
- Lint packed into attachment openings
- Damaged seals or loose connections
Section Takeaway: Deep cleaning is a full accessible-airflow inspection, not a reason to dismantle the motor. The goal is to remove accumulated dirt while protecting filters, seals, and electrical components.
What Should You Do Before Deep Cleaning a Vacuum?
Start by disconnecting the vacuum from power. Unplug a corded unit, or remove the battery when your cordless model is designed for battery removal.
Next, find the owner’s manual or official maintenance instructions for your exact model. This is especially important before washing a filter, cyclone assembly, powered floorhead, or dust container.
What supplies do you need?
- Microfiber cloths
- A small soft cleaning brush
- Blunt-tip scissors or a seam ripper for hair
- Mild dish soap for approved washable parts
- Warm water
- A dry towel or drying rack
- A flashlight for inspecting hoses
- Your vacuum’s owner manual
You usually don’t need strong chemicals. Mild cleaning is safer for most removable plastic parts when their manufacturer permits washing.
The CDC’s home-cleaning guidance also distinguishes ordinary cleaning from sanitizing and disinfecting. For routine vacuum care, removing dirt and residue is normally the main goal.
Expert Alert: Stop using the vacuum and contact a qualified appliance technician if you find exposed wiring, melted plastic, sparking, battery swelling, repeated electrical shutoffs, or a strong electrical burning smell.
How Do You Deep Clean a Vacuum Cleaner Step by Step?
The safest approach is to clean from the dirt collection area outward through the accessible airflow path. Keep electrical components dry throughout the process.
1. Empty the dust bin or remove the bag
Take the vacuum outside or near a trash container if emptying it releases a lot of dust. Remove the bag or empty the bagless container without aggressively shaking debris into the room.
Check the bin inlet and surrounding seals before moving on. Compressed hair and dust often collect in these narrow areas.
2. Remove loose dust before using water
Brush or wipe dry debris from removable components first. Wetting a thick layer of dust can turn it into muddy residue that’s harder to remove.
- Tap loose debris into a trash container.
- Brush dust from grooves and seals.
- Pull lint from narrow openings.
- Inspect hinges and latches for packed dirt.
3. Clean the brush roll
Turn the floorhead over and inspect the roller. Hair usually collects through the center and around the end caps.
- Remove the baseplate or roller only if your model allows it.
- Cut across wrapped hair without cutting bristles or belts.
- Pull the loosened strands away by hand.
- Check the roller ends for tightly packed fibers.
- Make sure the roller moves normally before reassembly.
I like to check both roller ends even when the center looks clean. Thin hair can migrate toward the bearings and become tightly compressed there.
4. Inspect the hose, wand, and intake
Remove detachable hose and wand sections. Shine a flashlight through each opening instead of pushing a sharp object blindly into the tube.
If you find a blockage, loosen it gently with a non-sharp tool that cannot puncture the hose. Avoid aggressive force around flexible hose walls and electrical connectors.
5. Clean approved washable parts
Wash only parts the manual identifies as washable. A removable plastic bin or non-powered attachment may tolerate mild soap and water, but that doesn’t mean every removable component can.
Rinse away soap residue and place washed pieces somewhere with good airflow. Reassemble them only when they’re completely dry.
6. Wipe the vacuum body
Use a slightly damp microfiber cloth on compatible exterior surfaces. Keep water away from switches, charging contacts, vents, batteries, motors, and powered connections.
7. Reassemble and test
Check that filters, seals, bins, hoses, and covers sit correctly before restoring power. A poorly seated component can create an air leak that feels like weak suction.
- Confirm every washed part is dry.
- Seat filters in the correct direction.
- Lock the dust container into place.
- Reconnect hoses firmly.
- Check the brush roll for free movement.
- Run a short test on a clean floor area.
Section Takeaway: Work in order—empty, dry-clean, clear the roller, inspect airflow, wash approved components, dry them, then reassemble. Never trade drying time for convenience.
How Should You Clean Each Vacuum Part Safely?
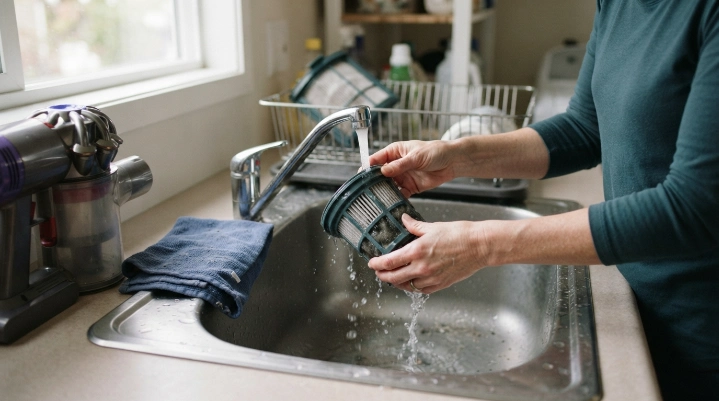
The biggest mistake is assuming that every filter or removable part can be washed. Materials and construction vary greatly between models.
| Vacuum Part | Safe Deep-Clean Approach | Water? |
|---|---|---|
| Dust bin | Empty, brush out debris, wash only when approved | Model dependent |
| Disposable bag | Replace when required | No |
| Brush roll | Cut and remove wrapped hair; wipe as permitted | Usually limited |
| Foam or pre-filter | Follow exact manufacturer cleaning method | Only if washable |
| HEPA filter | Clean or replace according to the model manual | Model dependent |
| Non-powered attachments | Remove debris; wash if approved | Often, but verify |
| Powered floorhead | Remove debris and wipe accessible surfaces | Do not submerge |
| Motor housing | Exterior wipe only | No |
Can you wash a HEPA vacuum filter?
Only wash it if the manufacturer says that exact filter is washable. HEPA describes filtration performance, not whether the filter material can safely get wet.
The EPA defines HEPA filtration as a high-efficiency particulate filtration category. EPA notes that qualifying HEPA filters can theoretically capture at least 99.97% of 0.3-micron particles under the applicable test conditions.
That performance specification doesn’t make every HEPA filter reusable. Washing a non-washable filter can damage its media or structure.
How do you clean vacuum attachments?
Start by separating powered attachments from simple plastic or rubber tools. Never soak an attachment that contains a motor, wiring, electrical contacts, or powered brush system.
- Crevice tools: Remove packed lint and wipe or wash when approved.
- Dusting brushes: Pull hair from bristles and clean compatible heads gently.
- Upholstery tools: Clear hair from fabric-catching strips and narrow channels.
- Powered heads: Remove debris and wipe accessible surfaces without submerging the unit.
Section Takeaway: “Removable” does not mean “washable.” Check the manual before putting any filter, floorhead, cyclone, hose, or attachment in water.
Does Deep Cleaning Change by Vacuum Type?
Yes. The overall principle stays the same, but upright, canister, stick, robot, and wet/dry vacuums have different service points.
Upright vacuums
Pay close attention to the brush roll, belt area, lower intake, hose connection, and filtration system. Long hair commonly wraps around rotating floorhead components.
Canister vacuums
Inspect the long hose and wand carefully because they create more places for debris to lodge. Check the bag compartment or collection bin and the powerhead connection as well.
Cordless stick vacuums
Keep moisture away from the battery, charging contacts, powered heads, and motor body. Small bins and narrow air passages can also become packed quickly.
Robot vacuums
Robot cleaning focuses heavily on the main roller, side brushes, wheels, sensors, dust bin, and filters. Don’t wet sensors, charging contacts, or electronic modules.
Wet/dry vacuums
These machines are designed differently from ordinary household dry vacuums. Filter setup may also change depending on whether you’re collecting dry debris or liquid.
Always follow the wet/dry vacuum’s specific instructions before washing the tank or changing filter configurations.
How Often Should You Deep Clean a Vacuum Cleaner?
There isn’t one universal deep-cleaning interval for every vacuum. Your usage level, household debris, filter design, pets, flooring, and manufacturer instructions all matter.
As of 2026, manufacturers still use different filter-care and maintenance schedules. Treat your manual as the final authority for your machine.
What signs mean your vacuum needs cleaning now?
- Suction drops: Check the bin, bag, filters, hose, wand, and intake.
- Debris remains: Inspect the brush roll and floorhead opening.
- Brush sounds strained: Look for hair or fibers around the roller.
- Vacuum smells dusty: Check collected debris, filters, tools, and airflow passages.
- Machine runs hotter: Stop and inspect for restricted airflow.
- Dust escapes: Check filter placement, seals, bag fit, and bin installation.
Homes with pets, long hair, carpeting, or heavy vacuum use will usually need inspections more often. Fine dust can also load filters and narrow airflow passages faster.
If household allergens are a concern, careful dust handling matters too. The Asthma and Allergy Foundation of America notes that vacuuming can stir up dust and recommends HEPA-filtered vacuuming as one part of a broader dust-mite control strategy.
Emptying a dusty bagless bin can also release debris into the air. People who are sensitive to dust may prefer emptying the container outdoors when practical.
Section Takeaway: Don’t wait for a total loss of suction. Deep-clean when dirt becomes visible in multiple components or whenever airflow, smell, sound, or brush performance changes.
Vacuum Deep Cleaning FAQ
Can I wash the inside of my vacuum cleaner?
Don’t wash the powered body or motor housing. Only wash removable parts that your manufacturer’s instructions specifically identify as washable, and let those components dry completely before reinstalling them.
Can I wash a vacuum hose?
Some removable, non-electrical hoses can be washed, while others should stay dry. Check your model instructions first, especially when the hose contains electrical wiring or powered-tool connections.
Can you use disinfectant inside a vacuum?
Avoid spraying disinfectant into filters, motors, vents, electrical connections, or the airflow path unless the manufacturer specifically approves it. Ordinary removal of dirt and residue is usually the main goal during routine vacuum cleaning.
How do I get a bad smell out of a vacuum?
Empty old debris, inspect the filter, clean the brush roll, check the hose for trapped material, and clean approved washable components. Stop using the machine if the odor smells electrical, burnt, or like melting plastic.
Should I clean the vacuum filter during every deep clean?
Inspect it during every deep clean, but don’t automatically wash it. Clean, replace, or leave it alone according to the instructions for that specific filter and vacuum model.
How long should vacuum parts dry before reassembly?
Wait until every washed component is completely dry. Exact drying guidance varies by manufacturer, so follow the manual rather than assuming one drying time works for every filter and vacuum.
Can deep cleaning restore lost suction?
It can help when restricted suction comes from a full bin, loaded filter, blocked hose, dirty intake, or poorly fitted component. Persistent weak suction after cleaning may point to damaged seals, mechanical wear, or another repair issue.
Keep the airflow path clean, and your vacuum has a much easier job.
A good deep clean doesn’t require stripping the machine down to its motor. Focus on the bin or bag, brush roll, filters, hose, wand, attachments, seals, and other user-serviceable areas.
Most importantly, let your vacuum’s manual decide what can be washed. A careful deep clean protects the appliance while keeping dust, hair, and debris from quietly building up inside it.