How to Reduce Vacuum Noise: 12 Practical Ways to Make It Quieter

Quick Answer
To reduce vacuum noise, start by emptying the bin or replacing the bag, cleaning the filters, removing brush-roll tangles, and checking the hose for clogs. Then tighten loose attachments and use a lower suction setting when full power is not needed. If you are shopping for a replacement, independent vacuum noise testing from Consumer Reports can help you compare models.
Quick steps to make a vacuum quieter
- Empty the vacuum: A packed bag or bin can restrict airflow and change the motor sound.
- Clean the filters: Dirty filters force air through a restricted path and may make the vacuum sound strained.
- Check for clogs: Inspect the hose, wand, floor head, and air passages for debris.
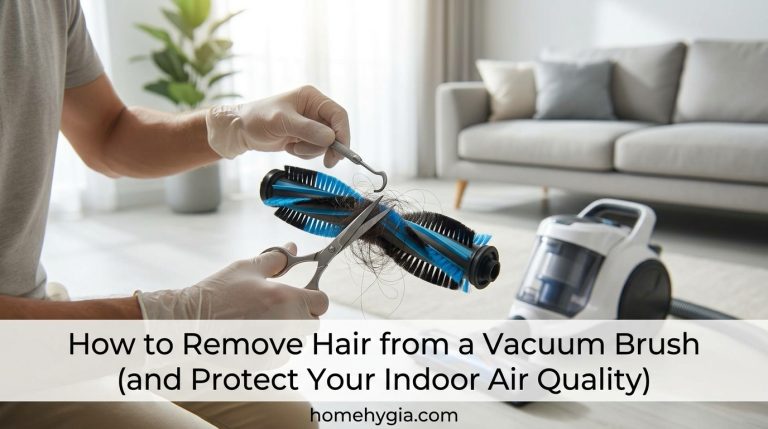
- Clean the brush roll: Cut away wrapped hair, thread, and fibers that can create rattling or vibration.
- Tighten loose parts: Secure the bin, hose, wand, attachments, and removable covers.
- Lower the power: Use an eco or reduced-suction mode when maximum suction is unnecessary.
Stop and inspect it if the sound suddenly changes
- Grinding, scraping, burning smells, or electrical buzzing: Turn the vacuum off and unplug it before checking for a problem.
Vacuum cleaners will never be silent, but they should not suddenly sound harsh, rattly, or strained. I have found that the loudest-looking problem is often something simple, such as hair around a brush roll or a partly blocked hose.
This guide explains how to reduce vacuum noise without sacrificing normal cleaning performance. I will also show you which sounds are harmless and which ones deserve professional attention.
In This Guide
Why Is My Vacuum Cleaner So Loud?
A vacuum becomes unusually loud when its normal airflow, moving parts, or vibration changes. Common causes include a blockage, dirty filter, tangled brush roll, loose attachment, damaged bearing, or worn motor component.
Definition: Vacuum noise is the sound produced by the motor, moving air, brush roll, wheels, and vibration of the vacuum body. A sudden change in that normal sound is often more useful than loudness alone when diagnosing a problem.
As of 2026, Consumer Reports notes that a typical vacuum produces around 70 decibels, although noise differs between models and vacuum types. The important clue at home is whether your machine sounds noticeably different from normal.
Restricted airflow can change the motor sound
A vacuum depends on a steady path for air to enter, pass through the machine, and exit. A blockage can make the sound sharper or more strained.
Check these areas first:
- Dust bin or bag: Empty a bagless bin before it becomes packed, or change a full disposable bag.
- Hose: Look for socks, paper, pet-hair clumps, or other objects.
- Wand: Check narrow bends where debris can lodge.
- Floor head: Inspect the airway behind the brush roll.
- Filters: Clean or replace them according to your vacuum’s manual.
Loose parts create vibration
Not every loud vacuum has a motor problem. A loose bin, tool, wheel, floor head, or hose connection can create surprising amounts of rattling.
I usually switch the vacuum off and gently shake the floor head and attachments by hand. That simple check often reveals a loose piece before I start taking anything apart.
Section Takeaway: A vacuum that suddenly becomes louder usually deserves a basic airflow, brush-roll, and loose-part inspection before you assume the motor has failed.
How Can I Reduce Vacuum Noise Right Away?
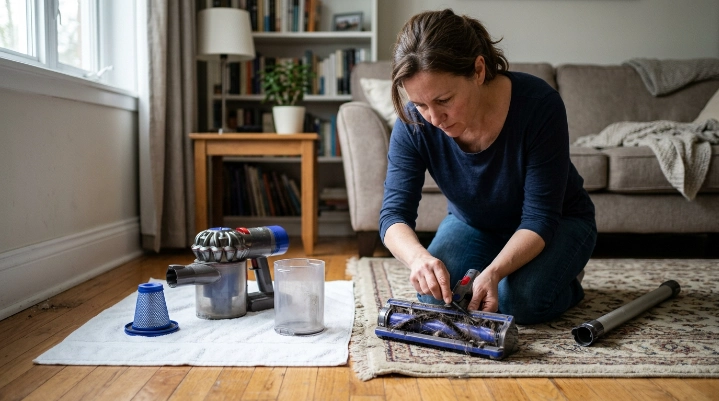
The safest approach is to remove anything that makes the vacuum work harder or vibrate unnecessarily. Most of these checks take only a few minutes and require no tools.
1. Empty the bag or dust bin
Start here because it is quick. A heavily filled vacuum can lose normal airflow and develop a different pitch.
For a bagless machine, empty the bin outdoors when practical if dust bothers you. Avoid shaking collected dust around the room.
2. Clean or replace dirty filters
Filters collect fine particles that would otherwise travel through the vacuum. Once loaded with dust, they can restrict airflow.
Only wash a filter if the manufacturer says it is washable. A non-washable filter can be damaged by water.
If household allergens are a concern, filtration matters for more than noise. The EPA’s guidance on indoor particulate matter notes that vacuuming can stir settled dust and suggests considering a vacuum with HEPA filtration.
3. Remove clogs from the airflow path
Unplug a corded vacuum before inspecting it. For cordless machines, switch the unit off and follow the manual’s instructions for safely removing the battery when applicable.
- Remove the hose and look through it toward a light source.
- Inspect both ends of the wand.
- Check the intake behind the floor head.
- Remove visible debris without forcing sharp objects through flexible hoses.
- Reassemble the vacuum securely before testing it.
4. Cut hair away from the brush roll
Long hair, carpet fibers, and thread can wrap tightly around a rotating brush. The extra drag may cause rattling, vibration, or a rougher motorized-head sound.
I pay special attention to the ends of the roller. Hair can hide around the end caps even when the middle of the brush looks clean.
5. Use lower suction when full power is unnecessary
Many stick, canister, and robot vacuums offer more than one power level. Lower power usually means less motor noise, although suction also decreases.
Use maximum power when the surface needs it. For light debris on hard flooring, a lower setting may be enough.
6. Reseat every removable component
A poorly seated dust bin or attachment can vibrate against the vacuum body. Remove it and reinstall it until it locks into its normal position.
- Check the bin: Make sure the latch closes fully.
- Check the wand: Push connections together firmly.
- Check tools: Remove loose accessories stored on the vacuum.
- Check covers: Confirm filter doors and access panels are secure.
Section Takeaway: Start with airflow and vibration. Emptying the vacuum, cleaning filters, clearing clogs, and securing loose components solve many common noise problems without repair work.
Which Vacuum Parts Should I Clean or Check?
Focus on parts that either move or carry airflow. Those components are the most common sources of new whistles, rattles, and rough mechanical sounds.
| Part | Noise clue | Quick check | Typical DIY check time |
|---|---|---|---|
| Dust bin or bag | Strained or higher-pitched sound | Empty bin or replace full bag | 1–2 minutes |
| Filter | Changed motor pitch or reduced airflow | Inspect for heavy dust loading | 2–5 minutes |
| Hose or wand | Whistling or sudden suction change | Inspect for blockage or air leak | 3–5 minutes |
| Brush roll | Rattle, knocking, or scraping | Remove tangled hair and thread | 5–10 minutes |
| Wheels or floor head | Rattle that changes while moving | Inspect for debris or loose parts | 2–5 minutes |
| Motor area | Grinding, electrical buzzing, or harsh mechanical noise | Stop using the vacuum | Professional diagnosis preferred |
Pay attention to the filter type
A pre-filter usually captures larger debris before air reaches later filtration stages. Some vacuums also use a HEPA filter for fine particle filtration.
HEPA means high-efficiency particulate air. The EPA explains the HEPA standard, but the presence of HEPA media alone does not tell you how quiet a vacuum will be.
Always follow the filter instructions for your exact Dyson, Shark, or other vacuum model. Replacement schedules and washing instructions can differ even within the same brand.
Section Takeaway: The best places to inspect are the bin or bag, filters, hose, wand, brush roll, wheels, and floor head. Leave sealed motor repairs to someone qualified.
What Do Different Vacuum Noises Mean?
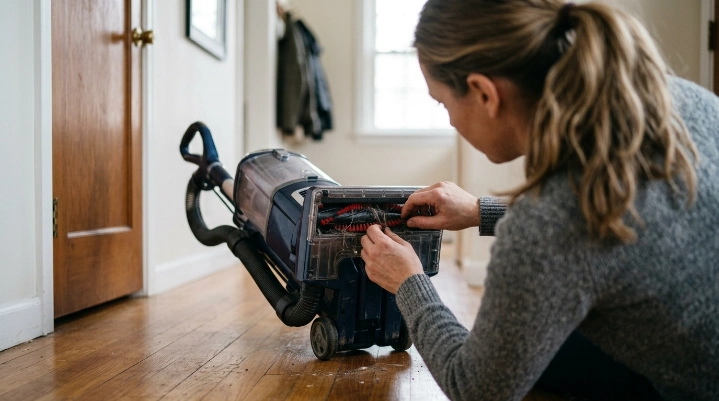
The type of sound often points toward the problem. Listen for what changed rather than focusing only on how loud the vacuum seems.
- High-pitched whistle: Check the hose, seals, wand, and airflow path for a restriction or air leak.
- Rattling: Look for loose attachments, debris inside the floor head, or a poorly seated bin.
- Repeated knocking: Inspect the brush roll for hair, string, or a foreign object.
- Scraping: Stop the brush and check for debris touching the roller or housing.
- Grinding: Switch the vacuum off because a bearing, roller, motor, or other moving component may be damaged.
- Electrical buzzing: Stop using the vacuum if the sound is new or accompanied by heat, odor, or unreliable operation.
- Normal steady hum: A consistent motor sound without performance changes is usually less concerning than a sudden new noise.
What if the vacuum gets loud and loses suction?
That combination strongly suggests checking airflow first. A full bin, loaded filter, or clogged hose can affect both sound and suction.
Do not keep running the machine while it sounds strained. Turn it off and find the restriction before continuing.
Expert Alert: If you hear grinding or electrical buzzing, smell burning insulation, see smoke, or notice damaged wiring, unplug the vacuum and stop using it. Internal electrical and motor repairs should be handled by a qualified appliance technician.
Section Takeaway: Whistling usually points you toward airflow, while rattling and knocking point toward moving or loose parts. Grinding, burning smells, and abnormal electrical sounds deserve immediate attention.
Can Floors and Room Conditions Make a Vacuum Louder?
Yes. The room itself can make the same vacuum sound louder even when nothing is wrong with the machine.
Hard floors reflect more sound
Tile, concrete, laminate, and other hard surfaces reflect sound instead of absorbing much of it. Empty rooms can make that effect stronger.
Carpet, curtains, upholstered furniture, and other soft materials absorb more sound. That is why a vacuum may seem louder in a bare hallway than in a furnished bedroom.
- Use the correct floor setting: Avoid running a powered brush unnecessarily on surfaces where the manufacturer recommends switching it off.
- Lower suction when possible: Light hard-floor cleaning may not require maximum power.
- Move slowly: Wheels and floor heads can chatter when pushed quickly across uneven surfaces.
- Vacuum during suitable hours: This does not reduce decibels, but it reduces disturbance for family members and neighbors.
Do not sacrifice filtration just to make it quieter
I would not remove a filter, open an exhaust cover, or modify seals to change the sound. Those parts are there for airflow control, filtration, safety, or all three.
For homes with allergy concerns, filtration deserves particular attention. The Asthma and Allergy Foundation of America recommends regular vacuuming and discusses vacuums designed to contain allergens.
Section Takeaway: Some perceived vacuum noise comes from room acoustics and floor contact. Change settings and cleaning technique, but do not remove filters or alter the vacuum’s sealed airflow system.
When Should I Repair or Replace a Noisy Vacuum?
Repair becomes more sensible when cleaning and basic inspections do not restore the vacuum’s normal sound. A sudden mechanical noise is more concerning than a machine that has always been moderately loud.
Consider repair when:
- The vacuum suddenly develops grinding or scraping sounds.
- The brush roll keeps knocking after you remove all visible debris.
- A wheel, bearing, or powered floor head has obvious play or damage.
- The vacuum overheats or repeatedly shuts itself off.
- The power cord, plug, switch, or electrical connection looks damaged.
- The motor sound has changed even after the filters and airflow path are clear.
Consider replacement when:
- A major repair approaches the cost of a suitable replacement vacuum.
- Several components are worn at the same time.
- Replacement parts are no longer available.
- The vacuum is consistently too loud for your household despite operating normally.
- You want a quieter model and your current vacuum has no lower-power mode.
Vacuum type also matters. Upright, canister, stick, handheld, and robot vacuums use different motor layouts, floor heads, and sound-control designs.
Do not assume a small cordless vacuum will automatically be quiet. Motor speed, airflow design, floor-head noise, and power setting can make two similar-looking machines sound quite different.
If allergies are part of your home-hygiene routine, compare filtration and sealing as well as sound. Quiet operation should not be the only buying criterion.
Section Takeaway: Repair a noisy vacuum when a serviceable component has failed and the machine is otherwise worth keeping. Replace it when repair costs, age, repeated faults, or unavoidable noise make a new machine the more practical choice.
Frequently Asked Questions About Reducing Vacuum Noise
Why has my vacuum suddenly become much louder?
A sudden increase in noise can come from a clogged hose, full bin, dirty filter, tangled brush roll, loose attachment, or damaged moving part. Turn the vacuum off and inspect these areas before continuing to use it.
Can a dirty vacuum filter make the machine louder?
Yes, a heavily loaded filter can restrict normal airflow and change the sound of some vacuums. Clean or replace the filter only as directed in your model’s manual, because not every vacuum filter is washable.
Does lower suction make a vacuum quieter?
Often, yes. Vacuums with adjustable motor power usually produce less motor and airflow noise on lower settings. The tradeoff is reduced suction, so use the lowest setting that still cleans the surface effectively.
Why does my vacuum make a whistling sound?
Whistling often comes from air moving through a narrow restriction or leak. Check the hose, wand, filters, seals, dust bin, and floor-head airway for a blockage or poorly fitted connection.
Why does my vacuum rattle when I move it?
A rattle that changes while you move the machine often points to the floor head, wheels, attachments, or loose debris. Turn the vacuum off, unplug it when appropriate, and inspect these components before using it again.
Is a 70 dB vacuum considered normal?
Consumer Reports describes a typical vacuum as producing about 70 decibels, but models vary. More important than one number is whether your particular vacuum suddenly becomes louder, develops a new sound, or loses performance.
Can I add foam inside my vacuum to reduce the noise?
I would not add homemade foam or insulation inside a vacuum. It can interfere with cooling, airflow, electrical components, or moving parts. Use manufacturer-approved replacement pieces or have damaged internal sound insulation serviced professionally.
Section Takeaway: Most noise complaints start with airflow, filters, clogs, brush-roll debris, or loose components. A sudden grinding, burning, or electrical sound is different and should not be ignored.
The simplest way to keep a vacuum quieter is regular maintenance. Empty it before debris becomes packed, keep the airflow path clear, clean the brush roll, and service filters exactly as the manufacturer recommends.
When the sound changes suddenly, treat that change as useful information. A five-minute inspection today can prevent you from continuing to run a vacuum with a simple blockage or a developing mechanical fault.