How Do You Empty a Robot Vacuum Dustbin?

Quick Answer
To empty a robot vacuum dustbin, pause the robot, remove the collection bin, hold it over a trash can, open the bin door, and let the debris fall out. Check the filter area before reinstalling the bin, and follow robot vacuum cleaning guidance for regular maintenance.
Quick Steps
- Stop the robot: Pause its cleaning cycle and place it on a stable surface.
- Remove the bin: Press the release button or latch specified for your model.
- Position it low: Hold the dustbin inside or directly above your trash container.
- Empty the debris: Open the door and gently shake out dust, hair, and crumbs.
- Check the filter: Remove loose debris without washing it unless your manual allows washing.
- Reinstall the bin: Close every latch and slide the bin back until it seats correctly.
One Important Rule
- Never rinse a dustbin or filter unless the instructions for your exact robot say that part is washable.
Emptying a robot vacuum sounds like a tiny maintenance job. Doing it carelessly, however, can scatter the same dust you just removed from your floors.
I’ve found that the easiest routine is to deal with the bin immediately after cleaning. This guide covers manual bins, filters, self-emptying docks, common mistakes, and cleaning frequency.
In This Guide
How Do You Empty a Robot Vacuum Dustbin Step by Step?
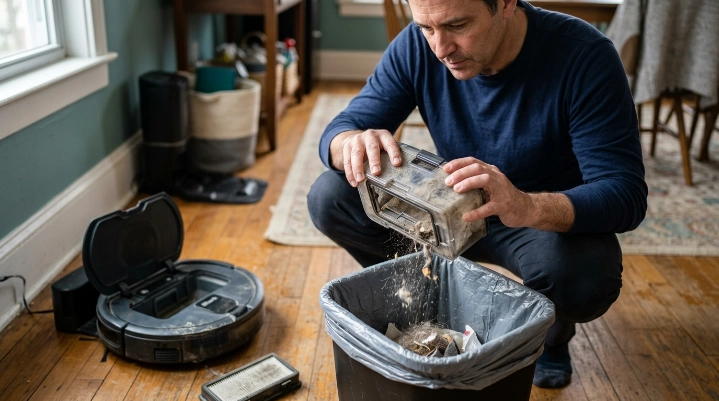
The basic process is simple: stop the robot, remove the bin, dump the debris, inspect the filter area, and reinstall everything. Your model’s latch location may differ, but the general routine is similar.
Definition: A robot vacuum dustbin is the removable container that stores dust, hair, crumbs, pet debris, and other material collected from your floors.
1. Pause the robot vacuum
Stop the cleaning cycle before touching the bin. I prefer waiting until the robot sits completely still.
If your manual tells you to shut down the machine before maintenance, follow that instruction. Don’t remove components while the robot is moving.
2. Move close to a trash container
Bring the robot or removable bin close to your trash can. This prevents you from carrying an open container across the room.
- Fine household dust: Lower the bin inside the trash container before opening it.
- Pet hair: Keep a tissue or small cleaning tool nearby for packed clumps.
- Allergy concerns: Avoid aggressive shaking that sends particles back into the air.
The EPA notes that cleaning activities can stir settled particles into indoor air. Its indoor particulate matter guidance also recommends regular cleaning to limit household dust buildup.
3. Release the dustbin
Find the bin release button, tab, or latch. Press it while gently sliding or lifting the bin in the intended direction.
Never pry the container out with a screwdriver or other tool. Resistance may mean a latch is still engaged.
4. Open the dustbin over the trash
Position the debris opening toward the trash before releasing the door. Keep the opening pointed away from your face.
This is where most accidental dust clouds happen. Opening the bin low inside a lined trash can helps contain loose debris.
5. Empty hair, dirt, and crumbs
Let gravity do most of the work. A few gentle taps are usually enough to release loose dirt.
- Hair: Pull strands from the opening without tugging on the filter.
- Crumbs: Remove pieces wedged against the door or seal.
- Fine dust: Don’t blow into the bin with your mouth.
- String or fibers: Remove them carefully before closing the door.
For households with allergy concerns, AAFA recommends regular cleaning to reduce indoor allergens. Its healthier-home guidance also highlights regular vacuuming as part of an indoor cleaning routine.
6. Inspect the filter area
Look for a thick layer of dust around the filter, screen, or airflow opening. Remove loose debris using the method approved by your manufacturer.
Some filters can be tapped clean. Others require a brush, replacement, or another model-specific procedure.
7. Close and reinstall the bin
Close the dustbin door completely before returning it to the robot. Slide the container into place until its latch engages.
- Check that the bin sits flush with the robot body.
- Confirm the debris door is fully closed.
- Make sure the filter is seated correctly.
- Restart only after every component is secure.
If the app says the dustbin is missing, remove it and install it again. Don’t solve the problem by pushing harder.
Section Takeaway: Empty the bin directly over a trash container, handle fine dust gently, inspect the filter area, and reinstall every component securely.
Where Is the Robot Vacuum Dustbin?
The dustbin is usually accessible from the top, back, or underside of the robot. Its exact position depends on the brand and model.
Newer designs can differ considerably. For example, some robots use a removable top cover before you can reach the bin.
How to identify the correct compartment
- Look for an icon: A bin or trash-can symbol often marks the release.
- Check the top cover: Some bins sit underneath a removable lid.
- Inspect the rear: Other models use a rear-sliding collection bin.
- Use the manual: Check the maintenance diagram when the release isn’t obvious.
Don’t confuse the dustbin with a mop-water tank on combination vacuum-and-mop robots. Some machines contain both components.
iRobot’s current bin and filter instructions, for example, show model-specific release, filter, rinsing, and reinstallation procedures. This is why checking your exact model matters.
Expert Alert: If the release latch, sensor, electrical contact, or internal housing appears broken, stop forcing the assembly. Contact the manufacturer or a qualified appliance technician instead of opening sealed electrical components.
Section Takeaway: The dustbin location isn’t universal, so use markings and your model’s manual rather than forcing an unfamiliar panel.
Should You Clean the Dustbin and Filter After Emptying?
Yes, but a full wash isn’t necessary after every emptying. A quick inspection helps prevent packed debris, blocked airflow paths, and poorly closing seals.
The biggest mistake is assuming every filter or bin can be washed. They can’t.
What should you check every time?
- Bin opening: Remove hair that prevents the door from closing.
- Bin walls: Clear visible clumps of dust and debris.
- Filter surface: Check for a heavy coating of fine particles.
- Filter frame: Remove loose hair or lint around its edges.
- Seals: Check rubber edges for trapped grit.
If your manufacturer allows the bin to be rinsed, remove any non-washable filters first. Let washable parts dry completely before reinstalling them.
Never guess. Even products from the same manufacturer can have different cleaning rules.
Can you wash a robot vacuum filter?
Only wash a filter when the instructions for that exact filter say it is washable. Many vacuum filters aren’t designed for contact with water.
For example, iRobot specifies that filters on several Roomba series should not be washed. Roborock also provides model-specific dustbin and maintenance tutorials.
| Part | Routine Check | Water? |
|---|---|---|
| Dustbin | Empty debris and wipe buildup | Only if the manual says it’s washable |
| Filter | Tap, brush, clean, or replace as directed | Never unless explicitly washable |
| Electrical contacts | Inspect for visible dust | Keep dry unless manufacturer says otherwise |
| Rubber seals | Remove grit and trapped fibers | Follow model instructions |
Section Takeaway: Inspect the bin and filter whenever you empty them, but treat washing instructions as model-specific.
Manual Dustbin vs. Self-Emptying Robot Vacuum
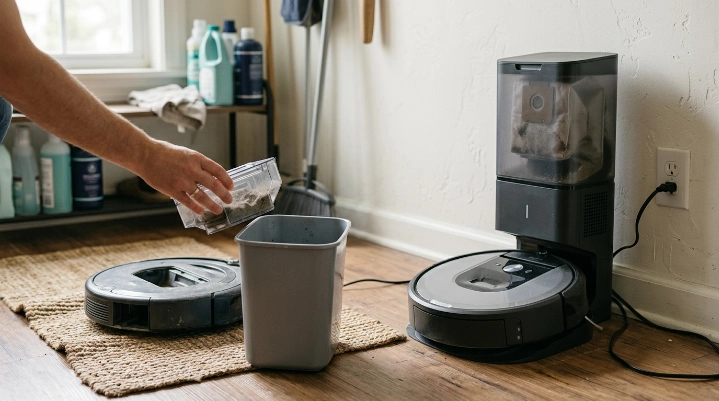
A manual robot stores debris in its onboard dustbin until you empty it. A self-emptying model transfers collected debris into a larger container inside its dock.
Self-emptying reduces routine handling, but it doesn’t eliminate maintenance. The onboard bin, dock pathway, filters, and dock bag or container still need attention.
| Feature | Manual Dustbin | Self-Emptying System |
|---|---|---|
| Debris transfer | You remove and dump the onboard bin | Dock transfers debris automatically |
| Routine handling | Usually more frequent | Usually less frequent |
| Onboard bin inspection | Required | Still required |
| Extra maintenance point | None beyond robot components | Dock bag/bin and airflow pathway |
| Possible blockage | Robot intake or bin area | Robot plus dock evacuation path |
How do you empty a self-emptying robot vacuum?
Normally, the robot returns to its dock and transfers debris automatically. You then empty or replace the dock’s larger debris container according to its instructions.
If auto-emptying stops working, inspect user-accessible airflow paths for obvious blockages. Don’t dismantle the dock motor or sealed electrical assemblies.
- Check whether the dock’s bag or container is full.
- Inspect the robot’s onboard bin for packed debris.
- Check accessible intake openings for obstructions.
- Confirm the robot is docking in the intended position.
- Review auto-empty settings in the manufacturer’s app.
Section Takeaway: A self-emptying dock reduces how often you handle debris, but it adds another container and airflow path that need maintenance.
How Often Should You Empty a Robot Vacuum?
Empty a manual robot vacuum when its bin is full or as often as the manufacturer recommends. There isn’t one universal schedule for every household.
Some homes fill a robot bin quickly. Others can complete several light cleaning runs before significant debris accumulates.
You may need to empty it more often when you have:
- One or more shedding pets
- Long human hair
- Carpets that release trapped debris
- Children dropping food crumbs
- Heavy outdoor dirt tracked indoors
- A small onboard collection bin
- Recent renovation or construction dust
- Several rooms cleaned in one run
When I use an unfamiliar robot in a household, I check the bin after its first few complete runs. That gives me a practical picture of how fast that specific home fills it.
For example, iRobot’s guidance for some older Roomba models recommends emptying the bin after each cleaning cycle or when the full-bin indicator appears. Treat that as model-specific guidance, not a universal rule.
What about self-emptying models?
Check the dock’s debris bag or container according to its indicator and manufacturer schedule. You should still inspect the onboard bin periodically.
Hair or larger objects can sometimes remain behind even after an automatic evacuation cycle. A quick visual check can catch that early.
Section Takeaway: Use your manufacturer’s instructions as the baseline, then adjust your routine based on how quickly your household fills the bin.
What Mistakes Should You Avoid When Emptying a Robot Vacuum?
The most common mistakes involve dust clouds, water, forcing parts, and forgetting the filter. Fortunately, they’re easy to avoid.
Don’t shake the bin aggressively indoors
A hard shake can send fine dust back into the room. Lower the dustbin into your trash container and use gentle taps instead.
Don’t blow dust from the filter
Blowing into a filter can scatter fine debris toward your face. Use the cleaning method listed for the filter instead.
Don’t wash an unknown filter
A filter can look washable even when it isn’t. Water can damage some filter materials and affect their shape.
Don’t reinstall wet components
Any part that the manufacturer allows you to rinse should dry completely before installation. Keep moisture away from electrical areas.
Don’t force a stuck dustbin
A stubborn bin may have an engaged latch or trapped debris. Check the release mechanism before applying more pressure.
Don’t forget the seals and openings
Hair caught around the bin door can stop it from closing correctly. Clear visible debris before sliding the bin back into place.
- Bin won’t come out: Recheck every release tab.
- Bin won’t close: Look for hair or large debris near the door.
- Robot says bin is missing: Remove and reseat the container.
- Suction seems weaker: Check the bin and filter for buildup.
- Auto-empty dock struggles: Inspect accessible airways and the dock container.
For broader household dust control, EPA guidance recommends regular cleaning and notes that vacuuming can disturb settled particles. AAFA also explains that cleaning may temporarily make allergens airborne.
Section Takeaway: Gentle handling, correct filter care, dry components, and properly seated latches prevent most dustbin-related problems.
Frequently Asked Questions
Do I need to empty my robot vacuum after every use?
Not always. Empty it whenever the bin is full and follow your manufacturer’s maintenance schedule. Homes with pets, heavy debris, or small robot bins may need emptying after nearly every cleaning cycle.
Can I rinse a robot vacuum dustbin with water?
Only rinse it if the instructions for your exact model say the bin is washable. Remove non-washable filters first, and let the bin dry completely before returning it to the robot.
Can I wash the robot vacuum filter?
Don’t assume a filter is washable. Many robot vacuum filters must remain dry, while some models use washable filter components. Follow the instructions for the exact filter installed in your machine.
Why does dust fly everywhere when I empty the bin?
Fine particles become airborne when the bin is opened high above the trash or shaken forcefully. Hold the container low inside a lined trash can and let debris fall out gently.
What should I do if hair is stuck inside the dustbin?
Pull loose hair away carefully with your fingers or the cleaning tool supplied with the vacuum. Don’t puncture the filter, damage seals, or use sharp objects near delicate components.
Do self-emptying robot vacuums still need their bins cleaned?
Yes. Automatic evacuation reduces manual emptying, but debris can remain inside the onboard bin or airflow path. Inspect the robot and maintain the dock according to the manufacturer’s instructions.
Why does my robot say the bin is missing after I emptied it?
The bin may not be fully seated, or its door or filter may be installed incorrectly. Remove the container, check each component, and reinstall it until the latch engages normally.
Final Takeaway
Emptying a robot vacuum dustbin takes only a minute once you know the release mechanism. Pause the robot, empty the bin over a trash can, inspect the filter area, and reinstall everything securely.
As of 2026, robot designs vary enough that the owner’s manual still matters. Make your model’s instructions the final authority on washing, filter care, and self-emptying dock maintenance.
If you’re building a regular home-hygiene routine, make dustbin checks part of your robot’s normal maintenance. A little attention after cleaning can save you from packed debris, dusty filters, and avoidable troubleshooting later.
“`