How Do You Clean Vacuum Wheels? A Step-by-Step Home Hygiene Guide

Quick Answer
Cleaning vacuum wheels requires removing tangled hair and trapped indoor pollutants using basic tools like tweezers, scissors, and a damp microfiber cloth. Unplug your machine, pop out removable axles if possible, slice through tightly wound thread, and wipe down rubber treads to restore smooth rolling action.
Essential Cleaning Steps
- Power disconnection: Always unplug your corded vacuum or turn off your robot and stick models before maintenance.
- Debris extraction: Use fine tweezers or a seam ripper to pull out embedded grit and carpet fibers.
- Hair slicing: Slide small embroidery scissors under wrapped strands of hair to cut them free without scratching plastic.
- Tread wiping: Clean sticky rubber tires with warm water and mild dish soap to eliminate black floor streaks.
- Axle lubrication: Apply a tiny drop of silicone lubricant if wheels squeak after reassembly.
Pro Maintenance Tip
- Inspect and clear your vacuum wheels monthly to prevent motor strain and protect delicate hardwood floors from scratches.
If your vacuum cleaner feels heavy to push or leaves black scuff marks across your pristine hardwood floors, dirty wheels are usually to blame. As a home hygiene enthusiast who has torn down dozens of upright, canister, and robot vacuums, I can tell you that wheels act like magnets for pet hair, carpet fibers, and sticky household grime.
Neglecting this simple maintenance task strains your motor and spreads trapped allergens right back onto your clean floors. This comprehensive guide walks you through the exact tools, techniques, and safety steps needed to restore your vacuum wheels to like-new condition.
In This Guide
Why Do Vacuum Wheels Get Dirty So Quickly?
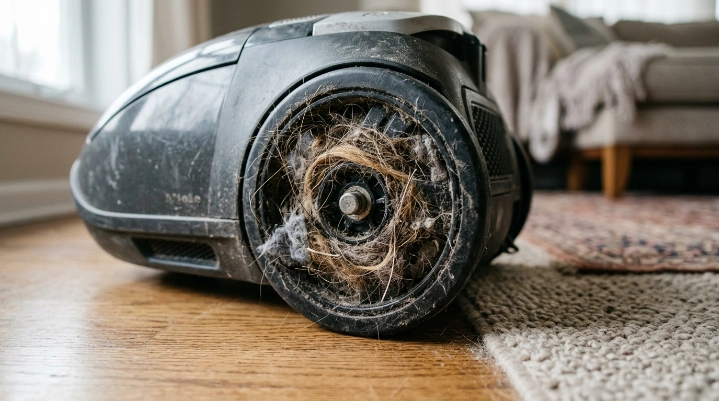
Your vacuum travels across high-traffic zones, picking up everything from microscopic dust mites to heavy pet shedding. Every time you clean, microscopic debris wraps tightly around rotating axles.
Static electricity acts as an invisible glue, pulling fine hair and dust particles into tight crevices around the wheel housing. Over weeks of cleaning, this compressed debris builds up into a dense felt-like ring that jams the mechanism completely.
Stuck wheels drag across carpets instead of rolling smoothly, wearing down rubber treads and scratching hard flooring surfaces. Regular wheel care ensures your HEPA filtration vacuum glides effortlessly while maintaining optimal suction height.
Clean wheels reduce physical strain, prevent floor scuffs, and protect your vacuum investment from premature motor burnout.
What Tools Do You Need to Clean Vacuum Wheels?
You do not need expensive professional equipment to deep-clean your vacuum cleaner wheels. Most items are already sitting in your kitchen drawer or utility closet.
Gathering your supplies beforehand makes the entire cleaning session quick and mess-free. Here is what you should prepare before flipping your machine upside down:
- Sharp tweezers or seam ripper: Perfect for grabbing deep-set hair and tight carpet threads.
- Embroidery scissors: Small, sharp blades slice through tangled yarn without nicking plastic wheel housing.
- Microfiber cloth: Ideal for wiping away sticky grime without leaving lint behind.
- Mild dish soap: Cuts through greasy floor residue on rubberized tires.
- Cotton swabs: Reaches narrow gaps between the wheel and the machine body.
Having the right compact tools prevents accidental damage to sensitive plastic axles and electronic sensors on modern robot vacuums.
How Do You Clean Vacuum Wheels Step-by-Step?
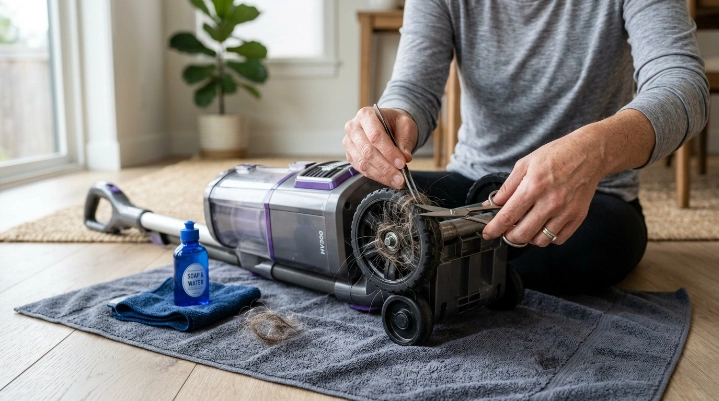
Different vacuum designs require slightly different approaches when it comes to wheel maintenance. Whether you own a heavy upright unit or an automated robot cleaner, follow these methodical steps.
First, always disconnect your appliance from power sources to prevent accidental activation. Lay a soft towel on your workspace to protect the main vacuum body from scratches.
Next, inspect all side wheels and small caster wheels for tangled obstructions. Use your tweezers to gently pull away loose clumps of pet hair and dust bunnies.
Slide your embroidery scissors underneath tightly wound strands wrapped around the axle. Snip the hair carefully, then pull the loosened pieces away with your tweezers.
Dampen your microfiber cloth with warm water and a single drop of mild dish soap. Wipe down the outer treads to remove sticky residue that attracts dirt.
Dry all components thoroughly with a clean towel before turning the vacuum upright. Test the wheel rotation by spinning it manually with your thumb to ensure smooth movement.
Taking your time during the hair-removal stage protects delicate plastic alignment pins from snapping off.
Vacuum Wheel Maintenance Comparison
Different vacuum categories present unique cleaning challenges based on their engineering. Review this breakdown to understand what to expect for your specific appliance type:
| Vacuum Type | Wheel Complexity | Common Debris Type | Recommended Cleaning Frequency |
|---|---|---|---|
| Upright Vacuum | Medium (fixed axles, large wheels) | Carpet fibers, long hair, dust | Every 4 to 6 weeks |
| Robot Vacuum | High (spring-loaded, tiny casters, sensors) | Fine dust, pet hair, sticky spills | Every 2 weeks |
| Canister Vacuum | Low (swivel wheels, exposed mounts) | Lint, threads, surface grit | Every 2 months |
| Cordless Stick Vacuum | Low-Medium (small motorized brushroll wheels) | Human hair, threads, pet fur | Monthly |
Matching your maintenance routine to your specific vacuum type prevents unexpected mechanical failures during heavy cleaning days.
Troubleshooting Stuck or Squeaky Wheels
Sometimes cleaning out hair is not enough to restore full mobility to your vacuum wheels. If a wheel remains stubborn or squeaks loudly during operation, deeper investigation is required.
Check if the wheel axle has been warped or damaged by a hard impact against baseboards or furniture legs. Replacement wheels are widely available from major manufacturers like Dyson, Shark, and Levoit.
Avoid using petroleum-based greases like WD-40 on plastic vacuum parts, as these formulas attract dust and create a sticky sludge. Instead, use a drop of food-safe silicone lubricant if an unsealed metal axle requires smoothing.
Inspect front caster wheels on robot vacuums very carefully, as these small swivel points trap hidden lint balls that lock the rotation entirely. Pop small casters out using a flathead screwdriver if your model supports removable pins.
Addressing persistent squeaks early prevents friction heat from melting surrounding plastic wheel housings.
Frequently Asked Questions
Can I wash removable vacuum wheels in the sink?
Yes, if the wheels detach completely from any electrical components or motorized parts, you can wash them in warm soapy water. Dry them completely with a towel before snapping them back into place.
Why do my vacuum wheels leave black marks on my floor?
Black scuff marks happen when rubber tires collect greasy floor residue or when the wheels lock up and drag instead of rolling. Scrub the rubber treads with mild dish soap and warm water to eliminate staining.
How do I remove tightly wrapped pet hair from deep inside the axle?
Use an embroidery seam ripper or sharp precision tweezers to carefully slice through the compressed hair layers. Never pull forcefully, as you might bend the internal metal axle pin.
Do robot vacuum front wheels need cleaning too?
Robot vacuum front caster wheels accumulate massive amounts of fine dust and pet fur. Pop them out every two weeks to clear out debris and ensure your device navigates rooms accurately.
What should I do if a vacuum wheel breaks completely?
Contact the appliance manufacturer or check authorized online parts suppliers for an exact replacement wheel assembly. Operating a vacuum with a missing wheel damages floor surfaces and strains the motor unevenly.
Closing Takeaway
Maintaining your vacuum wheels takes only a few minutes each month, yet it dramatically extends the lifespan of your cleaning equipment. By clearing out tangled hair, wiping down sticky rubber treads, and checking axle movement regularly, you ensure smooth gliding action and protect your home surfaces. Keep your tools handy, stay consistent with your cleaning schedule, and enjoy effortless cleaning performance.