
How to Vacuum More Efficiently: 10 Practical Cleaning Tips

Quick Answer
To vacuum more efficiently, prepare the room first, dust higher surfaces before cleaning floors, choose the correct attachment, and work in slow, slightly overlapping passes. Focus extra effort on high-traffic areas, clean edges with the right tool, and maintain the vacuum’s filters and brush roll. A consistent route helps you finish thoroughly without wasting time on unnecessary repeat passes.
Efficient vacuuming is about getting more dirt out of your home with less wasted movement. Moving the vacuum faster does not necessarily save time if you miss debris, repeatedly clean the same area, or have to stop because the floor head is clogged.
A better routine combines preparation, a sensible cleaning order, suitable settings, and regular maintenance. Once these habits become automatic, you can clean each room more systematically without sacrificing the result.
1. Prepare the Room Before Turning on the Vacuum
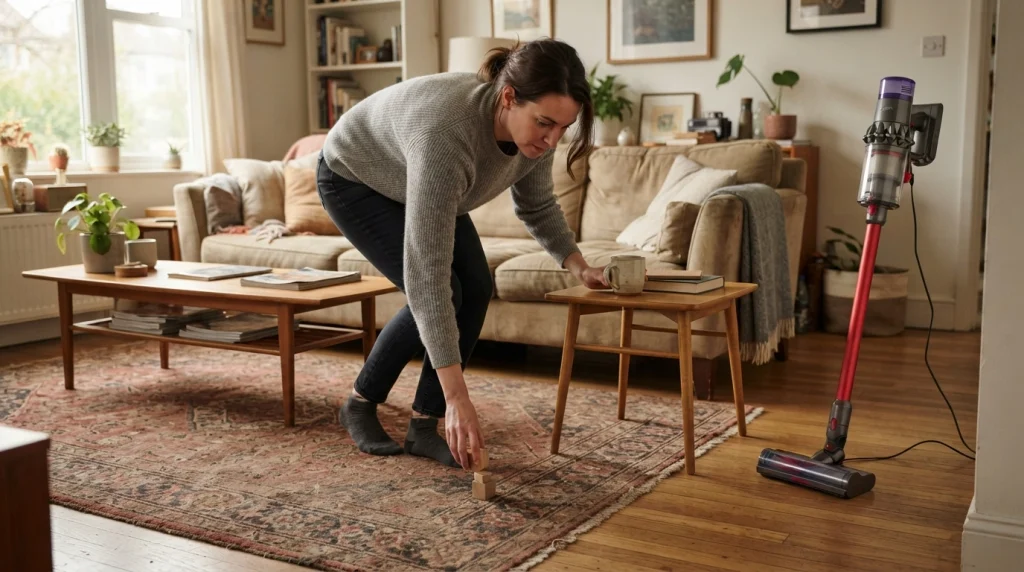
Clear the floor before vacuuming so you can move continuously instead of stopping to pick up obstacles. Remove toys, clothing, charging cables, loose papers, and other objects that could block the intake or become tangled in the brush roll.
Move lightweight chairs or small items that obstruct large sections of flooring. You do not need to rearrange every piece of furniture; prioritize objects that would otherwise force you to make several awkward passes.
- Pick up small objects and loose debris that could damage the machine.
- Move accessible rugs or mats if you need to clean underneath them.
- Check for cords, tassels, and loose carpet fibers near the floor head.
- Keep the vacuum’s path to the next room clear.
Preparation saves time because it prevents interruptions halfway through a cleaning session. It also makes it easier to follow a consistent route rather than moving randomly around the room.
2. Dust First and Vacuum the Floors Last
When cleaning an entire room, dust shelves, furniture tops, window ledges, and other elevated surfaces before vacuuming. Some of the loosened dust will settle on the floor, allowing you to collect it during your final pass.
Use a slightly damp microfiber cloth on suitable hard surfaces when practical. This helps capture dust instead of simply moving it into the air.
Follow a top-to-bottom sequence: higher surfaces, furniture and accessible upholstery, then floors. If you vacuum first and dust afterward, you may have to repeat part of the floor-cleaning job.
There is one useful distinction: if you are only removing a small spill of dry crumbs from the floor, you do not need to dust the whole room first. Match the preparation to the size of the task.
3. Choose the Right Vacuum Setting for Each Surface
The correct floor head and brush setting can improve cleaning results while preventing unnecessary strain on the machine or floor. Use the attachment and settings recommended for your vacuum and the surface you are cleaning.
| Surface | Efficient approach |
|---|---|
| Hardwood and delicate hard floors | Use a suitable soft floor head or bare-floor setting; avoid an aggressive rotating brush if the manufacturer advises against it. |
| Carpet | Use a compatible carpet head and appropriate brush or height setting. |
| Area rugs | Reduce suction or use a gentler attachment if needed to prevent the rug from lifting or its fibers from catching. |
| Upholstery | Use an upholstery attachment or a compatible small brush tool. |
| Corners and narrow gaps | Switch to a crevice tool or suitable narrow attachment. |
The important principle is to match the tool to the surface rather than using one setting everywhere. Electrolux’s vacuum cleaner guidance explains why floor type and nozzle design matter for effective cleaning.
If a vacuum head is difficult to push, do not automatically force it across the floor. Check the settings, suction level, and attachment compatibility before continuing.
4. Use Slow, Straight, Slightly Overlapping Passes
Move the vacuum steadily instead of rushing back and forth. A controlled pass gives the machine time to collect debris, while slight overlap between adjacent passes reduces the chance of leaving narrow strips untouched.
- Start at the far end. Choose a section away from the doorway or your planned exit.
- Work in straight rows. Follow a consistent direction rather than zigzagging around the room.
- Overlap each row slightly. Keep the floor head aligned so you do not leave gaps between passes.
- Reverse direction smoothly. Avoid repeatedly twisting the machine or making unnecessary sharp turns.
- Finish near the exit. This reduces the need to walk across areas you have already cleaned.
On carpet, a second pass at a different angle can help remove debris that remains between fibers. You usually do not need to repeat every section several times; concentrate extra passes on visibly dirty or heavily used areas.
On hard floors, slow and controlled movement is particularly helpful around edges and scattered crumbs. If the head pushes debris ahead of it, adjust the attachment or technique instead of simply increasing your speed.
5. Spend More Time Where Dirt Actually Accumulates
Not every part of a room needs the same amount of attention. Entrances, hallways, dining areas, pet resting places, and frequently used walkways often collect more dirt than quiet corners or rarely occupied rooms.
Give these busy zones an extra pass when needed, while cleaning relatively clear areas with your normal routine. This targeted approach is more efficient than vacuuming every square foot repeatedly just to maintain an identical number of passes.
- Entryways: Focus on tracked-in grit, sand, and outdoor dirt.
- Dining areas: Look for crumbs beneath tables and chairs.
- Pet zones: Pay attention to loose hair and debris around beds or favorite resting spots.
- Walkways: Clean carpet sections that receive frequent foot traffic.
- Room edges: Check for dust and hair along skirting boards and behind furniture.
For guidance on deciding how frequently to clean these areas, see our guide to how often you should vacuum your house. A practical schedule prevents both neglected areas and unnecessary cleaning.
6. Use Attachments Instead of Forcing the Main Floor Head
The wide floor head is useful for open spaces, but it cannot reach every narrow gap or elevated surface. Changing attachments at the right time is often faster than repeatedly maneuvering the main head into places where it does not fit.
- Crevice tool: Clean narrow gaps, corners, edges, and spaces beside fixed furniture.
- Upholstery tool: Remove loose debris from compatible sofas, chairs, and fabric-covered surfaces.
- Small brush attachment: Clean suitable ledges, furniture details, and delicate surfaces according to the manufacturer’s instructions.
- Extension wand: Reach appropriate high or low areas without stretching or bending awkwardly.
For under-furniture cleaning, check the available clearance and use a low-profile head or compatible extension. Our guide on vacuuming under furniture without moving everything covers practical ways to reach these areas.
Use each attachment only on compatible surfaces. A brush that works well on upholstery may not be suitable for delicate finishes, and a powered tool can damage loose threads or fragile fabric if used incorrectly.
7. Maintain Strong Airflow Before Cleaning
A poorly maintained vacuum can take longer to clean because restricted airflow, tangled hair, or a blocked intake reduces its effectiveness. A quick inspection before starting can prevent interruptions and repeated passes.
Check these components when needed:
- Dustbin or bag: Empty the bin or replace the bag according to the manufacturer’s instructions.
- Filter: Inspect for accumulated dust and clean or replace it as directed.
- Brush roll: Remove wrapped hair, thread, and fibers after switching off and unplugging the machine as instructed.
- Hose and wand: Check for blockages if suction suddenly drops.
- Floor head: Remove accumulated debris that obstructs the intake or wheels.
Do not assume every filter is washable or that every vacuum uses the same maintenance schedule. Washing a filter that must remain dry, or reinstalling a damp filter, can damage the machine. Consult its manual before cleaning internal components.
If the vacuum loses suction during use, pause and investigate rather than spending extra time passing over the same area. The problem may be a full bin, blocked airflow, a clogged brush roll, or a maintenance issue.
8. Reduce Dust Disturbance During Vacuuming
Efficient cleaning should remove settled dust without unnecessarily increasing the amount circulating in the room. Vacuuming can disturb particles, so equipment condition, filtration, and cleaning technique matter as well as speed.
The U.S. Environmental Protection Agency’s guidance on indoor particulate matter recommends regular cleaning, damp dusting, and considering a vacuum with a HEPA filter to help limit the return of some collected particles to indoor air.
For better dust control:
- Use a well-maintained vacuum with suitable filtration for your needs.
- Dust hard surfaces with a damp cloth before vacuuming the floor.
- Empty the vacuum carefully, following the manufacturer’s instructions.
- If vacuuming triggers allergy or asthma symptoms, leave the area during cleaning and until airborne dust has settled.
A HEPA filter can help capture fine particles, but a filter alone does not guarantee that the entire vacuum is sealed or that every particle stays inside. Choose a suitable system and maintain it properly rather than relying on a label alone.
9. Avoid Habits That Waste Time or Reduce Cleaning Results
Small mistakes can turn a short vacuuming session into a longer one. Correcting them usually requires changing your routine rather than buying additional equipment.
- Moving too quickly: Fast passes may leave debris behind, forcing you to clean the same area again.
- Using the wrong setting: An unsuitable floor head can scatter debris, catch rug fibers, or make the vacuum hard to move.
- Vacuuming before dusting: Falling dust may require you to repeat floor cleaning.
- Ignoring edges: Dirt along walls and around furniture can remain even when the center of the room looks clean.
- Repeating clean passes: Give extra attention to dirty spots rather than automatically repeating every row.
- Ignoring maintenance: A clogged filter or brush roll can reduce performance and waste effort.
Also, do not use an ordinary dry vacuum for wet spills unless the machine is specifically designed for wet pickup. Moisture can damage unsuitable equipment and create an electrical hazard. Follow the appliance’s instructions for the type of debris it can safely handle.
10. Create a Repeatable Room-by-Room Routine
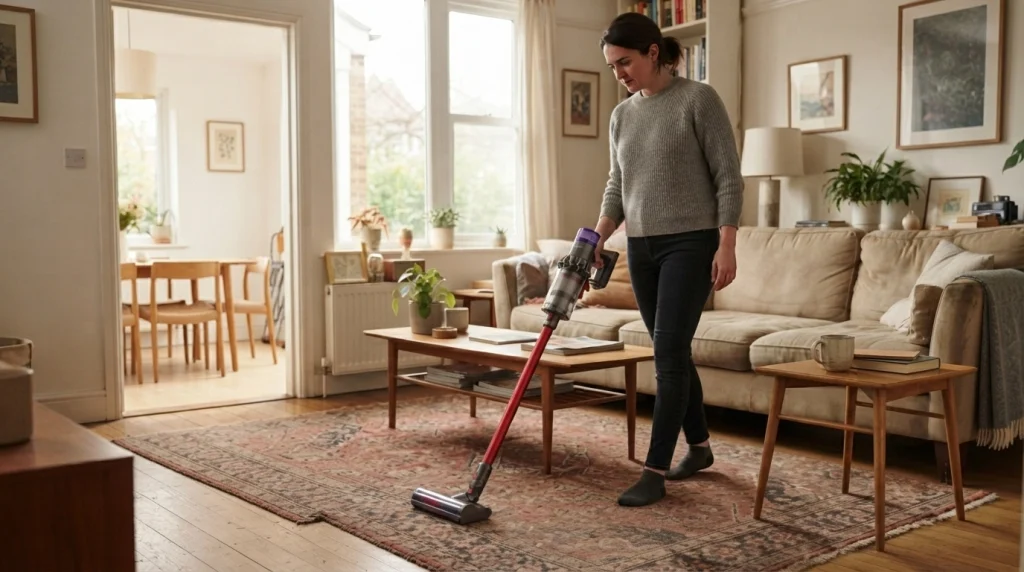
A consistent sequence helps you avoid missed areas and unnecessary backtracking. Rather than deciding what to do next every few minutes, use the same basic order for each room and adjust it only when the layout requires it.
- Collect loose objects and clear the main walking path.
- Dust elevated surfaces and clean accessible furniture as needed.
- Select the appropriate vacuum head and settings.
- Start at the far end and work toward the doorway in overlapping rows.
- Use the right attachment for edges, corners, and accessible gaps.
- Give visibly dirty or high-traffic areas additional attention.
- Inspect the floor and vacuum, then empty or maintain the machine when necessary.
You can divide a large home into zones if cleaning every room at once feels inefficient. For example, clean frequently used living areas on one day and bedrooms on another, while giving entrances or pet areas extra attention as needed.
The objective is not to finish every room in an identical number of minutes. It is to remove dirt reliably with fewer interruptions and less duplicated effort.
Frequently Asked Questions
Is it better to vacuum fast or slow?
Slow, controlled passes are generally more effective than rushing because they give the vacuum time to collect debris. Maintain a steady pace and use additional passes only where needed.
Should you vacuum in straight lines?
Yes. Straight, slightly overlapping rows make it easier to cover the floor systematically. On suitable carpets, a second pass in a different direction can help remove remaining debris.
Should you vacuum before or after dusting?
Dust elevated surfaces first, then vacuum the floor. This lets you collect particles that fall during dusting without having to repeat the floor-cleaning step.
How can you make vacuuming easier on your back?
Use a comfortable handle height, keep your posture natural, and avoid twisting repeatedly. Use an extension wand or suitable attachment to reach awkward areas instead of bending or stretching excessively.
Does a stronger vacuum always clean faster?
No. Cleaning efficiency also depends on airflow, the floor head, filtration, maintenance, and how well the machine suits the surface. Excessive suction can make some rugs or carpets difficult to clean.
How often should you clean a vacuum filter?
Follow the manufacturer’s maintenance schedule because filter types and cleaning requirements vary. Inspect the filter regularly, and clean or replace it as directed to help maintain airflow and filtration.
Conclusion
To vacuum more efficiently, focus on preparation, a consistent cleaning route, the correct floor head, and steady passes rather than speed alone. Dust first, spend extra time where dirt accumulates, and use specialized attachments when the main floor head cannot reach an area properly.
Keep the vacuum maintained so clogged filters, tangled hair, and blocked airflow do not undermine your effort. Adjust your technique for different flooring types and avoid unnecessary repeat passes over already-clean areas. With a simple room-by-room routine, you can maintain cleaner floors while making vacuuming a more manageable part of your regular household cleaning.