
How to Replace a Vacuum Bag Without Ruining Your Indoor Air Quality

Have you ever noticed a dusty, stale smell filling your living room while you vacuum? Or perhaps your vacuum cleaner seems to be pushing dirt around rather than picking it up? For homeowners dealing with asthma, allergies, or shedding pets, a vacuum cleaner is more than just a floor-cleaning tool—it is a mobile air purifier.
Learning exactly how to replace a vacuum bag is essential for maintaining both the suction power of your machine and the air quality of your home. When a vacuum bag becomes too full, the machine’s exhaust can blow microscopic allergens, pet dander, and fine dust right back into the air you breathe.
In this comprehensive guide, we will walk you through the step-by-step process of changing your vacuum bag safely. We will also cover the warning signs of a full bag, how to choose the right replacement bag for maximum allergen control, and common mistakes that could be compromising your home’s indoor air quality.
Quick Answer
To replace a vacuum bag, first unplug the vacuum cleaner for safety. Open the main housing chamber to access the bag. Carefully slide the stiff cardboard or plastic collar of the full bag off the internal suction tube, sealing the opening immediately to trap dust. Dispose of the old bag. Slide the new bag’s collar onto the suction tube until it clicks into place, ensuring the bag is tucked in and not folded, then securely close the vacuum housing.
Why Changing Your Vacuum Bag Matters for Home Air Quality
Many homeowners treat vacuuming simply as a way to keep carpets looking clean. However, the true purpose of a bagged vacuum is to permanently remove particulate matter from your indoor environment.
When your vacuum bag is functioning correctly, it acts as a primary filter. It traps larger debris like hair and crumbs, as well as microscopic particles like dust mites, pollen, and mold spores. But as the bag fills up, the pores in the bag’s material become clogged.
Because the vacuum’s motor relies on air flowing through the bag to keep it cool, a clogged bag restricts this airflow. This leads to a severe loss of suction. Worse, the built-up pressure can force fine dust particles to bypass the bag entirely, shooting them out through the vacuum’s exhaust vent and back into your room.
According to the EPA’s guidelines on indoor particulate matter, reducing the source of airborne particles is one of the most effective ways to improve your indoor air. A properly functioning vacuum cleaner with a fresh, high-quality bag is your first line of defense against floor-level pollutants before they become airborne.
Step-by-Step Guide: How to Replace a Vacuum Bag
Changing a vacuum bag is a straightforward process, but doing it correctly ensures you don’t accidentally release a cloud of trapped dust back into your home. Follow these steps for a clean and safe replacement.
Step 1: Prepare Your Workspace and Unplug the Unit
Never open a vacuum cleaner while it is plugged into a wall outlet. Accidental start-ups can cause injury or damage the machine.
If you suffer from severe allergies, consider taking the vacuum cleaner outside to your garage or patio before opening it. This ensures any accidental dust spills happen outside your living space.
Step 2: Open the Main Housing Chamber
Locate the release latch for the vacuum’s main compartment. On upright vacuums, this is usually on the front of the main body. On canister vacuums, the latch is typically located on the top or rear of the unit.
Gently press the release button and pull the cover away. Avoid forcing the plastic cover, as the hinges can be delicate on some models.
Step 3: Remove the Full Bag Carefully
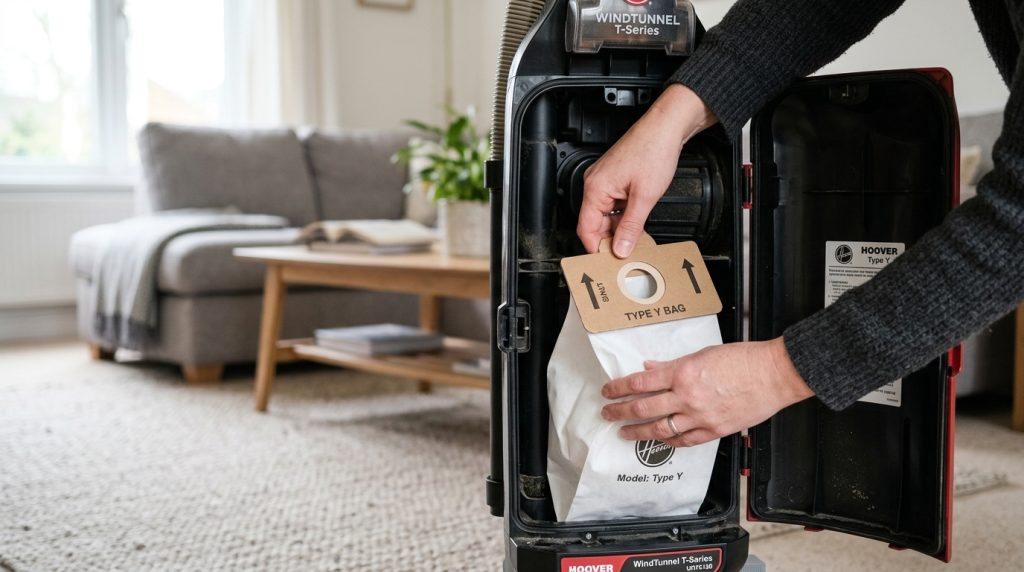
Look for the stiff collar at the top of the vacuum bag. This collar connects the bag to the internal suction pipe.
Grip the collar tightly and slide it backward, off the pipe. Do not squeeze the soft belly of the bag, as this acts like a bellows and will puff a cloud of fine dust into your face. Many modern high-efficiency bags feature a sliding shutter on the collar that automatically closes the hole as you pull it off. If yours has this, make sure it is pulled fully shut.
Step 4: Insert the New Vacuum Bag
Take your fresh replacement bag and unfold it slightly so it can expand properly once the vacuum is turned on.
Align the hole in the new bag’s collar with the suction pipe inside the vacuum chamber. Push the collar firmly onto the pipe until you feel it seat securely. If there are plastic retaining clips or springs, ensure the collar slides smoothly behind them.
Step 5: Check Secondary Filters
Before you close the machine, take a moment to look at the pre-motor filter. This is usually a small sponge or felt pad located directly behind or beneath the vacuum bag.
If this filter is heavily soiled, wash it (if washable) or replace it. A clogged pre-motor filter restricts airflow just as much as a full bag.
Step 6: Close the Housing and Test
Tuck the edges of the new vacuum bag neatly into the chamber. Ensure no part of the bag is pinched by the hinges or the outer cover.
Snap the cover back into place, plug the vacuum in, and turn it on briefly. Listen to the motor; it should sound smooth and high-pitched, and you should feel strong suction at the hose or floor head.
Signs It’s Time to Change Your Vacuum Bag
Many homeowners wait until their vacuum bag is completely packed solid before changing it. This is a significant mistake for your indoor air quality. By the time a bag is 100% full, the vacuum has already been blowing dust back into your home for weeks.
Here are the critical warning signs that it is time for a replacement:
- The “Fill Line” is reached: Most standard bags have a printed line indicating maximum capacity. As a general rule, a bag should be replaced when it is 60% to 70% full.
- A sudden loss of suction: If your vacuum leaves crumbs behind or struggles to pick up pet hair, the bag is likely restricting airflow.
- The vacuum is unusually loud: A clogged bag forces the motor to work harder, often resulting in a whining or straining noise.
- Musty or dusty odors: If turning on the vacuum makes your room smell like a dusty attic or wet dog, the bag is saturated. The odors are escaping through the exhaust.
- The indicator light turns on: Many modern vacuums feature a pressure-sensor light that turns red when airflow is restricted. Never ignore this warning.
Choosing the Right Vacuum Bag for Air Quality
Not all vacuum bags are created equal. If you are serious about protecting your family from indoor allergens, the type of bag you purchase matters just as much as how often you replace it.
Standard Paper Bags
Standard paper bags are the most basic and inexpensive option. They are adequate for picking up large debris, sand, and hair. However, standard paper is highly porous. It allows microscopic dust, pet dander, and pollen to pass straight through the walls of the bag and back into your room. If you suffer from allergies, you should avoid basic paper bags.
Microfiltration (Synthetic) Bags
These bags are made from multiple layers of woven synthetic cloth. They are much stronger than paper bags and are highly resistant to tearing, even if you accidentally vacuum up a sharp object. More importantly, the multi-layer fabric traps fine dust particles significantly better than paper, providing a noticeable improvement in exhaust air quality.
HEPA Vacuum Bags
For the ultimate protection, look for True HEPA vacuum bags. The Asthma and Allergy Foundation of America’s recommendations on reducing dust strongly emphasize using vacuums equipped with HEPA filtration to prevent stirring up settled allergens.
HEPA bags are certified to capture 99.97% of particles down to 0.3 microns in size. This includes mold spores, dust mite droppings, fine pet dander, and even some bacteria. While they cost slightly more, they are essential for households with respiratory sensitivities.
Vacuum Bag Filter Types Comparison
To help you make the right choice for your home, review this quick comparison table:
| Bag Type | Allergen Capture | Best Suited For | Estimated Cost per Bag |
|---|---|---|---|
| Standard Paper | Low (Captures large debris only) | Garages, workshops, homes with no allergy concerns | $1 – $3 |
| Microfiltration | Medium/High (Traps most fine dust) | Homes with mild allergies, shedding pets | $3 – $5 |
| True HEPA | Maximum (Traps 99.97% of particles) | Severe allergies, asthma, capturing fine dander | $4 – $8 |
Expert Tip: Never try to save money by purchasing cheap, off-brand “compatible” vacuum bags online if air quality is your priority. Generic bags often use thinner materials and have poorly fitting collars. A loose collar allows air and dust to bypass the bag entirely, instantly clogging your vacuum’s motor and ruining your indoor air. Always buy OEM (Original Equipment Manufacturer) bags or highly rated HEPA equivalents.
Common Mistakes Homeowners Should Avoid
Even well-intentioned homeowners can accidentally sabotage their vacuum’s performance. When you replace a vacuum bag, be sure to avoid these common pitfalls:
- Emptying and reusing single-use bags: Paper and synthetic bags are designed for one use. Cutting them open, emptying the dirt, and taping them shut destroys the microscopic pores. Reusing a bag guarantees that fine dust will be blown into your home’s air.
- Forgetting the exhaust filter: Your vacuum likely has a secondary HEPA filter where the air exits the machine. Changing the bag but leaving a clogged exhaust filter will still result in poor suction and a strained motor.
- Pinching the bag in the door: When closing the vacuum housing, carefully check that the edges of the new bag aren’t caught in the seal. A pinched bag will rip wide open as soon as the vacuum turns on.
- Vacuuming up wet messes: Unless you have a specific wet/dry shop vacuum, never vacuum damp carpets or spills. Moisture inside a dark, warm vacuum bag creates a perfect breeding ground for mold, which will then be dispersed throughout your home.
- Ignoring the brush roll: Changing the bag improves suction, but if the floor brush is tangled with hair and strings, it won’t agitate the carpet enough to lift the dust up to the suction hose.
When to Consult an Air Quality or HVAC Professional
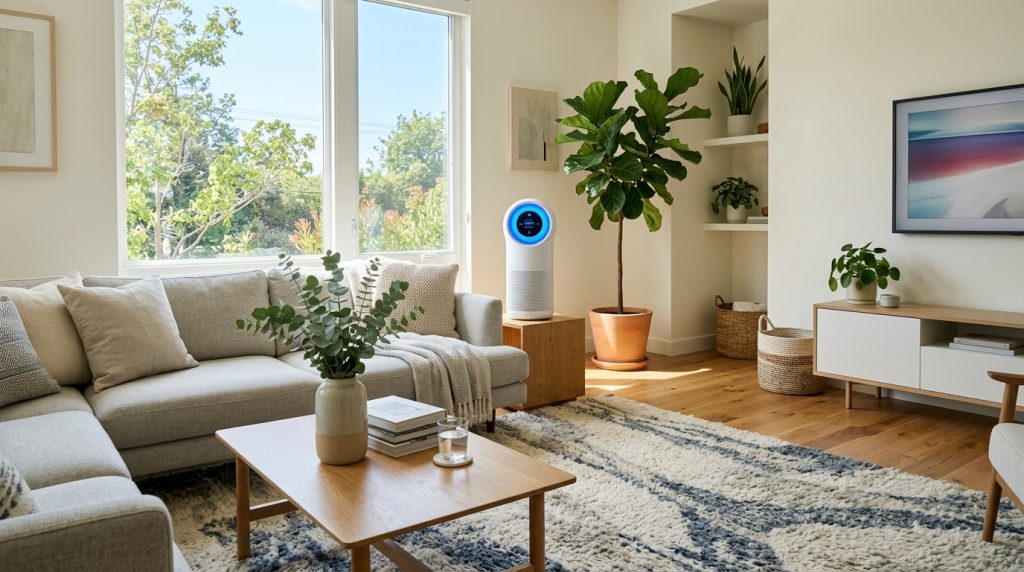
While keeping your vacuum in top condition is a great DIY step for improving your living environment, a vacuum cleaner cannot solve severe indoor air quality issues on its own.
If you diligently replace your HEPA vacuum bags, use standalone room air purifiers, and still find that your home is constantly coated in a thick layer of dust, the problem may be structural.
Airborne particulates can enter the living space through leaky ductwork, poor weatherstripping, or an overwhelmed central HVAC system. If you notice a musty smell coming from your home’s vents, or if family members are experiencing chronic allergy flare-ups despite rigorous cleaning, it is time to call a professional.
An HVAC or indoor air quality specialist can perform a blower door test, inspect your ductwork for leaks, and evaluate whether your home needs a whole-house HEPA filtration system or upgraded MERV-rated furnace filters. Relying solely on a vacuum cleaner to fix a whole-house ventilation issue is a losing battle.
FAQs
How often should I change my vacuum bag?
You should replace your vacuum bag when it is about 60% to 70% full, rather than waiting for it to be completely packed. For the average home vacuuming once or twice a week, this usually means changing the bag every 1 to 2 months. Homes with multiple shedding pets may need to change it more frequently.
Can I empty and reuse a vacuum bag?
No, you should never empty and reuse a standard or HEPA vacuum bag. Vacuum bags act as microscopic filters. Even if you empty the large debris, the microscopic pores in the bag’s material remain clogged with fine dust. Reusing it will cause a loss of suction and force allergens back into your room.
Why does my vacuum smell bad even with a new bag?
If your vacuum smells bad after a bag change, the odor is likely trapped in the secondary filters or the hose. Check and replace the pre-motor filter and the exhaust HEPA filter. Additionally, wash the floor head and check the hose for clogs of damp, trapped debris.
Are HEPA vacuum bags worth the money?
Yes, HEPA vacuum bags are absolutely worth the investment, especially if anyone in your home suffers from asthma or allergies. Standard bags allow fine particulate matter to pass through, whereas HEPA bags trap 99.97% of microscopic irritants, acting as an air purifier while you clean.
What happens if I overfill my vacuum bag?
Overfilling a vacuum bag severely restricts airflow. This causes the vacuum to lose its suction power and forces the motor to overheat. In extreme cases, the built-up pressure can cause the bag to tear open inside the chamber, ruining the motor and blowing a massive cloud of dust out of the exhaust vent.
Conclusion
Understanding how to replace a vacuum bag correctly is a simple but highly effective way to protect your home’s indoor air quality. By changing the bag before it gets too full, opting for high-quality HEPA filtration materials, and ensuring a tight seal on the suction pipe, you keep trapped dust where it belongs—in the trash, not in your lungs.
Don’t let a full, dusty vacuum compromise the health of your home. Take five minutes today to open up your vacuum cleaner, check the bag’s capacity, and inspect the secondary filters. Upgrading your vacuum maintenance routine is one of the easiest and most affordable steps you can take toward a cleaner, fresher living space.
