How to Replace a Vacuum Filter for Cleaner Indoor Air

If you have allergies, pets, or just want a fresh-smelling home, you likely rely heavily on your vacuum cleaner to keep dust and dander at bay. But there is a hidden problem many homeowners ignore: a dirty vacuum filter. When a vacuum filter becomes clogged, your machine stops trapping microscopic pollutants and instead blasts them directly back into the air you breathe.
Understanding how to replace a vacuum filter is not just about keeping your appliance running smoothly; it is a critical step in managing your home’s indoor air quality. If you want to protect your family’s respiratory health and keep your floors truly clean, maintaining your vacuum’s filtration system is non-negotiable. This guide will walk you through exactly how and when to change your filters, the difference between filter types, and how this simple task protects your indoor air.
Quick Answer
To replace a vacuum filter, unplug the machine and locate the filter compartment, usually near the dust cup or exhaust port. Remove the old filter, wipe the housing with a damp cloth, and firmly press the new filter into place to ensure an airtight seal. Replace HEPA filters every six months.
Why Your Vacuum Filter is Crucial for Home Air Quality
It is easy to think of a vacuum strictly as a floor-cleaning tool. However, in the world of home air quality, a vacuum is essentially a high-powered air mover. It sucks in dirt, debris, and air, traps the solid particles, and then pushes that air back out into your room.
If your vacuum lacks a clean, functioning filter, you are actively circulating fine dust, pet dander, mold spores, and dust mite debris into your breathing space. According to the EPA’s guidelines on managing indoor particulate matter, utilizing a vacuum with a high-efficiency filter is one of the most effective ways to reduce airborne irritants that settle on your carpets and upholstery.
When you maintain your vacuum’s exhaust filter—especially if it is a true HEPA filter—you trap particles as small as 0.3 microns. This keeps them out of the air, significantly reducing the burden on your standalone room air purifiers and your home’s HVAC system.
Warning Signs It’s Time to Change Your Vacuum Filter
Homeowners often wait until their vacuum stops picking up dirt before checking the filter. By then, your home air quality has already suffered. Watch for these common warning signs:
- A Musty or “Dusty” Smell: If your room smells worse after you vacuum, your filter is likely saturated with bacteria, pet oils, or mold spores.
- Loss of Suction Power: A clogged filter restricts airflow, meaning your vacuum leaves heavier dirt behind in the carpet fibers.
- Visible Dust Plumes: If you see fine dust blowing out of the vacuum’s exhaust vents, the filter has failed or is improperly seated.
- Increased Allergy Flare-Ups: If vacuuming triggers sneezing, coughing, or itchy eyes for anyone in the home, your machine is dispersing allergens rather than containing them.
Understanding Your Vacuum’s Filtration System
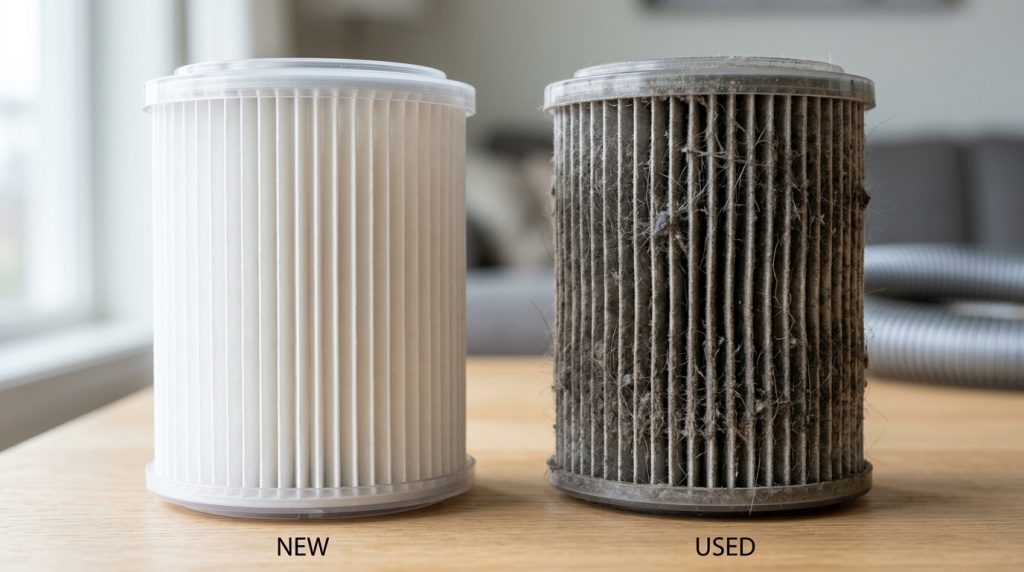
Before you start pulling things apart, it helps to know what you are looking for. Most modern upright, canister, and stick vacuums use a multi-stage filtration system.
1. The Pre-Motor Filter
This filter is usually made of washable foam or felt. Its primary job is to catch larger particles before they can reach and damage the vacuum motor. While it helps slightly with air quality, its main purpose is appliance protection.
2. The Post-Motor (Exhaust) Filter
This is the critical filter for your home’s air quality. Placed after the motor, right before the air leaves the machine, this is often a pleated HEPA (High-Efficiency Particulate Air) filter. It catches the microscopic carbon dust from the motor and the fine allergens that slipped through the main dust bin.
Step-by-Step Guide: How to Replace a Vacuum Filter
Replacing a filter is usually a simple process, but doing it correctly ensures you do not accidentally contaminate your indoor air or damage your machine.
Step 1: Unplug and Relocate
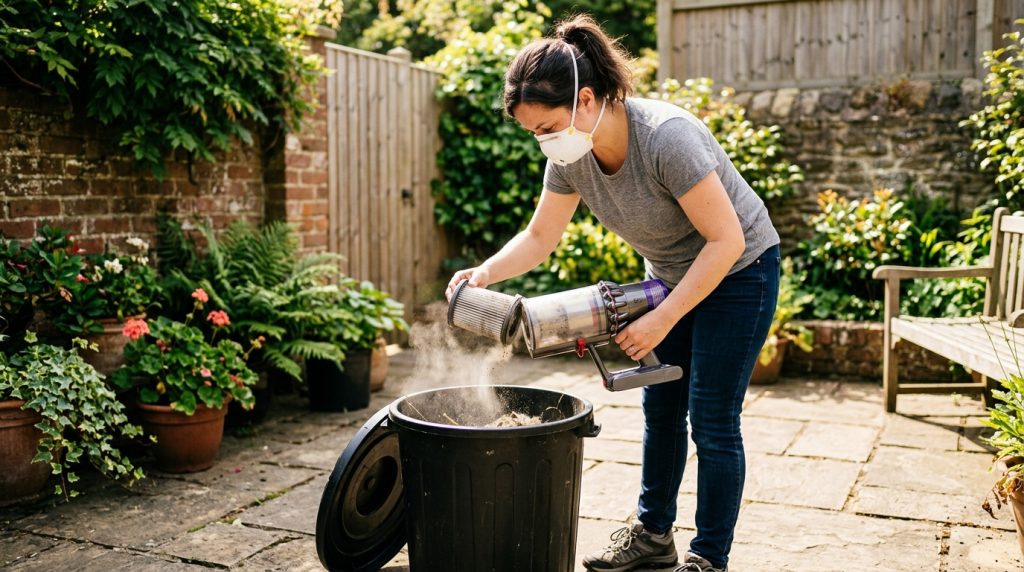
Always unplug your vacuum before performing maintenance. Because changing a dirty filter can release a cloud of trapped dust, it is highly recommended to take your vacuum outside, or into a garage, before opening the filter housing.
Step 2: Locate the Filter Compartments
Check your user manual if you are unsure. Pre-motor filters are typically located directly under or behind the dust canister. Post-motor exhaust filters are usually hidden behind a plastic grill on the side, front, or bottom of the vacuum base.
Step 3: Remove and Inspect
Gently pull the old filters out. Do not tap or bang them indoors, as this will release millions of microscopic allergens into your breathing space. If your exhaust filter is heavily discolored or gray, it is time for the trash.
Step 4: Clean the Filter Housing
Before inserting the new filter, use a damp microfiber cloth to wipe down the empty plastic filter housing. Removing the residual dust ensures a tight seal for the new filter.
Step 5: Install the New Filter
Press the new filter into place. Ensure the rubber gasket is completely seated. If a HEPA filter sits crooked, air will take the path of least resistance and bypass the filter entirely, defeating its purpose.
Step 6: Secure the Covers
Snap the protective grills or covers back into place. Turn on the vacuum and feel the exhaust air; it should feel strong and smell completely neutral.
Helpful Table: Vacuum Filter Maintenance Schedule
To keep your indoor air fresh, you need a routine. Use this general schedule, though you should always check your manufacturer’s specific recommendations.
| Filter Type | What It Does | Maintenance Frequency | Replacement Frequency |
|---|---|---|---|
| Foam Pre-Motor Filter | Protects the motor from large dust and hair. | Wash every 1–2 months. Let dry for 24 hours. | Replace every 6–12 months if torn or degraded. |
| Felt Pre-Motor Filter | Adds a secondary layer of motor protection. | Tap out dust monthly. (Some are washable). | Replace every 6 months. |
| HEPA Exhaust Filter | Traps 99.97% of microscopic allergens and dander. | Inspect monthly. Do not wash unless explicitly stated. | Replace every 6 months (or sooner if you have pets). |
| Carbon Filter Layer | Absorbs pet odors and volatile organic compounds (VOCs). | Cannot be washed. | Replace every 3–6 months. |
Common Mistakes Homeowners Should Avoid
Even well-meaning homeowners can make mistakes that inadvertently ruin their vacuum’s ability to clean the air. Avoid these common pitfalls:
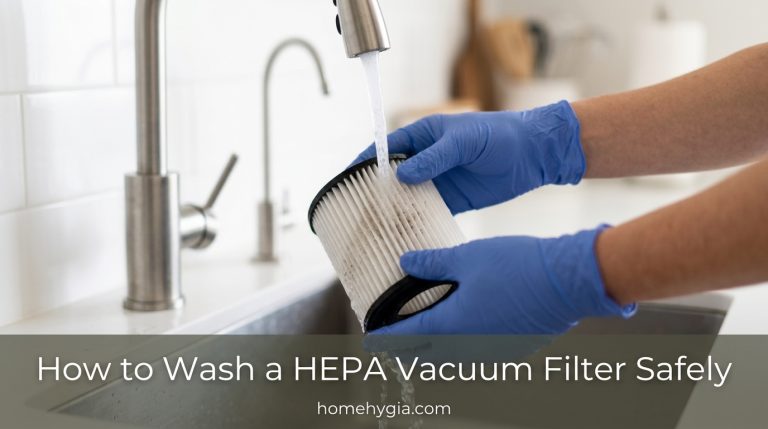
- Washing a non-washable HEPA filter: True HEPA filters are made of tightly woven fiberglass. If you get them wet, the water destroys the micro-structure, rendering the filter useless at catching fine particles.
- Reinstalling a damp foam filter: If you wash your pre-motor foam filter, it must dry for a full 24 to 48 hours. Putting a damp filter back into a dark, warm vacuum creates a perfect breeding ground for mold, which will then blow throughout your house.
- Buying cheap, off-brand replacements: Generic filters often have poor rubber seals. If the seal isn’t perfectly tight, unfiltered air leaks out the sides. Always look for tight-fitting, highly-rated replacements.
- Ignoring the exhaust filter: Many people diligently empty the dust bin and wash the foam filter but completely forget the hidden HEPA exhaust filter exists.
Expert Tip: If you suffer from severe allergies, wear an N95 mask when emptying your vacuum canister and changing the filters. Always perform this task outdoors over a trash can to prevent a massive plume of concentrated dust mites and dander from re-entering your home’s air supply.
How Your Vacuum Combines with Air Purifiers
No matter how good your vacuum’s HEPA filter is, it cannot clean the air all day long. A vacuum is an active cleaning tool, while an air purifier is a passive, continuous cleaner.
For the healthiest home environment, these two devices should work together. When you vacuum, you inevitably stir up some dust from the carpets into the air. Running a high-quality room air purifier while you vacuum—and leaving it on high for an hour afterward—helps capture the airborne particles before they settle back onto your furniture. The Asthma and Allergy Foundation of America notes that to effectively control indoor allergens and pet dander, homeowners must combine source control (like HEPA vacuuming) with continuous air filtration.
When to Consult an Air Quality or HVAC Professional
Changing your vacuum filter is a vital DIY task, but it cannot solve severe, systemic air quality issues. If you maintain a strict cleaning schedule but still struggle with poor air, it may be time to seek expert help.
You should consult a professional if:
- You notice an excessive, rapid buildup of dust on your furniture just days after thoroughly cleaning and vacuuming.
- Family members experience chronic respiratory irritation, asthma flare-ups, or morning congestion that does not improve with standard cleaning.
- Your home has persistent musty odors that remain even after you have cleaned carpets, changed vacuum filters, and replaced your standalone air purifier filters.
In these cases, the problem might originate inside your home’s ductwork. An HVAC professional can inspect for leaky return ducts (which pull dust from attics or crawlspaces) or recommend upgrading your central furnace filter. A whole-home approach is sometimes required when localized cleaning isn’t enough.
FAQs
How often should I change my vacuum filter?
As a general rule, replace HEPA exhaust filters every 6 months. Pre-motor foam filters should be washed monthly and replaced every 6 to 12 months. If you have multiple pets or live in a dusty area, you may need to replace them more frequently.
Can I just wash my HEPA vacuum filter?
Unless the manufacturer explicitly labels the HEPA filter as “washable,” do not get it wet. Water degrades the densely packed fibers that trap microscopic allergens. Washing a standard HEPA filter will destroy its effectiveness.
Why does my vacuum smell bad even after I empty the bin?
The smell is usually trapped inside the filters, not just the dust bin. Odors come from bacteria, pet dander, and microscopic food particles trapped in the filter fibers. Replacing the pre-motor and exhaust filters will almost always eliminate the odor.
Does a dirty filter affect vacuum suction?
Yes, significantly. A vacuum relies on a continuous flow of air to generate suction. If the filters are caked in dust, air cannot escape the machine, causing suction power to drop dramatically and potentially overheating the motor.
What is the difference between a HEPA filter and a standard filter?
A standard foam or paper filter captures large particles like dirt, sand, and hair. A True HEPA filter is designed to capture 99.97% of particles as small as 0.3 microns, which includes invisible threats like smoke, pollen, dust mites, and pet dander.
Will a better vacuum filter help my allergies?
Yes. Using a vacuum with a sealed system and a fresh HEPA filter ensures that the allergens you suck out of your carpet stay trapped inside the machine, rather than being blown back into the air you breathe.
Conclusion
Knowing how to replace a vacuum filter is one of the easiest, yet most impactful, ways a homeowner can protect their indoor air quality. By keeping your filters fresh, you ensure your vacuum actually removes allergens, pet dander, and dust rather than recirculating them throughout your living space.
Make it a habit to check your pre-motor filters monthly and swap out your HEPA exhaust filter every six months. Combine this routine with a good standalone air purifier, and you will notice a drastic reduction in household dust and allergy symptoms. Don’t wait until your vacuum loses suction or starts to smell—take control of your home’s air quality today by checking your filters!