How Do You Clean Robot Vacuum Sensors?

Quick Answer
To clean robot vacuum sensors, turn the robot off, move it away from its dock, and gently wipe accessible sensor windows with a clean, dry microfiber or soft lint-free cloth. Never spray water or cleaner directly onto the sensors, and check your model’s manual because sensor locations and cleaning instructions vary; iRobot’s cliff-sensor cleaning guidance also specifies a clean, dry cloth.
Quick cleaning steps
- Power it down: Stop the cleaning cycle and switch off the robot when your manual recommends it.
- Find the sensors: Check underneath, around the bumper, near the dock receiver, and around navigation hardware.
- Use dry microfiber: Wipe each exposed sensor window gently without pushing into openings.
- Remove loose dust: Clear debris around nearby bumper edges without forcing moving parts.
- Inspect again: Make sure no lint, fingerprints, or visible film remains.
- Test the robot: Run a short cycle on a clear floor after cleaning.
One rule to remember
- Check the manual: Don’t assume cliff, camera, LiDAR, docking, and optical sensors all use the same cleaning method.
Robot vacuum sensors spend every cleaning run close to household dust, pet hair, crumbs, and floor debris. Keeping them clean is a small but useful part of robot vacuum cleaner maintenance and everyday home hygiene.
I’ve found that sensor cleaning is also one of the easiest checks when a robot suddenly navigates strangely. This 2026 guide explains how to clean them safely, what to avoid, and when dirt probably isn’t the real problem.
In This Guide
- Why Do Robot Vacuum Sensors Need Cleaning?
- What Should You Use to Clean Robot Vacuum Sensors?
- How Do You Clean Robot Vacuum Sensors Step by Step?
- How Should Different Robot Vacuum Sensors Be Cleaned?
- What If the Robot Still Acts Strangely After Cleaning?
- How Often Should You Clean Robot Vacuum Sensors?
- Frequently Asked Questions
Why Do Robot Vacuum Sensors Need Cleaning?
Robot vacuum sensors help the machine understand its surroundings. Dust or residue covering an exposed sensor window can interfere with the information the robot receives.
A robot vacuum sensor is an electronic component that detects or measures something around the machine. Depending on the model, that may include floor edges, obstacles, walls, docking signals, carpet, or the robot’s position.
- Cliff sensors: Look toward the floor to help identify stairs and sudden drops.
- Obstacle sensors: Help the robot detect furniture, walls, and objects.
- Wall sensors: Help some robots follow room edges at an appropriate distance.
- LiDAR: Uses laser-based distance measurements for mapping and navigation on equipped models.
- Camera or optical sensors: Provide visual information for navigation or object recognition on compatible robots.
- Docking sensors: Help the robot locate or align with its charging station.
- Bin sensors: Monitor the dustbin or debris level on some machines.
Because several sensors sit underneath the robot, they operate only centimeters above the floor. Fine dust can gradually create a visible coating over their windows.
Dirty sensors don’t always cause an obvious error message. You may first notice changed movement or unreliable docking.
- The robot stops near an open floor area.
- It repeatedly turns or circles.
- It avoids an area that it previously cleaned.
- It struggles to locate the dock.
- It reports a cliff or drop-related warning.
- It bumps into obstacles more often than expected.
That doesn’t prove the sensor is dirty. Dark flooring, direct sunlight, map problems, blocked wheels, software issues, and damaged components can create similar symptoms.
For example, iRobot lists dirty cliff sensors as one possible cause of certain drop-detection errors. Roborock also tells users to clean cliff sensors when troubleshooting its Error 4.
Section Takeaway: Sensor cleaning is a sensible first maintenance check when navigation changes, but it shouldn’t be treated as a guaranteed repair.
What Should You Use to Clean Robot Vacuum Sensors?
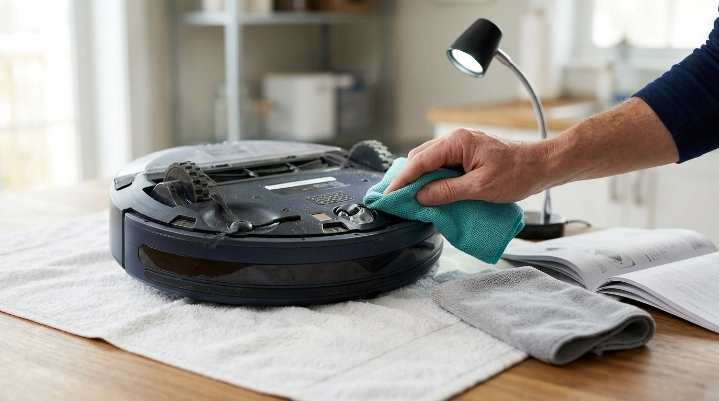
For most exposed sensor windows, start with the gentlest tool possible: a clean, dry microfiber or soft lint-free cloth. That approach matches instructions published for many robot vacuum models.
A few simple supplies are usually enough.
- Dry microfiber cloth: Best starting point for accessible optical surfaces.
- Soft lint-free cloth: A practical alternative when microfiber isn’t available.
- Owner’s manual: Essential for identifying sensor locations and model-specific exceptions.
- Soft work surface: A towel or clean mat can protect the robot when you turn it over.
- Good lighting: Makes thin films of dust easier to spot.
I keep a small microfiber cloth just for robot vacuum maintenance. That prevents greasy kitchen residue or cleaning-product traces from another cloth reaching an optical window.
What should you avoid?
A sensor is not the place to experiment with strong household cleaners. The safest baseline is to avoid applying liquid unless your manufacturer’s instructions specifically permit it.
- Don’t spray cleaner directly onto the robot.
- Don’t pour water onto sensor windows.
- Don’t use abrasive pads on clear optical surfaces.
- Don’t push cotton swabs deep into openings.
- Don’t scrape dried residue with metal tools.
- Don’t disassemble a navigation module unless the manufacturer provides a user-service procedure.
Consumer Reports’ robotic vacuum cleaning guidance also emphasizes regular component maintenance because dust and debris accumulate inside these machines over time.
Expert Alert: If a sensor lens is cracked, an internal component is loose, or liquid has entered the electronics, stop DIY cleaning and contact the manufacturer or a qualified appliance technician.
How Do You Clean Robot Vacuum Sensors Step by Step?
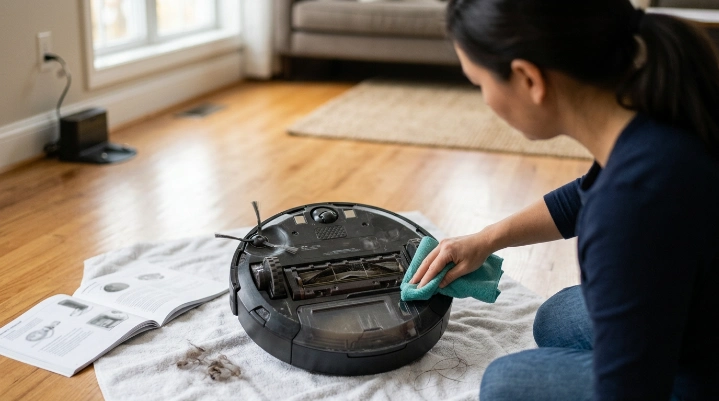
Turn the robot off, identify only the accessible sensors, and wipe them gently with the method approved for your model. A careful cleaning session usually takes only a few minutes.
1. Stop the robot and move it away from the dock
Pause the current cleaning cycle before handling the machine. Follow your manual’s shutdown procedure if it requires a physical power switch or specific maintenance mode.
Place the robot on a stable, clean surface. Avoid balancing it on furniture where it could fall.
2. Check the owner’s manual for sensor locations
Don’t assume every dark window underneath the robot is the same component. Sensor layouts change across brands, product generations, and vacuum-mop combinations.
Look for diagrams labeled cliff sensor, wall sensor, obstacle sensor, camera, dock locator, optical-flow sensor, carpet sensor, or similar terms.
3. Turn the robot over carefully
Place a soft towel underneath if needed. Keep pressure away from a raised LiDAR turret, camera housing, or other protruding navigation hardware.
Once the underside is visible, look for dust covering smooth sensor windows. Use good light rather than poking into recesses.
4. Wipe cliff and bottom sensors
Use a clean, dry microfiber cloth and light pressure unless your manual states otherwise. Wipe across the complete exposed surface instead of cleaning only the center.
- Use a clean section of cloth for each visibly dirty area.
- Remove loose hair sitting beside the sensor.
- Check for fingerprints or greasy film.
- Avoid pushing debris deeper into gaps.
iRobot specifically instructs owners to wipe Roomba cliff-sensor openings with a clean, dry microfiber or soft cotton cloth. That’s a useful baseline, but your exact model manual still takes priority.
5. Clean side, front, and navigation sensors
Return the robot upright and inspect exposed sensors around the bumper or front body. Wipe accessible windows without forcing the bumper backward.
On LiDAR-equipped robots, clean only the surfaces identified for user maintenance. Don’t try to open the laser-navigation assembly to remove internal dust.
6. Inspect the docking sensor and base
Look for dust on the robot’s docking window and any accessible signal area on the base. Follow separate instructions for electrical charging contacts because their cleaning method may differ from optical sensors.
For example, certain iRobot care instructions allow lightly dampened melamine foam on charging contacts while still requiring a dry cloth on cliff sensors. One method does not automatically apply to every component.
7. Test the vacuum on a clear floor
Put the robot back on the floor and start a short cleaning run. Watch its first few minutes rather than sending it immediately toward stairs.
- Confirm that it starts normally.
- Watch for repeated spinning or stopping.
- Check whether a previous sensor error returns.
- Confirm that the bumper moves normally.
- Test docking if that was the original problem.
Section Takeaway: Use a dry, gentle cleaning method for exposed optical sensors unless the manufacturer says otherwise, then verify the result with a short controlled test.
How Should Different Robot Vacuum Sensors Be Cleaned?
Different sensors do different jobs, so location matters. The safest approach is to identify the component first and then follow the manufacturer’s specific care method.
| Sensor type | Common location | Main job | Safe starting approach |
|---|---|---|---|
| Cliff/drop | Underside | Detect floor drop-offs | Gently wipe exposed windows with a dry soft cloth |
| Wall/side | Side of robot | Measure nearby walls or edges | Wipe the external sensor window gently |
| Obstacle | Front or bumper area | Detect objects ahead | Remove surface dust without forcing bumper parts |
| LiDAR | Top turret or front module | Mapping and distance measurement | Clean only manufacturer-approved external surfaces |
| Camera/optical | Top or front | Visual navigation or obstacle recognition | Use a clean lint-free cloth and avoid scratches |
| Dock locator | Front/top and charging base | Help align the robot with its dock | Keep accessible signal windows free from dust |
Cliff sensors
Cliff sensors deserve regular attention because they face the floor. Dirt can contribute to false drop detection on some robots.
Manufacturers commonly recommend a dry cloth. Roborock’s Error 4 guidance, for example, tells owners to wipe the cliff sensors when troubleshooting that warning.
Camera and optical sensors
Camera windows need the same care you’d give another small optical surface. Avoid abrasive materials that could leave scratches or haze.
If an optical-flow sensor has a manufacturer-specific cleaning method, follow that method instead of applying a generic rule. Some models may permit a treatment that another brand does not.
LiDAR sensors
LiDAR-equipped robots use laser-based ranging to understand their surroundings. The visible turret or navigation window should stay clear of dust without unnecessary disassembly.
Roborock manuals for several models instruct owners to wipe accessible robot sensors with a soft, dry cloth. That includes wall, cliff, dock-locator, and other external sensors on supported models.
Section Takeaway: Sensor type changes both location and function, but gentle external cleaning remains the safest starting point unless the manual gives different instructions.
What If the Robot Still Acts Strangely After Cleaning?
If cleaning doesn’t solve the problem, stop assuming more wiping will help. Navigation faults can come from the floor, lighting, wheels, bumper, map, software, dock, or damaged hardware.
Check the floor and lighting
Some optical or infrared-based drop sensors can react to certain dark, reflective, or unusual surfaces. Strong lighting conditions may also affect specific sensor systems.
eufy notes that dirty edge sensors can cause navigation trouble on some RoboVac models. Its Error 6 troubleshooting instructions recommend cleaning bottom drop sensors with a dry cloth before retesting.
Inspect the bumper and wheels
A robot that turns repeatedly may have a mechanical problem instead of an optical one. Check for hair, thread, or debris around accessible wheel gaps and bumper edges.
- Make sure the front caster turns freely.
- Check drive wheels for trapped hair.
- Confirm the bumper isn’t physically jammed.
- Look for debris around the side brush.
Consider the map or software
Mapping robots can behave strangely when saved room data becomes inaccurate. A reboot, map correction, or manufacturer-approved reset may help when physical cleaning doesn’t.
Don’t perform a factory reset first. It may remove maps, schedules, Wi-Fi information, and other saved preferences.
Check for visible damage
Look closely at the sensor window after cleaning. Cracks, deep scratches, condensation, looseness, or liquid exposure suggest a hardware problem rather than ordinary dirt.
Expert Alert: Stop using the robot near stairs if its drop detection appears unreliable. Contact the manufacturer or a qualified appliance technician if cleaning and basic troubleshooting don’t restore normal operation.
Section Takeaway: Clean sensors first, but investigate environmental, mechanical, mapping, and hardware causes if the same behavior continues.
How Often Should You Clean Robot Vacuum Sensors?
A monthly sensor check is a reasonable starting point for many models, but there is no universal schedule. Heavy dust, pets, frequent cleaning, and model-specific instructions can justify checking sooner.
Manufacturer maintenance schedules show why checking the manual matters.
| Example model/family | Published sensor care interval | Published cleaning approach |
|---|---|---|
| Roomba i Series | Cliff sensors: once per month | Clean, dry microfiber or soft cotton cloth |
| Roomba 100/1000 | Cliff sensors: once per month or as needed | Follow the model’s cliff-sensor care procedure |
| Roborock Q8 Max+ | Robot sensors: monthly | Soft, dry cloth |
You don’t need to wait for the calendar when sensors are visibly dusty. Check sooner after unusually dusty cleaning, construction debris nearby, or repeated sensor warnings.
A practical home routine
- After messy runs: Look underneath for obvious dust or stuck debris.
- Every few weeks: Inspect exposed sensor windows under good lighting.
- About monthly: Perform a more deliberate sensor check when that matches your manual.
- After an error: Clean the relevant sensor before assuming it has failed.
- Anytime behavior changes: Add sensor inspection to your basic troubleshooting routine.
Homes with shedding pets or frequent fine dust may need more frequent checks. The goal isn’t constant cleaning; it’s preventing visible buildup from becoming an avoidable troubleshooting problem.
Some Shark manuals also warn that cliff sensors may work less effectively when dirty and recommend regular cleaning. You can check Shark’s published robot-vacuum maintenance guidance for an example.
Section Takeaway: Monthly is a useful reference point for several current robot families, but the correct maintenance schedule is always the one published for your exact model.
Frequently Asked Questions
Can I clean robot vacuum sensors with water?
Don’t use water unless your exact model’s instructions specifically allow it for that component. Many manufacturers tell owners to use a clean, dry cloth on cliff and navigation sensors, and spraying liquid directly onto sensor openings can create unnecessary risk.
Can I use alcohol on robot vacuum sensors?
Don’t assume rubbing alcohol is safe for every sensor. A manufacturer may permit it for a particular optical component, while another model may specify only a dry cloth, so follow the instructions for your exact vacuum.
Where are the sensors on a robot vacuum?
Common locations include the underside, front bumper, sides, top navigation turret, camera housing, and areas facing the charging dock. Check the manual because two robots from the same brand can still use different sensor layouts.
Why does my robot vacuum keep saying the cliff sensor is dirty?
Visible dust may be covering the sensor, but the warning can also involve flooring conditions or a sensor fault. Clean the sensor using the approved method, move the robot to a suitable test area, and follow the model’s official troubleshooting steps if the warning returns.
Can dirty sensors make a robot vacuum go in circles?
Dirty sensors can contribute to abnormal navigation on some robots, but circling doesn’t prove the sensors are responsible. Check the wheels, bumper, brushes, saved map, floor conditions, and manufacturer error guidance if a careful sensor cleaning doesn’t fix it.
Should I clean the charging contacts at the same time?
You can inspect them during the same maintenance session, but don’t automatically clean them the same way as optical sensors. Some manufacturers specify different materials or moisture levels for charging contacts, so treat them as a separate component.
How do I know if a robot vacuum sensor is damaged?
Possible warning signs include a cracked window, visible internal moisture, repeated errors after correct cleaning, or persistent navigation problems across suitable surfaces. Hardware diagnosis is model-specific, so contact the manufacturer when basic maintenance and approved troubleshooting fail.
Final takeaway: Cleaning robot vacuum sensors is simple when you keep the process gentle. Power the machine down, identify each accessible sensor, use the manufacturer-approved method, and test the robot before returning it to normal service.
Make sensor inspection part of your normal robot vacuum maintenance rather than waiting for a navigation error. A few minutes of routine care can also help you separate ordinary dust buildup from problems that need deeper troubleshooting.