
How Do I Clean Robot Vacuum Sensors? A Safe Step-by-Step Guide

Quick Answer
To clean robot vacuum sensors, switch the robot off, place it on a stable surface, and gently wipe the accessible sensor windows with a clean, dry microfiber or lint-free cloth. Don’t spray water or cleaner directly onto sensors, and check your model’s instructions first because cleaning methods vary; iRobot’s cliff-sensor guidance recommends a clean, dry cloth.
Quick Cleaning Steps
- Power it down: Stop the cleaning cycle and switch off the robot as your manual directs.
- Find the sensors: Check the underside, front bumper, sides, dock-facing area, camera, and lidar module.
- Remove loose debris: Clear visible hair, lint, and dust without pushing debris into openings.
- Wipe gently: Use a clean microfiber or other soft lint-free cloth with light pressure.
- Keep them dry: Don’t add liquids unless your model’s instructions specifically allow them.
- Test afterward: Run a short cleaning or docking cycle on a clear floor.
Most Important Rule
- Your owner’s manual takes priority because cliff, camera, lidar, obstacle, and docking sensors may have different care instructions.
Robot vacuum sensors sit close to dust, pet hair, crumbs, and floor-level grime. Keeping them clean is a simple part of robot vacuum maintenance and everyday home hygiene.
I’ve also found sensor cleaning is one of the first checks worth making when a robot suddenly stops, circles, misses areas, or struggles to find its dock. This 2026 guide explains how to do it safely without turning a five-minute maintenance job into an expensive repair.
In This Guide
- Why do robot vacuum sensors need cleaning?
- What should you use to clean robot vacuum sensors?
- How do you clean robot vacuum sensors step by step?
- How should different robot vacuum sensors be cleaned?
- What should you avoid when cleaning sensors?
- What if the robot still has problems after cleaning?
- Frequently asked questions
Why Do Robot Vacuum Sensors Need Cleaning?
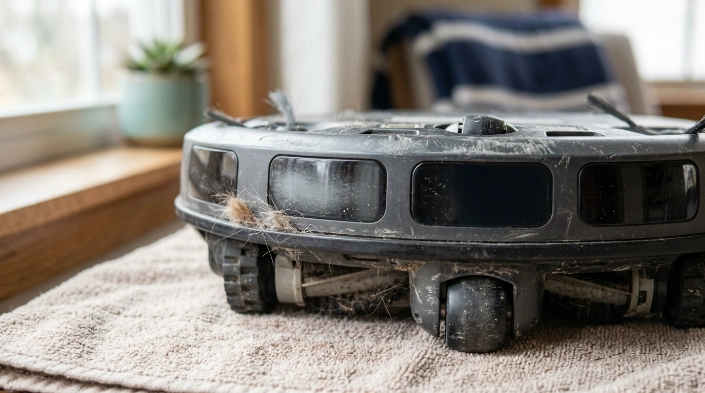
Robot vacuum sensors need cleaning because dust and residue can cover the small windows they use to detect the surrounding environment. A dirty sensor doesn’t automatically mean your robot is damaged.
A robot vacuum sensor is an electronic component that helps the machine detect or measure something around it. That can include stairs, walls, furniture, floor surfaces, obstacles, docking signals, or the robot’s position.
- Cliff sensors look toward the floor to help detect stairs and sudden drops.
- Obstacle sensors help identify furniture, walls, and objects in the robot’s path.
- Wall sensors help compatible robots follow edges at the correct distance.
- Lidar systems measure surrounding distances for navigation and mapping.
- Camera or optical sensors support navigation or object recognition on equipped models.
- Docking sensors help the machine locate and align with its charging station.
The problem is location. Many sensors operate only inches above a surface where brushes and wheels constantly disturb fine particles.
In my own cleaning routine, the underside can look fairly clean until I tilt the robot toward a bright window. That’s when a pale gray film becomes obvious across the glossy sensor windows.
Dust can also collect around the bumper. Pet hair, carpet fibers, and sticky kitchen residue may build up around nearby openings.
Manufacturers recognize this as routine maintenance. Samsung, for example, instructs owners of several Jet Bot models to wipe sensor windows with a soft cloth and warns against using cleaning liquids on those models.
Section Takeaway: Sensor dirt is usually normal maintenance. Start with gentle cleaning before assuming an electronic sensor has failed.
What Should You Use to Clean Robot Vacuum Sensors?
A soft, clean cloth is the safest starting tool for most exposed robot vacuum sensor windows. Your specific manual should decide whether anything else is appropriate.
- Microfiber cloth: Useful for lifting fine dust without scratching glossy sensor windows.
- Soft lint-free cloth: A good alternative when microfiber isn’t available.
- Soft brush: Helpful for loose debris around accessible edges when the manufacturer permits it.
- Good lighting: Makes thin dust films, fingerprints, and trapped fibers easier to see.
- Owner’s manual: Essential for identifying sensor locations and model-specific restrictions.
You normally don’t need soap, polish, glass cleaner, or disinfectant for routine sensor cleaning. More chemicals don’t mean better cleaning here.
Consumer Reports’ robot vacuum maintenance guidance also recommends checking the manufacturer’s instructions and notes that a dry cloth is enough for many robot vacuum sensors.
There is an important exception to any universal rule. Some manufacturers allow a slightly damp cloth on particular products, while others specifically say not to use liquid.
That difference is why I don’t apply one cleaning solution to every robot I handle. I check the instructions first, especially around cameras and navigation modules.
How Do You Clean Robot Vacuum Sensors Step by Step?
Start with the robot stopped, powered down as required, and positioned on a stable surface. Then work slowly through the visible sensors instead of wiping the whole underside at once.
- Stop the cleaning cycle. Use the normal controls to stop the robot before lifting or turning it over.
- Switch it off when required. Follow your manual’s shutdown procedure if your model has a physical power switch or maintenance mode.
- Move it away from the dock. Give yourself enough space to inspect the robot without accidentally pressing it against charging hardware.
- Place it on a soft, stable surface. A clean towel can protect both the robot and your table or floor.
- Identify the sensors. Check your manual for diagrams showing cliff, obstacle, wall, optical, camera, lidar, carpet, or docking sensors.
- Remove loose debris first. Lift away visible hair and lint so it doesn’t drag across sensor windows while you wipe.
- Wipe each sensor gently. Use a clean, dry microfiber or lint-free cloth unless your manufacturer specifies another method.
- Inspect under bright light. Tilt the robot slightly and look for haze, fingerprints, stuck dust, or cloth fibers.
- Check the bumper area. Remove accessible debris without pulling, forcing, or dismantling the bumper.
- Return the robot upright. Make sure every cleaned area is dry and free from loose material.
- Run a short test. Try a small cleaning cycle or send the robot back to its dock.
When I clean cliff sensors, I make one light pass first and then inspect them again from an angle. Fine dust often becomes easier to see after the first wipe.
Avoid scrubbing harder when a mark doesn’t disappear immediately. Stop and check the manual before introducing moisture or another cleaning method.
For example, Roborock’s support instructions for Error 4 tell users to wipe the cliff sensors when the robot reports that problem. Roborock’s maintenance guidance for several models also specifies a dry, lint-free cloth for sensors and charging contacts.
Section Takeaway: The safe routine is simple: power down, identify the correct components, remove loose debris, wipe gently, inspect, and test.
How Should Different Robot Vacuum Sensors Be Cleaned?
Different sensors perform different jobs, but most exposed optical surfaces need gentle handling. The table below is a starting point, not a replacement for your model’s instructions.
| Sensor or Area | Common Location | Main Job | Safe Starting Method |
|---|---|---|---|
| Cliff sensor | Underside near the outer edge | Detects stairs or sudden drops | Dry microfiber or soft lint-free cloth |
| Obstacle sensor | Front or sides | Detects walls, furniture, and objects | Soft cloth on accessible surfaces |
| Lidar/navigation sensor | Top turret or front module | Mapping and positioning | Gently clean exposed areas only |
| Camera/optical sensor | Front, top, or underside | Visual navigation or tracking | Clean lint-free cloth with light pressure |
| Docking sensor | Front of robot and/or dock | Helps locate and align with base | Dry cloth on signal windows |
| Carpet/floor sensor | Usually underneath | Recognizes floor changes on equipped models | Follow model-specific instructions |
How do you clean cliff sensors?
Cliff sensors usually face downward and are among the easiest sensors to collect dust. Wipe their exposed windows gently with the method specified by your manufacturer.
iRobot recommends regularly wiping Roomba cliff-sensor openings with a clean, dry microfiber or soft cotton cloth. Dirty cliff sensors can also contribute to some drop-detection errors.
How do you clean lidar and navigation sensors?
Clean only the exposed surfaces your manual identifies as user-serviceable. Don’t remove covers or push tools into a lidar turret.
Samsung’s current Jet Bot guidance identifies several sensor types and recommends wiping them with a soft cloth. Its instructions for certain models specifically warn against cleaning liquids.
How do you clean camera sensors?
Treat camera windows like other delicate optical surfaces. Use light pressure and avoid anything abrasive that could scratch or haze the window.
A dirty camera isn’t the only reason for poor navigation. Low light, moved furniture, map errors, and blocked routes may also affect some robots.
Section Takeaway: Sensor location and cleaning method vary by model. Identify the component before touching it, and clean only accessible surfaces intended for routine maintenance.
What Should You Avoid When Cleaning Robot Vacuum Sensors?
The biggest mistakes usually come from using too much liquid, too much force, or the wrong cleaning product. Sensors need less aggressive cleaning than brushes and wheels.
- Don’t spray cleaner directly: Liquid can run through gaps and reach electronic components.
- Don’t soak the cloth: Follow the manual if moisture is permitted and keep it controlled.
- Don’t use abrasive pads: Scratches or haze can damage exposed optical surfaces.
- Don’t scrape with metal tools: A hard edge can mark sensor windows or surrounding plastic.
- Don’t force the bumper: Remove only debris you can reach safely.
- Don’t disassemble navigation hardware: Internal cleaning is different from routine user maintenance.
- Don’t assume alcohol is safe: Some sensor materials and coatings can react poorly to solvents.
- Don’t use compressed air automatically: Use it only when your model’s manufacturer specifically recommends it.
One reason this matters is that manufacturer instructions can conflict between product families. Samsung guidance for one Jetbot Mop permits a damp cloth, while guidance for other Jet Bot sensor windows says not to use cleaning liquids.
That is a good example of why model-specific instructions beat generic internet advice. The safest cleaner is often no cleaner at all.
What If the Robot Still Has Problems After Cleaning?
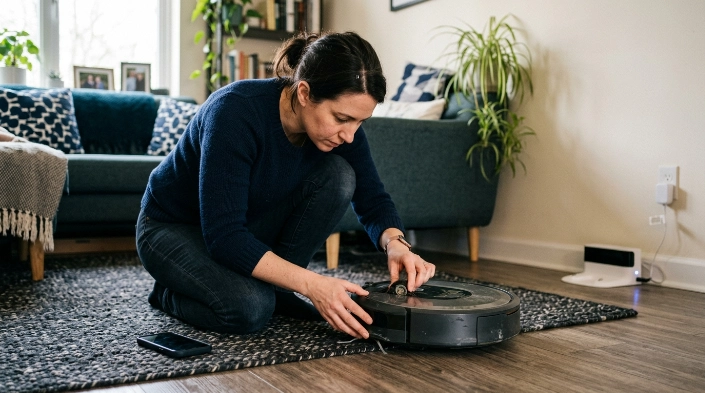
If cleaning doesn’t fix the problem, the sensor itself may not be the cause. Strange movement can also come from wheels, bumpers, flooring, maps, charging hardware, or software.
- Check both drive wheels: Hair or thread around one wheel can make a robot turn or circle.
- Inspect the bumper: A stuck bumper can cause repeated backing, turning, or obstacle errors.
- Check dark flooring: Some cliff-sensor systems may interpret certain dark surfaces as a drop.
- Review the saved map: Mapping problems can look like sensor problems on navigation-based robots.
- Check the dock: Keep the charging station stable and its signal areas clear.
- Read the error message: Your app or voice alert may identify the exact component needing attention.
- Restart correctly: Use the manufacturer-approved restart or reset procedure.
As of 2026, robot vacuums use a wide range of navigation systems. Two machines that look almost identical can rely on different combinations of cameras, infrared sensors, lidar, bump switches, and floor tracking.
I therefore avoid diagnosing a failed sensor from one symptom. I clean first, test on a clear floor, and then work through the manual’s troubleshooting sequence.
Expert Alert: If the manufacturer instructs you to open the robot, repair wiring, replace internal electronic parts, or service the battery system, stop DIY troubleshooting unless you are qualified. Contact the manufacturer or an appliance repair professional instead.
How often should you clean robot vacuum sensors?
There isn’t one correct interval for every household. Check the manual’s maintenance schedule and adjust based on how often the robot runs and how quickly visible dust returns.
- Heavy daily use: Inspect sensors frequently, especially in homes with pets or dusty floors.
- Moderate use: Add sensor inspection to your regular bin, brush, and wheel maintenance routine.
- After an error: Inspect the relevant sensors before assuming replacement is necessary.
- After a messy run: Check sensors if the robot crossed flour, fine dust, pet debris, or sticky residue.
Roborock documentation for at least some models lists monthly sensor cleaning, while maintenance schedules differ across brands and product generations. Your manual remains the best schedule for your exact machine.
Frequently Asked Questions
Can I clean robot vacuum sensors with water?
Don’t use water unless your exact model’s instructions permit it. Many manufacturers recommend a dry cloth, while a few models allow a lightly damp cloth. Never pour or spray water directly onto a sensor or into an opening.
Can I use alcohol wipes on robot vacuum sensors?
Avoid alcohol unless the manufacturer specifically approves it for that sensor. Solvents can affect plastics, coatings, or optical surfaces, and Samsung warns against alcohol-based products on certain robot vacuum sensors.
Why does my robot vacuum say the cliff sensors are dirty?
Dust may be covering the sensor windows, but dirt isn’t the only possible cause. Some dark or unusual floor surfaces can also trigger cliff-detection behavior. Clean the sensors first, then follow the manufacturer’s troubleshooting instructions if the warning remains.
Where are the sensors on a robot vacuum?
Common locations include the underside, front bumper, sides, top navigation turret, camera area, and front-facing docking section. The exact layout varies significantly between brands, so use your manual’s component diagram instead of guessing.
Can dirty sensors make a robot vacuum spin in circles?
They can contribute to unusual navigation, but circling can also result from a jammed drive wheel, stuck bumper, floor-reading problem, or navigation error. Inspect the wheels and bumper as well as cleaning the sensors.
Should I clean the charging contacts at the same time?
It’s sensible to inspect them during maintenance, but charging contacts are not the same as optical sensors. Use the cleaning method specified by your manufacturer and disconnect or power down equipment when the manual requires it.
How do I know if a sensor is broken rather than dirty?
A fault becomes more likely when the same sensor-related error continues after proper cleaning, restarting, floor checks, and manufacturer troubleshooting. At that point, contact the manufacturer rather than opening sealed electronic assemblies yourself.
Cleaning robot vacuum sensors is usually a small job: identify the correct components, wipe them gently, and test the machine again. The most important habit is following your model’s manual instead of assuming every sensor and every robot can be cleaned the same way.
If your robot still struggles after the sensors, wheels, bumper, and dock are clean, use the exact error code or symptom to guide your next troubleshooting step.
