
How Do I Fix a Cordless Vacuum That Won’t Charge?

Quick Answer
If your cordless vacuum won’t charge, first test the wall outlet, confirm you’re using the correct charger, reconnect the battery, and clean dry charging contacts. Let an unusually hot or cold battery return to room temperature before trying again. If the battery is swollen, cracked, leaking, smoking, or unusually hot, stop using it and check CPSC recalls and safety warnings before doing anything else.
Try these checks in order
- Step 1 — Test the outlet: Plug in another small appliance to confirm the socket has power.
- Step 2 — Check the charger: Confirm it matches your exact vacuum model and inspect its cable for damage.
- Step 3 — Reseat the battery: Remove a detachable battery and reinstall it firmly until it locks into place.
- Step 4 — Clean the contacts: Wipe dry charging terminals with a clean microfiber cloth after unplugging the charger.
- Step 5 — Check temperature: Allow a hot or cold battery to reach normal room temperature before charging.
- Step 6 — Isolate the fault: Persistent failure usually points toward the battery, charger, dock, or internal charging circuit.
Important safety check
- Do not open a lithium-ion battery pack, bypass its charging system, or experiment with an unrelated power adapter.
A cordless vacuum that suddenly refuses to charge can turn an easy home-hygiene routine into a frustrating troubleshooting job. Fortunately, many charging problems come from simple things such as a dead outlet, loose battery, dirty contact, temperature protection, or failed charger.
The key is testing one part at a time. That helps you find the problem without buying a battery or charger you may not need.
In This Guide
- Why won’t my cordless vacuum charge?
- How do I fix a cordless vacuum that won’t charge?
- What do the charging lights mean?
- How can I tell whether the charger or battery is bad?
- Can temperature or dirty contacts stop charging?
- When should I replace the battery or get professional help?
- Frequently Asked Questions
Why Won’t My Cordless Vacuum Charge?
A cordless vacuum usually stops charging because electricity isn’t reaching the battery correctly, the battery isn’t accepting the charge, or the vacuum’s protection system has interrupted charging.
Start with the simple causes. A failed battery is possible, but it shouldn’t be your first assumption.
A cordless vacuum charging system is the group of components that move power from your wall outlet into the rechargeable battery. It normally includes the power adapter, cable, charging dock or port, electrical contacts, battery pack, and internal battery-management electronics.
A dead or switched-off outlet
This is easy to overlook. Manufacturer troubleshooting guides commonly recommend testing the charging outlet with another device before blaming the vacuum.
Plug a phone charger, lamp, or another small appliance into the same socket. If that device also fails, try another outlet.
The wrong or damaged charger
Cordless vacuum chargers aren’t automatically interchangeable. Two plugs can look similar while supplying different electrical output.
- Check the charger label against your vacuum’s manual or model number.
- Look for cuts, crushed sections, exposed wire, or damaged plug pins.
- Check whether the connector sits firmly inside the vacuum or dock.
- Use the manufacturer-approved replacement if the charger is defective.
Tineco, Bissell, and Dyson troubleshooting information all emphasizes checking the power source, charger, and connections before moving to battery replacement.
A loose battery or charging connection
Removable batteries can appear installed while sitting slightly outside their charging position. A small gap may prevent the terminals from making proper contact.
Remove the battery with the vacuum turned off. Reinstall it until it sits flush and locks as your manual describes.
The battery has aged or failed
Rechargeable batteries lose usable capacity over time. Eventually, a battery may run briefly, charge inconsistently, or stop accepting a charge.
Consumer Reports also identifies battery deterioration as an important reliability issue for cordless stick vacuums. Its current vacuum testing information is available through its vacuum testing program.
How Do I Fix a Cordless Vacuum That Won’t Charge?
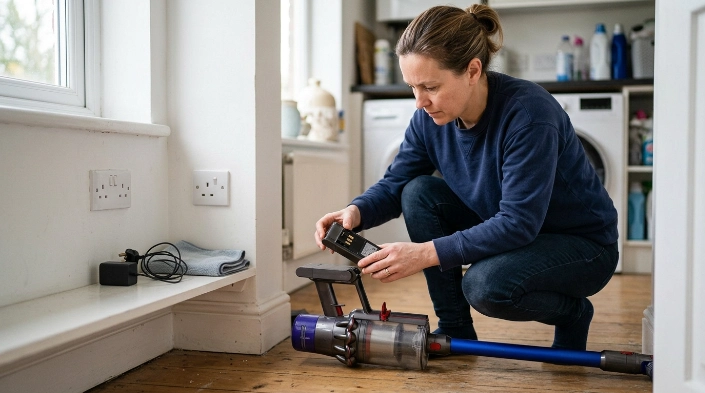
Use a process of elimination. Don’t replace the battery until you’ve ruled out the outlet, charger, dock, contacts, connection, and temperature protection.
1. Turn the vacuum off and unplug the charger
Stop using the vacuum while you’re inspecting the charging system. Disconnect the charging adapter from mains power before touching its cable, plug, dock, or contacts.
2. Test the wall outlet
Plug another working device into the outlet. Try a second outlet if the first one doesn’t work reliably.
A wall switch, tripped breaker, loose receptacle, or failed power strip can make a healthy vacuum look defective.
3. Inspect the charging adapter and cable
- Check the entire cable for cuts or flattened sections.
- Look for bent or loose connector pins.
- Check the adapter housing for cracks or melting.
- Stop using the charger if you find visible electrical damage.
If the cord only works when you bend or hold it at a particular angle, replacement is safer than repeatedly flexing a damaged connection.
Expert Alert: Don’t cut, splice, solder, or repair a mains-powered vacuum charger unless you’re qualified for electrical work. Replace a damaged charger with the correct approved unit instead.
4. Bypass the dock when the design allows it
Some cordless vacuums let you connect the charger directly to the vacuum or removable battery. That test can help separate a dock problem from a charger or battery problem.
Only do this when your manufacturer’s instructions specifically allow direct charging. Dyson, for example, provides direct-charging troubleshooting for certain cordless models through its official cordless vacuum support.
5. Remove and reinstall a detachable battery
Turn everything off before removing it. Inspect the battery casing and connection points, then reinstall the pack firmly.
Don’t force a battery that no longer fits properly. Swelling can alter the battery’s shape and creates a serious safety concern.
6. Clean dry charging contacts
Dust and household debris can collect around exposed charging contacts. Disconnect power first, then wipe accessible contacts using a clean, dry microfiber cloth.
- Don’t scrape contacts with a knife or screwdriver.
- Don’t pour cleaner into the charging port.
- Don’t clean energized contacts.
- Don’t bend spring-loaded charging pins.
7. Let the battery return to room temperature
A battery that has just worked hard may be warm. A vacuum stored in an unusually cold area can also experience temporary charging problems.
Leave the machine switched off in a dry indoor location until the battery reaches normal room temperature. Then reconnect the correct charger.
8. Leave it connected for the model’s normal charging period
Charging time differs widely between models, so use the time listed in your manual. Don’t assume ten minutes on the charger is enough to prove a deeply discharged battery has failed.
If there is still no charging indication after the manufacturer’s troubleshooting steps, the charger, battery, charging dock, or internal electronics may need replacement or service.
Section Takeaway: Test the charging path in order: outlet, charger, dock, connection, contacts, temperature, and finally the battery. This prevents unnecessary replacement parts and keeps troubleshooting safer.
What Do the Charging Lights Mean?
Charging lights can reveal whether power is reaching the vacuum, but there is no universal cordless-vacuum light code. The same color can mean different things on different brands.
Always compare the light pattern with the manual for your exact model.
| What you see | What it may indicate | Safe next check |
|---|---|---|
| No light at all | No outlet power, loose connection, failed charger, dock fault, or battery problem | Test the outlet and reconnect the charger |
| Normal pulsing or sequential lights | Often indicates normal charging | Confirm the pattern in the manual |
| Amber or temperature warning | May indicate a temporary temperature-related condition | Switch off and let the battery normalize indoors |
| Red or repeated error pattern | Possible battery, charger, or machine fault | Check the exact model’s error guide |
| Lights show full but vacuum quickly dies | Battery capacity may have deteriorated | Check runtime and manufacturer battery diagnostics |
For example, some Dyson models use different blue, amber, and red patterns for charging, temporary temperature conditions, and faults. Bissell models may use another sequence entirely.
That is why a generic internet description of a flashing light shouldn’t override your model’s manual.
How Can I Tell Whether the Charger or Battery Is Bad?
A bad charger usually fails to deliver charging power at all. A deteriorated battery may still show charging activity but provide little runtime afterward.
The symptoms overlap, so compare several clues instead of relying on one.
| Symptom | Charger more suspect | Battery more suspect |
|---|---|---|
| No charging light | Yes, especially after outlet and connections are verified | Also possible |
| Cable works only when moved | Strong possibility | Less likely |
| Vacuum shows full charge but dies quickly | Less likely | Strong possibility |
| Battery is swollen or deformed | Don’t continue testing | Stop using the battery immediately |
| Known-good compatible battery charges normally | Charger is probably functioning | Original battery becomes more suspect |
Don’t test compatibility by plugging in random chargers. Matching connector shape doesn’t prove that voltage, polarity, current, or charging control is correct.
UL Solutions explains that rechargeable battery systems depend on proper charging conditions and appropriate chargers. Its battery safety testing information covers batteries, chargers, and adapters as parts of the safety system.
Can Temperature or Dirty Contacts Stop a Cordless Vacuum From Charging?
Yes. Temperature protection, dirty terminals, and poor physical connections can all interfere with charging even when the battery itself still works.
Let a warm battery cool naturally
If you just finished vacuuming on a high-power setting, switch the machine off before charging. Let the battery cool naturally in a dry room.
Don’t put it in a refrigerator or freezer. Rapid artificial cooling isn’t a suitable battery troubleshooting method.
Keep the charging area dry
Moisture and electrical charging equipment shouldn’t mix. Don’t charge a cordless vacuum beside a wet mop bucket, damp utility sink, or freshly washed battery compartment.
If moisture entered the electronics or battery housing, stop using the machine until the manufacturer or qualified technician advises you.
Remove dust from the contact area
Vacuum cleaners naturally operate around fine household dust. That debris can settle near battery rails, charging ports, and dock contacts.
- Switch off the vacuum.
- Unplug the charger.
- Remove the battery if the manual permits it.
- Wipe accessible contact surfaces with a dry cloth.
- Reconnect everything firmly.
Don’t confuse a shutdown with a charging failure
A vacuum that stops while cleaning isn’t automatically suffering from a charging problem. Blocked airflow, a clogged filter, obstructed brush roll, or thermal protection can make some machines shut down.
If the battery later charges normally, troubleshoot the airflow and floor head separately.
When Should I Replace the Battery or Get Professional Help?
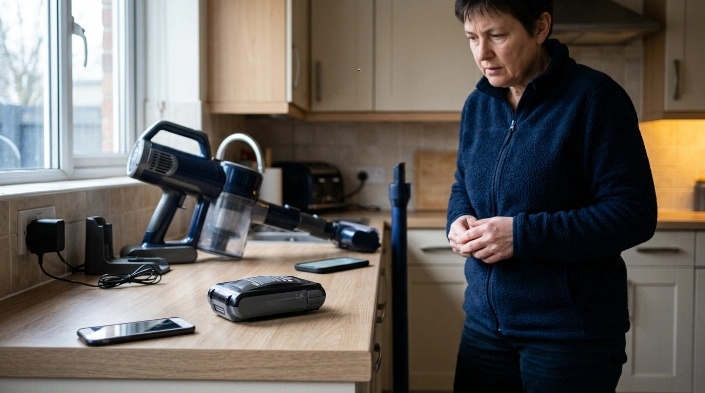
Battery replacement becomes reasonable after you’ve confirmed the outlet and correct charger work, connections are clean, temperature is normal, and model-specific troubleshooting still points toward the pack.
Choose the exact battery specified for your model. Genuine or manufacturer-approved components also reduce the risk of electrical incompatibility.
Stop troubleshooting if the battery looks unsafe
- The casing is swollen or distorted.
- The pack has cracked after a drop.
- You see leaking material.
- You hear hissing, crackling, or popping.
- The battery becomes unusually hot while idle or charging.
- You notice smoke or an unusual chemical odor.
Lithium-ion cells can become hazardous when damaged or improperly charged. UL documents overheating, internal short circuits, and thermal runaway among the risks associated with damaged rechargeable battery systems.
The CPSC has also issued fire-related warnings involving specific cordless vacuum battery packs. Checking the current CPSC recall database is sensible when a battery behaves abnormally.
Expert Alert: Stop using a damaged, swollen, smoking, leaking, or overheating lithium-ion battery. Don’t open the pack or attempt cell-level repairs; contact the manufacturer or an appropriate battery-service or recycling provider.
Consider service when a known-good charger and battery don’t solve it
If both components are verified but the vacuum still won’t charge, the problem may sit inside the charging port, wiring, control board, or battery-management circuitry.
Those repairs involve electrical components and aren’t a good place for trial-and-error DIY work.
Frequently Asked Questions
Why is my cordless vacuum plugged in but not charging?
Start by confirming the outlet works and the correct charger is connected firmly. Then check the dock, battery seating, dry charging contacts, and battery temperature. If none of those help, the charger, battery, or internal charging circuit may have failed.
Can a completely dead cordless vacuum battery charge again?
Sometimes. A deeply discharged but healthy battery may begin charging when connected to its correct charger for the normal manufacturer-specified period. If there is no charging indication after approved troubleshooting, don’t attempt to jump-start or bypass the battery-management system.
How do I reset a cordless vacuum battery?
There is no universal battery-reset procedure. Some models only require turning the vacuum off and reconnecting the battery, while others have model-specific steps. Check the manufacturer’s manual rather than following a reset procedure written for another brand.
Why does my vacuum charge but only run for a few minutes?
Short runtime can point toward reduced battery capacity, especially when the vacuum previously ran much longer under similar conditions. High-power modes, blocked airflow, dirty filters, and motorized attachments can also shorten runtime, so check those factors before replacing the battery.
Can I use another charger if the plug fits?
No, plug shape alone doesn’t establish electrical compatibility. Use the charger specified by your vacuum manufacturer because output voltage, polarity, charging control, and other electrical requirements can differ between products.
Should I leave my cordless vacuum charging all the time?
Follow the instructions for your exact model. Charging controls and manufacturer recommendations vary, so there isn’t one rule that applies to every cordless vacuum or lithium-ion battery system.
Why does my cordless vacuum battery get hot while charging?
Some warmth can occur during normal use and charging, but excessive heat or a sudden change in temperature behavior deserves attention. Disconnect the vacuum if the battery becomes unusually hot, swells, smells abnormal, smokes, or shows physical damage.
The simplest troubleshooting rule is to work from the wall toward the battery. Verify the outlet, charger, connections, contacts, and temperature before spending money on replacement parts.
If those checks don’t restore charging, use your exact model number to find the manufacturer’s diagnostic guide. A correct battery or charger replacement is far safer than experimenting with incompatible electrical parts.
