
How Do I Fix a Vacuum That Won’t Start?

Quick Answer
If your vacuum won’t start, unplug it first, confirm the wall outlet works, inspect the cord or battery, empty the bin, clean blocked airflow paths, and let an overheated machine cool before trying again. Stop using it if you see damaged wiring, smell burning, notice sparks, or repeatedly trip a breaker; the U.S. Consumer Product Safety Commission’s electrical safety guidance explains why damaged electrical equipment needs careful handling.
Quick troubleshooting steps
- Check the outlet: Test it with a small appliance you know works.
- Inspect the power source: Look for cord, plug, battery, or charger damage.
- Check the bin: Empty an overfilled dustbin or inspect the bag.
- Clear airflow: Look for clogs in the hose, wand, floor head, and filters.
- Let it cool: An overheated vacuum may need 30–60 minutes or longer, depending on the model.
- Check assembly: Make sure removable parts, batteries, and connectors are seated correctly.
Stop troubleshooting if:
- You find exposed wiring, a melted plug, smoke, sparks, battery swelling, or repeated breaker trips.
A vacuum that suddenly appears completely dead can be frustrating, especially when you have a half-cleaned room in front of you. Fortunately, many no-start problems come from a power interruption, overheating protection, a clogged airflow path, or a battery issue rather than a failed motor.
When I troubleshoot a vacuum that won’t turn on, I start with the simplest checks outside the machine. That approach avoids unnecessary disassembly and catches many common home-hygiene appliance problems quickly.
In This Guide
- Why Won’t My Vacuum Cleaner Start?
- How Do I Troubleshoot a Vacuum That Won’t Turn On?
- Can Overheating Stop a Vacuum From Starting?
- What Should I Check on Corded, Cordless, and Robot Vacuums?
- Which Vacuum No-Power Problems Can I Fix Myself?
- When Should I Stop Troubleshooting and Call for Repair?
- Frequently Asked Questions
Why Won’t My Vacuum Cleaner Start?
A vacuum usually fails to start because it is not receiving power, a safety system has interrupted operation, or an electrical or battery component has failed. Start with the power supply before assuming the motor is bad.
Definition: A vacuum no-start fault is a condition where the cleaner does not power on normally after you activate its main control. The cause may be outside the vacuum, such as a dead outlet, or inside the machine.
The outlet may not be supplying power
Plug a phone charger, lamp, or another small appliance into the same outlet. If that device also fails, the problem is probably not your vacuum.
Try another outlet in a different room. If the circuit breaker has tripped, reset it once after removing the appliance load.
If the breaker trips again when you connect the vacuum, stop. Repeated breaker trips can point to an electrical fault that should not be treated as a routine DIY repair.
The cord, plug, battery, or charger may be damaged
For a corded vacuum, unplug the machine and visually inspect the full cable. Look for cuts, crushed sections, exposed conductors, melting, loose prongs, or discoloration around the plug.
For cordless machines, check whether the battery is charged and fully seated. Inspect the battery casing and charger for cracking, swelling, overheating, or other visible damage.
- Corded upright or canister: Check the wall outlet, cord, plug, switch, and removable connections.
- Cordless stick vacuum: Check the battery charge, charger, charging contacts, and battery fit.
- Robot vacuum: Check the dock, charging contacts, battery state, and main power switch.
- Handheld vacuum: Check battery charge and confirm the charger is receiving power.
A safety interlock may not be engaged
Some vacuums will not run when a dustbin, pod, battery, hose, wand, or cleaner head is not seated correctly. Reassemble removable parts until each one locks into its normal operating position.
Do not force a connector that does not fit easily. Bent contacts or cracked plastic can create a second problem.
Section Takeaway: Start with the external power supply and visible connections. A completely dead vacuum does not automatically mean the motor has failed.
How Do I Troubleshoot a Vacuum That Won’t Turn On?
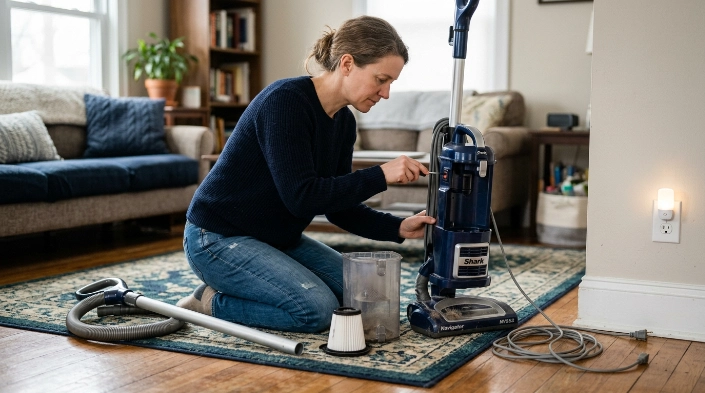
Use a fixed troubleshooting order so you do not overlook simple causes. Disconnect the vacuum from power whenever you are inspecting removable parts, filters, rollers, or air passages.
- Turn the vacuum off. Unplug a corded model or follow the shutdown instructions for your cordless machine.
- Test the outlet. Use another small appliance to confirm that power is available.
- Try another outlet. Choose one in another room when possible.
- Inspect the cord or battery. Stop if you find visible electrical damage.
- Empty the dustbin or inspect the bag. Packed debris can contribute to restricted airflow.
- Inspect filters. Clean or replace them only according to the manufacturer’s instructions.
- Check the hose and wand. Remove compacted debris that blocks airflow.
- Inspect the cleaner head. Remove hair and fibers wrapped around accessible brush-roll areas.
- Allow cooling time. If the machine stopped during use, its thermal protection may have activated.
- Reassemble everything securely. Then reconnect power and test the vacuum.
Do not wash every vacuum filter
Some filters are washable, while others are replacement-only. A wet non-washable filter can become damaged and may restrict airflow.
If you wash an approved reusable filter, let it dry completely before reinstalling it. Follow your model’s manual instead of using a universal drying time.
Check for airflow restrictions
A blocked air path can reduce cooling around the motor. That can cause certain vacuums to shut down through a thermal protection system.
- Floor nozzle opening
- Brush-roll housing
- Extension wand
- Flexible hose
- Dustbin inlet
- Pre-motor filter area
- Exhaust filter area
I like checking these areas in that order because debris often gets trapped near bends and transitions. A flashlight can help you spot a blockage without pushing tools deep into the machine.
Section Takeaway: Troubleshoot from the power source toward the airflow system. Avoid opening the motor housing during ordinary home troubleshooting.
Can Overheating Stop a Vacuum From Starting?
Yes. Many vacuums include thermal protection that can shut the motor off when temperatures rise too far. Restricted airflow from clogs, full bins, or dirty filters can contribute to overheating.
Cooling requirements vary by model. Current manufacturer support guidance gives different reset periods, which is why your own manual should take priority.
| Manufacturer guidance example | No-power check | Example cooling guidance |
|---|---|---|
| BISSELL upright support | Inspect cord and plug, test outlet, check for dirty filters or clogs | About 30 minutes on the referenced model |
| Shark upright support | Inspect cord, try another outlet, verify connections, clear blockages | 60 minutes for overheating guidance on referenced uprights |
| Dyson support | Check cord/socket on corded models; charge, battery casing, and airway on cordless models | Follow model-specific troubleshooting |
BISSELL’s no-power troubleshooting guidance for one upright family says a clog or dirty filter can activate its internal thermal protector and recommends about 30 minutes of cooling.
Shark’s upright vacuum support guidance tells users to allow 60 minutes of cooling on models covered by that advice while checking the hose, wand, dust cup, nozzle, and other airflow areas.
What should you do after an overheating shutdown?
- Switch the vacuum off and unplug it.
- Let it cool for the time specified in its manual.
- Empty the bin or replace a full bag if needed.
- Check the filters according to manufacturer instructions.
- Remove accessible clogs from the hose, wand, and floor head.
- Clear hair or string from the brush roll.
- Reconnect everything and test the machine.
If it shuts off again quickly after you restore airflow, stop using it. Repeated overheating can indicate a fault that routine cleaning will not solve.
Expert Alert: Do not bypass a thermal protector, fuse, temperature sensor, or other safety device. Internal electrical repair should be handled by a qualified technician.
Section Takeaway: Cooling can restore a vacuum after a thermal shutdown, but you also need to address the condition that caused excess heat.
What Should I Check on Corded, Cordless, and Robot Vacuums?
The basic logic is the same for every vacuum, but the power system changes by design. A corded vacuum depends on the household electrical supply, while cordless and robot models add batteries, chargers, and charging contacts.
Corded upright and canister vacuums
Begin with the outlet, plug, and cord. Dyson’s current no-power support page similarly tells corded users to inspect the cable and confirm that the wall socket works.
- Test the outlet.
- Inspect the plug and full cord.
- Confirm detachable hoses, pods, and cleaner heads are seated.
- Check for airflow blockages.
- Allow an overheated machine to cool according to its manual.
Cordless stick and handheld vacuums
Battery state becomes the first extra variable. A battery can appear connected while failing to make proper contact.
- Charge with the correct manufacturer-approved charger.
- Check that the charging outlet works.
- Clean dry charging contacts only as the manual permits.
- Make sure the battery is fully latched.
- Check indicator lights or error codes.
- Inspect for cracks, swelling, leaks, or unusual heat.
Never continue charging a swollen or visibly damaged lithium-ion battery. Keep it away from heat and follow the manufacturer’s service or disposal instructions.
Robot vacuums
A robot can appear dead because its charging dock has lost power. The robot’s own main power switch may also have been turned off during cleaning or storage.
- Confirm the dock is plugged into a working outlet.
- Wipe accessible charging contacts with a dry material if the manual allows it.
- Place the robot correctly on its dock.
- Check its physical power switch.
- Look for battery, charging, or temperature error messages in the app.
Section Takeaway: Match your troubleshooting to the vacuum’s power system. Battery-powered machines add charging components that corded machines do not have.
Which Vacuum No-Power Problems Can I Fix Myself?
Routine cleaning and basic power checks are reasonable DIY tasks. Internal electrical repairs are a different category.
| Problem | Safe first action | When to stop |
|---|---|---|
| Dead wall outlet | Test another appliance and another outlet | Outlet is hot, damaged, or repeatedly trips protection |
| Full bin or bag | Empty or replace it | Machine still overheats after airflow is restored |
| Blocked hose or wand | Remove accessible debris with power disconnected | Clearing requires opening powered components |
| Dirty washable filter | Clean exactly as the manual directs | Filter is damaged or is not designed to be washed |
| Damaged cord or plug | Stop using the vacuum | Professional repair or replacement is needed |
| Swollen battery | Stop charging and using it | Follow manufacturer guidance for safe service or disposal |
Can I replace a vacuum fuse or switch myself?
That depends on the model and the manufacturer’s service design. An externally accessible, user-replaceable component listed in the owner’s manual is different from a fuse or switch inside the motor housing.
Do not dismantle electrical housings simply to hunt for a failed component. That can expose energized parts, damage insulation, and affect product safety.
Should I use an extension cord to test the vacuum?
Using another known-good wall outlet is usually a cleaner diagnostic test. Avoid questionable, undersized, damaged, or overloaded extension cords.
As of 2026, electrical safety remains the priority over forcing a machine to run. A vacuum that starts only when its cord is bent, twisted, or held in one position should be disconnected and repaired.
When Should I Stop Troubleshooting and Call for Repair?
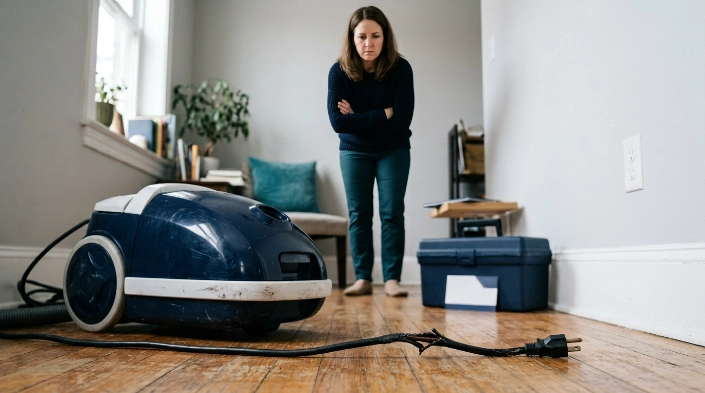
Stop DIY troubleshooting when the problem moves beyond normal cleaning, reassembly, charging, and external power checks. Electrical warning signs deserve extra caution.
- Burning smell: Stop immediately if the odor appears electrical or returns after clogs are cleared.
- Sparks or smoke: Disconnect power and do not retest the machine.
- Damaged cord: Do not tape over exposed or broken conductors and continue using the vacuum.
- Hot or melted plug: Stop using both the vacuum and any suspect outlet until the fault is identified.
- Repeated breaker trips: Do not keep resetting the breaker and retrying the appliance.
- Battery swelling: Stop using and charging the battery.
- Repeated overheating: Get service if normal airflow maintenance does not stop the shutdowns.
- No response after basic checks: Contact the manufacturer or a qualified appliance repair technician.
Before paying for a repair, find the vacuum’s exact model and serial number. These are usually printed on a label underneath or behind part of the machine.
You can then check the manufacturer’s support page for model-specific troubleshooting, warranty status, replacement parts, and recall information. That is much safer than assuming every vacuum uses the same internal design.
Expert Alert: Opening a motor housing, rewiring a damaged cord, bypassing a safety switch, or diagnosing live electrical components should be left to a qualified repair professional.
Section Takeaway: Basic cleaning is DIY-friendly. Electrical faults, damaged batteries, repeated breaker trips, and internal safety-component failures are not.
Frequently Asked Questions
Why did my vacuum suddenly stop and not turn back on?
The vacuum may have overheated and activated its thermal protection. Unplug it, check the bin, filters, hose, wand, and floor head for restricted airflow, then let it cool for the model-specific time listed in the manual before trying again.
How long should I let my vacuum cool before restarting it?
There is no universal cooling period. Some BISSELL support instructions specify about 30 minutes, while Shark guidance for certain uprights recommends 60 minutes. Follow the instructions for your exact model rather than assuming one cooling time works for every vacuum.
Why won’t my vacuum turn on even though the outlet works?
Possible causes include a damaged cord, faulty switch, discharged battery, poor battery connection, activated thermal protector, incorrectly installed component, or an internal electrical fault. Perform only the external checks allowed in your manual before arranging service.
Can a clogged filter stop a vacuum from turning on?
A dirty filter may restrict airflow and contribute to overheating on some machines. If thermal protection then shuts the motor down, the vacuum may not restart until it cools. Clean or replace filters only according to the manufacturer’s instructions.
Why is my cordless vacuum not turning on after charging?
Confirm that the charger and wall outlet work, the battery is installed correctly, and the charging contacts are clean and dry. Check indicator lights for an error condition. Stop using the battery if its casing is cracked, swollen, leaking, or unusually hot.
Should I replace a vacuum if it won’t start?
Not immediately. Rule out a dead outlet, overheating, clogs, incorrect assembly, and charging problems first. If the machine has electrical damage, repeated failures, or an expensive motor or control-board fault, compare the repair cost with the vacuum’s age and replacement value.
Can I keep using a vacuum with a damaged cord?
No. A damaged cord can create shock or fire hazards. Unplug the machine and have the cord properly repaired or replaced according to manufacturer guidance before using the vacuum again.
Final Takeaway
If your vacuum won’t start, begin with the outlet and power source before assuming the machine is finished. Then check airflow, filters, the dust container, removable connections, battery condition, and possible overheating.
Keep the repair line clear. Cleaning a clog is routine maintenance; opening an electrical housing or bypassing a safety device is not. If basic checks fail or you find electrical damage, use the model number to get manufacturer-specific support or qualified repair service.
