
Common Vacuum Maintenance Mistakes: 12 Habits to Avoid in 2026

Quick Answer
The most common vacuum maintenance mistakes are overfilling the bin or bag, washing non-washable filters, reinstalling damp parts, ignoring tangled brush rolls, overlooking clogs, and continuing to use a vacuum that overheats or smells burnt. Good maintenance protects airflow and keeps the machine operating as designed; the EPA’s indoor particulate matter guidance also explains why effective vacuum filtration matters when managing household dust.
Mistakes to avoid first
- Overfilling the bin: Empty collected dirt before it becomes tightly packed or passes your model’s fill line.
- Washing every filter: Only wash a filter when the manufacturer specifically says it is washable.
- Installing damp parts: Let approved washable filters, bins, and other parts dry completely before reassembly.
- Ignoring tangled hair: Remove hair, thread, and fibers before they restrict brush-roll movement.
- Missing hidden clogs: Check the hose, wand, floorhead, and intake whenever suction suddenly changes.
- Ignoring warning signs: Stop using a vacuum with smoke, electrical damage, abnormal heat, or a persistent burning smell.
Best rule to remember
- Your owner’s manual should override any general cleaning schedule or maintenance shortcut.
Vacuum maintenance looks simple until one small shortcut causes weak suction, a clogged roller, or a filter problem. I’ve found that the easiest routine is usually the safest one: protect airflow, remove collected debris, and avoid cleaning parts more aggressively than the manufacturer recommends.
This 2026 guide covers the common vacuum maintenance mistakes I would check first in an everyday home. It applies broadly to upright, canister, stick, cordless, bagged, bagless, and robot vacuums.
In This Guide
- What Are the Most Common Vacuum Maintenance Mistakes?
- Why Do Bin, Bag, and Filter Mistakes Hurt Airflow?
- What Happens When You Ignore the Brush Roll, Hose, and Floorhead?
- Which Cleaning and Washing Mistakes Can Damage a Vacuum?
- How Should Maintenance Change by Vacuum Type?
- Vacuum Maintenance Mistakes FAQ
What Are the Most Common Vacuum Maintenance Mistakes?
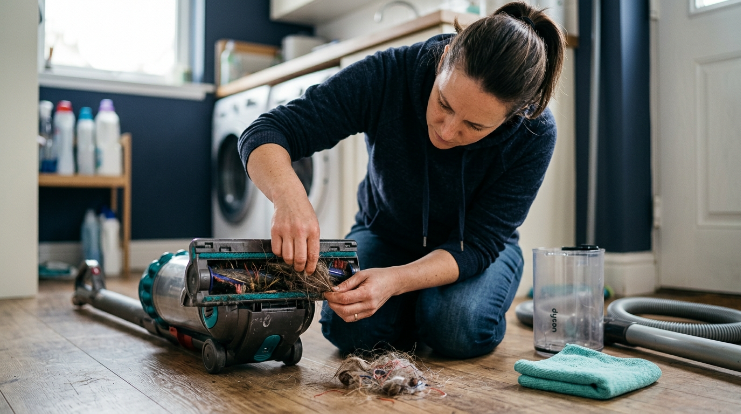
The biggest vacuum maintenance mistakes usually involve restricted airflow, incorrect filter care, tangled moving parts, moisture, or ignored warning signs. Most don’t require complicated repairs to prevent.
A vacuum maintenance mistake is a cleaning, inspection, storage, or servicing habit that conflicts with the machine’s normal care requirements. Some mistakes reduce performance, while others can damage components or create a safety concern.
1. Waiting until the dustbin is packed
A bagless vacuum shouldn’t be treated like a container you compact until nothing else fits. Check the manufacturer’s maximum-fill line and empty the bin when required.
Pet hair can make this mistake deceptive. A fluffy mass may occupy substantial bin space even when its actual weight seems small.
2. Running a bagged vacuum with an overloaded bag
Bagged machines need the same attention. Replace the bag according to the vacuum’s indicator or manufacturer guidance instead of squeezing extra cleaning sessions from it.
A replacement bag also needs to fit correctly. A poorly seated collar can interfere with the intended dirt path or allow debris into the compartment.
3. Assuming every removable filter is washable
This is one of the easiest mistakes to make. A filter coming out of the machine does not automatically mean it can go under a faucet.
- Washable filter: Clean it only by the method listed in the manual.
- Non-washable filter: Keep it dry and replace or service it as directed.
- Unknown filter: Check the model manual before using water.
- Damaged filter: Replace it rather than attempting a homemade repair.
4. Ignoring hair around the brush roll
Long hair, pet fur, thread, and carpet fibers can wrap tightly around a rotating roller. The buildup often becomes obvious near the roller ends and bearings.
I prefer checking the roller before the vacuum starts sounding different. Catching a thin wrap is much easier than cutting away a dense rope of hair later.
5. Treating reduced suction as a motor failure
Weak pickup doesn’t automatically mean the motor has failed. Start with the simple airflow path before assuming the vacuum needs a major repair.
- Check the dustbin or bag.
- Inspect the filters.
- Look through the hose and wand.
- Inspect the floorhead intake.
- Check removable attachments.
- Look for loose connections or visible hose damage.
6. Waiting for a breakdown before doing maintenance
Routine inspection works better than crisis maintenance. Small changes in sound, roller movement, airflow, or debris pickup can tell you where to look.
Section Takeaway: Most vacuum maintenance mistakes begin with neglecting simple serviceable parts. Start with dirt collection, filtration, airflow, and the brush roll before considering complicated repairs.
Why Do Bin, Bag, and Filter Mistakes Hurt Airflow?
A household vacuum depends on a continuous path for moving air and debris through the machine. Restrictions anywhere along that route can interfere with normal pickup.
That path commonly includes the floorhead, wand or hose, dirt container, filtration system, and exhaust. Exact layouts vary between models.
7. Cleaning the filter only after suction becomes poor
Filter care shouldn’t begin only when the machine feels weak. Inspect filters as part of routine maintenance, then clean or replace them on the manufacturer’s schedule.
Don’t create a universal replacement interval for every vacuum. Filter materials and maintenance instructions vary too much between models.
8. Cleaning filters too often or too aggressively
Neglect is a problem, but over-cleaning can be another one. Scrubbing, brushing, soaking, or rinsing delicate material without approval may damage it.
Use the gentlest method permitted by the manufacturer. More aggressive cleaning isn’t automatically better maintenance.
9. Forgetting pre-motor and post-motor filters
Some vacuums contain more than one filtration stage. Cleaning the most visible filter while ignoring another serviceable filter can leave your maintenance routine incomplete.
- Pre-motor filters sit before the motor on many designs.
- Post-motor filters filter air later in the airflow path.
- Foam or felt layers may accompany another filter.
- HEPA filters require the care instructions specified for that exact machine.
The term HEPA means high-efficiency particulate air. A HEPA-equipped vacuum should still be operated and maintained according to its manufacturer’s instructions.
That point matters because a filter is only one part of the machine. The housing, seals, installation, and full airflow design also affect how the vacuum operates.
| Maintenance Area | Common Mistake | Better Practice | Practical Check Point |
|---|---|---|---|
| Dustbin | Letting debris pack above the fill line | Empty according to the fill marker or manual | During or after regular use |
| Vacuum bag | Waiting until it is tightly packed | Use the bag indicator or manufacturer guidance | During routine cleaning |
| Brush roll | Ignoring hair until rotation changes | Remove visible wraps while they are manageable | About weekly in hair-heavy homes |
| Filters | Washing every removable filter | Follow the exact filter instructions | Inspect about monthly; service per manual |
| Hose and wand | Ignoring partial blockages | Inspect the accessible airflow path | Monthly or whenever suction changes |
These intervals are inspection reminders, not universal replacement schedules. Your owner’s manual remains the final authority for model-specific maintenance.
Consumer Reports’ vacuum maintenance guidance likewise emphasizes basic practices such as avoiding an overfilled dirt container and disconnecting power before maintenance.
Section Takeaway: Protect the entire airflow path instead of focusing on one component. A clean filter cannot compensate for an overloaded bin, clogged hose, blocked floorhead, or badly installed part.
What Happens When You Ignore the Brush Roll, Hose, and Floorhead?
Brushes and airflow passages collect some of the hardest debris to notice. Hair wraps slowly, while partial clogs can hide inside bends and connections.
Inspect these areas when cleaning performance changes. Don’t force tools deep into a hose or floorhead without checking the manufacturer’s disassembly instructions.
10. Cutting brush-roll hair carelessly
Removing tangled hair is good maintenance, but rushing the job can create another problem. Scissors or blades can nick bristles, belts, wiring, or soft roller material.
- Disconnect the vacuum from power.
- Remove the battery when your model permits it.
- Turn the floorhead over on a stable surface.
- Locate approved cutting grooves if the roller has them.
- Cut wraps carefully without digging into the roller.
- Pull loosened strands away by hand.
- Check both roller ends before reassembly.
11. Pushing a clog farther into the hose
A long object can sometimes move debris, but it can also push the blockage deeper or damage a flexible hose. Remove detachable sections first when the manual permits it.
Use a safe method that doesn’t puncture the hose. Stop if the obstruction requires force or reaches a powered component.
12. Forgetting the edges of the floorhead
The center of the roller gets most of the attention. Small wheels, intake channels, side brushes, roller ends, and narrow openings can also collect debris.
- Remove visible hair from wheel axles.
- Clear lint from accessible intake openings.
- Inspect removable edge brushes on robot vacuums.
- Check that the roller can move as designed.
- Look for cracked or loose removable components.
Don’t lubricate random moving parts
A squeak doesn’t automatically mean the vacuum needs household oil. Lubricants can attract dust, damage some materials, or reach places where the manufacturer never intended them to go.
Check the manual before applying any lubricant. If a sealed bearing or motor assembly is noisy, servicing may be the safer choice.
Section Takeaway: Clean visible debris without turning routine maintenance into uncontrolled disassembly. Hair, thread, and clogs deserve attention, but powered and sealed components should stay within the manufacturer’s service limits.
Which Cleaning and Washing Mistakes Can Damage a Vacuum?
Water is one of the easiest ways to turn simple vacuum cleaning into a problem. Many removable plastic pieces can look washable even when attached electronics, bearings, seals, or filter materials say otherwise.
Never assume a part is water-safe because it detaches from the vacuum. Check the manual first.
Reinstalling a filter while it is still damp
Washable means washable, not immediately reusable. An approved filter should be fully dry before it returns to the machine.
A damp component can hold dust against its surface and introduce moisture into areas intended for dry operation. Give it enough drying time for your specific model and environment.
Washing powered floorheads and attachments
A powered cleaner head may contain a motor, electrical contacts, sensors, or wiring. Submerging it or rinsing it without explicit approval can cause damage.
Instead, remove dry debris with the method specified by the manufacturer. Use only approved damp wiping where allowed.
Vacuuming liquids with a dry-only vacuum
A standard household dry vacuum isn’t a wet/dry vacuum. Don’t use it for spilled drinks, standing water, wet carpet, or another liquid mess unless the manufacturer explicitly designed it for liquid pickup.
The same caution applies to damp debris. Let appropriate surfaces dry or use equipment rated for that job.
Vacuuming unsuitable debris
Household vacuums also aren’t automatically suitable for every dry material. Fine construction debris, hot fireplace ash, sharp objects, and large chunks can exceed what an ordinary machine was designed to collect.
- Renovation dust: Use equipment and procedures appropriate for the material involved.
- Hot ash: Never vacuum material that may still contain heat or embers.
- Sharp debris: Pick it up safely instead of sending it through a hose or bag.
- Wet material: Use a machine specifically approved for wet pickup.
For specialized renovation cleanup, the EPA’s HEPA vacuum guidance is a useful reminder that the complete vacuum design and correct maintenance matter, not just the presence of a filter labeled HEPA.
Continuing to run a vacuum with electrical warning signs
Don’t treat a burning electrical odor, smoke, damaged power cord, swollen battery, exposed wiring, or repeated abnormal overheating as a cleaning issue. Disconnect the machine and stop using it.
Expert Alert: Electrical, motor, battery, or internal wiring problems should be handled by the manufacturer or a qualified appliance repair professional rather than DIY disassembly.
Section Takeaway: Wash only approved parts and dry them fully. Keep water, unsuitable debris, and DIY electrical repairs away from equipment not designed to handle them.
How Should Maintenance Change by Vacuum Type?
The basic priorities stay similar across vacuum styles, but the parts that need attention change. A robot vacuum has wheels and sensors that an upright doesn’t, while a cordless stick adds battery and charging components.
Bagless upright and canister vacuums
Focus on the dustbin, filters, hose, floorhead, brush roll, and seals. Check hose connections when suction changes unexpectedly.
- Empty the bin according to its fill line.
- Check filter instructions before washing.
- Remove hair from the roller.
- Inspect the hose for accessible obstructions.
- Check visible seals and connections.
Bagged vacuums
The bag itself is part of the maintenance system, not just a disposable container. Use the correct replacement type and install it as directed.
Don’t forget filters, rollers, and hoses simply because dirt stays contained in a bag. Those parts still need routine inspection.
Cordless stick vacuums
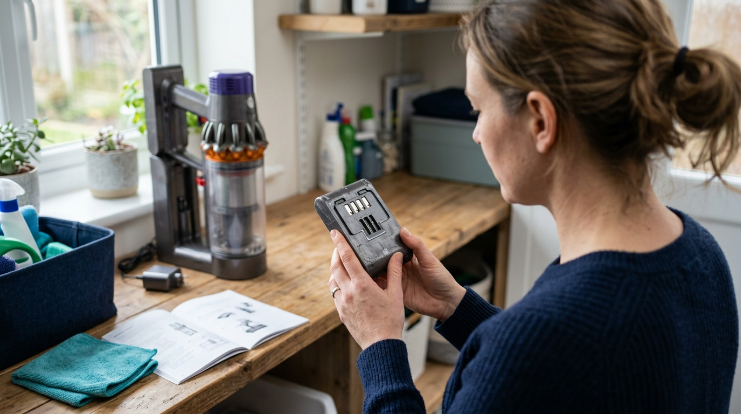
Cordless models add battery care and charging contacts to the routine. Follow the manufacturer’s charging, storage, and battery instructions rather than applying universal battery advice.
- Inspect the battery housing for visible damage.
- Keep approved charging contacts clean and dry.
- Check compact bins frequently.
- Remove hair from narrow floorheads.
- Watch for unusual battery heat or swelling.
Expert Alert: Stop using a visibly swollen, leaking, damaged, or abnormally hot rechargeable battery and follow the manufacturer’s safety guidance.
Robot vacuums
Robot vacuums need attention in places owners can easily overlook. Small bins, main rollers, side brushes, wheels, sensors, and charging contacts all collect dust.
Don’t spray cleaning liquid directly onto sensors or electronics. Clean each area using the procedure recommended for your model.
Wet/dry vacuums
A wet/dry vacuum needs a different routine after liquid pickup. Empty wet material promptly, clean approved components, and dry them thoroughly before storage.
Filter configurations can also change between wet and dry jobs. Follow the exact filter setup described by the manufacturer.
Homes with pets or long hair
Maintenance should respond to what your vacuum collects. Two shedding pets can load a roller and dustbin much faster than a lightly used vacuum in a small apartment.
- Check the brush roll more often.
- Inspect pet tools for compacted fur.
- Empty small bins sooner when hair becomes bulky.
- Look at roller ends for tightly wound strands.
- Inspect filters without automatically assuming they need washing.
For households managing allergens, the Asthma and Allergy Foundation of America’s indoor allergen guidance provides broader cleaning information beyond vacuum maintenance alone.
Section Takeaway: The right maintenance schedule depends on the vacuum design and what your household collects. Use general inspection habits as reminders, then let your model’s manual set the actual service procedure.
Vacuum Maintenance Mistakes FAQ
What is the biggest vacuum maintenance mistake?
One of the biggest mistakes is allowing dirt, clogged filters, or hidden blockages to restrict the vacuum’s normal airflow path. Check the bin or bag, filters, hose, wand, floorhead, and roller before assuming a major component has failed.
Can I wash every vacuum filter?
No. Only wash a filter when the manufacturer identifies that exact filter as washable and provides cleaning instructions. Some removable filters must stay dry or be replaced, so appearance alone isn’t a reliable guide.
How often should I clean my vacuum?
There isn’t one schedule for every vacuum. Check high-debris areas such as the bin and brush roll frequently, inspect the broader airflow path periodically, and follow the manufacturer’s specific schedule for filter cleaning, replacement parts, and deeper servicing.
Is it bad to let a vacuum bin become completely full?
Don’t intentionally pack the bin beyond its maximum-fill indicator. Empty it according to your model’s instructions, especially when bulky pet hair or debris reaches the marked limit quickly.
Why does my vacuum still have weak suction after I clean the filter?
The restriction may be somewhere else. Check the dustbin or bag, floorhead, hose, wand, attachments, seals, and accessible intake passages for clogs, poor connections, or damage before considering an internal fault.
Can I use my regular vacuum on renovation dust?
Not automatically. Fine construction or renovation debris can require specialized collection equipment and safety procedures, depending on the material. Check the vacuum manufacturer and applicable safety guidance before using an ordinary household machine for renovation cleanup.
When should I stop maintaining a vacuum myself?
Stop when the problem involves smoke, damaged wiring, a swollen battery, repeated overheating, internal electrical components, or disassembly beyond the owner’s manual. Those warning signs deserve manufacturer support or a qualified appliance repair professional.
The simplest way to avoid common vacuum maintenance mistakes is to keep dirt and hair under control without over-cleaning the machine. Empty debris on time, protect airflow, follow filter instructions, keep washable parts completely dry, and investigate unusual sounds or heat early.
Your vacuum’s manual should always win when general advice conflicts with a model-specific instruction. Build those small checks into your normal cleaning routine, and maintenance becomes much easier to manage.