
Why Is My Robot Vacuum Bumper Stuck?

Quick Answer
A robot vacuum bumper usually gets stuck because dust, hair, grit, or a small object is trapped around the bumper gap. The bumper may also be misaligned after hitting furniture. Turn the robot off, press the bumper across its left, center, and right sections, clean the gap, and confirm that it springs back freely. This matches iRobot’s official stuck-bumper troubleshooting.
Check These First
- Test the rebound: Press the bumper gently in several places and make sure it springs back immediately.
- Clear the gap: Remove visible dust, hair, thread, crumbs, or grit caught between the bumper and robot body.
- Check alignment: Look for one side sitting farther outward or inward than the other.
- Restart the robot: Reboot it according to your model’s manual after the mechanical check.
- Watch the next run: Test on a clear, level floor before changing maps or resetting the entire vacuum.
Stop Troubleshooting If
- The bumper is cracked, remains compressed, or the same error returns after approved cleaning and restarting.
A stuck robot vacuum bumper looks like a small problem, but it can make the machine act completely confused. It may reverse repeatedly, spin, stop cleaning, or report an obstacle even on an open floor.
When I troubleshoot robot vacuums, I check the physical bumper before touching maps or performing a factory reset. In many cases, a few minutes of careful cleaning tells you whether you’re dealing with debris, poor alignment, or a deeper sensor fault.
In This Guide
- What Does a Stuck Robot Vacuum Bumper Mean?
- Why Does a Robot Vacuum Bumper Get Stuck?
- How Do You Fix a Stuck Robot Vacuum Bumper?
- Is It the Bumper, Sensor, Wheel, or Navigation System?
- When Does a Stuck Bumper Need Repair?
- How Can You Prevent the Bumper From Sticking Again?
- Frequently Asked Questions
What Does a Stuck Robot Vacuum Bumper Mean?
A robot vacuum bumper is the movable front section that helps the machine detect physical contact with walls, furniture, and other obstacles. When it cannot move or return normally, the robot may continue receiving an obstacle signal after the obstacle is gone.
Simple definition: A stuck bumper is a front collision bumper that remains pressed, moves poorly, sits out of position, or fails to spring back correctly after contact.
The resulting behavior depends on the brand and model. Some robots stop with a bumper warning, while others reverse, turn repeatedly, or behave as if an invisible obstacle is blocking them.
As of 2026, major manufacturers still treat free bumper movement as a basic first troubleshooting check. iRobot identifies Error 9 on several Roomba generations with a bumper that is stuck or not moving freely.
Why Does a Robot Vacuum Bumper Get Stuck?
Most stuck bumpers come down to contamination, alignment, or physical damage. Dust alone can cause trouble when it combines with hair, fibers, sticky residue, or fine grit inside a narrow moving gap.
- Dust and grit: Fine debris can collect along the bumper opening and restrict smooth movement.
- Hair or thread: Long strands can enter small gaps and create drag.
- Sticky residue: Food residue or dried spills can make moving surfaces bind.
- Hard impacts: Repeated contact with furniture can sometimes shift or dislodge a bumper.
- Shipping protection: On some new robots, protective material must be removed before normal use.
- Internal switch or sensor trouble: The bumper may move normally while the machine still detects constant contact.
ECOVACS specifically advises checking the left, center, and right bumper areas for normal rebound on affected models. Its support guidance also tells owners to remove bumper protection material where applicable.
| Brand or System | Documented Indicator | Manufacturer’s First Check |
|---|---|---|
| iRobot Roomba 600-900 series | Error 9 | Tap the bumper several times, clear debris, and restart. |
| Roborock Q7 family | Error 2 | Clean the bumper and lightly tap it to release it. |
| ECOVACS supported robots | Bumper stuck alert | Test rebound across the bumper, then restart. |
How Do You Fix a Stuck Robot Vacuum Bumper?

Start with the least invasive fix. Don’t remove screws or reset the entire robot until you’ve confirmed that the bumper itself can move normally.
- Stop and power down the robot. Move it to a table or clear section of floor where you can inspect it safely.
- Press the bumper across its width. Check the left, center, and right areas separately. Each section should move and spring back without sticking.
- Inspect the gap. Look for hair, thread, crumbs, grit, pet fur, or sticky material between the bumper and housing.
- Remove loose debris gently. Use a dry microfiber cloth, soft brush, or another cleaning method approved by your manufacturer.
- Check both sides for alignment. One edge should not look noticeably raised, pushed inward, or separated from the body.
- Restart the vacuum. Follow the normal restart procedure in your manual or app.
- Run a short test. Use a clear hard floor and watch the robot for several minutes.
Avoid flooding the bumper gap with water or household cleaner. Liquid that reaches switches, wiring, infrared components, or circuit boards can turn a simple cleaning job into an electrical problem.
Consumer Reports’ robot vacuum maintenance guidance also recommends clearing debris from moving components and checking the manufacturer before performing more invasive disassembly.
Expert Alert: If fixing the bumper requires electrical work, internal sensor testing, or disassembly beyond your manual’s user-serviceable steps, contact the manufacturer or a qualified appliance repair technician.
Is It the Bumper, Sensor, Wheel, or Navigation System?
A robot that turns strangely does not automatically have a bumper problem. Wheels, cliff sensors, navigation hardware, and room obstacles can create similar symptoms.
| What You Notice | Most Useful First Check | Likely Area |
|---|---|---|
| Bumper stays pressed inward | Press and release several bumper points | Bumper or bumper mechanism |
| Robot constantly reverses from open space | Bumper plus cliff and obstacle sensors | Sensor or bumper input |
| Robot spins in one direction | Compare movement of both drive wheels | Wheel, bumper, or navigation input |
| Robot gets stuck only in one location | Remove the nearby obstacle and repeat the route | Furniture or environment |
| Bumper moves freely but error immediately returns | Restart and check the exact app error | Bumper switch, sensor, or internal hardware |
One useful test is to place the vacuum on an uncluttered hard floor after cleaning. If the same bumper warning appears before the robot touches anything, an internal detection issue becomes more plausible.
Don’t delete a good map simply because the bumper is stuck. Mapping software cannot physically free a compressed mechanical bumper.
When Does a Stuck Bumper Need Repair?
You should move beyond routine cleaning when the bumper cannot return to its normal position or when the warning immediately returns. Visible misalignment is another reason to check model-specific repair instructions.
- One side remains permanently pushed inward.
- One side sticks noticeably farther out than the other.
- You hear grinding, cracking, or repeated clicking.
- The bumper has a visible crack or broken attachment point.
- The same bumper error returns after cleaning and restarting.
- The bumper moves normally, but the robot constantly reports contact.
iRobot provides a separate procedure for a dislodged Roomba bumper. That distinction matters because a misaligned bumper may need more than surface cleaning.
Check your warranty before removing covers or bumper assemblies. The correct procedure differs by model, and unnecessary disassembly can create more work than the original fault.
How Can You Prevent the Bumper From Sticking Again?
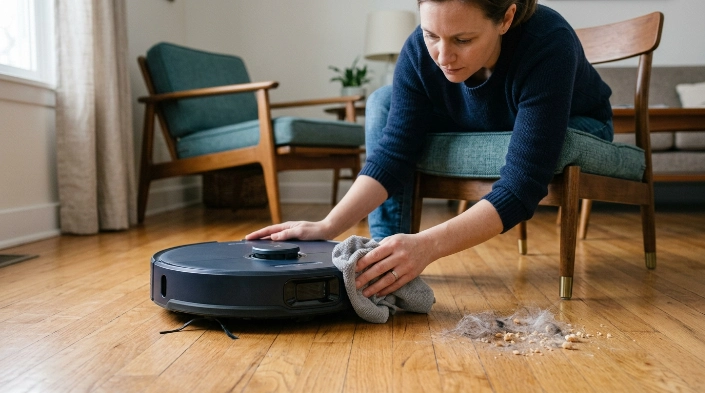
Prevention is mostly about keeping fine debris away from moving gaps and reducing unnecessary collisions. A quick inspection during routine vacuum maintenance is usually enough.
- Wipe the bumper regularly: Remove surface dust before it builds into the gap.
- Pick up loose fibers: Threads, cords, pet hair clumps, and rug fringe can create mechanical trouble.
- Clean after messy runs: Check the robot after it encounters food crumbs, fine construction dust, or sticky material.
- Use no-go zones wisely: Block areas where the robot repeatedly wedges itself between furniture.
- Watch furniture clearance: Prevent the robot from forcing itself beneath gaps that are only slightly taller than its body.
- Follow model-specific maintenance: Bumper and sensor designs vary across robot vacuum brands.
For ECOVACS owners, the company’s bumper-stuck support guidance emphasizes confirming that the bumper rebounds normally after you press its different sections.
Frequently Asked Questions
Why does my robot vacuum say the bumper is stuck when it isn’t?
The bumper may look normal while debris, a sticking switch, or an internal sensor still reports contact. Press every section, clean accessible gaps, restart the robot, and test it on an open floor.
Can I use compressed air around a robot vacuum bumper?
Only use compressed air if your model’s manufacturer specifically approves it and follow its directions. Never assume a cleaning method approved for one robot is safe for every bumper or sensor design.
Can a stuck bumper make a robot vacuum spin in circles?
Yes. A bumper that constantly signals contact can make some robots turn or reverse repeatedly. However, a jammed drive wheel or dirty navigation sensor can cause similar behavior, so check those parts too.
Should I reset my robot vacuum after cleaning the bumper?
Start with a normal restart rather than a factory reset. A factory reset can erase settings or maps on some models, while a physical bumper jam usually needs physical cleaning or realignment.
How do I know whether my robot vacuum bumper is dislodged?
Look for uneven positioning, such as one side protruding farther than the other. A bumper that will not rebound evenly after gentle presses may also need model-specific inspection.
What if the bumper error keeps returning?
Record the exact error, model number, and what the robot does on a clear floor. If approved cleaning and restarting do not fix it, contact the manufacturer’s support team before opening internal components.
Final Takeaway
If your robot vacuum bumper is stuck, start with the mechanical basics: power down, test the rebound, remove debris, check alignment, restart, and test on a clear floor. That sequence solves the simple causes without risking your saved maps or unnecessary disassembly.
If the bumper stays compressed, looks crooked, or keeps triggering errors after cleaning, stop forcing it. Model-specific manufacturer support is the safer next step.
