
Weekly Vacuum Maintenance Checklist: A Simple Routine That Works

Quick Answer
A good weekly vacuum maintenance checklist takes about 10 to 15 minutes. Empty the dirt container, remove hair from the brush roll, inspect the filters, check the hose and intake for clogs, clean attachments, and look for damage. Keeping the vacuum clean also matters because EPA guidance on indoor particulate matter notes that household dust can become airborne during vacuuming.
Your weekly vacuum checklist
- Empty collected dirt: Check the dustbin or bag before debris becomes tightly packed.
- Clear the brush roll: Remove hair, thread, pet fur, and fibers wrapped around the roller.
- Inspect the filters: Check for heavy buildup, but clean or replace them only as your manual directs.
- Check airflow: Look through the hose, wand, floorhead, and intake for obvious blockages.
- Clean attachments: Remove lint and hair from crevice tools, upholstery tools, and brushes.
- Inspect for damage: Look at the cord, battery, wheels, seals, hose, and cleaner head.
One important rule
- Never wash a filter, roller, bin, or other component unless its manufacturer says that part is washable.
I like weekly vacuum maintenance because it catches small problems before they turn into frustrating cleaning problems. A little wrapped hair or packed dust may seem harmless today, but buildup can gradually restrict airflow or brush movement.
This 2026 checklist works as a practical starting point for upright, canister, stick, cordless, bagged, bagless, and robot vacuums. Your owner’s manual should always override a general schedule.
In This Guide
- What Should Be on a Weekly Vacuum Maintenance Checklist?
- How Do You Complete Weekly Vacuum Maintenance Safely?
- Which Vacuum Parts Need Weekly vs. Monthly Maintenance?
- Does the Checklist Change by Vacuum Type?
- What Problems Can a Weekly Check Catch Early?
- How Does Vacuum Maintenance Affect Household Dust and Allergens?
- Weekly Vacuum Maintenance FAQ
What Should Be on a Weekly Vacuum Maintenance Checklist?
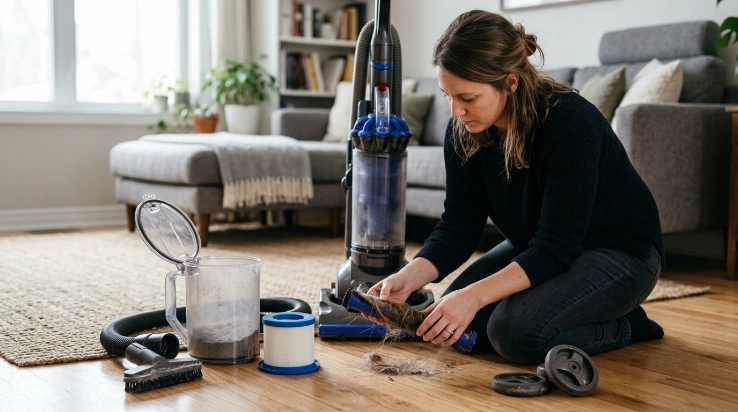
A weekly vacuum maintenance checklist is a short inspection and cleaning routine for the parts that collect dirt or affect airflow. It isn’t the same as completely dismantling and deep-cleaning your vacuum every week.
The goal is prevention. You’re looking for developing clogs, tangled rollers, packed dirt, damaged parts, and filters that need attention.
1. Check the dustbin or vacuum bag
Start where the dirt ends up. A bagless vacuum needs enough free space for its dirt-separation and airflow system to work as designed.
- Bagless vacuum: Empty the bin when it reaches the manufacturer’s fill line or earlier if debris becomes packed.
- Bagged vacuum: Check the bag level and replace it according to the manufacturer’s instructions.
- Robot vacuum: Inspect its smaller dustbin because these can fill quickly in homes with pets.
I prefer checking the bin before starting rather than discovering halfway through a room that it’s already full. It takes seconds and makes the rest of the inspection easier.
2. Inspect the brush roll
Hair is one of the first things I look for. Long hair, pet fur, carpet fibers, and thread can wind tightly around a rotating brush.
- Check the center of the roller.
- Inspect both roller ends.
- Look between rows of bristles.
- Check the intake behind the brush roll.
Never pull aggressively on a motorized roller while the vacuum is connected to power. Disconnect the machine before removing tangled material.
3. Look at the filters without automatically washing them
A filter check belongs on the weekly list, but filter washing usually does not. The correct cleaning method and interval depend on the exact vacuum.
HEPA means high-efficiency particulate air. The EPA definition of a HEPA filter describes a pleated mechanical filter that can theoretically capture at least 99.97% of 0.3-micron particles under the applicable test conditions.
- Washable filter: Follow the stated washing and drying procedure.
- Non-washable filter: Don’t rinse it simply because it looks dirty.
- Disposable filter: Replace it at the specified interval.
- Multiple-filter system: Check each stage separately.
HEPA describes filtration performance. It does not automatically mean the filter is washable.
4. Check the airflow path
You don’t need to dismantle the entire vacuum every Saturday. A quick inspection of accessible openings can expose a blockage before it becomes solid.
- Floorhead intake
- Hose
- Wand
- Dustbin inlet
- Attachment openings
- Accessible internal air passages
A coin, paper scrap, small toy, or dense clump of hair can create surprisingly noticeable suction loss.
5. Inspect attachments and exterior parts
Attachments collect the same dirt as the main floorhead. Pet tools and upholstery brushes deserve extra attention when you use them regularly.
- Pull hair from bristles.
- Remove lint from upholstery tools.
- Check narrow crevice tools for blockages.
- Wipe accessible dry surfaces as appropriate.
- Inspect wheels for wrapped thread or hair.
Section Takeaway: Weekly maintenance should focus on inspection, airflow, collected dirt, and moving parts. Save deeper washing and replacement work for the intervals specified by your vacuum’s manufacturer.
How Do You Complete Weekly Vacuum Maintenance Safely?
Disconnect the vacuum from its power source before touching the brush roll, opening a cleaner head, or reaching into an airflow passage. A cordless machine may also require battery removal if its instructions specify that procedure.
Then work from the dirtiest components toward the cleaner ones.
- Turn off and disconnect the vacuum. Unplug a corded model and follow the shutdown instructions for cordless or robot vacuums.
- Empty the dustbin or inspect the bag. Avoid shaking fine dust around the room when emptying a bagless container.
- Remove brush-roll tangles. Use the roller-cleaning method or tool recommended for your machine.
- Inspect the floorhead opening. Remove accessible debris blocking the intake.
- Check the hose and wand. Look for objects, compacted hair, cracks, or loose connections.
- Inspect the filters. Clean or replace them only if their maintenance schedule calls for it.
- Clean the attachments. Remove hair, lint, and visible dirt from frequently used tools.
- Inspect the vacuum body. Check wheels, seals, latches, cord, plug, battery housing, and connections.
- Reassemble carefully. Make sure filters, bins, covers, hoses, and attachments seat correctly.
- Do a brief test. Listen for abnormal sounds and check whether normal suction has returned.
Don’t reinstall wet parts too soon
If your scheduled maintenance includes washing an approved filter or bin, let it dry completely as instructed. Moisture shouldn’t be trapped inside an appliance that handles dust and uses electrical components.
Some filters need substantial air-drying time. Follow the manual rather than guessing based on how dry the surface feels.
Know when to stop doing it yourself
A normal weekly checklist shouldn’t require opening the motor housing, repairing wiring, or dismantling sealed electrical components. Those jobs move beyond routine household maintenance.
Expert Alert: Stop using the vacuum if you see exposed wiring, a damaged plug, battery swelling, smoke, sparking, or persistent electrical burning smells. Have the machine checked by a qualified repair professional or the manufacturer’s service team.
Which Vacuum Parts Need Weekly vs. Monthly Maintenance?
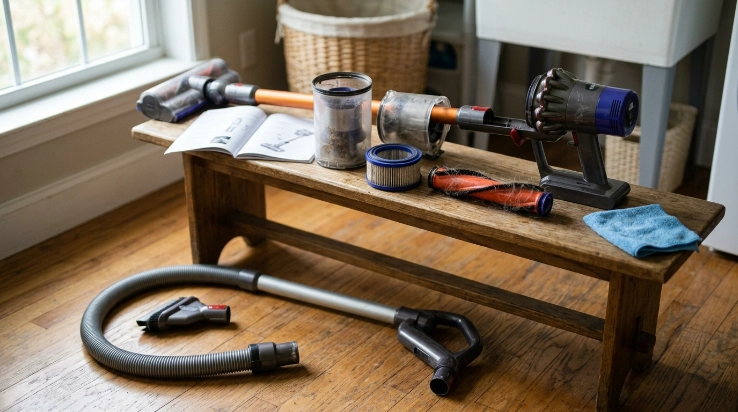
Not everything needs cleaning every seven days. Over-cleaning can waste time and may damage parts when the wrong method is used.
This table is a practical inspection schedule, not a replacement for your owner’s manual.
| Vacuum Part | Weekly Check | Deeper Maintenance | Check Sooner If |
|---|---|---|---|
| Dustbin or bag | Check level and empty or replace as needed | Clean approved removable parts per manual | Debris reaches the fill line or suction drops |
| Brush roll | Remove visible hair and thread | Remove roller for deeper cleaning if allowed | Roller slows, stops, or sounds different |
| Filters | Visually inspect | Clean or replace on manufacturer schedule | Airflow falls or a maintenance alert appears |
| Hose and wand | Quick obstruction check | Detailed inspection as needed | Suction suddenly decreases |
| Attachments | Remove hair and visible debris | Wash only approved non-powered parts | Tools are visibly dirty or blocked |
| Cord or battery | Visual safety inspection | Follow manufacturer service guidance | Heat, damage, swelling, or charging problems appear |
Household conditions change the schedule
A home with two shedding pets can load a brush roll much faster than a low-traffic apartment. Long human hair can also make weekly roller cleaning more important.
- Pets: Check rollers and pet tools more frequently.
- Long hair: Watch both ends of the brush roll for tight wrapping.
- Heavy carpet use: Inspect the floorhead and airflow path often.
- Fine household dust: Check filters without assuming they should be washed.
- Robot vacuuming every day: Inspect the bin, brushes, wheels, and sensors more frequently.
Your maintenance calendar should respond to what the vacuum collects. A fixed schedule is only a starting point.
Does the Checklist Change by Vacuum Type?
Yes, although the core routine stays similar. Every vacuum needs unobstructed airflow, correctly maintained filtration, free-moving parts, and securely fitted components.
Upright vacuums
The floorhead deserves close attention on an upright. Brush rolls, belts, intake channels, and wheels sit near the debris and often collect hair first.
- Inspect the rotating brush.
- Check the floorhead intake.
- Look over the hose and extension wand.
- Inspect accessible belts only as the manufacturer permits.
Canister vacuums
Canister models have a longer path between the cleaning head and dirt container. A blockage can appear in the hose, wand, joint, or powered floorhead.
- Check hose connections.
- Inspect the wand.
- Clean hair from powered heads.
- Check bag or bin fit.
Cordless stick vacuums
Small bins and compact airflow passages can make debris buildup more noticeable. Battery condition also becomes part of the routine.
- Check the bin frequently.
- Inspect narrow intake passages.
- Remove roller tangles.
- Look for unusual battery heat or physical damage.
Robot vacuums
Robot vacuums add small side brushes, wheels, charging contacts, and sensors to the checklist. Hair can accumulate around wheel axles and rotating parts.
- Empty the onboard bin.
- Remove hair from the main roller.
- Inspect side brushes.
- Check wheels for wrapped fibers.
- Clean sensors and charging contacts according to the manual.
Bagged vacuums
Don’t judge a bag only by whether it contains some dirt. Replace it when your manufacturer recommends, especially if its indicator shows that service is due.
Also inspect the bag collar and compartment seal. A poorly fitted bag can create a different problem from a full one.
What Problems Can a Weekly Check Catch Early?
A vacuum usually gives warning signs before performance becomes unusable. Weekly inspections make those changes easier to notice.
Start with simple causes before assuming the motor has failed.
- Weak suction: Check the bin, bag, filters, hose, wand, floorhead, and intake.
- Debris left behind: Inspect the brush roll, intake, floor setting, and airflow.
- Brush not turning: Remove tangles and inspect the drive system as instructed.
- Whistling noise: Look for a partial clog, air leak, or loose connection.
- Rattling: Check the hose or floorhead for a trapped hard object.
- Dust escaping: Inspect filters, seals, bin placement, and bag installation.
- Unusual heat: Stop the machine and check for blocked airflow.
- Bad odor: Inspect collected debris, filters, pet hair, and the brush roll.
Consumer Reports’ vacuum guidance also notes that vacuum filters require periodic cleaning or replacement. The correct interval still depends on the machine.
When a smell is a safety warning
A dusty or pet-related odor is different from the smell of overheated plastic or electrical insulation. Don’t keep running the vacuum to see whether an electrical smell disappears.
Switch it off and disconnect power. Persistent overheating, smoke, sparking, or electrical odors require proper service.
Section Takeaway: Reduced suction, unusual noise, excess heat, escaping dust, and brush-roll problems are useful early warnings. A weekly check helps you investigate them before continuing to use the machine.
How Does Vacuum Maintenance Affect Household Dust and Allergens?
A vacuum is part of a household dust-control routine, but it can’t remove every allergen from a home. Cleaning technique, filtration, moisture control, bedding care, and other source-control measures also matter.
The EPA notes that settled indoor dust may contain pollen, mold spores, pet dander, dust mites, skin flakes, and particles from outdoor and indoor sources. Vacuuming can also temporarily stir some settled dust into the air.
Filtration matters, but maintenance still matters
A good filter cannot perform as intended forever without maintenance. Filters accumulate material and eventually need cleaning or replacement according to their design.
Make sure the filter is seated correctly after maintenance. Also inspect the surrounding seals and covers whenever you remove it.
What if someone in the home has dust-mite allergies?
The Asthma and Allergy Foundation of America recommends using a HEPA-filter vacuum weekly as part of dust-mite control. It also explains that vacuuming alone doesn’t remove all mites and their waste from upholstered materials and carpeting.
That distinction matters. Vacuum maintenance supports a broader cleaning plan rather than replacing other allergen-control measures.
- Keep the vacuum’s filtration system properly installed.
- Avoid allowing the bin or bag to become overloaded.
- Use clean attachments on upholstery when appropriate.
- Follow allergy-specific cleaning precautions when needed.
- Combine vacuuming with other recommended dust-control measures.
A maintained vacuum is easier to use as intended. It should be one tool within your overall home-hygiene routine.
Weekly Vacuum Maintenance FAQ
Should I clean my vacuum every week?
You don’t need to deep-clean every vacuum weekly. A weekly inspection of the bin or bag, brush roll, accessible airflow paths, filters, attachments, and exterior components is a practical starting point. Follow your owner’s manual for actual filter washing, replacement, and service intervals.
Should I wash my vacuum filter every week?
No. Inspecting a filter weekly doesn’t mean washing it weekly. Wash only a filter that the manufacturer identifies as washable, and follow the specified cleaning interval. Non-washable and disposable filters can be damaged by water.
How often should I remove hair from the brush roll?
Check it weekly if your home has pets, long hair, or frequent carpet cleaning. You may need to inspect it more often when hair accumulates quickly. Remove tangles with the vacuum disconnected from power and follow the manufacturer’s brush-removal instructions.
Do I need to empty a bagless vacuum after every use?
Check the bin after every use, but follow your machine’s fill limit rather than a universal rule. Empty it before debris becomes densely packed or exceeds the marked limit. Small cordless and robot bins often require more frequent emptying.
Can a dirty vacuum filter reduce suction?
A heavily loaded filter can restrict airflow, but it isn’t the only possible cause of weak suction. Check the bin or bag, hose, wand, floorhead, intake, and filter system. A clog or poorly fitted component can create similar symptoms.
What should I do if my vacuum still has weak suction after maintenance?
Recheck the entire accessible airflow path and confirm that the bin, bag, filters, hoses, and covers are installed correctly. If suction remains poor despite routine maintenance, consult the manufacturer’s troubleshooting guidance or arrange professional service.
Can weekly maintenance help my vacuum last longer?
Routine care can prevent avoidable problems involving clogged airflow, tangled rollers, overloaded dirt containers, and neglected filters. It cannot guarantee a specific lifespan because durability also depends on the vacuum’s design, usage, parts, battery condition, and overall build quality.
Final Takeaway: Make the weekly vacuum maintenance checklist simple enough to repeat. Check the dirt container, roller, filters, airflow path, attachments, and visible safety components, then handle deeper maintenance according to your owner’s manual.
Ten focused minutes can reveal a surprising amount. If you notice declining suction, strange sounds, abnormal heat, or damaged electrical parts, investigate the cause instead of pushing through another cleaning session.