
What Maintenance Schedule Should You Follow for a Vacuum?

Quick Answer
A practical vacuum maintenance schedule combines quick checks after use, weekly brush-roll inspection, monthly airflow and filter checks, and model-specific filter or part replacement. Your owner’s manual should always override a generic schedule, while the EPA’s indoor particulate matter guidance explains why regular vacuuming and effective filtration matter for controlling household dust.
Simple Vacuum Maintenance Schedule
- After each use: Check the bin or bag, cleaner head, and intake for obvious debris.
- About weekly: Remove wrapped hair and thread from the brush roll when needed.
- About monthly: Inspect filters, hoses, wands, seals, wheels, and accessible air passages.
- Every few months: Inspect belts, rollers, attachments, and other wear parts if your model uses them.
- Manufacturer schedule: Wash or replace filters and service parts only as your manual directs.
- Immediately: Investigate sudden suction loss, overheating, strange noises, burning smells, or electrical damage.
Most Important Rule
- Treat these intervals as inspection reminders. Follow the instructions for your exact vacuum when they differ.
I’ve found that vacuum maintenance becomes much easier when it’s tied to normal cleaning instead of saved for a big repair day. A few small checks can catch packed debris, wrapped hair, clogged airflow, and damaged parts before they become harder to deal with.
In This Guide
- What Is a Vacuum Maintenance Schedule?
- What Should You Check After Every Vacuum Use?
- What Vacuum Maintenance Should You Do Weekly and Monthly?
- How Does the Maintenance Schedule Change by Vacuum Type?
- What Signs Mean Your Vacuum Needs Maintenance Early?
- How Does Vacuum Maintenance Relate to Dust and Allergens?
- Vacuum Maintenance Schedule FAQs
What Is a Vacuum Maintenance Schedule?
A vacuum maintenance schedule is a routine for inspecting, cleaning, and replacing vacuum components before dirt or wear interferes with normal operation. It covers the dirt container, filters, brush roll, hose, attachments, seals, power system, and other serviceable parts.
The important word is “schedule.” You’re not waiting for the vacuum to stop working before checking it.
No single calendar fits every machine. Uprights, canisters, cordless sticks, robots, and wet/dry vacuums use different filters, brush systems, batteries, bags, and sensors.
- Usage matters: A vacuum used twice daily needs more frequent checks than one used once a week.
- Pets matter: Shedding hair can wrap around rollers quickly.
- Flooring matters: Thick carpet can place different demands on a cleaner head than hard flooring.
- Debris matters: Fine dust can load filters and air passages faster than larger crumbs.
- Vacuum design matters: Bagged and bagless machines have different dirt-handling systems.
That’s why I treat the schedule in this guide as a maintenance inspection framework. Your owner’s manual remains the final authority for washing filters, replacing bags, servicing batteries, and changing wear parts.
| Maintenance Level | Practical Starting Point | Typical Tasks |
|---|---|---|
| Quick check | After use | Bin, bag, intake, visible debris |
| Frequent inspection | About weekly | Brush roll, floorhead, hair and thread |
| Detailed inspection | About monthly | Filters, hose, wand, seals, attachments, wheels |
| Wear-part review | Every few months or when symptoms appear | Belts, rollers, connectors, physical wear |
| Model-specific service | Manufacturer interval | Filter washing/replacement, batteries, special parts |
Section Takeaway: Use a recurring inspection schedule, but let your vacuum’s manual control exact service and replacement intervals.
What Should You Check After Every Vacuum Use?
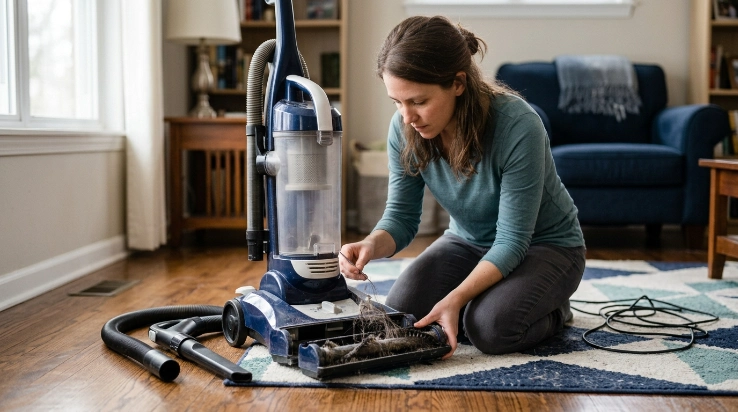
After-use maintenance should take only a minute or two. Focus on anything that could restrict airflow or interfere with the next cleaning session.
Check the dust bin or vacuum bag
Look at the dirt level before putting the vacuum away. Empty a bagless bin when needed, and replace a disposable bag according to the fill indicator or manufacturer instructions.
Don’t intentionally pack the dirt container beyond its stated limit. A visibly overloaded dirt system deserves attention even if your regular maintenance day is still several days away.
Look at the cleaner head
Turn the vacuum off and disconnect it from power before touching the brush area. For cordless models, remove the battery first if the manufacturer recommends doing so.
- Remove loose string or thread.
- Check for large objects near the intake.
- Look for heavy hair wrapping.
- Make sure wheels turn normally.
- Inspect the floorhead for visible damage.
With long hair in the house, I find this quick inspection more useful than waiting for a fixed monthly brush-cleaning day. The roller tells you when it needs attention.
Notice changes in sound and suction
A maintenance schedule should include observation, not just cleaning. Sudden suction loss, a new rattling sound, or an unusual smell deserves investigation before the next normal interval.
Start with accessible areas such as the dirt container, floorhead, wand, and hose. Never open electrical or motor housings unless your manufacturer specifically provides a user-service procedure.
Store the vacuum correctly
Keep the cord, hose, wand, and attachments arranged without sharp bends or crushing pressure. Store removable tools clean and dry.
For cordless machines, follow the manufacturer’s charging and storage instructions. Battery systems differ too much for one universal charging rule.
Section Takeaway: Your after-use routine should catch obvious debris, an overloaded dirt container, brush tangles, and performance changes before storage.
What Vacuum Maintenance Should You Do Weekly and Monthly?
A weekly-to-monthly routine covers the parts most likely to collect hair, lint, and dust during normal household use. Increase the frequency whenever your vacuum shows signs that it needs attention sooner.
About weekly: inspect the brush roll
Pet hair, thread, carpet fibers, and long human hair can wrap around a rotating brush. Remove these materials using the cleaning method approved for your model.
Never assume the brush roll can be removed. Some machines provide tool-free access, while others require a specific procedure.
About monthly: check the airflow path
Inspect accessible passages from the floorhead toward the dirt container. A partial clog can hide in a hose, elbow, wand, attachment, or inlet.
- Disconnect power: Unplug the vacuum or follow the battery-removal procedure.
- Remove attachments: Inspect each opening for compacted debris.
- Check the hose: Look through accessible sections without forcing sharp tools inside.
- Inspect connections: Make sure detachable sections seat correctly.
- Reassemble carefully: Confirm every component locks back into place.
Inspect filters without assuming they are washable
This is one of the most important maintenance rules. Some filters can be washed, while others must remain dry or be replaced.
Check your manual before putting any vacuum filter under water. If a washable filter is cleaned, reinstall it only after it has dried exactly as the manufacturer requires.
Inspect seals and attachment connections
Look at accessible gaskets around bins, filter housings, hose connections, and other removable components. Dust caught on a sealing surface can prevent parts from sitting correctly.
Check attachments for packed lint or hair at the same time. Upholstery and crevice tools can collect more debris than their small openings suggest.
Every few months: look for physical wear
Depending on the vacuum design, inspect accessible belts, rollers, wheels, hose sections, connectors, and other wear parts. Replace parts only with compatible items specified for your model.
| Part | Practical Inspection Frequency | Check Earlier When |
|---|---|---|
| Bin or bag | During or after use | Fill indicator activates or debris is packed |
| Brush roll | Weekly to monthly | Hair, thread, or fibers are visibly wrapped |
| Filters | About monthly | Maintenance alert, visible loading, or airflow changes |
| Hose and wand | About monthly | Suction suddenly drops |
| Attachments | About monthly | Openings become visibly dirty or blocked |
| Cord, plug, or battery housing | Before regular use | Damage, abnormal heat, swelling, or exposed wiring appears |
Section Takeaway: Weekly maintenance targets fast-building tangles, while monthly maintenance focuses on filters, airflow paths, seals, and attachments.
How Does the Maintenance Schedule Change by Vacuum Type?
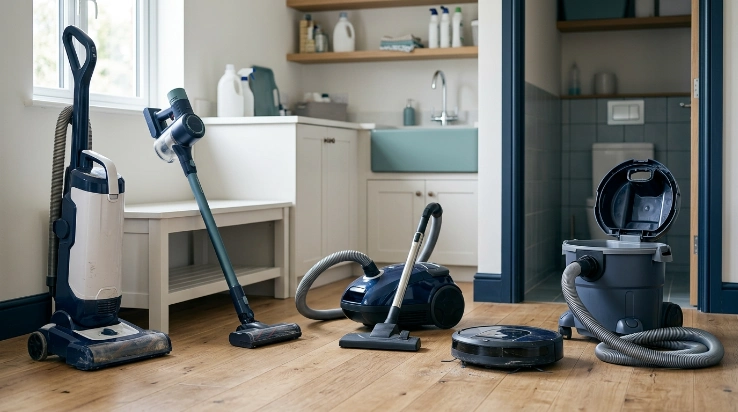
The basic principles stay the same, but different vacuum designs shift your maintenance priorities. Focus on the parts your particular machine relies on most.
Upright vacuums
- After use: Check the bag or bin and cleaner head.
- Weekly to monthly: Inspect the rotating brush for wrapped hair.
- Monthly: Check accessible filters, hose sections, and tool connections.
- Periodically: Inspect belts or rollers if your model uses serviceable versions.
Canister vacuums
- After use: Check bag or bin condition.
- Regularly: Inspect the long hose and wand for restrictions.
- Monthly: Check filters and attachment connections.
- As needed: Examine powered floorheads for hair wrapping.
Cordless stick vacuums
- After use: Check the smaller dirt bin, which may fill quickly.
- Frequently: Look for brush-roll tangles.
- Manufacturer schedule: Maintain filters exactly as directed.
- Ongoing: Watch the battery housing and charger for damage or unusual heat.
Robot vacuums
Robot vacuums introduce several small components that can collect hair and dust. Side brushes, main rollers, wheels, sensors, and charging contacts may all need routine inspection.
- Empty the onboard bin as needed.
- Remove hair from rotating brushes.
- Keep sensors clean using the approved method.
- Inspect wheels for trapped fibers.
- Check charging contacts as the manufacturer directs.
Wet/dry vacuums
Wet pickup changes the maintenance routine because moisture cannot be treated like ordinary dry household dust. Empty collected liquid and deal with wet components promptly according to the machine’s instructions.
Never assume the same filter setup works for both wet and dry pickup. Use only the configuration specified by the manufacturer.
Section Takeaway: Match your schedule to the vacuum design. Cordless and robot models often need frequent small-component checks, while upright and canister machines place more emphasis on bags, bins, hoses, filters, and powered floorheads.
What Signs Mean Your Vacuum Needs Maintenance Early?
Don’t wait for the calendar if performance changes. A symptom-based check should always take priority over your normal maintenance interval.
Suction suddenly drops
Start with the simplest airflow checks. Look at the bin or bag, filters, hose, wand, cleaner head, and accessible intake passages.
A sudden change often provides more useful information than a date on your calendar. Check what changed before assuming the motor has failed.
The brush roll stops or sounds different
Turn the machine off immediately before inspecting the floorhead. Wrapped hair, thread, or an obstruction may interfere with movement.
Do not continue forcing a jammed rotating component. Follow the manual’s procedure for accessing and cleaning it.
The vacuum runs unusually hot
Stop using a vacuum that becomes abnormally hot, repeatedly shuts itself off, or behaves differently from normal. Check user-serviceable airflow areas only after disconnecting power.
Persistent overheating needs proper diagnosis. Continuing to run the machine can make the underlying problem harder to identify.
You notice a burning smell, smoke, or electrical damage
These are not routine cleaning reminders. Disconnect the vacuum from power and stop using it.
Expert Alert: A damaged cord, plug, charger, battery pack, internal wiring issue, smoke, or persistent burning smell should be handled by the manufacturer or a qualified appliance repair professional. Do not open electrical housings unless the manufacturer specifically identifies them as user-serviceable.
Dust appears around seals or connections
Inspect removable bins, bags, filter covers, hose joints, and accessible gaskets. Make sure each component is installed in the correct orientation.
- Check for debris: Dust or hair can sit on a sealing surface.
- Check alignment: A bin or filter cover may not be fully seated.
- Check damage: Torn or distorted seals may require replacement.
- Check the manual: Sealed filtration systems can have model-specific assembly requirements.
Section Takeaway: Performance changes override the calendar. Investigate suction loss, jams, excess heat, unusual noises, odors, or damaged electrical parts as soon as they appear.
How Does Vacuum Maintenance Relate to Dust and Allergens?
A maintained vacuum can support a regular household cleaning routine, but it shouldn’t be presented as a medical treatment. Indoor dust can contain soil, pollen, mold spores, pet dander, dust-mite material, hair, and other particles.
The Asthma and Allergy Foundation of America recommends regular vacuuming as one part of reducing indoor allergen buildup. Cleaning frequency may need to increase in homes where dust, pet hair, or allergens accumulate quickly.
Why filters need model-specific care
A dirty or incorrectly installed filter can interfere with normal operation. However, filter materials and replacement intervals vary widely.
- Never wash a filter just because it looks washable.
- Use the cleaning method listed for the exact filter.
- Allow washable filters to dry as instructed before reinstallation.
- Install filters in the correct direction and location.
- Replace disposable filters at the specified interval.
What does HEPA mean for vacuum maintenance?
HEPA refers to high-efficiency particulate air filtration. A vacuum advertised with this type of filtration still needs correct filter installation and maintenance to operate as designed.
The EPA notes that HEPA-filter vacuums can help keep some collected dust from escaping back into the room. The agency also emphasizes operating and maintaining filtration equipment according to manufacturer instructions.
Vacuuming is only one part of dust control
Regular floor care works best as part of a broader household cleaning routine. The EPA also recommends frequent cleaning and damp dusting to reduce settled indoor dust.
For people with asthma or allergies, the EPA advises avoiding exposure to dust stirred up during vacuuming when needed. Individual health concerns should be discussed with a qualified healthcare professional.
Section Takeaway: Vacuum maintenance supports effective cleaning, but filter care must remain model-specific. For allergen control, combine vacuuming with broader dust-reduction practices rather than relying on the vacuum alone.
Vacuum Maintenance Schedule FAQs
How often should you maintain a vacuum cleaner?
Do quick checks after use, inspect high-wear areas such as the brush roll regularly, and perform a more detailed inspection about monthly. Use your owner’s manual for exact filter cleaning, replacement, battery, belt, and service intervals.
Should you clean a vacuum after every use?
You usually don’t need to deep-clean the entire machine after every session. Check the bin or bag, visible intake area, cleaner head, and obvious debris, then save more detailed inspection for your weekly or monthly routine.
How often should you clean a vacuum filter?
There is no universal interval for every vacuum filter. Check the manufacturer’s instructions because some filters are washable, some are dry-clean only, and others require replacement rather than cleaning.
How often should you clean hair from a vacuum brush roll?
Inspect the brush roll about weekly when your household has pets or long hair. Clean it sooner whenever you can see heavy wrapping, hear a change in the floorhead, or notice that the roller is no longer turning normally.
How often should you check a vacuum hose for clogs?
A monthly inspection is a practical baseline for many household vacuums. Check immediately if suction suddenly drops, debris rattles inside the hose, or pickup becomes weak despite an empty bin or fresh bag.
Does a robot vacuum need more maintenance?
Robot vacuums often have several small parts that need frequent attention, including side brushes, rollers, wheels, sensors, bins, and charging contacts. Follow the app or manufacturer schedule because component designs vary significantly between models.
When should you get a vacuum professionally serviced?
Seek professional help when routine user maintenance does not solve persistent suction loss, overheating, abnormal noise, electrical problems, smoke, or burning smells. Stop using a machine with damaged wiring, a damaged plug, or a concerning battery problem.
Final Takeaway: The best vacuum maintenance schedule is simple: check obvious problem areas after use, inspect fast-wearing parts weekly, perform a broader check monthly, and follow the manufacturer for exact service intervals.
Add the routine to the same calendar you use for household cleaning. Small, consistent checks are much easier than waiting for several maintenance problems to appear at once.
“`
