
Why Is My Vacuum Cleaner Not Turning On? 7 Safe Checks to Try

Quick Answer
If your vacuum cleaner is not turning on, first check its power source, plug, outlet, breaker, battery, charger, and safety locks. A clogged airflow path or overheated motor can also make some vacuums temporarily shut down, but damaged cords, burnt smells, sparks, or exposed wiring need professional attention; the CPSC electrical safety guidance is a useful reference for electrical hazards.
Check these first
- Confirm power: Test the outlet with another small appliance that you know works.
- Inspect the plug: Stop if the cord, plug, or prongs look damaged, loose, melted, or scorched.
- Check the breaker: Look for a tripped circuit breaker or GFCI outlet.
- Check the battery: On cordless models, reseat the battery and confirm the charger is working.
- Clear airflow: Inspect the bin, filters, hose, wand, and floorhead for restrictions.
- Let it cool: If it stopped during use, switch it off and follow your manual’s overheating instructions.
Stop troubleshooting if
- You notice smoke, sparks, exposed wires, battery swelling, melted plastic, or a strong electrical burning smell.
When a vacuum suddenly stays silent, I start with the simple checks before assuming the motor has failed. In home hygiene and everyday cleaning, a no-power problem often comes from something surprisingly basic.
This guide covers corded, cordless, upright, canister, stick, and robot vacuums. It also shows when troubleshooting should stop and professional repair should begin.
In This Guide
- Why Is My Vacuum Cleaner Not Turning On?
- What Should I Check First on a Corded Vacuum?
- Why Won’t My Cordless Vacuum Start?
- Can a Clog or Dirty Filter Stop a Vacuum From Turning On?
- How Do I Tell a Simple Problem From an Electrical Fault?
- What If the Vacuum Starts, Then Shuts Off?
- Vacuum Cleaner Won’t Turn On FAQ
Why Is My Vacuum Cleaner Not Turning On?
A vacuum that will not turn on usually has a problem somewhere between its power source and its motor controls. Start with the outlet or battery before investigating airflow, overheating, or internal faults.
A no-power vacuum problem is a condition where the machine does not start normally when its power control is activated. The cause can be external, protective, mechanical, battery-related, or electrical.
What are the most common causes?
The exact design varies by model, but several causes appear repeatedly across vacuum types.
- No power at the outlet: The receptacle, GFCI, or household circuit may have lost power.
- Loose plug: The plug may not be fully seated in the outlet.
- Damaged cord: A cut, kinked, scorched, or internally damaged cord can interrupt power.
- Tripped protection: Heat or excessive load may have triggered a protective shutdown.
- Battery problem: A cordless vacuum may have a discharged, poorly seated, overheated, or aging battery.
- Charging problem: The charger, dock, charging contacts, or outlet may not be supplying power.
- Safety interlock: Some models will not operate when a bin, filter cover, battery, or other component is installed incorrectly.
- Internal failure: A switch, control board, wiring connection, battery pack, or motor may require service.
One troubleshooting habit saves me a lot of unnecessary disassembly: I prove the power source works first. There is little value opening bins and checking hoses when the outlet itself is dead.
Also check whether your model is affected by a safety notice. The CPSC maintains a searchable vacuum cleaner recall category covering recalled products and reported hazards.
Section Takeaway: Start outside the vacuum and work inward. Confirm the power supply first, then check removable parts and airflow before suspecting an internal component.
What Should I Check First on a Corded Vacuum?
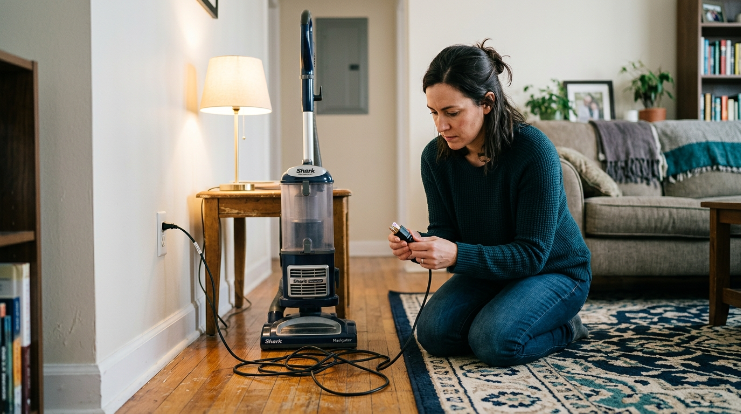
For a corded vacuum, check the outlet, plug, cord, breaker, and power switch in that order. These tests can rule out several common no-power causes without opening the appliance.
1. Test the wall outlet
Unplug the vacuum and test the same outlet with a small appliance or lamp you already know works. If that device also stays off, the vacuum may not be the problem.
If the outlet is controlled by a wall switch, confirm the switch is on. Kitchens, bathrooms, garages, basements, and outdoor areas may also use GFCI protection.
2. Check the breaker or GFCI
A tripped breaker can cut power even when the outlet looks normal. A tripped GFCI can do the same for one outlet or several connected receptacles.
- Look for an obviously tripped breaker.
- Check nearby GFCI outlets for a tripped state.
- Reset only according to the device or electrical panel instructions.
- Stop if the circuit trips repeatedly after the vacuum is connected.
Repeated tripping can indicate an appliance or circuit fault. It deserves more attention than simply resetting the breaker again.
3. Inspect the cord and plug without opening them
Run your eyes along the unplugged cord from the vacuum body to the plug. Look closely where the cord enters the machine because repeated bending can stress that area.
- Cracked or missing insulation
- Exposed conductors
- Loose or bent plug blades
- Brown or black scorching
- Melted plastic
- A cord that feels unusually hot during use
Don’t tape over serious cord damage and continue vacuuming. A damaged mains cord needs proper repair or replacement.
Expert Alert: If the cord, plug, internal switch, wiring, or motor appears electrically damaged, unplug the vacuum and use a qualified appliance technician or electrician rather than opening powered components yourself.
Section Takeaway: A working outlet plus an undamaged plug and cord narrows the problem quickly. Repeated breaker trips, scorching, or exposed wiring are repair issues, not routine cleaning tasks.
Why Won’t My Cordless Vacuum Start?
A cordless vacuum usually fails to start because the battery is discharged, incorrectly seated, too hot or cold, no longer charging correctly, or blocked by a model-specific safety condition. Check the charging system before assuming the motor has failed.
Confirm that charging is actually happening
A vacuum sitting on its dock is not necessarily charging. Check the manufacturer’s normal charging indicators for your specific model.
- Confirm the charger is connected to a working outlet.
- Check that the charging connector or dock is seated correctly.
- Inspect accessible contacts for dirt or obvious damage.
- Reseat a removable battery if the manual allows it.
- Check the manual for the meaning of flashing or solid indicator lights.
Don’t assume every flashing light means a bad battery. Manufacturers use different light patterns for charging, temperature warnings, blockages, and faults.
Could battery temperature prevent startup?
Lithium-ion battery systems often include electronic protection. A battery outside its permitted operating range may refuse to charge or run until conditions return to normal.
Keep the vacuum and battery away from heaters, hot vehicles, direct intense heat, and freezing storage conditions. Follow the model manual for acceptable charging and storage conditions.
When should you stop using the battery?
Physical battery damage needs a different response from normal charging trouble. Don’t keep testing a battery that appears unsafe.
- Swelling or deformation
- Cracked battery housing
- Leaking material
- Smoke or unusual heat
- Strong chemical or electrical odor
- Visible scorching around terminals
Cordless vacuum battery hazards aren’t theoretical. CPSC recall records include vacuum models recalled for battery overheating and fire risks.
Section Takeaway: For cordless vacuums, troubleshoot the entire charging chain: outlet, charger, dock, contacts, battery seating, temperature, and battery condition. Stop immediately if the pack shows physical damage or abnormal heat.
Can a Clog or Dirty Filter Stop a Vacuum From Turning On?
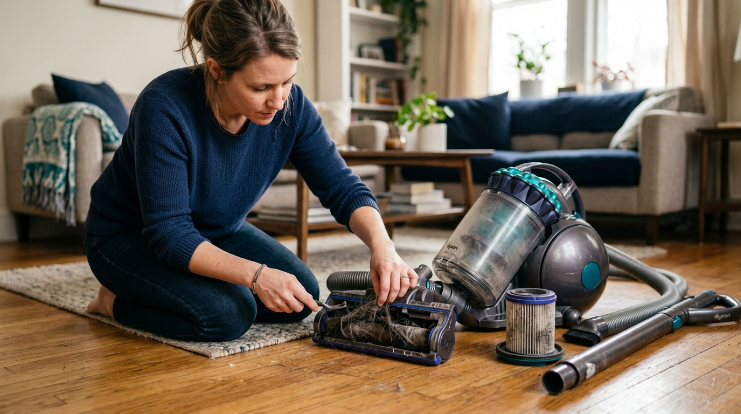
A blockage or heavily restricted filter can contribute to overheating, and some vacuums protect themselves by shutting down. However, a clogged filter does not explain every completely dead vacuum.
If the vacuum stopped after running normally, airflow becomes much more important to check. If it never started at all, begin with power or battery checks first.
Check the dirt container and filters
An overfilled bin or bag can restrict airflow. Empty the bin or replace the bag according to the manufacturer’s instructions.
Inspect each filter next. Wash only filters specifically identified as washable, and reinstall washed components only after they are fully dry.
Inspect the airflow path
Disconnect the vacuum from power before removing accessible components. Then work through the airflow path in a logical order.
- Floorhead opening
- Brush-roll area
- Intake channel
- Wand
- Flexible hose
- Dirt container or bag inlet
- Accessible filter openings
Hair, string, paper, pet fur, and compacted dust can create surprisingly solid obstructions. Don’t force sharp tools into hoses or internal passages.
Why filter condition also matters for home hygiene
Filters affect more than machine performance. The EPA advises regular household cleaning and notes that a vacuum with a HEPA filter can help keep some collected dust from escaping back into indoor air.
You can read the EPA’s guidance on indoor particulate matter and household cleaning for broader dust-control advice.
HEPA means high-efficiency particulate air. EPA states that a HEPA filter can theoretically capture at least 99.97% of particles at 0.3 microns under the applicable test conditions.
That number describes the filter standard, not the cleaning performance of every vacuum carrying a HEPA-related label. Sealing, airflow, maintenance, and overall vacuum design still matter.
Section Takeaway: If your vacuum stopped during cleaning, inspect airflow after it is safely disconnected from power. Full bins, blocked hoses, tangled brush rolls, and neglected filters can place extra stress on the machine.
How Do I Tell a Simple Problem From an Electrical Fault?
Simple no-start problems usually involve an external power source, removable component, charging connection, clog, or temporary protective shutdown. Sparks, smoke, scorched parts, repeated circuit trips, or damaged wiring point toward professional service.
| Symptom | Possible Area | Safe First Check | Repair Warning |
|---|---|---|---|
| Completely silent corded vacuum | Outlet, plug, breaker, switch | Test outlet with a known-working device | Damaged cord, plug, or repeated breaker trips |
| Cordless vacuum has no response | Battery or charging system | Check charger, dock, contacts, and battery seating | Swollen, leaking, scorched, or overheating battery |
| Stopped after extended cleaning | Heat or restricted airflow | Check bin, bag, filters, hose, wand, and floorhead | Burning smell, smoke, or repeated shutdown after maintenance |
| Power returns when cord moves | Possible cord or connection fault | Stop using and unplug it | Qualified repair is appropriate |
| Sparks, smoke, melted plastic | Electrical or battery fault | Stop use immediately | Do not continue DIY testing |
As of 2026, I also recommend checking current product recalls whenever a vacuum develops unusual electrical or battery behavior. A recall can change the correct next step completely.
A useful rule is simple: cleaning accessible parts is maintenance, while diagnosing live wiring is electrical repair. Those are not the same job.
Expert Alert: Don’t bypass switches, thermal protection, battery electronics, or safety interlocks to make a vacuum run. Have internal electrical faults diagnosed by a qualified technician.
Section Takeaway: Home troubleshooting should stay on the safe side of the appliance housing. If fixing the problem requires testing internal energized components, move from DIY maintenance to professional service.
What Should I Do If the Vacuum Starts, Then Shuts Off?
A vacuum that starts normally but stops later points more strongly toward heat, airflow restriction, battery protection, a loose connection, or an internal fault. Note exactly when the shutdown happens because timing is a useful clue.
If it shuts off after several minutes
Switch the vacuum off and disconnect it from its power source. Check for conditions that could restrict normal airflow.
- Overfilled dustbin or bag
- Dirty or incorrectly installed filter
- Blocked hose or wand
- Obstructed floorhead
- Hair wrapped tightly around the brush roll
- Covered or obstructed ventilation openings
Follow the manufacturer-recommended cooling or reset procedure before restarting the machine. Cooling times and reset methods vary, so don’t assume one universal waiting period.
If touching or moving the cord changes the power
Stop using the vacuum. Intermittent operation linked to cord movement can indicate a damaged conductor or connection.
Don’t repeatedly bend the cord until you find a position where the vacuum runs. That behavior should be treated as a fault requiring proper repair.
If a cordless vacuum runs only briefly
First confirm the battery completed a normal charge cycle. Then check whether the vacuum behaves differently at lower and higher power settings.
Short runtime can have several causes, including battery condition, charging problems, high-load operation, airflow restrictions, or temperature protection. Your model’s diagnostic lights or app may provide a more precise fault indication.
Section Takeaway: A vacuum that starts and then stops gives you more diagnostic information than one that is completely dead. Pay attention to heat, runtime, airflow, cord movement, warning lights, and whether the problem repeats.
Vacuum Cleaner Won’t Turn On FAQ
Why is my vacuum not turning on even though it is plugged in?
The outlet may have no power, the breaker or GFCI may have tripped, or the vacuum may have a cord, switch, overheating, or internal electrical problem. Test the outlet first with another working device, then visually inspect the unplugged vacuum for obvious damage.
Can a full vacuum bag stop the vacuum from working?
A heavily loaded bag can restrict airflow and increase operating stress. Some machines may then shut down through protective systems, but this varies by model. Replace the bag according to the manufacturer’s instructions and check filters and air passages before restarting.
Why did my vacuum suddenly turn off while I was cleaning?
Sudden shutdown can follow restricted airflow, overheating, a clogged floorhead, battery protection, power interruption, or an internal fault. Disconnect power, inspect accessible airflow components, and follow your owner’s manual before attempting another start.
How do I reset a vacuum cleaner that won’t start?
There is no universal vacuum reset procedure. Some models recover after cooling, while others use buttons, battery removal, app controls, or model-specific sequences. Check the manufacturer’s instructions for your exact model rather than guessing or bypassing a safety system.
Why is my cordless vacuum charged but not turning on?
The battery may not be seated correctly, the charging indicator may have been misread, a safety interlock may be open, or the vacuum may have a battery or electronic fault. Reseat user-removable parts according to the manual and check for diagnostic lights.
Is it worth repairing a vacuum that won’t turn on?
It depends on the fault, age, condition, parts availability, and repair cost. A simple switch, cord, battery, or replaceable component may justify repair, while multiple electrical failures in an older machine can make replacement more practical.
Can I open the vacuum motor housing to find the problem?
I would avoid opening powered electrical sections unless you’re trained and equipped to service appliances safely. Internal wiring, capacitors, battery systems, and damaged insulation can create hazards even when basic external troubleshooting seems straightforward.
Final Takeaway: When your vacuum cleaner won’t turn on, troubleshoot from the safest and simplest cause toward the more serious ones. Check power, charging, removable parts, airflow, and overheating first, then stop if you encounter electrical damage, battery damage, smoke, sparks, or repeated failures.
A systematic check often tells you whether you’re dealing with routine maintenance or a real repair. That distinction can save time, prevent unnecessary replacement, and keep your cleaning routine safer.