
How Do You Prepare a Vacuum for Long-Term Storage?

Quick Answer
To prepare a vacuum for long-term storage, empty it, remove trapped debris, clean the brush roll, service filters according to the manual, and let every washed part dry completely. Protect the battery, cord, hose, and attachments, then choose a clean, dry location that follows sensible moisture-control practices.
Quick storage steps
- Empty it: Remove dust, debris, dirty water, or a used disposable bag.
- Clear blockages: Inspect the floor head, hose, wand, and intake path.
- Clean moving parts: Remove hair and thread from brushes and wheels.
- Service filters: Wash, replace, or leave them alone according to the manufacturer.
- Dry everything: Never close damp washable parts inside the vacuum for storage.
- Protect the machine: Store it away from leaks, high heat, pests, and crushing weight.
If I know a vacuum will sit unused for several months, I treat storage like a small home-hygiene maintenance job. Simply wrapping the cord around a dusty machine leaves too many problems waiting for later.
The process is straightforward. Clean the vacuum, remove moisture, protect vulnerable parts, and give it a safe place to sit.
In This Guide
- What counts as long-term vacuum storage?
- How do you clean a vacuum before long-term storage?
- How should you prepare filters, bags, and dust bins?
- How should you prepare a cordless vacuum battery?
- How should you store cords, hoses, and attachments?
- Where is the best place to store a vacuum long term?
- Frequently asked questions
What Counts as Long-Term Vacuum Storage?
Long-term vacuum storage means preparing a vacuum for an extended period of non-use while protecting it from dirt, moisture, heat, pests, and physical damage. I use the full routine whenever I expect a machine to sit unused for several months.
Definition: Preparing a vacuum for long-term storage is the process of cleaning, drying, inspecting, protecting, and correctly positioning the appliance before extended non-use.
There isn’t one universal number of days that defines long-term storage. Your vacuum manufacturer may also give model-specific instructions that override general advice.
Why does preparation matter?
A vacuum holds dirt in more places than the visible dust bin. Fine debris can remain in filters, hoses, floor heads, brush rolls, wheels, and internal air passages.
- Dust can stay trapped: Old debris may create stale odors after months of sitting.
- Hair can remain wound: Threads around a brush roll can restrict free movement later.
- Moisture can stay enclosed: Damp filters and bins should not be sealed inside an unused machine.
- Flexible parts can deform: A sharply folded hose may develop persistent kinks.
- Batteries need special care: Cordless models require manufacturer-specific storage guidance.
As of 2026, the safest general approach remains simple: store the vacuum clean and dry. Model-specific instructions should decide anything involving washable filters or batteries.
How Do You Clean a Vacuum Before Long-Term Storage?
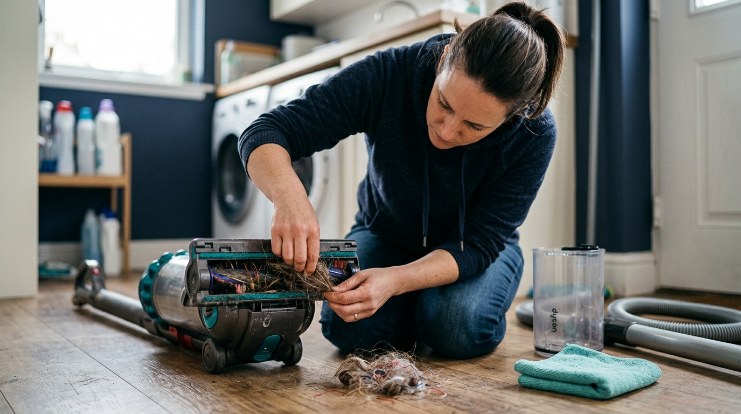
Clean the areas that collect or touch dirt before you put the vacuum away. Start with dry debris, then wash only parts that the manufacturer’s manual identifies as washable.
1. Empty the vacuum completely
Empty a bagless dust bin outdoors or over a trash container where practical. If the vacuum is bagged, check whether the disposable bag should be removed or replaced before storage.
Wet/dry vacuums need extra attention. Drain any collected liquid and clean the tank before the machine goes into storage.
2. Clear the airflow path
Disconnect removable hoses and wands when your model allows it. Look for visible clumps of hair, paper, lint, or other debris.
- Check the floor-head opening.
- Inspect removable hoses.
- Look through extension wands.
- Check tool connectors.
- Inspect accessible intake openings.
Don’t push sharp metal objects deep into a hose or internal airway. They can puncture flexible material or damage internal parts.
3. Clean the brush roll and wheels
Hair and thread often wrap tightly around a rotating brush. Remove them carefully while the vacuum is unplugged or safely powered down.
I also rotate each accessible wheel by hand after removing debris. That quick check often catches thread wrapped behind a wheel before storage.
4. Remove surface dust
Wipe the outside casing with a soft cloth appropriate for the appliance. Avoid allowing water to enter vents, switches, battery contacts, or electrical openings.
The EPA notes that household dust can contain several biological contaminants and recommends routine cleaning; its indoor particulate matter guidance also explains that HEPA filtration can help keep some collected dust from escaping a vacuum back into indoor air.
Section Takeaway: Clean dirt from every accessible collection and airflow area, but don’t turn storage preparation into unauthorized appliance disassembly.
How Should You Prepare Filters, Bags, and Dust Bins?
Filters need the most caution because vacuum designs differ. Never assume a filter is washable just because it looks like foam, fabric, or pleated paper.
Follow the filter label or manual
HEPA means high-efficiency particulate air. A HEPA-equipped vacuum may use washable, non-washable, reusable, or replaceable components depending on the model.
- Washable filter: Clean it only with the approved method and let it dry completely.
- Non-washable filter: Remove loose debris only if the manual permits it.
- Disposable filter: Replace it when the manufacturer’s schedule or condition indicates replacement.
- Pre-filter: Service it separately if your vacuum’s instructions require that.
I don’t reinstall a washed filter just because the outside feels dry. I check both sides and any thick folds before putting the vacuum away.
Should you leave a vacuum bag installed?
Don’t store a bag that is packed with old household debris. A fresh bag or an empty bag compartment gives you a cleaner starting point later.
If your vacuum uses a reusable collection container, clean it according to the manual. Let the container dry before closing it inside the machine.
The Asthma and Allergy Foundation of America recommends HEPA-filter vacuuming as part of dust-mite allergen control, while noting that vacuuming alone doesn’t remove every mite or allergen reservoir.
How Should You Prepare a Cordless Vacuum Battery?
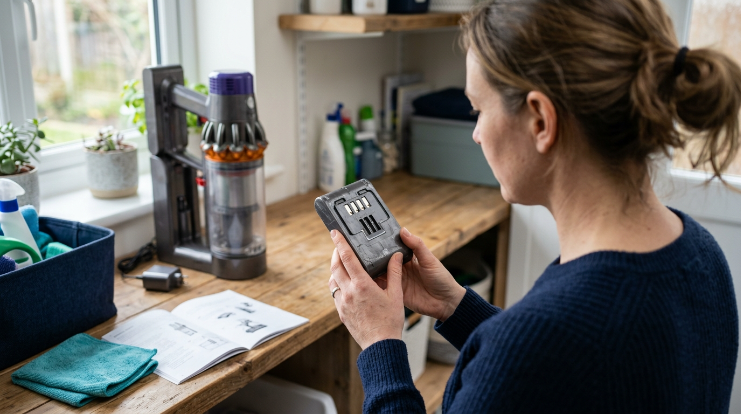
A cordless vacuum battery should be stored according to its manufacturer’s instructions. Don’t apply a universal charge percentage or storage rule to every lithium-ion battery.
Dyson, Shark, and other cordless-vacuum makers may use different battery systems. Your exact model manual should decide charging, removal, and storage conditions.
Check these points before storage
- Temperature: Keep the battery away from storage conditions outside its specified temperature range.
- Battery removal: Remove it only if the model supports removal and the manual recommends doing so.
- Charging: Follow the manufacturer’s guidance for charge level and long periods of non-use.
- Contacts: Keep exposed battery contacts clean, dry, and protected from conductive objects.
- Damage: Don’t store a swollen, leaking, cracked, or unusually hot battery for later use.
Inspect corded vacuums too. Look at the plug, cord jacket, strain-relief area, and visible connectors before storage.
Expert Alert: If a cord, plug, charger, battery, or electrical connection appears damaged, stop using the appliance and contact the manufacturer or a qualified repair professional instead of attempting an electrical repair yourself.
How Should You Store Cords, Hoses, and Attachments?
Store flexible and removable parts without sharp bends or unnecessary tension. This is one of the easiest ways to prevent storage damage.
Wrap the power cord loosely
Use the vacuum’s cord hooks if provided, but don’t pull the cable tight. Leave a relaxed bend near the plug and where the cord enters the appliance.
Avoid winding the cord around handles that create hard corners. Tight repeated bends can place unnecessary stress on the cable.
Keep hoses in a natural curve
A canister vacuum hose should not sit crushed beneath boxes or furniture. Give it enough room to keep a broad, relaxed curve.
For detachable hoses, don’t force a tight coil just to fit a small container. Use a larger storage area instead.
Keep attachments together
Crevice tools, upholstery tools, dusting brushes, extension wands, and specialty heads are easy to misplace during a long storage period.
- Use onboard storage when available.
- Place loose tools in a labeled container or bag.
- Keep delicate brushes from being crushed.
- Store powered heads with their connectors protected.
One habit I use with vacuums that have many accessories is taking a quick phone photo before storage. It makes matching tools to the correct machine much easier months later.
Where Is the Best Place to Store a Vacuum Long Term?
A dry indoor closet, utility area, or cabinet is usually the safest choice. The location should protect the vacuum from leaks, condensation, extreme temperatures, pests, and falling objects.
The CDC’s mold guidance emphasizes keeping indoor humidity low and correcting leaks. Those principles also make sense when choosing a location for a cleaned appliance that will sit unused.
Places to approach cautiously
- Damp basement: Avoid areas with condensation, seepage, or known water problems.
- Hot garage: Temperature extremes can be especially important for cordless batteries.
- Leaking utility room: Don’t place a vacuum beside plumbing with a history of leaks.
- Outdoor shed: Humidity, pests, dust, and temperature changes may make it unsuitable.
- Under heavy storage: Never position boxes where they can fall onto the vacuum or crush its hose.
A breathable dust cover can keep settled dirt off a clean vacuum. I avoid sealing the appliance tightly in plastic unless I’m certain every component is dry.
Expert Alert: If the proposed storage area has widespread mold, repeated water intrusion, or an unresolved moisture problem, correct that issue before using the space for appliance storage. Larger mold problems may require qualified remediation help.
How does storage preparation change by vacuum type?
| Vacuum type | Before storage | Main concern | Preferred setup |
|---|---|---|---|
| Upright | Empty bag/bin and clear brush roll | Cord strain and brush debris | Stable upright position |
| Canister | Empty container and inspect hose | Hose crushing or sharp bends | Canister stable, hose relaxed |
| Cordless stick | Clean bin/head and follow battery manual | Battery temperature and storage guidance | Secure mount or stable supported position |
| Robot | Empty bin, clean brushes, dry mop parts | Battery and wet mop components | Follow model-specific shutdown/storage instructions |
| Wet/dry vacuum | Drain, clean, and completely dry tank | Residual liquid and damp accessories | Dry tank with accessories protected |
Frequently Asked Questions
Should I empty my vacuum before storing it?
Yes. Empty a bagless dust bin and remove collected debris before long-term storage. For bagged models, don’t leave an overloaded bag inside for months; check the manufacturer’s instructions and replace or remove it as appropriate.
Can I store a vacuum with a damp filter?
No. If the filter is washable, let it dry completely before reinstalling it or enclosing it with the vacuum. Never wash a filter unless your model’s instructions specifically say that filter can be washed.
Can I store my vacuum cleaner in the garage?
You can if the garage stays dry and remains within the temperature limits specified for your vacuum and battery. Avoid a garage with regular condensation, water leaks, pest problems, or severe temperature swings.
Should I put my vacuum in a plastic bag for storage?
A dust cover can be useful, but airtight plastic may be a poor choice if any moisture remains. Make sure the vacuum and every washed component are completely dry before covering or enclosing the appliance.
What should I do with a cordless vacuum battery during storage?
Follow the exact manufacturer’s instructions for your model. Battery chemistry, removable designs, charging systems, and recommended storage conditions differ, so don’t rely on a universal charge percentage or temperature rule.
Do I need to clean a vacuum again after taking it out of storage?
Inspect it before use. Check for dust, pests, hose blockages, damaged cords, battery problems, loose attachments, or stale debris, then confirm that all filters and collection parts are correctly installed before powering it on.
Final takeaway: Long-term vacuum storage works best when you put away a clean, dry, inspected machine rather than a vacuum straight from its last cleaning job.
Spend a few extra minutes on the bin, filter, brush roll, hose, cord, and battery now. When you need the vacuum again, you’ll have far less maintenance to handle before the first use.