
How Do You Keep Your Vacuum Working Like New?

Quick Answer
To keep your vacuum working like new, protect its airflow, clean the brush roll, maintain the filters, empty the bin or replace the bag before it becomes packed, and deal with unusual heat or noises early. Good vacuum care also matters for household dust control, as explained in the EPA’s indoor particulate matter guidance.
Quick maintenance routine
- Empty debris early: Don’t let a bag or dustbin become tightly packed.
- Clear the roller: Remove wrapped hair, thread, and fibers before they restrict movement.
- Maintain filters: Clean or replace each filter only as your vacuum’s manual directs.
- Check airflow: Inspect the floorhead, hose, wand, and intake whenever suction drops.
- Watch for heat: Stop using the vacuum if it overheats, smells burnt, or repeatedly shuts down.
- Inspect routinely: A few minutes of preventive care can catch small problems before they become repairs.
A vacuum often loses performance gradually, so it’s easy to assume an older machine simply isn’t as strong anymore. In many cases, the first things worth checking are much simpler: a restricted filter, tangled brush roll, packed bin, or partially blocked air path.
I’ve found that vacuum care is easier when I treat it as part of cleaning rather than a separate repair job. This guide shows you what to check, how often to check it, and which problems deserve professional attention.
In This Guide
What Keeps a Vacuum Working Like New?
A vacuum stays at its best when air can move freely through the machine and its moving parts aren’t fighting built-up debris. Filters, brush rolls, hoses, seals, bags, bins, and floorheads all affect that basic system.
Vacuum maintenance is the routine inspection, cleaning, and care of the vacuum’s collection system, filtration system, airflow path, brush system, attachments, and visible wear parts.
Airflow is the first thing I protect
Your vacuum needs an open path from the floorhead to the exhaust. A blockage anywhere along that route can make the machine feel weaker even when the motor itself is fine.
- Dustbin or bag: Collected debris needs enough room to avoid restricting normal airflow.
- Filters: Fine dust can load a filter and make air harder to move through it.
- Hose and wand: Socks, paper, hair, pet fur, and compacted dust can create partial or complete clogs.
- Floorhead: Debris around the intake can limit pickup before dirt even reaches the hose.
Moving parts need freedom too
A brush roll wrapped in long hair or thread may not spin as freely as intended. That can reduce agitation on carpet and put extra stress on the brush system.
Check the roller ends as well as the center. Hair can work its way toward bearings, end caps, and narrow gaps that are easy to overlook.
- Remove hair and fibers before they form a thick layer.
- Check that the roller turns as your model is designed to turn.
- Look for damaged bristles, loose parts, or melted material.
- Never cut toward exposed wiring or delicate components.
Filtration matters beyond suction
Filters help separate captured particles from the air moving through a vacuum. Some machines use pre-filters, post-motor filters, HEPA filtration, or several stages together.
If dust control is important in your home, filtration deserves special attention. AAFA recommends HEPA-filtered vacuuming as one part of a broader dust-mite control strategy, while also noting that vacuuming alone cannot remove every allergen source.
See the AAFA dust mite allergy guidance for the broader household approach.
Section Takeaway: Protect airflow first, then keep the brush system and filtration system clean. Those three areas account for many of the performance problems you can prevent at home.
How Often Should You Maintain Your Vacuum?
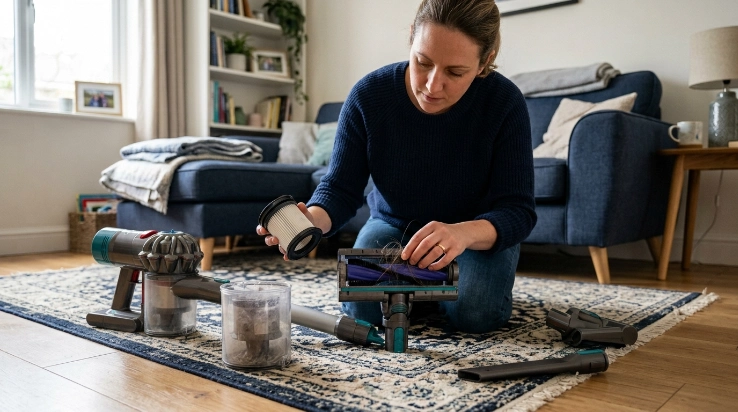
There isn’t one correct maintenance calendar for every vacuum. Your owner’s manual should override a generic schedule because washable filters, disposable filters, bags, rollers, batteries, and sensors vary between models.
As of 2026, I use the following intervals as inspection reminders rather than fixed replacement rules.
| Vacuum Part | Practical Check Interval | Check Earlier When |
|---|---|---|
| Dustbin | During or after regular cleaning | Debris reaches the fill line or suction weakens |
| Vacuum bag | Check during regular use | The bag indicator activates or airflow falls |
| Brush roll | About weekly in hair-heavy homes | Hair, thread, or pet fur wraps around it |
| Hose and wand | About monthly | Suction suddenly changes or debris rattles inside |
| Filters | Inspect about monthly | Fine dust, odor, heavy use, or an alert appears |
| Cord or battery | During routine use | Damage, swelling, abnormal heat, or charging problems appear |
Pet homes may need more frequent checks
Pet hair can accumulate quickly around rollers, upholstery tools, narrow bends, and filters. A vacuum used daily around shedding pets may need attention much sooner than one used weekly in a low-debris apartment.
- Inspect the floorhead after heavy pet-hair sessions.
- Check upholstery tools for packed fur.
- Watch narrow hose bends for clumps.
- Empty the collection system before debris becomes compressed.
Fine dust changes the maintenance pattern
Fine particles can load filters differently from ordinary crumbs and hair. If you’ve vacuumed an unusually dusty room, inspect the machine sooner instead of waiting for your normal maintenance day.
Don’t assume a household vacuum is suitable for construction dust, fireplace ash, or other specialized debris. Use equipment specifically designed for the material you’re collecting.
Section Takeaway: Use frequency as a reminder, not a guarantee. The amount and type of debris entering your vacuum matter more than a universal calendar.
How Do You Maintain a Vacuum Step by Step?
Start with the parts that affect airflow and debris collection, then inspect the brush system and visible wear points. Always disconnect the vacuum from power before opening, cleaning, or touching accessible moving parts.
- Disconnect the power. Unplug a corded machine or follow the manufacturer’s shutdown instructions for a cordless model.
- Empty the bin or inspect the bag. Remove collected material before it becomes tightly packed.
- Inspect the filters. Clean, wash, or replace them only by the method approved for your exact vacuum.
- Clear the brush roll. Remove hair, string, and fibers without damaging the roller or wiring.
- Check the airflow path. Inspect the floorhead, inlet, wand, hose, and attachment openings.
- Inspect seals and connections. Look for loose hoses, damaged gaskets, misaligned bins, or poorly seated bags.
- Check visible wear. Look at the wheels, cord, plug, battery, attachments, and accessible belts if your manual permits.
Empty the collection system before it struggles
I prefer emptying a bagless machine before debris becomes packed against its normal fill limit. A densely filled bin also makes emptying messier because fine dust tends to cling to the surrounding surfaces.
For a bagged vacuum, follow the bag indicator and manufacturer instructions rather than trying to squeeze every last cleaning session from a disposable bag.
Reassemble every part carefully
A vacuum can lose performance simply because a bin, filter cover, hose, or bag isn’t seated correctly. After maintenance, check every latch and connection before assuming something mechanical has failed.
- Seat filters in the correct orientation.
- Lock the dustbin completely into place.
- Check that hoses click or seal securely.
- Confirm the brush cover is installed correctly.
- Make sure washable parts are completely dry before reassembly.
Test the machine after maintenance
Run the vacuum briefly on a normal surface and listen to it. Suction should feel consistent, and the machine shouldn’t produce a new scraping, rattling, burning, or high-pitched sound.
If performance remains poor, stop repeating the same cleaning steps. Persistent symptoms may point to a damaged seal, worn part, electrical fault, motor problem, or blockage you cannot safely reach.
Section Takeaway: Work from simple causes to complex ones. Collection, filtration, brush-roll, and airflow checks should come before assuming the motor is worn out.
How Do You Care for Filters, Brush Rolls, and Airflow?
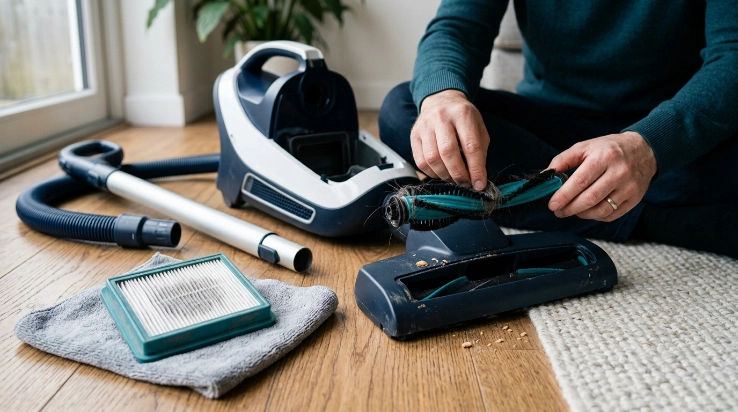
These three systems deserve the most regular attention because they directly affect how debris moves through the vacuum. Cleaning them correctly is more important than cleaning them aggressively.
How should you clean a vacuum filter?
First identify the filter type. Some filters are washable, some are tap-clean only, and others must be replaced rather than exposed to water.
- Washable filter: Follow the manual’s rinsing method and drying instructions.
- Disposable filter: Replace it when the manufacturer specifies or when its condition requires replacement.
- Pre-filter: Keep it free of heavy dust so later filtration stages aren’t overloaded unnecessarily.
- HEPA filter: Never assume that “HEPA” means washable; its maintenance depends on the filter’s construction.
A HEPA filter is a high-efficiency particulate air filter designed for fine-particle capture under defined performance standards. In a vacuum, however, the entire machine’s sealing and airflow design also affect whether collected particles can bypass the filter.
EPA guidance on asthma triggers recommends HEPA-filtered vacuuming for reducing household dust buildup in relevant homes. You can read the broader recommendations in the EPA asthma trigger guidance.
How should you clean the brush roll?
Remove long strands before they become tightly wound. Pay special attention to the ends of the roller, where hair can migrate away from the easy-to-see center section.
- Disconnect the vacuum from power.
- Remove the roller only if your model allows user removal.
- Cut hair in small sections instead of pulling against delicate parts.
- Lift loosened fibers away by hand.
- Inspect the roller ends and bristles.
- Reinstall the roller exactly as directed.
How do you find a hidden clog?
A sudden suction drop often deserves an airflow inspection. Start at the floorhead and move toward the collection chamber instead of randomly opening components.
- Check the intake opening.
- Look through detachable wands.
- Inspect hose bends and connection points.
- Check the bin inlet or bag chamber.
- Look for debris around attachment necks.
Use only a safe, blunt tool if the manufacturer permits you to clear a hose manually. Sharp objects can puncture flexible hoses or damage internal surfaces.
Expert Alert: Stop DIY work if a clog requires opening the motor housing, disturbing electrical wiring, or dismantling components not described as user-serviceable in the manual. A qualified appliance technician is the safer option.
Section Takeaway: Clean each part according to its design. A filter ruined by washing or a hose punctured during clog removal can create a larger problem than the dirt you were trying to remove.
Does Maintenance Change by Vacuum Type?
Yes. The basic goals stay the same, but the parts needing the most attention differ between upright, canister, cordless stick, robot, bagged, and bagless vacuums.
| Vacuum Type | Main Maintenance Focus | Common Area to Inspect |
|---|---|---|
| Upright | Brush roll, belt or drive system, filters, air path | Floorhead and hose connections |
| Canister | Hose, wand, floorhead, bag or bin | Long hose and wand joints |
| Cordless stick | Filter, small bin, brush roll, battery | Compact air passages and charging system |
| Robot | Main brush, side brushes, wheels, sensors, bin | Hair around axles and sensor surfaces |
| Bagged | Bag, filters, bag seal, hose | Bag collar and compartment seal |
| Bagless | Bin, filters, separator area, seals | Fine dust around the collection assembly |
Cordless vacuums need battery awareness
A cordless vacuum adds a battery and charging system to the maintenance picture. Follow the manufacturer’s charging, storage, temperature, and replacement guidance rather than applying generic battery advice.
Stop using a battery that is swollen, physically damaged, leaking, or behaving abnormally. Don’t open or attempt to rebuild a sealed battery pack yourself.
Robot vacuums collect hair in different places
Robot vacuums often wrap fibers around side brushes, main rollers, and wheel axles. Their sensors can also collect a film of dust that should be cleaned only by the approved method.
- Inspect the main brush.
- Remove hair from side brushes.
- Check the caster and drive wheels.
- Empty the onboard bin.
- Keep charging contacts clean as directed.
- Wipe accessible sensors using the manufacturer’s recommended material.
Don’t judge a vacuum only by age
Two vacuums of the same age can be in completely different condition. Usage frequency, pet hair, carpet type, debris load, storage conditions, and maintenance history all influence wear.
Consumer Reports also separates vacuum choices by design and household needs rather than treating every machine as interchangeable. Its vacuum cleaner buying guide is useful when you’re deciding whether an aging machine still suits your home.
Section Takeaway: Match the maintenance routine to the vacuum design. A robot’s wheels and sensors, a cordless vacuum’s battery, and a bagged vacuum’s bag seal all deserve type-specific attention.
What Habits Can Wear Out a Vacuum Faster?
The fastest way to make maintenance harder is to ask the vacuum to handle debris or conditions it wasn’t designed for. Misuse can damage filters, rollers, hoses, electrical parts, and motors.
Waiting until airflow is badly restricted
A full collection system, dirty filter, or partial clog may worsen gradually. Because the change is slow, you may compensate by making extra passes instead of noticing the underlying problem.
- Empty the bin before debris becomes densely packed.
- Replace bags as directed.
- Check filters when pickup starts declining.
- Inspect for clogs after sucking up bulky debris.
Vacuuming unsuitable material
Ordinary household vacuums aren’t automatically designed for liquids, hot ash, fireplace debris, construction dust, sharp objects, or large pieces of material. Check the manual before picking up anything outside normal household dirt.
A wet/dry vacuum also needs the correct setup for the material being collected. “Wet/dry” doesn’t mean every filter or configuration can be used for every job.
Putting damp parts back into the machine
Wash only parts specifically identified as washable. Then let them dry completely before putting them back near the vacuum’s airflow or powered components.
Damp filters can collect dirt differently and may cause odor or other problems. Never speed drying with a method that the manufacturer warns against.
Ignoring smells, heat, and strange sounds
A new burning smell, repeated overheating, smoke, sparking, or electrical odor isn’t a normal maintenance reminder. Stop using the vacuum and disconnect it safely.
- Rattling: Check for loose debris in accessible air passages.
- Grinding: Stop and inspect the floorhead or other user-serviceable moving parts.
- Repeated shutdown: Check basic airflow issues, then follow the troubleshooting guide.
- Burning smell: Stop using the machine until the source is identified.
- Damaged cord: Don’t tape over exposed wiring and continue vacuuming.
Expert Alert: Electrical faults, damaged wiring, smoke, internal motor problems, or persistent overheating need qualified repair rather than experimental DIY work.
Storing a dirty vacuum
I like to put a vacuum away ready for its next cleaning session. That means an emptied collection system, a quick roller check, neatly stored accessories, and no damp washable parts sealed inside.
This habit takes little time. It also means the next weak-suction problem is less likely to begin with last week’s dirt.
Section Takeaway: Avoiding misuse is part of maintenance. Correct debris, clear airflow, dry components, and early attention to abnormal symptoms can protect the machine from preventable stress.
Vacuum Maintenance FAQ
How can I make my vacuum suction strong again?
Empty the bin or check the bag, inspect the filters, remove hair from the brush roll, and check the floorhead, wand, and hose for blockages. If suction remains weak after basic maintenance, inspect seals and connections before considering professional repair.
How often should I clean my vacuum cleaner?
Do small checks during regular use and inspect major debris areas about monthly as a practical baseline. Homes with pets, long hair, heavy carpet use, or large amounts of fine dust may need more frequent cleaning.
Can I wash my vacuum filter?
Only if the manufacturer identifies that exact filter as washable. HEPA, foam, felt, pleated, and cartridge filters can have different cleaning requirements, so don’t decide based on appearance alone.
Why does my vacuum lose suction so quickly?
Common causes include a packed bin or bag, dirty filter, clogged hose, blocked floorhead, poorly seated collection chamber, or damaged seal. Work through the airflow path from the floorhead toward the exhaust before assuming the motor is failing.
Should I replace a vacuum that keeps overheating?
Not automatically, but repeated overheating shouldn’t be ignored. Check user-serviceable airflow restrictions first, then stop using the machine and arrange professional diagnosis if the problem continues.
Is a HEPA vacuum better for household dust?
A well-designed HEPA-filtered vacuum can help limit some collected fine particles from returning through the exhaust. However, filtration is only one part of dust control, and people with allergies may need several environmental measures rather than relying on vacuuming alone.
How do I know when my vacuum needs professional repair?
Seek repair when routine maintenance doesn’t resolve poor performance or when you notice electrical damage, smoke, persistent overheating, burning smells, internal grinding, battery damage, or faults requiring access to non-user-serviceable components.
Section Takeaway: Start with routine maintenance when the problem is ordinary dirt or airflow. Move to professional repair when symptoms persist or involve electrical, battery, motor, or inaccessible internal components.
The simplest way to keep your vacuum working like new is to maintain it before performance drops. Empty debris early, protect airflow, keep the roller clear, follow the filter instructions, and pay attention when the machine sounds or feels different.
A five-minute check now is much easier than diagnosing a completely clogged or overheated vacuum later. Keep the owner’s manual nearby and let your exact model’s instructions override any general maintenance schedule.