How to Vacuum Tile Floors: A Simple Step-by-Step Guide

Quick Answer
To vacuum tile floors, clear the room, use a hard-floor setting or gentle floor head, and work slowly from one side of the room to the other. Pay extra attention to grout lines, edges, and corners, then mop only after the loose dust and grit are gone. For choosing a suitable vacuum, see this vacuum cleaner buying guide.
Quick Steps for Vacuuming Tile
- Clear the floor: Pick up cords, toys, rugs, and anything that blocks the vacuum path.
- Check the vacuum: Empty the bin or replace a full bag and inspect the floor head.
- Use hard-floor mode: Turn off an aggressive brush roll when your vacuum allows it.
- Vacuum slowly: Make controlled passes instead of racing across the tiles.
- Clean the grout: Use a crevice tool along grout lines, edges, and tight corners when needed.
- Mop afterward: Remove sticky residue with a cleaner that is suitable for your specific tile.
Learning how to vacuum tile floors properly made my own floor-cleaning routine much easier. The biggest improvement came when I stopped treating tile like carpet and started focusing on loose grit, grout lines, and the correct vacuum head.
Tile is a hard surface, but dirt still hides in surprising places. This guide covers the method I use for everyday home hygiene, including tools, settings, grout cleaning, frequency, common mistakes, and when to mop afterward.
In This Guide
- What Is the Best Way to Vacuum Tile Floors?
- Which Vacuum Settings and Attachments Work Best on Tile?
- How Do You Vacuum Grout Lines, Edges, and Corners?
- How Often Should You Vacuum Tile Floors?
- What Mistakes Should You Avoid When Vacuuming Tile?
- Should You Mop Tile After Vacuuming?
- Frequently Asked Questions
What Is the Best Way to Vacuum Tile Floors?
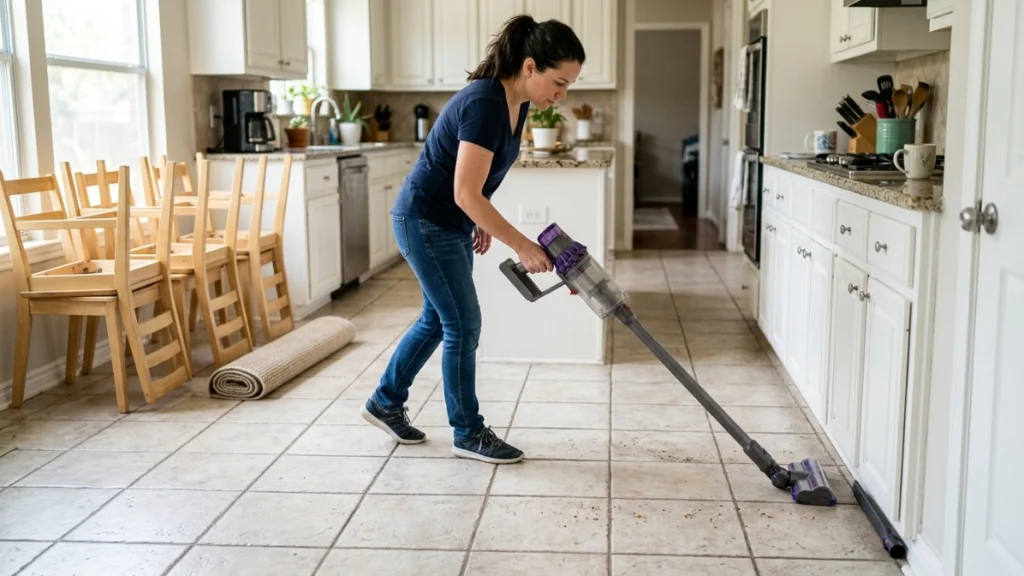
The best method is to remove obstacles first, vacuum loose debris slowly, clean the edges, and finish with the grout lines. You want to lift dirt from the floor rather than scatter it across the room.
Vacuuming tile floors means using suction to remove dry dust, hair, crumbs, grit, and other loose debris from tile and grout before any wet cleaning.
1. Prepare the Room First
I start by moving lightweight objects and picking up anything the vacuum could catch. A clear path makes it much easier to clean systematically.
- Pick up charging cables and electrical cords.
- Move small rugs and floor mats.
- Remove toys and lightweight decorations.
- Slide movable chairs aside where practical.
- Check for coins, screws, or other hard objects.
I also look for wet spills before switching on a standard dry vacuum. Unless the manufacturer specifically says the machine handles liquids, I clean wet messes separately.
2. Check the Vacuum Before Starting
A packed dustbin or clogged floor head can weaken airflow. I usually spend a few seconds checking both before starting a larger tiled area.
- Dustbin or bag: Empty or replace it when needed.
- Floor head: Remove wrapped hair and visible debris.
- Filter: Maintain it according to the vacuum manufacturer’s instructions.
- Wheels: Check for trapped grit that could drag across the tile.
3. Start at the Far Side of the Room
I begin away from the exit and gradually work toward it. This keeps me from repeatedly walking across areas I’ve already cleaned.
Long, controlled passes usually work better than quick random movements. Tile lets dust move easily, so rushing can push lightweight debris away from the floor head.
4. Vacuum in Overlapping Passes
I slightly overlap each new pass with the previous one. That helps catch fine dust sitting near the edge of the vacuum head.
For visible grit, I sometimes approach the area from a second direction. This is especially useful around textured tile and recessed grout.
5. Finish With the Perimeter
Dust and pet hair often collect against cabinets, walls, appliances, and baseboards. I save those areas for a crevice tool or narrow attachment.
Section Takeaway: A good tile-vacuuming routine is simple: prepare the floor, use the correct setting, work slowly, and finish the edges and grout.
Which Vacuum Settings and Attachments Work Best on Tile?
A hard-floor setting, suction-only floor head, or gentle soft roller usually makes the most sense for tile. The ideal choice still depends on your vacuum and the tile manufacturer’s care instructions.
One feature I value on mixed-floor vacuums is control over the brush roll. Consumer Reports notes that turning a brush roll off can help stop debris from scattering on uncarpeted surfaces.
| Vacuum Tool or Mode | Best Use on Tile | Main Advantage | What to Watch For |
|---|---|---|---|
| Hard-floor head | Whole-room cleaning | Direct pickup of dry debris | Debris trapped under wheels or head |
| Soft roller | Fine dust and hair | Gentle contact with hard flooring | Hair wrapping around the roller |
| Brush roll off | Loose crumbs and grit | Reduces scattering on bare flooring | Not available on every vacuum |
| Crevice tool | Edges and deep grout lines | Concentrates suction in narrow spaces | Too slow for an entire floor |
| Robot vacuum | Routine maintenance | Automates light daily pickup | May miss edges and difficult grout |
Do You Need a HEPA Filter?
A high-efficiency particulate air, or HEPA, filter can be useful when fine household dust is a concern. The filter matters most when the vacuum’s overall design directs exhaust air through it properly.
The EPA explains that indoor dust can contain soil, pollen, mold spores, pet dander, skin flakes, and other particles. It also notes that cleaning and vacuuming can temporarily disturb settled dust.
You can read more in the EPA’s guidance on sources of indoor particulate matter.
How Do You Vacuum Grout Lines, Edges, and Corners?
Use the main floor head for the tile surface, then switch to a crevice attachment for dirt that remains in recessed grout or along walls. This targeted approach is faster than using a small attachment everywhere.
Grout is the part I inspect most closely after my first pass. Fine particles can remain below the level of the tile even when the surface already looks clean.
My Grout-Line Method
- Vacuum the main floor: Remove most loose debris first.
- Inspect the grout: Look across the floor from a low angle if possible.
- Attach the crevice tool: Use it where visible dirt remains.
- Follow the grout lines: Move steadily rather than scrubbing with the nozzle.
- Clean the perimeter: Finish beside walls, cabinets, and fixed appliances.
I avoid aggressively scraping a hard plastic nozzle across grout or tile. The vacuum should remove the debris through airflow, not force.
What About Textured Tile?
Textured tile can hold more fine grit than a smooth glazed surface. A second pass from another direction often exposes debris sitting in shallow surface patterns.
If dry vacuuming doesn’t remove stuck grime, that usually means you’re dealing with residue rather than loose debris. Save that problem for the appropriate wet-cleaning method.
How Often Should You Vacuum Tile Floors?
Vacuum tile whenever visible dust, crumbs, hair, or grit begins to build up. Busy kitchens, entrances, pet areas, and homes with children often need attention more frequently than low-traffic rooms.
I don’t use one rigid schedule for every room. I base it on how quickly the floor becomes dirty.
- Entryways: Check frequently because outdoor grit gets tracked inside.
- Kitchens: Vacuum when crumbs and food debris appear.
- Pet areas: Increase frequency during heavy shedding.
- Bathrooms: Remove hair and dry debris before wet cleaning.
- Low-traffic rooms: Vacuum as dust becomes noticeable.
Frequent removal of loose grit has another practical benefit. It keeps abrasive particles from being repeatedly walked across the floor.
As of 2026, the basic principle remains straightforward: clean based on actual soil levels rather than chasing an arbitrary schedule.
What Mistakes Should You Avoid When Vacuuming Tile?
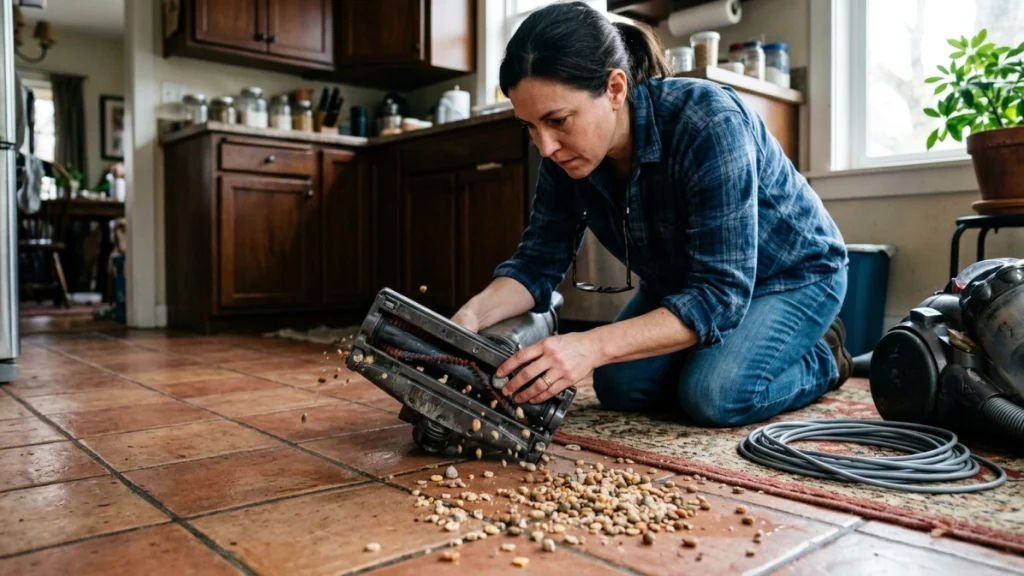
The most common mistakes are using the wrong floor setting, vacuuming wet material with a dry-only machine, ignoring trapped grit, and moving too quickly. Each can reduce cleaning quality or create unnecessary problems.
Using an Aggressive Carpet Brush Setting
A fast rotating carpet brush can scatter crumbs across smooth floors. If your vacuum offers a hard-floor mode or brush-roll shutoff, use the setting intended for bare flooring.
Vacuuming Wet Spills With a Dry Vacuum
Don’t assume a standard household vacuum can collect liquid. Use wet pickup only when the manufacturer specifically designed and approved the machine for it.
Expert Alert: Stop using a vacuum that has liquid inside electrical areas, damaged wiring, sparking, burning odors, or another electrical fault. Unplug it safely and have a qualified appliance technician inspect it.
Ignoring Dirt Under the Vacuum Head
A small stone caught under a wheel can follow you across an entire room. I check wheels and contact points whenever I hear an unusual scraping sound.
Rushing Over the Floor
Fast passes don’t give the floor head much opportunity to collect lightweight dust around grout and edges. Slow down around visibly dirty areas.
Trying to Vacuum Stuck-On Grime
Vacuuming removes loose dry material. It isn’t a replacement for cleaning oily residue, dried spills, or grime bonded to tile.
Section Takeaway: Use your vacuum for dry debris and let the correct wet-cleaning method handle stuck residue. Matching the tool to the mess gives better results.
Should You Mop Tile After Vacuuming?
Yes, when the tile has sticky residue, footprints, grease, or other soil that suction can’t remove. Vacuuming first keeps loose grit from mixing with water and spreading around during mopping.
The CDC distinguishes cleaning from disinfecting. Routine cleaning removes dirt and impurities, while disinfecting is a separate step that is generally more relevant when illness or another specific need is present.
For general household guidance, see the CDC’s information on cleaning and disinfecting your home.
Use a Cleaner Suitable for Your Tile
Not every tiled floor should receive the same cleaner. Ceramic, porcelain, and natural stone can have different care requirements, especially when grout or sealers are involved.
- Check the flooring manufacturer’s instructions.
- Use products labeled for the surface.
- Avoid leaving unnecessary standing water.
- Pay attention to grout and sealant condition.
- Test an unfamiliar cleaner in an inconspicuous spot when appropriate.
The EPA also recommends routine cleaning of household surfaces and notes that hard floors can be damp-mopped as part of controlling accumulated dust and biological contaminants. Its broader guidance is available on biological contaminants and indoor air quality.
Vacuuming and mopping therefore do different jobs. I think of vacuuming as the dry-debris stage and mopping as the residue-removal stage.
Frequently Asked Questions
Can you use a regular vacuum cleaner on tile floors?
Yes, if the vacuum is suitable for hard floors. A hard-floor head, suction-only mode, soft roller, or brush-roll shutoff can make cleaning smoother and reduce debris scattering.
Is vacuuming better than sweeping tile?
Vacuuming can collect dust, hair, crumbs, and grit without pushing as much debris around the room. Sweeping can still be useful for quick cleanup when a vacuum isn’t convenient.
Can a vacuum clean tile grout?
A vacuum can remove loose dry dirt from grout lines, especially with a crevice tool. It won’t remove stains, oily buildup, mildew, or material that has bonded to the grout.
Should I vacuum tile before mopping?
Yes. Removing crumbs, grit, pet hair, and dust first prevents those materials from mixing into the mop water and being dragged across the floor.
Can I use a robot vacuum on tile?
Most robot vacuums designed for hard floors can handle routine tile cleaning. They work well for light maintenance, but edges, deep grout lines, and difficult corners may still need manual attention.
Why does my vacuum push crumbs around on tile?
An active brush roll, excessive airflow at the front of the head, or moving too quickly can scatter lightweight debris. Try hard-floor mode, disable the brush roll if possible, and approach the debris more slowly.
Do tile floors need a special vacuum?
Not necessarily. You mainly need a vacuum that performs well on bare floors and has a floor head that won’t scatter debris or drag trapped grit across the surface.
Once you know how to vacuum tile floors, the job doesn’t need to be complicated. Clear the floor, use a suitable hard-floor setup, work methodically, clean grout and edges, and mop only when the remaining mess calls for it.
That simple routine is the one I keep coming back to. It removes the loose dirt first and makes every cleaning step that follows easier.