How to Vacuum the Trunk: A Complete Step-by-Step Guide

Quick Answer
To vacuum the trunk, empty it completely, remove loose mats and floor panels, loosen trapped dirt, then vacuum from the upper surfaces down to the carpet. Use a crevice tool around seams and corners, and choose an upholstery tool for carpeted surfaces. A vacuum with the right attachments makes tight trunk areas much easier to clean.
Quick trunk-vacuuming steps
- Empty the trunk: Remove bags, tools, emergency supplies, mats, and loose objects.
- Check for hazards: Pick up glass, screws, wet items, and anything that could damage the vacuum.
- Remove loose panels: Lift the trunk mat and spare-tire cover when your vehicle allows it.
- Loosen debris: Brush stubborn sand, hair, and grit away from carpet fibers and seams.
- Vacuum systematically: Clean the sides first, then the main floor, corners, seams, and storage wells.
- Finish dry: Deal with stains or dampness separately and let the area dry before replacing items.
I like cleaning a car trunk in the same order I clean a dusty room: clear the space, work from the edges inward, and save the main floor for last. That simple order keeps dirt from falling onto an area you already vacuumed.
The trunk can collect sand, dried mud, crumbs, pet hair, leaves, road dust, and debris from shopping bags. This guide shows how to vacuum the trunk thoroughly without turning a small cleaning job into an afternoon project.
In This Guide
What Do You Need to Vacuum a Car Trunk?
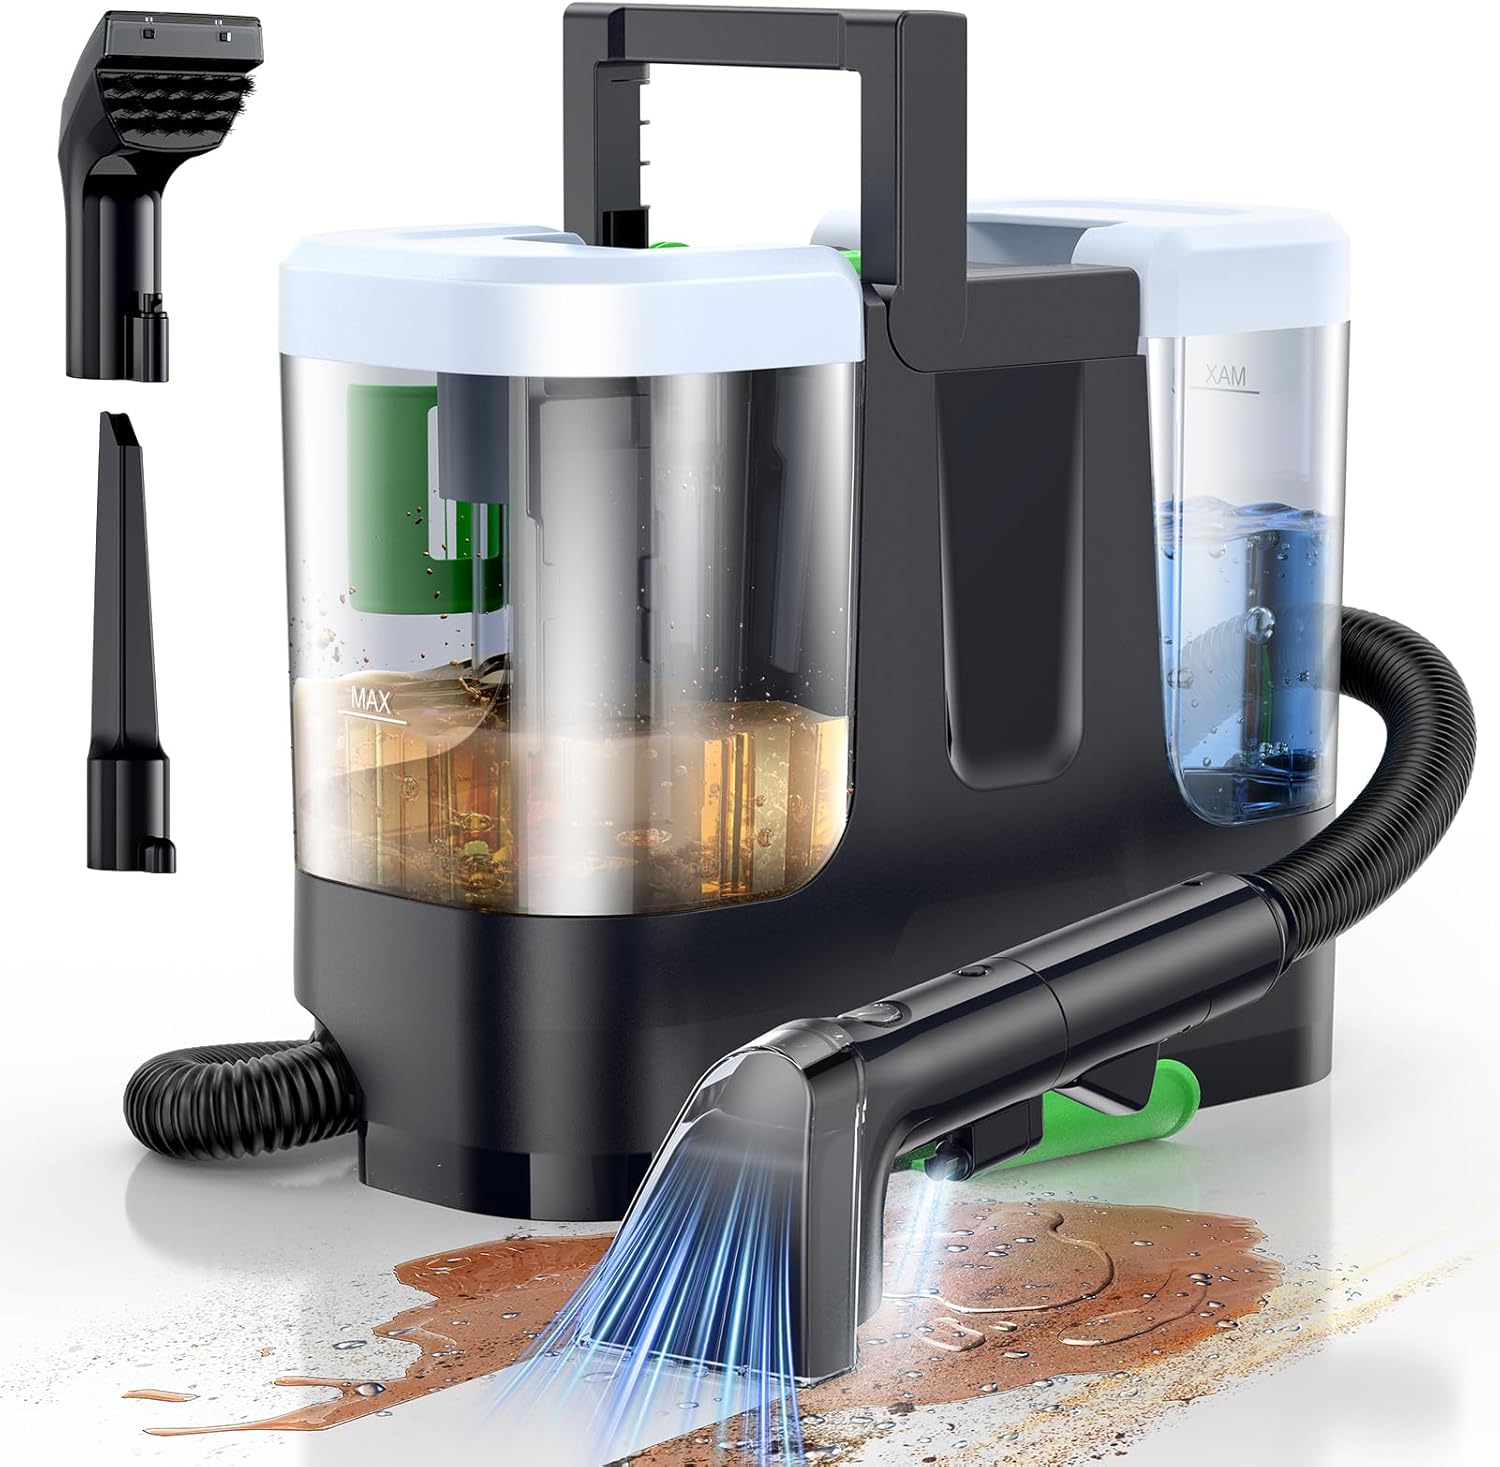
You usually need a vacuum, a crevice attachment, and a soft brush or upholstery tool. A small detailing brush can also help loosen debris before vacuuming.
A trunk vacuuming setup is simply a vacuum and attachments that can reach carpet, seams, storage pockets, and narrow gaps without damaging the interior.
Useful tools for the job
- Vacuum cleaner: A household canister, shop vacuum, cordless stick, or handheld model can work if it suits the surface and debris.
- Crevice tool: Use it around seat backs, hinges, carpet edges, seams, and narrow storage areas.
- Upholstery tool: Its wider opening helps cover larger sections of trunk carpet.
- Soft detailing brush: Use it to loosen dust from trim, grooves, and textured plastic.
- Stiff carpet brush: It can release embedded sand and some pet hair before vacuuming.
- Microfiber cloth: Use this after vacuuming to wipe hard plastic or painted surfaces.
As of 2026, vacuum types still vary widely in size, filtration, attachments, and intended cleaning jobs. Consumer Reports recommends considering attachments when choosing a vacuum because tools such as crevice and upholstery attachments serve different surfaces and hard-to-reach areas.
| Tool | Best Trunk Use | Main Limitation |
|---|---|---|
| Crevice tool | Corners, seams, gaps, hinges | Slow on large carpet areas |
| Upholstery tool | Main carpet and fabric panels | May not reach narrow gaps |
| Soft brush | Dusty trim and textured surfaces | Not ideal for embedded grit |
| Handheld vacuum | Quick cleanups and small trunks | Smaller bin and limited reach |
| Shop vacuum | Heavy grit and larger debris | Bulkier than a handheld vacuum |
How Should You Prepare the Trunk Before Vacuuming?
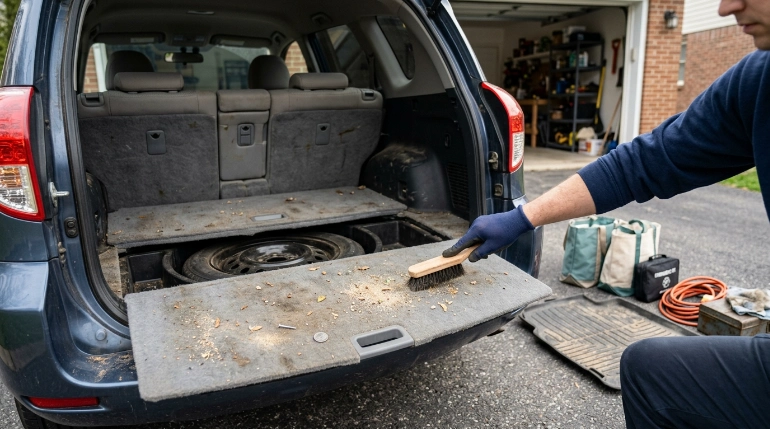
Empty the trunk completely before switching on the vacuum. Removing everything exposes hidden dirt and keeps small valuables from disappearing into the vacuum.
This preparation step often determines how thorough the final result looks. Dirt likes to collect beneath mats, cargo organizers, spare-tire covers, and items that rarely move.
1. Remove everything you can
Take out groceries, tools, sports gear, reusable bags, emergency supplies, cargo organizers, and loose accessories. Set important items somewhere clean and dry.
Remove the trunk mat if it lifts out easily. Vacuuming it outside the vehicle gives you better access to both sides.
2. Inspect the floor before vacuuming
Look closely for objects that should be picked up by hand. A vacuum is designed for ordinary debris, not every object that lands in your trunk.
- Broken glass
- Screws and nails
- Coins
- Large stones
- Sticky food
- Wet paper
- Leaking containers
- Loose cords or straps
Wear suitable gloves if you discover sharp debris. Never run your fingers blindly through carpet where broken glass may be hidden.
3. Check under the floor panel
Many trunks have a removable or hinged panel above the spare tire or storage compartment. Lift it according to your vehicle’s design and check underneath.
I find this area easy to forget because the visible carpet may look clean. Yet leaves, dust, tiny stones, and spilled cargo debris can work their way below the panel.
4. Loosen dry debris
Use a clean brush to lift compacted sand, dried mud, and debris from carpet fibers. Brush the material toward an open area where the vacuum can collect it.
Don’t scrub delicate fabric aggressively. Start gently and increase pressure only when the material can handle it.
How Do You Vacuum the Trunk Step by Step?
Vacuum the trunk from the upper and outer areas toward the main floor. Finish with corners and narrow seams so displaced dirt gets collected instead of left behind.
For an ordinary trunk, I use one repeatable sequence. It prevents me from jumping between clean and dirty sections.
Step 1: Start with the seat backs and side panels
If the rear seat backs are carpeted, vacuum them first. Move next to fabric side panels, ledges, and other raised surfaces.
Use a soft brush or upholstery attachment where appropriate. Avoid dragging a hard nozzle across delicate trim.
Step 2: Vacuum the main carpet
Use overlapping passes across the trunk floor. Move slowly enough for the nozzle to collect loose debris instead of simply pushing it around.
Change direction for the second pass if the carpet holds visible grit. Sand and hair can sit between fibers and become easier to collect from another angle.
Step 3: Switch to the crevice tool
The wide floor area is only part of the job. Much of the stubborn debris hides around edges.
Use the crevice tool in these locations:
- Along the rear edge of the trunk
- Where carpet meets plastic trim
- Around cargo hooks
- Beside the rear seat backs
- Inside narrow storage pockets
- Around hinges and recessed areas
- Along the spare-tire compartment edge
Step 4: Vacuum removable mats separately
Lay the mat on a clean, dry surface. Vacuum the top, then flip it over and clean loose dirt from the underside.
If it is carpeted, brush embedded grit before making another vacuum pass. Rubber or plastic cargo liners can usually be wiped or washed separately according to their care instructions.
Step 5: Clean underneath the cargo floor
Vacuum loose dirt from accessible storage wells and the spare-tire area. Keep the nozzle away from delicate wiring, connectors, and loose vehicle components.
If you’re unsure whether a component should be touched, leave it alone. Cleaning visible loose debris is enough.
Step 6: Make one final inspection
Look at the carpet from several angles. Sand and pet hair often become easier to see when the light hits the fibers differently.
Finish with another crevice-tool pass around the perimeter. Then wipe dusty hard surfaces with a clean microfiber cloth.
The EPA notes that vacuuming can stir some dust into the air and suggests a vacuum with HEPA filtration as one way to reduce the amount of collected dust escaping back from the vacuum.
Section Takeaway: Empty first, vacuum high areas before the floor, then finish with the crevice tool. A consistent order makes it much harder to miss hidden debris.
How Do You Remove Pet Hair, Sand, and Embedded Dirt?
Loosen difficult debris before trying to vacuum it repeatedly. A brush, rubber tool, or change in vacuuming direction can make embedded material easier to collect.
Pet hair
Pet hair often grips automotive carpet instead of sitting loosely on top. Vacuum the easy material first so you can see what remains.
Then use a suitable carpet brush or rubber pet-hair tool to gather the remaining hair into small piles. Vacuum those piles before they spread again.
Work gently near thin side-panel fabric. Aggressive brushing can roughen delicate material.
Sand and fine grit
Sand tends to settle deep in short trunk carpet. A single fast vacuum pass may leave plenty behind.
- Vacuum once in the normal direction.
- Brush the carpet lightly to lift trapped grit.
- Vacuum across the first direction.
- Use the crevice tool around carpet edges.
- Repeat only where grit remains visible.
Dried mud
Let ordinary mud dry before vacuuming loose material unless you are using equipment specifically designed for wet pickup. Trying to vacuum sticky mud with a dry-only vacuum can create a mess inside the machine.
Once dry, break the soil apart carefully with a brush. Vacuum the loosened dirt, then treat any remaining stain separately.
Crumbs and food debris
Remove large pieces by hand first. Then vacuum seams and storage pockets where crumbs tend to collect.
Food residue deserves attention because vacuuming removes particles but does not necessarily remove a sticky spill. Clean residue with a product suitable for the specific trunk material.
What Should You Do About Dampness, Odors, or Mold?
Do not treat a damp trunk as a normal dry-vacuuming job. Find the moisture source, remove wet materials, and dry the area before putting cargo and mats back.
A musty odor can be a warning that moisture has remained trapped somewhere. Check beneath the floor panel, around the spare-tire well, and under removable mats.
If the carpet is simply damp
- Remove damp cargo and mats.
- Blot accessible liquid instead of spreading it.
- Use wet-pickup equipment only if the vacuum is designed for that purpose.
- Allow the trunk to dry fully.
- Check again for moisture before reinstalling the mat.
If water keeps returning, cleaning is not the complete fix. A leaking seal, body opening, drain problem, or other vehicle issue may need inspection.
If you see or smell mold
The EPA explains that moisture control is central to preventing and addressing mold. Its mold and moisture guidance stresses dealing with the moisture problem rather than cleaning visible growth alone.
For a vehicle, that means identifying why the trunk became wet. Simply vacuuming visible debris won’t solve recurring dampness.
The CDC also provides mold cleanup guidance and warns against mixing bleach with ammonia or other cleaners. I would avoid experimenting with strong chemical mixtures on trunk upholstery or enclosed vehicle interiors.
Expert Alert: If mold covers a substantial area, keeps returning, follows significant water intrusion, or involves materials you cannot safely remove and dry, consider a qualified mold-remediation or automotive water-leak professional instead of relying on DIY vacuuming.
Section Takeaway: Vacuuming removes loose debris, but moisture problems need moisture control. A trunk that repeatedly becomes damp needs diagnosis, not stronger vacuuming.
Frequently Asked Questions
Can I use a regular household vacuum in my car trunk?
Yes, if the vacuum has suitable attachments and the debris is within its intended use. A canister vacuum with a hose can work well because the main machine can stay outside the trunk while the tools reach inside.
Is a handheld vacuum strong enough for a trunk?
A handheld vacuum can work well for routine crumbs, dust, and small debris. A heavily soiled trunk with lots of embedded sand or pet hair may take longer because handheld models usually have smaller bins and cleaning heads.
What vacuum attachment is best for a car trunk?
A crevice tool is best for seams, corners, storage gaps, and carpet edges. An upholstery attachment is more practical for the broad carpeted floor, so using both usually gives better coverage.
Should I vacuum under the spare tire?
You can clean accessible loose debris in the spare-tire compartment if your vehicle allows safe access. Follow the owner’s manual for removing or moving components, and avoid disturbing wiring, tools, sensors, or equipment you don’t recognize.
How often should I vacuum my trunk?
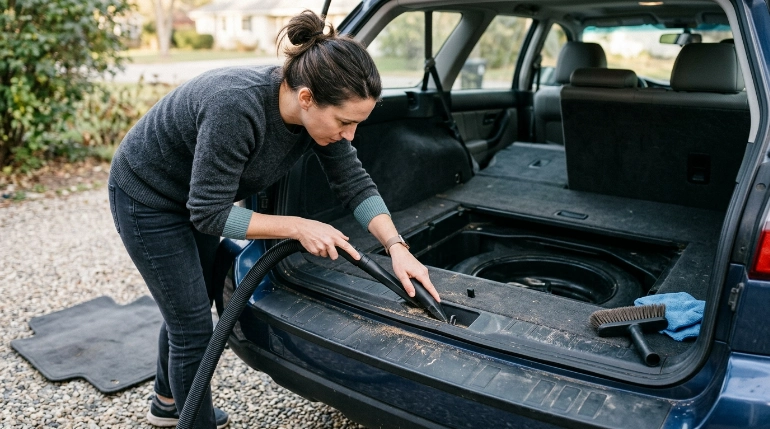
There is no universal schedule. Vacuum when visible dirt accumulates, after carrying messy cargo, after transporting pets, or whenever sand, leaves, crumbs, and other debris start collecting around the carpet and seams.
Can I vacuum a wet trunk?
Only use a vacuum for liquid pickup if its manufacturer says it is designed for wet use. A normal dry vacuum should not be used to collect standing water or wet debris.
Why does my trunk still smell after vacuuming?
Vacuuming removes loose particles but may not remove the source of an odor. Check for spilled liquids, damp carpet, spoiled food, pet accidents, contaminated cargo liners, or water beneath the trunk floor.
Final Takeaway
Learning how to vacuum the trunk is mostly about cleaning in the right order. Empty everything, inspect for hazards, loosen trapped debris, vacuum broad surfaces, and finish with the narrow seams.
Don’t ignore the hidden areas beneath mats and removable floor panels. Those spaces can hold much more dirt than the visible carpet suggests.
For routine cleaning, a crevice tool and upholstery attachment handle most of the work. Pet hair and sand usually need brushing before another vacuum pass.
If the trunk is damp or musty, solve the moisture problem before treating it as a normal cleaning job. Once everything is clean and fully dry, return only the items you actually need and keep the cargo area easier to maintain next time.