How to Vacuum an RV: A Complete Step-by-Step Guide

Quick Answer
To vacuum an RV, remove loose items first, shake out removable mats, then vacuum from high surfaces down to the floor. Use a crevice tool around cabinets and seat rails, an upholstery tool on fabric, and the correct floor head for carpet or hard flooring. A vacuum with good filtration can also help control fine dust; the EPA’s indoor particulate matter guidance discusses regular cleaning and HEPA-filter vacuums for reducing household dust.
Quick RV Vacuuming Steps
- Clear the space: Remove shoes, bags, pet items, bedding, and anything blocking the floor.
- Work high to low: Vacuum cushions, beds, window areas, and furniture before cleaning the floor.
- Clean tight gaps: Use a crevice tool around cabinets, dinette bases, corners, vents, and seat tracks.
- Match the floor: Use a suitable brush setting for carpet and a gentle floor head for vinyl, laminate, or other hard surfaces.
- Finish at the exit: Vacuum toward the RV door so you do not walk across freshly cleaned flooring.
- Empty outdoors: Empty the bin or change the bag outside when practical to avoid releasing collected dust inside.
Vacuuming an RV looks simple until you start finding crumbs behind the dinette, sand beside the slide, and pet hair under the bed. The small floor plan actually creates more tight spaces than many rooms at home.
This guide explains how to vacuum an RV efficiently without turning the job into an all-day project. The approach works for travel trailers, fifth wheels, camper vans, and many motorhomes.
Definition: RV vacuuming is the systematic removal of dust, dirt, hair, crumbs, and loose debris from an RV’s floors, furniture, sleeping areas, storage edges, and hard-to-reach spaces.
In This Guide
What Do You Need Before Vacuuming an RV?
You need surprisingly little equipment. The most useful setup combines a maneuverable vacuum with a few attachments that reach places a full-size floor head cannot.
Start by checking your RV flooring and your vacuum manufacturer’s instructions. Some aggressive rotating brushes can be unnecessary on delicate hard flooring.
Useful RV vacuuming tools
- Vacuum cleaner: A cordless stick, compact canister, handheld, or wet/dry model can work depending on your RV.
- Crevice tool: Essential for wall edges, seat tracks, cabinet gaps, and narrow spaces beside furniture.
- Upholstery tool: Useful for dinette cushions, fabric seating, mattresses, and upholstered trim.
- Soft dusting brush: Helps clean delicate surfaces, fabric blinds, and some vent covers.
- Small brush: Loosens dry debris from corners before vacuuming.
- Microfiber cloth: Picks up settled dust on surfaces that are awkward to vacuum.
I recommend removing as much loose clutter as possible before switching on the vacuum. Moving the same shoes, bags, and charging cables repeatedly slows the entire job.
Prepare the RV first
- Open the door and ventilate the RV when conditions allow.
- Remove trash and food packaging.
- Take removable rugs and mats outside.
- Shake loose dirt from the mats outdoors.
- Move lightweight objects off the floor.
- Lift cushions when their design allows it.
- Check beneath tables and retractable furniture for small objects.
Look for coins, screws, stones, cable ties, or larger food pieces before vacuuming. These items can obstruct a hose or damage some floor heads.
How Do You Vacuum an RV Step by Step?
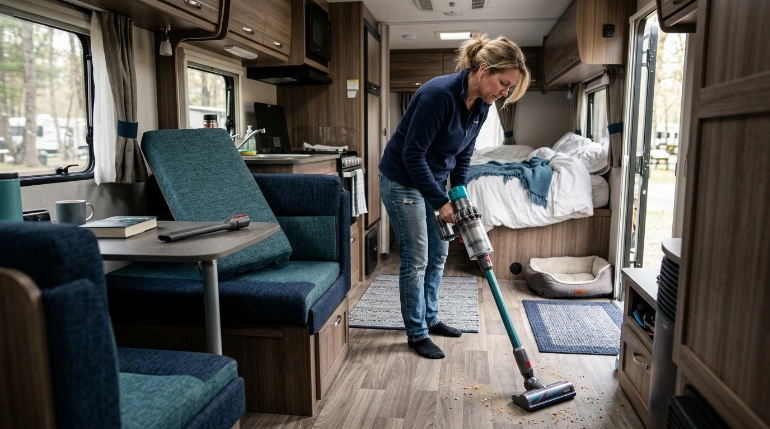
The easiest method is to work from the highest dusty surfaces toward the floor, then move from the back of the RV toward the exit. This keeps falling debris from landing on an area you already cleaned.
1. Start with beds and upper fabric surfaces
Remove loose bedding if you plan to clean the mattress. Use an upholstery attachment with controlled suction rather than dragging a hard floor nozzle across the fabric.
Vacuum the mattress surface, seams, and accessible edges. Pay extra attention to the wall side because dust and hair often collect where access is limited.
2. Vacuum sofas and dinette cushions
Remove cushions when practical and vacuum both the exposed seat platform and cushion surfaces. Crumbs often fall between cushions and collect along the back edge.
- Vacuum cushion faces.
- Clean seams and piping.
- Use the crevice tool between cushions.
- Vacuum beneath removable cushions.
- Check around seat-belt hardware.
3. Clean window edges and accessible vents
Use a soft brush attachment for dusty window ledges and similar areas. Keep the nozzle from scraping screens, shades, or delicate trim.
For vent covers, vacuum only accessible surface dust unless the RV or appliance manual provides a deeper cleaning procedure. Do not insert tools into powered equipment.
4. Reach under cabinets and furniture
This is where the crevice tool earns its place. Run it along cabinet toe kicks, wall edges, under the dinette, and around fixed furniture.
Check the narrow gap beside the refrigerator and other appliances only when the area is safely accessible. Never force a vacuum tool around wiring, gas lines, or hot equipment.
5. Vacuum the main floor
Begin at the farthest point from the RV door. Work in overlapping passes and finish at the entrance.
- Vacuum open floor areas first.
- Clean along walls and cabinet edges.
- Go beneath the table and accessible furniture.
- Vacuum around the slide area carefully.
- Finish the entry steps and doorway last.
6. Empty the vacuum after cleaning
A small RV can still produce a surprising amount of sand, hair, and fine dust. Check the bin or bag before storing the vacuum.
Empty a bagless bin outside when possible. Clean or replace filters according to the vacuum manufacturer’s instructions rather than automatically washing them.
Section Takeaway: Vacuum high surfaces first, floors last, and move toward the RV door. That simple order prevents repeated work.
Which Type of Vacuum Works Best in an RV?
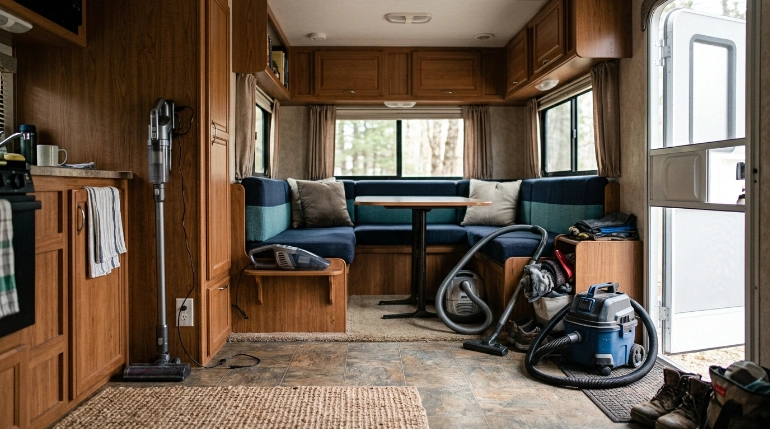
There is no single best vacuum type for every RV. Storage space, electrical access, floor material, pets, and the amount of dirt you track inside all matter.
| Vacuum Type | Power Source | Best RV Use | Main Trade-Off |
|---|---|---|---|
| Cordless stick | Rechargeable battery | Routine floors, rugs, quick whole-RV cleaning | Runtime and charging space depend on the model |
| Handheld | Battery, 12-volt, or other model-specific supply | Crumbs, seats, steps, corners, small spills | Small bin and slower for full floors |
| Compact canister | Usually AC power | Detailed cleaning with hose attachments | Needs more storage space |
| Wet/dry vacuum | Battery or AC, depending on model | Heavy debris and liquid pickup when specifically rated for it | Often bulkier and louder |
Cordless stick vacuum
A cordless stick is convenient when you want one tool for most routine cleaning. The slim shape also tends to fit RV storage better than a traditional upright.
Check battery runtime, storage dimensions, attachments, and whether the floor head suits your RV flooring. Manufacturer specifications matter more than marketing labels.
Handheld vacuum
A handheld works well for quick cleanup after meals or campground stops. It is especially useful on steps, dinette seats, and vehicle-style cab areas.
The downside is capacity. Cleaning a larger fifth wheel entirely with a tiny handheld can become tedious.
Wet/dry vacuum
A wet/dry vacuum makes sense for messier camping situations. Only use it for liquid pickup when the manufacturer specifically rates and configures that model for wet use.
Never assume a normal household vacuum can collect water. Mixing liquid with equipment designed only for dry debris can create serious damage or electrical danger.
How Do You Vacuum Different RV Surfaces?
RV interiors combine several materials within a small area. Adjusting your technique protects those surfaces and improves debris pickup.
RV carpet and rugs
Vacuum slowly enough for the floor head to collect embedded grit. Make several passes through high-traffic areas near the entrance and dinette.
- Shake removable rugs outside first.
- Use the carpet setting recommended for your vacuum.
- Work in overlapping passes.
- Use a crevice tool along wall edges.
- Check beneath rugs for trapped sand.
Vinyl, laminate, and other hard flooring
Hard RV floors usually hold loose crumbs, grit, hair, and sand near walls. A floor head suitable for hard surfaces helps collect debris without unnecessarily scattering it.
Do not assume every rotating brush should stay engaged. Follow both the flooring and vacuum manufacturer’s care instructions when you are unsure.
Upholstery and dinette seating
A compact upholstery tool provides more control than a large floor head. Use the crevice attachment around seams and between fixed cushions.
If fabric is loose or delicate, reduce suction when your vacuum allows it. Stop if the nozzle pulls or distorts the material.
Mattresses
Remove bedding and vacuum the exposed mattress using a clean upholstery tool. Pay attention to seams, edges, and the area near the wall.
Vacuuming removes loose surface debris. It is not a substitute for dealing with a moisture problem beneath or around the mattress.
Cab and driving areas
Motorhomes and camper vans often collect outdoor debris around pedals, seat rails, and door pockets. A handheld vacuum and crevice tool work well in these compact spaces.
Park safely and switch the vehicle off before detailed cleaning. Avoid disturbing wiring and electronic connectors under powered seats.
Section Takeaway: Match the attachment to the surface. A crevice tool, upholstery tool, and suitable floor head cover most RV vacuuming jobs.
How Do You Handle Fine Dust, Pet Hair, and Allergens?
Fine campground dust and pet hair can spread throughout an RV quickly. Regular removal matters because the interior is compact and contains many fabric surfaces.
The EPA notes that regular cleaning helps reduce indoor particulate buildup and that a HEPA-filter vacuum can help keep some collected dust from escaping back into the air.
For fine dust
- Vacuum slowly instead of making fast passes.
- Use the crevice tool along edges where dust accumulates.
- Wipe remaining surface dust with a damp microfiber cloth.
- Check the vacuum filter regularly.
- Empty the collection bin outside when practical.
The Asthma and Allergy Foundation of America also recommends controlling indoor allergens through cleaning and reducing allergen sources. Its guidance notes that vacuum quality and dust containment matter.
For pet hair
Start with upholstery before cleaning the floor. Hair that falls from seating or bedding can then be collected during the final floor pass.
- Vacuum pet bedding separately.
- Use a suitable upholstery or pet-hair tool.
- Clean cushion seams carefully.
- Check beneath dinette seats and beds.
- Remove hair from the vacuum brush roll as directed by the manufacturer.
What about mold or damp carpet?
Do not treat visible mold as an ordinary vacuuming problem. Moisture control comes first because mold can grow on damp carpet, upholstery, wood, and other RV materials.
The CDC’s mold information explains that mold grows where moisture is present. The EPA’s mold cleanup guidance also emphasizes fixing water problems and drying affected materials.
Expert Alert: If mold is widespread, keeps returning, is hidden inside walls or flooring, or follows significant water intrusion, contact a qualified RV repair or mold-remediation professional instead of relying on vacuuming alone.
What about wet debris?
Do not vacuum water with an ordinary dry vacuum. Use a wet/dry machine only when its instructions specifically allow liquid pickup.
Investigate the source of recurring moisture before cleaning the area repeatedly. Roof leaks, plumbing leaks, window intrusion, and condensation can require professional repair.
Frequently Asked Questions
How often should you vacuum an RV?
Vacuum high-traffic areas whenever visible dirt, crumbs, sand, or pet hair accumulates. During active trips, a quick floor cleanup every few days can be easier than waiting for debris to spread through the RV.
Can you use a regular household vacuum in an RV?
Yes, if you have enough storage space and a suitable power source. A compact canister or stick vacuum is often easier to maneuver around narrow RV aisles and fixed furniture than a large upright.
Is a cordless vacuum good for an RV?
A cordless vacuum can be convenient because you do not need to move a power cord through a small interior. Check runtime, charging requirements, storage size, filtration, and included attachments before choosing one.
Should I use a HEPA vacuum in my RV?
A vacuum with effective HEPA filtration can be useful when fine dust containment is a priority. The overall design still matters because filtration works best when collected air and dust do not leak around the filter or housing.
Can I vacuum RV air vents?
You can gently vacuum accessible surface dust from many vent covers with a suitable attachment. Do not push tools deep into electrical, heating, cooling, or appliance components unless the manufacturer’s cleaning instructions specifically tell you to do so.
How do I get sand out of an RV carpet?
Remove loose mats first, then vacuum the carpet slowly in overlapping passes. A second pass from another direction can help collect grit left between carpet fibers, especially near the entrance.
Can I vacuum a damp RV carpet?
Not with a standard dry vacuum. Find the moisture source first, then use equipment specifically designed for wet pickup if appropriate and follow the manufacturer’s instructions.
Keep Your RV Cleaner Between Trips
Learning how to vacuum an RV is mostly about using the right order. Clear clutter, work from high areas downward, detail the tight spaces, and finish the floor near the door.
Small habits also make the next cleanup easier. Shake outdoor dirt from shoes, clean spills promptly, maintain your vacuum filters, and deal with moisture as soon as you notice it.
- Keep a small doormat at the entrance.
- Store a crevice tool with the vacuum.
- Vacuum crumbs soon after meals.
- Clean pet bedding regularly.
- Check corners for moisture while cleaning.
- Empty the vacuum before long-term storage.
As of 2026, the basic approach has not changed: remove debris without redistributing it, protect each surface, and address moisture separately from ordinary dry cleaning. A simple routine keeps the RV easier to maintain before, during, and after a trip.