How to Vacuum a Garage: Safe Step-by-Step Cleaning Guide

Quick Answer
To vacuum a garage, remove large objects first, choose a vacuum suited to the debris, clean high surfaces before the floor, and work from the farthest corner toward the door. For renovation dust, choose a properly designed HEPA vacuum rather than relying on a basic shop vacuum with an added filter.
Quick garage vacuuming steps
- Clear the floor: Move vehicles, boxes, tools, cords, and loose objects out of your cleaning path.
- Remove large debris: Pick up nails, glass, bolts, large stones, and anything that could damage the vacuum.
- Check the mess: Identify ordinary dirt, fine construction dust, liquids, mold, or rodent waste before vacuuming.
- Start up high: Vacuum shelves, ledges, corners, and workbenches before cleaning the floor.
- Clean the edges: Use a crevice tool along walls, cabinets, garage-door tracks, and floor joints.
- Finish the floor: Vacuum in steady lanes toward the open garage door so you don’t walk through cleaned areas.
Stop before vacuuming if you find:
- Fuel or solvents: Never pick up gasoline or other flammable liquids with an ordinary vacuum.
- Rodent waste: Don’t dry-vacuum mouse or rat droppings.
- Heavy construction dust: Use dust-control equipment suited to the material.
A garage collects a different mix of dirt than most rooms. I usually find road grit, leaves, sawdust, cobwebs, dried mud, small stones, and dust hiding along the walls.
I learned that simply pushing a vacuum around the middle of the floor leaves half the mess behind. A better method starts with preparation and follows a clear top-to-bottom order.
In This Guide
What Vacuum Should You Use in a Garage?
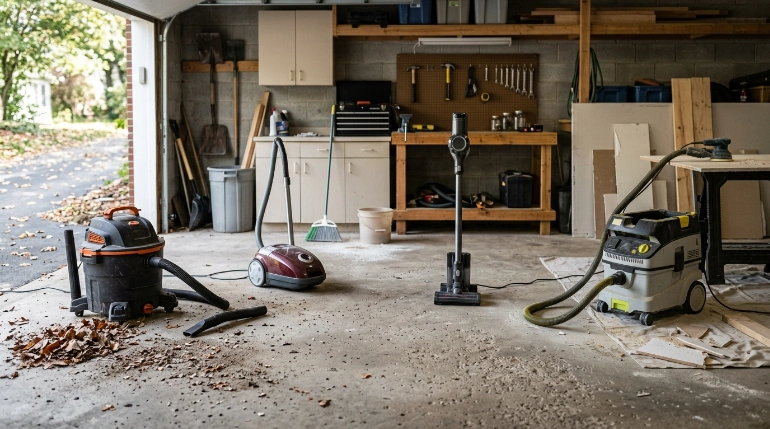
For most unfinished garages, I prefer a wet/dry vacuum because it handles rough floors and larger dry debris better than a typical household vacuum. The right choice still depends on what you’re trying to collect.
Garage vacuuming means removing loose dirt and debris from garage floors, edges, shelves, cracks, and storage areas with a vacuum designed for the material being collected.
Wet/dry shop vacuum
A wet/dry vacuum is my normal choice for a concrete garage floor. It can handle dust, dried mud, leaves, small gravel, and similar garage debris when fitted correctly.
Many models can also collect water. You must set the machine up for wet pickup exactly as its manufacturer requires.
Household upright or canister vacuum
I reserve a household vacuum for finished garage spaces with light, dry household-type dust. Sharp screws, stones, workshop debris, and liquids can damage equipment that wasn’t made for those materials.
Cordless stick or handheld vacuum
A cordless vacuum works well for quick maintenance. I use one for light dirt near a doorway, workbench, or vehicle between deeper cleanings.
Its smaller bin and narrower passages can make heavy garage cleanup frustrating. Large debris can also clog some models.
HEPA vacuum or dust extractor
A High Efficiency Particulate Air, or HEPA, vacuum is the better tool when hazardous or extremely fine renovation dust is involved. A HEPA filter alone doesn’t automatically turn every basic vacuum into a sealed HEPA vacuum system.
| Vacuum Type | Typical Dry Garage Debris | Liquid Pickup | Fine Renovation Dust | Best Use |
|---|---|---|---|---|
| Wet/dry vacuum | Good | Yes, when configured for wet pickup | Only with suitable filtration and design | General garage cleaning |
| Household upright/canister | Light debris only | Usually no | Usually not appropriate | Finished garage spaces |
| Cordless stick/handheld | Light debris | Model-dependent | Not my first choice | Quick touch-ups |
| HEPA vacuum/dust extractor | Good | Model-dependent | Best option when designed for the dust involved | Fine or renovation dust |
How Should You Prepare a Garage Before Vacuuming?
Prepare the space before switching on the vacuum. Ten minutes of setup can make the actual vacuuming much faster.
I also try to avoid creating a new dust cloud while preparing. The EPA discusses ventilation, filtration, and source control as ways to reduce exposure to indoor air pollutants.
Clear your cleaning path
Move the vehicle outside when practical. Shift bicycles, trash cans, portable shelves, boxes, extension cords, and tools away from the section you’re cleaning.
I don’t try to empty the whole garage unless necessary. I divide it into zones when storage makes a full clear-out unrealistic.
Pick up anything the vacuum shouldn’t swallow
- Large screws and nails: Pick them up by hand while wearing suitable gloves.
- Broken glass: Remove large or sharp pieces carefully before vacuuming tiny remaining fragments.
- Long wire or string: Keep it away from rotating brushes and vacuum inlets.
- Large stones: Remove anything too large for the hose or floor nozzle.
- Unknown chemicals: Identify the material before trying to vacuum it.
Check the vacuum before starting
A clogged filter or nearly full tank can make a good vacuum feel weak. I inspect the tank, hose, filter, floor nozzle, and cord before a longer garage cleanup.
- Empty a nearly full collection tank or bag.
- Install the correct filter for the job.
- Check the hose for clogs.
- Choose a floor nozzle for open areas.
- Keep a crevice tool ready for edges.
- Follow the manual before switching between wet and dry pickup.
How Do You Vacuum a Garage Step by Step?
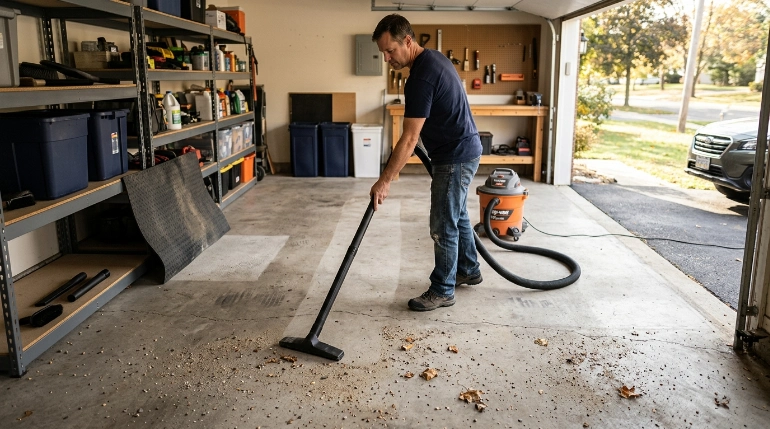
The easiest method is to work from high surfaces to low surfaces and from the back of the garage toward the exit. That keeps falling dust from landing on an area you’ve already finished.
I used to begin with the center of the concrete floor because it looked dirtiest. Then I would clean shelves and knock fresh dust straight onto my clean floor.
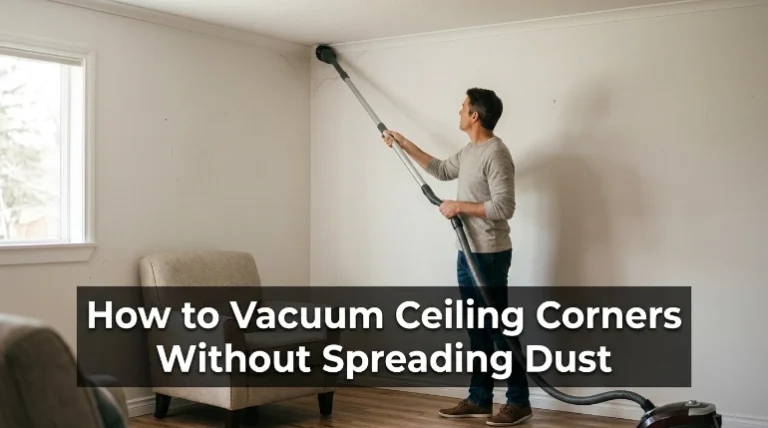
1. Vacuum ceiling corners and cobwebs
Start with an extension wand or suitable brush attachment. Vacuum reachable ceiling corners, wall junctions, exposed ledges, and obvious cobwebs.
Don’t stretch from an unstable chair or box to reach high areas. Use a safe access method or leave inaccessible areas alone.
2. Clean shelves and work surfaces
Remove loose items when practical, then vacuum exposed shelf surfaces. Pay special attention behind containers that haven’t moved for months.
A soft brush attachment works better than a wide floor tool here. It gives you more control around tools and stored items.
3. Vacuum along the garage perimeter
Next, use the crevice tool where the wall meets the floor. Dirt tends to gather there because tires and foot traffic push debris toward the edges.
- Work behind movable storage bins.
- Clean around cabinet feet.
- Vacuum accessible floor expansion joints.
- Clean loose debris from around door edges.
- Check behind freezers or appliances if they can be moved safely.
4. Vacuum under mats and movable equipment
Lift garage mats instead of vacuuming only around them. Dirt, sand, moisture, and leaves often collect underneath.
I vacuum the exposed floor first. I then clean the mat separately before putting it back.
5. Vacuum the main garage floor in lanes
Begin at the farthest point from the exit. Work in lanes about the width of your floor nozzle.
Move steadily rather than racing across the concrete. Give the nozzle time to collect grit from textured areas and shallow joints.
- Start in one back corner.
- Make one pass toward the garage door.
- Move sideways roughly one nozzle width.
- Return along the next lane.
- Repeat until the open floor is finished.
6. Make a final edge pass
Once the center is clean, check the perimeter again. Your main floor passes may have pushed a few pieces of debris toward cabinets or walls.
Finish around the threshold last. This is where leaves, sand, and road grit often collect again while you’re working.
Section Takeaway: Vacuum from the highest dusty surfaces downward, then clean the floor from the back of the garage toward the exit. This order prevents repeated work.
What Garage Messes Should You Handle Differently?
Not everything on a garage floor belongs inside a normal vacuum. Stop and identify unusual material before treating it like ordinary dirt.
Fine concrete, mortar, or masonry dust
Concrete, mortar, stone, and similar materials can contain crystalline silica. OSHA provides specific information about crystalline silica hazards and dust-control practices.
A small amount of ordinary settled household dust on a concrete floor isn’t the same as dust created by grinding, cutting, drilling, or sanding masonry. Don’t treat a heavy layer of construction dust as a routine vacuuming job.
Expert Alert: If substantial concrete or masonry dust came from cutting, grinding, or renovation work, use appropriate dust-control equipment or call a qualified professional rather than improvising with a basic household vacuum.
Water and other nonflammable liquids
Only vacuum liquids with equipment specifically designed for wet pickup. Check its instructions because filter and bag requirements can change between dry and wet operation.
Never assume that every shop-style vacuum is ready for water just because its tank looks durable. Verify the model first.
Gasoline, solvents, and flammable materials
Don’t vacuum gasoline, fuel, paint thinner, solvent spills, or areas with flammable vapors using an ordinary electric vacuum. Remove ignition sources and follow the product’s spill instructions instead.
Also avoid vacuuming hot ashes, glowing material, or unknown powders. The risk isn’t worth saving a few minutes.
Mouse or rat droppings
This is one garage mess I would never dry-vacuum. CDC guidance says not to sweep or vacuum rodent urine, droppings, or nesting material because that can put contaminated particles into the air.
Follow the CDC’s rodent cleanup guidance before cleaning the surrounding garage normally.
Visible mold or damp, musty areas
Vacuuming alone doesn’t solve a moisture problem. CDC guidance says mold cleanup should go together with correcting the moisture source.
If you find recurring or widespread growth, review the CDC’s mold guidance instead of simply vacuuming over the area.
Expert Alert: Widespread mold, repeated water intrusion, sewage contamination, or a major hidden moisture problem deserves professional assessment rather than a routine DIY vacuuming session.
Section Takeaway: Ordinary dirt can usually be vacuumed normally. Construction dust, flammable spills, rodent waste, and mold need separate safety decisions before the vacuum comes out.
How Often Should You Vacuum a Garage?
There isn’t one perfect schedule. I base garage vacuuming on traffic, season, hobbies, and how quickly debris returns.
A lightly used garage may need only occasional deep cleaning. A workshop or frequently opened garage can need quick vacuuming much more often.
Use the mess as your schedule
- After messy projects: Clean safe debris before it spreads into vehicles or the house.
- After windy days: Vacuum leaves, sand, and dirt that entered under an open door.
- During wet seasons: Watch for tracked mud and moisture around entrances.
- After car maintenance: Pick up safe solid debris once tools and chemicals are put away.
- When dust reaches the house: Clean the garage entry zone more often.
I find that a short maintenance pass prevents the big cleanup from becoming exhausting. The doorway, vehicle paths, workbench, and wall edges usually show dirt first.
Deep clean when quick passes stop working
A deeper clean makes sense when dust sits behind storage, cobwebs cover corners, or dirt remains under mats. That’s when I move more items and clean the garage zone by zone.
As of 2026, my practical rule remains simple: clean based on use rather than forcing every garage onto the same calendar.
How Do You Clean the Vacuum After Garage Use?
Garage debris can clog filters and hoses faster than light indoor dust. A few minutes of maintenance after cleaning helps keep the vacuum ready for the next job.
Empty the collection container
Don’t store the machine packed with damp dirt or a large load of garage debris. Empty the tank or bag according to the manufacturer’s directions.
If you collected approved liquids with a wet/dry model, empty and dry the tank promptly. Standing dirty water can create unpleasant odors.
Inspect the filter
Fine dust can coat a filter even when the tank isn’t full. Follow the manufacturer’s cleaning or replacement method rather than banging a delicate filter until it looks clean.
- Check for heavy dust buildup.
- Look for tears or damage.
- Confirm the filter is fully dry if washing is permitted.
- Replace disposable filters when required.
- Reinstall everything correctly before the next use.
Check the hose and attachments
Small stones, wood chips, leaves, and scraps can lodge inside bends. Reduced airflow during the next cleaning session is often my first clue that something remained in the hose.
Wipe dirty attachments before bringing them into the house. I also keep garage-specific nozzles separate when they get exposed to greasy floor dirt.
Frequently Asked Questions
Can you vacuum a concrete garage floor?
Yes. A suitable wet/dry or shop-style vacuum can work well on a concrete garage floor with ordinary dry dirt, leaves, grit, and similar debris. If the dust came from cutting or grinding concrete, treat it as construction dust and use appropriate dust controls.
Is a shop vacuum better than a regular vacuum for a garage?
Usually, yes for an unfinished working garage. A wet/dry shop vacuum is generally better suited to rough surfaces and larger debris. A household vacuum makes more sense in a finished garage where the mess resembles normal indoor dust.
Should I sweep before vacuuming my garage?
You can pick up large debris or use a dustpan for objects that shouldn’t enter the vacuum. I avoid aggressive dry sweeping when fine dust is present because it can send dust back into the air rather than capturing it.
Can I vacuum leaves in my garage?
Small dry leaves can usually be collected with a suitable wet/dry vacuum if they fit through the hose. I remove large piles, sticks, and oversized leaves first because bulky material can block the hose and slow the job.
Can I use a cordless vacuum in my garage?
Yes, for light maintenance. Cordless stick and handheld vacuums are convenient around doors, vehicles, and workbenches. I wouldn’t make one my first choice for large stones, sharp workshop debris, heavy dirt, or an entire neglected concrete garage.
Should I use a HEPA vacuum in my garage?
A HEPA vacuum can be useful when controlling fine particles matters, especially after certain renovation work. For ordinary leaves and road grit, HEPA filtration isn’t automatically necessary. Match the vacuum and filtration system to the actual debris you’re collecting.
Vacuuming a garage gets much easier once you stop treating it like a living-room floor. Clear the hazards first, choose the right machine, clean high areas before low ones, and work toward the garage door.
For normal dirt, that process is simple. When you find fine construction dust, flammable liquids, rodent waste, or mold, identify and handle that problem safely before continuing your regular garage cleanup.