
How to Reset a Robot Vacuum: Safe Step-by-Step Guide

Quick Answer
To reset a robot vacuum, start with the least destructive option: reboot or power-cycle it first. If that fails, reset its Wi-Fi connection, map, or factory settings depending on the problem. Button combinations vary by brand and model, so check your manual or official robot reboot instructions before performing a factory reset.
Quick Reset Steps
- Charge it first: Put the vacuum on its dock and make sure it has enough power.
- Try a reboot: Restart the robot before erasing stored settings.
- Identify the problem: Wi-Fi, mapping, app, and system problems may require different resets.
- Check your model: Never assume one brand’s button combination works on another model.
- Factory reset last: Use it only when simpler troubleshooting hasn’t worked.
Before You Continue
- A factory reset may erase maps, schedules, Wi-Fi credentials, preferences, and account pairing.
If your robot vacuum has stopped connecting, forgotten rooms, frozen mid-clean, or started behaving strangely, a reset can often get it working again.
I always start with the smallest reset possible. Going straight to a factory reset can turn a five-minute fix into a complete Wi-Fi, map, and schedule setup.
In This Guide
What Does Resetting a Robot Vacuum Mean?
A robot vacuum reset is a process that restarts or clears part of the vacuum’s electronic control system. The amount of information removed depends on which reset you perform.
That’s why “reset” doesn’t always mean “erase everything.” A simple reboot and a factory reset are two different procedures.
Definition: A robot vacuum reboot restarts the operating system without intentionally deleting your setup, while a factory reset returns stored settings much closer to their original state.
A reboot is usually the first choice
I use a reboot first when a robot freezes, ignores commands, shows a temporary error, or disappears from its app.
This approach gives the software a fresh start without deliberately wiping maps and schedules.
- Frozen controls: The robot doesn’t respond normally to buttons or app commands.
- Temporary app problems: The vacuum appears offline despite working Wi-Fi.
- Unexpected errors: An error appeared once without an obvious mechanical problem.
- Odd behavior: The vacuum suddenly pauses, restarts, or fails to begin a cleaning job.
A factory reset goes much further
A factory reset is better saved for persistent software problems, ownership changes, or situations where the manufacturer’s troubleshooting specifically recommends it.
Depending on the model, it can remove network details, schedules, preferences, cleaning history, saved maps, and account connections.
For example, iRobot explains that a factory reset removes stored robot data and disconnects the robot from the account. The company provides model-specific instructions through its factory reset support page.
Section Takeaway: A reboot is a restart. A factory reset is a much larger cleanup of stored settings, so don’t treat them as interchangeable.
How Do You Reset a Robot Vacuum Safely?
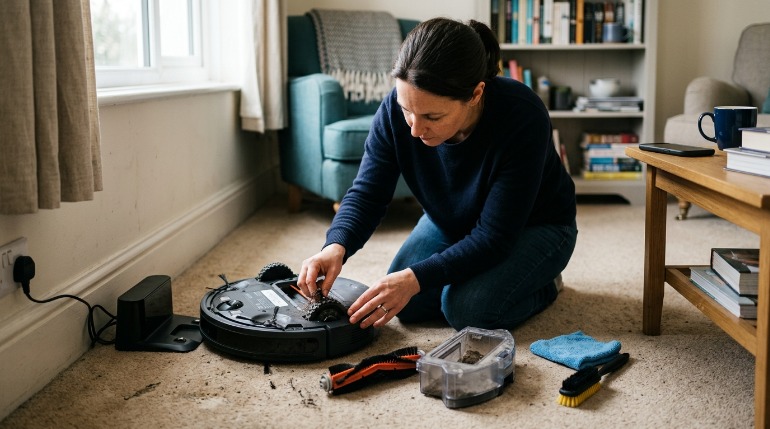
The safest method is to troubleshoot in stages. Start with power, then reboot the robot before moving to Wi-Fi or factory-reset options.
This order protects your saved settings while still fixing many temporary glitches.
1. Put the robot on its charging dock
Start with a charged battery whenever possible. A robot losing power halfway through a reset can make troubleshooting more confusing.
Check that the dock has power and the charging contacts are reasonably clean.
2. Inspect for a physical problem first
A reset can’t remove hair wrapped around a brush or clear an object stuck inside a wheel.
- Empty the dustbin.
- Check the main brush for wrapped hair and string.
- Inspect the side brush.
- Check both drive wheels.
- Wipe cliff and navigation sensors gently.
- Make sure the bumper can move freely.
If the robot has a washable part, follow the manufacturer’s drying instructions before reinstalling it.
3. Reboot the robot
Use the reboot procedure listed for your exact model. Many robots use a long button press, but the required button and duration aren’t universal.
Wait for the robot to complete its restart before pressing buttons again.
4. Test one normal cleaning cycle
Don’t factory-reset immediately after rebooting. Start a short cleaning job and see whether the original problem returns.
If everything works, stop there.
5. Reset only the affected feature if possible
If the robot works but won’t connect to your network, look for a Wi-Fi reset rather than a complete factory reset.
Likewise, a bad map may only require deleting or rebuilding the map.
6. Factory-reset only when needed
Before continuing, record any schedules, room names, no-go zones, cleaning preferences, or other settings you want to recreate.
Then follow the manufacturer procedure for your exact model.
Expert Alert: If the robot or dock has a swollen battery, damaged power connection, burning smell, melted plastic, liquid inside electrical components, or exposed wiring, stop using it. Don’t open or repair those components yourself; contact the manufacturer or a qualified appliance technician.
Section Takeaway: Troubleshoot from least destructive to most destructive: inspect, reboot, test, reset the affected feature, then factory-reset only if necessary.
Which Type of Robot Vacuum Reset Should You Use?
The right reset depends on what has gone wrong. Using a full reset for every problem can erase useful information without fixing the real cause.
| Reset Type | Best Used For | What May Be Removed | Risk of Setup Loss |
|---|---|---|---|
| Reboot | Frozen controls, temporary errors, app glitches | Normally no intentional deletion of user setup | Low |
| Wi-Fi reset | New router, changed password, connection problems | Network credentials or pairing information | Low to medium |
| Map reset | Incorrect rooms, distorted map, major furniture changes | Saved map and map-related zones | Medium |
| Factory reset | Persistent software faults, transferring ownership, manufacturer-directed troubleshooting | May include Wi-Fi, schedules, maps, history, preferences, and pairing | High |
Reset Wi-Fi when the network changed
A new router or Wi-Fi password doesn’t automatically mean the whole vacuum needs erasing.
Look in the robot’s app or manual for its network-pairing procedure first.
Reset the map when navigation is the main problem
If rooms appear in the wrong places or a saved layout is no longer useful, rebuilding the map can be more appropriate.
Roborock, for example, provides a separate option for resetting a saved cleaning map instead of requiring a full system reset.
Factory-reset when you are giving the vacuum away
This is one situation where a full reset makes sense even when the robot works perfectly.
It helps remove your stored setup before the new owner pairs the vacuum with another account and home network.
How Do Reset Methods Differ by Robot Vacuum Brand?
There is no universal reset-button sequence for robot vacuums. Even two models from the same manufacturer can use different procedures.
Use the examples below to understand the differences, not as interchangeable instructions.
iRobot Roomba
iRobot distinguishes between rebooting and factory resetting its robots. Reboot button combinations and hold times vary across Roomba and Braava families.
Its official documentation therefore recommends identifying your robot before following the procedure.
Roborock
Some Roborock models use a physical reset procedure. Roborock’s published instructions for applicable models involve holding the Home button for three to five seconds, pressing the recessed reset button, then continuing to hold Home until the restore process begins.
Roborock also warns that a factory restore can disconnect Wi-Fi and remove settings, cleaning logs, and maps. Check the exact procedure on Roborock’s official reset guide.
Shark robot vacuums
Shark reset and troubleshooting procedures depend heavily on the product series. Model families such as Shark IQ, AI Ultra, Matrix, and Detect Pro don’t necessarily share identical control sequences.
Use the model number from the underside label and locate its instructions through the Shark support center before holding multiple buttons.
eufy RoboVac and eufy Clean models
eufy’s older RoboVac models and newer app-connected robots also differ in controls and pairing methods.
Instead of copying a button combination from another eufy model, locate yours through the eufy support center.
| Brand | Safe Starting Point | Important Caution |
|---|---|---|
| iRobot | Try the documented reboot before factory reset | Button actions differ by Roomba/Braava family |
| Roborock | Identify the exact model before using recessed reset controls | Factory restore can remove Wi-Fi, schedules, logs, and maps on supported models |
| Shark | Find the model-specific troubleshooting guide | Don’t assume every Shark robot uses the same sequence |
| eufy | Check RoboVac/eufy Clean model instructions | Older and newer generations can use different controls |
As of 2026, app features and firmware continue to change across these product lines. The label on the robot and the current manufacturer instructions are safer than a generic reset video.
Section Takeaway: Brand name alone isn’t enough. Match the instructions to the exact model before attempting any factory-reset button combination.
What Should You Do After Resetting the Vacuum?
A successful reset isn’t the end of the job. Give the robot time to restart completely before setting it up again.
Then rebuild only what the reset removed.
- Return it to the dock. Let the vacuum stabilize and charge if needed.
- Reconnect Wi-Fi. Follow the app’s pairing process if network details were cleared.
- Check for firmware updates. Install updates through the official app when offered.
- Recreate schedules. Restore cleaning times you still want.
- Check map settings. Rebuild rooms, zones, or boundaries if they disappeared.
- Run a short test. Use an open room before sending the robot through the whole house.
Watch the first cleaning run
I like to stay nearby for the first cycle after a major reset. It quickly shows whether the original problem was software-related.
Watch docking, obstacle handling, brush movement, and app connectivity rather than focusing only on whether the vacuum moves.
Give mapping robots time to relearn
A robot with a deleted map may behave less efficiently during its first mapping or cleaning runs.
Keep doors open to rooms you want mapped and remove temporary clutter that could confuse the new layout.
What If Resetting the Robot Vacuum Doesn’t Work?
If the same fault returns immediately after a correct reset, stop repeating the process. The problem may not be software-related.
Move on to basic mechanical, charging, sensor, and connectivity checks.
The robot still won’t turn on
- Confirm the outlet works.
- Check whether the dock shows power.
- Clean dry charging contacts.
- Seat the robot correctly on the dock.
- Allow a deeply discharged battery time to charge.
A battery that no longer accepts a charge may need service or replacement.
The robot still appears offline
Restart your router and confirm the phone running the robot app is connected normally.
Then repeat the manufacturer’s Wi-Fi pairing process rather than performing another factory reset.
The robot still navigates badly
- Clean cliff and navigation sensors.
- Check the bumper for debris.
- Remove hair from wheels.
- Move cords and small objects.
- Rebuild the map if the saved layout is corrupted.
The same error code keeps returning
Write down the exact error number or message. Search the manufacturer’s support documentation for that code instead of repeatedly clearing it.
A recurring wheel, fan, brush, battery, sensor, or charging error may point to a component that needs cleaning or service.
Expert Alert: Stop using the vacuum if you notice overheating, battery swelling, smoke, a burning smell, damaged charging pins, or liquid inside the robot or dock. Have the unit inspected rather than attempting internal electrical repairs.
Section Takeaway: A reset fixes software and configuration problems. It cannot repair a blocked motor, damaged sensor, exhausted battery, or failed charging hardware.
Frequently Asked Questions About Resetting Robot Vacuums
Will resetting my robot vacuum delete the map?
A reboot usually doesn’t intentionally delete the map, but a factory reset may. The exact behavior depends on the manufacturer and model, so check the reset description before confirming it.
Does a robot vacuum need Wi-Fi after a factory reset?
Many smart models can perform limited cleaning without Wi-Fi, but app control, schedules, mapping features, updates, and remote commands may require reconnecting the robot. Capabilities differ by model.
Should I factory-reset my robot vacuum if it won’t connect to Wi-Fi?
Not immediately. Restart the vacuum and router first, then try the manufacturer’s Wi-Fi reset or pairing procedure. A full factory reset should usually come later if simpler network troubleshooting fails.
How long does a robot vacuum take to reset?
A simple reboot may finish within a few minutes. Factory restoration can take longer depending on the model. Wait for the robot’s lights, sounds, or app status to show that startup has finished.
Can I reset a robot vacuum without the app?
Some models support physical button resets, while others rely heavily on their app. The correct method depends on the exact model, so use its manual or official support instructions.
Should I reset a robot vacuum before selling it?
Yes, a factory reset is usually appropriate before selling or giving away a connected robot. It helps remove your stored settings and account association before the next owner pairs it.
Why does my robot vacuum still have an error after resetting?
The fault may be mechanical or electrical instead of software-related. Check brushes, wheels, sensors, charging contacts, the battery, and the manufacturer’s explanation for the specific error code.
Resetting a robot vacuum is simple once you know which kind of reset you actually need. Start with a reboot, protect your maps and schedules when possible, and leave the factory reset for problems that truly require it.
Afterward, run a short test before rebuilding your entire cleaning schedule. That one step can save a lot of repeated setup if the original fault still needs attention.