
How to Fix Vacuum Suction: A Homeowner’s Guide to Restoring Cleaning Power

Nothing is more frustrating than pushing a vacuum cleaner across your rug, only to realize it is leaving all the dirt and pet hair behind. When your vacuum loses its power, it doesn’t just make your cleaning routine harder. It also leaves fine particulate matter in your carpets, which can easily become airborne and circulate throughout your home.
If you are wondering how to fix vacuum suction, you are in the right place. Fortunately, most suction issues do not mean your machine is broken forever. Most performance drops are caused by simple airflow blockages, clogged filters, or tangled brush rolls.
This guide will walk you through the practical, step-by-step process of troubleshooting your vacuum. By following these simple maintenance steps, you can restore your vacuum’s suction, protect your expensive home appliances, and ensure your indoor air remains clean and breathable for your family.
Quick Answer
To fix vacuum suction quickly, start by emptying the dustbin or replacing the vacuum bag. Next, remove and gently wash or replace the pre-motor and exhaust filters. Detach the main hose to check for and remove hidden clogs using a broomstick. Finally, cut away tangled hair from the floor brush roll and inspect the hose for air leaks.
Why Your Vacuum Keeps Losing Suction
Vacuum cleaners operate on a very basic principle: they create an airflow system that pulls dirt from your floor and traps it inside a bin or bag. The clean air is then exhausted back into your room.
When a vacuum loses suction, it simply means that the continuous flow of air has been interrupted. Your motor might be running perfectly, but if the air cannot move freely through the machine, the suction will vanish.
This interruption usually happens for three main reasons: something is full, something is clogged, or air is escaping before it reaches the floor head. Identifying which of these three issues is affecting your machine is the first step in restoring its cleaning power.
Step-by-Step: How to Fix Vacuum Suction
You do not need to be an appliance technician to get your vacuum running like new. Follow these systematic steps to locate and clear the blockage.
Step 1: Empty the Dustbin or Replace the Bag
The most common culprit for weak suction is a full dustbin or bag. As dirt accumulates, there is less empty space for air to circulate inside the chamber.
If you have a bagless vacuum, empty the canister into an outdoor trash can to prevent dust from billowing back into your home’s air. Check the upper part of the canister, where dust often gets wedged around the cyclone mechanism.
If your vacuum uses bags, replace the bag when it is about two-thirds full. Waiting until the bag is completely packed solid forces the motor to work harder, which can cause overheating and permanently damage the unit.
Step 2: Clean or Replace the Filters
Modern vacuums, especially those designed for allergy sufferers, rely on multiple filters to trap fine dust. When these filters become caked with debris, the motor cannot pull air through them, immediately killing the suction power.
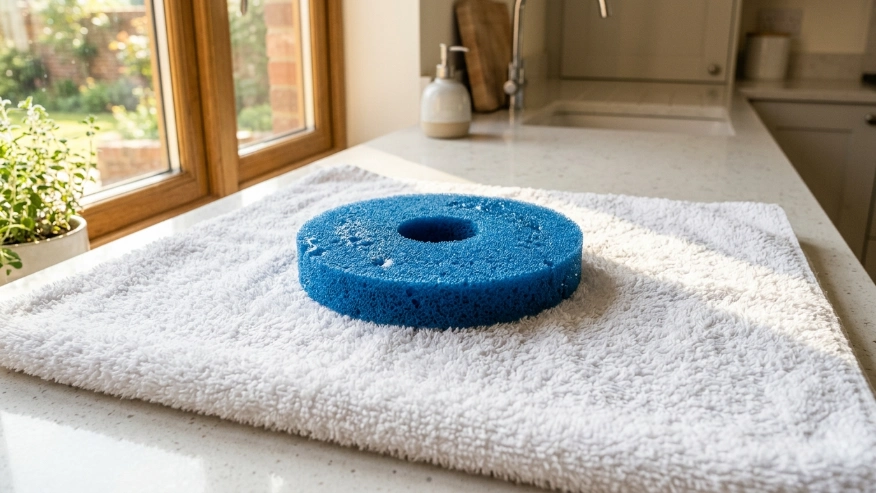
Locate your pre-motor filter, which is usually a sponge-like pad near the dustbin. Wash this filter with warm water and let it air dry completely for at least 24 hours before putting it back.
Next, check your exhaust filter, which is often a pleated HEPA filter. A clean HEPA filter is vital for improving indoor air quality because it stops microscopic allergens from blowing back into your living room. Never wash a paper HEPA filter unless the manual explicitly says it is washable. If it is grey, dark, and covered in dust, simply replace it with a new one.
Step 3: Check for Hose Clogs
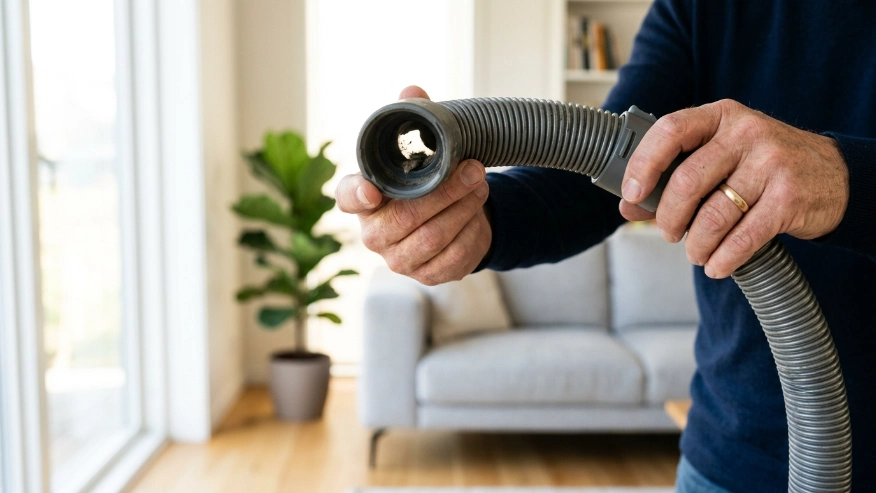
If the bin and filters are clean but the suction is still poor, you likely have a clog in the hose. Pennies, large clumps of pet hair, and small toys are notorious for getting lodged in the flexible tubing.
Detach the hose from both the main vacuum body and the cleaning wand. Drop a small coin down the hose; if it does not fall straight through to the other side, you have found your blockage.
Use a blunt object, like the handle of a wooden broomstick, to gently push the clog out. Never use a sharp tool like a coat hanger, as it can easily puncture the flexible plastic and create an air leak.
Step 4: Clean the Brush Roll and Floor Head
Sometimes, the vacuum has plenty of suction, but it cannot pick up debris because the brush roll is paralyzed. Long hair, carpet fibers, and strings can wrap tightly around the spinning brush, preventing it from sweeping dirt into the suction path.
Turn the vacuum over and use a pair of scissors to carefully cut away entangled hair. Avoid cutting the bristles themselves.
While you are examining the base, check the small intake port directly behind the brush roll. This narrow opening is a prime location for dense dust bunnies to accumulate and block dirt from traveling up into the hose.
Step 5: Check for Air Leaks
If you have cleared all clogs and cleaned the filters, but the suction is still weak, you might be dealing with an air leak. Suction relies on an airtight seal from the floor head all the way to the motor.
Inspect the flexible hose for cracks, splits, or tears. If you find a small hole, you can patch it temporarily with heavy-duty duct tape, but ordering a replacement hose is the best long-term solution.
Check the rubber seals around the dustbin and filter housing. If these gaskets are cracked or missing, air will escape through the sides of the machine instead of pulling dirt from the floor.
How Vacuum Suction Impacts Your Home’s Air Quality
A vacuum does much more than keep your rugs looking tidy. It is an active participant in your home’s overall air quality management.
When your vacuum lacks proper suction, it merely agitates the carpet fibers. Instead of sucking up the dirt, it kicks microscopic dust, pollen, and pet dander up into the breathing zone of your home.
Maintaining your machine’s suction power is highly recommended to effectively manage indoor allergens like dust mites and pet dander before they trigger respiratory issues. A well-maintained vacuum with a sealed HEPA system ensures that once allergens are lifted from the floor, they stay trapped inside the machine permanently.
Helpful Table: Troubleshooting Vacuum Suction Loss
Use this quick diagnostic table to identify what might be causing your vacuum’s specific issues.
| Symptom | Likely Cause | Best Solution |
|---|---|---|
| High-pitched whining sound | Severe airflow blockage | Check the hose and wand for lodged objects; empty the bin. |
| Vacuum smells dusty or musty | Clogged or dirty filters | Wash the pre-motor filter; replace the HEPA exhaust filter. |
| Suction is fine on wand, poor on floor | Tangled brush roll or broken belt | Cut hair from the brush roll; replace the rubber drive belt. |
| Motor gets unusually hot | Overworked motor due to full bag | Replace the vacuum bag immediately to restore airflow. |
| Visible dust blowing out the back | Torn filter or broken bin seal | Inspect gaskets; ensure the HEPA filter is seated properly. |
Expert Tip: To check if your vacuum’s floor head is actually making a proper seal with your carpet, turn the machine on and sprinkle a small pinch of baking soda a few inches away from the side of the vacuum head. A vacuum with healthy suction and proper airflow will pull the baking soda in from the sides, even if the machine isn’t directly over it.
Common Mistakes Homeowners Should Avoid
When trying to fix a vacuum, many homeowners accidentally cause permanent damage to their appliances. Avoid these common missteps:
- Vacuuming wet spills: Unless you own a specialized wet/dry shop vacuum, never suck up liquids. Moisture ruins paper HEPA filters, rusts internal motor components, and creates a breeding ground for mold inside the dustbin.
- Putting wet filters back in: If you wash your foam pre-motor filter, it must be completely dry before reinstallation. A damp filter will restrict airflow and can allow water droplets to get sucked directly into the electrical motor.
- Ignoring a broken belt: If your brush roll isn’t spinning but the motor sounds fine, the rubber drive belt has likely snapped. Continuing to run the machine without replacing the belt will leave pet hair embedded in your carpets.
- Vacuuming drywall dust: Standard household vacuums are not designed for ultra-fine construction dust. Drywall dust will instantly clog your HEPA filter, overheat the motor, and potentially ruin the vacuum.
When to Consult an Air Quality or HVAC Professional
Your vacuum cleaner is your first line of defense against floor-bound dust. However, if you are constantly vacuuming but your home remains incredibly dusty, your vacuum may not be the root of the problem.
If you notice a rapid accumulation of dust on your furniture just days after cleaning, or if your family is experiencing persistent allergy flare-ups indoors, it is time to look beyond the vacuum cleaner.
You should consult an HVAC or indoor air quality professional when:
- You see visible dust blowing out of your air conditioning vents.
- Your home consistently smells musty, despite regular cleaning and vacuuming.
- You want to explore whole-home filtration systems to capture airborne particles that your vacuum cannot reach.
- You need to confirm your HVAC system meets the standards set by the Association of Home Appliance Manufacturers for properly circulating and filtering your home’s air volume.
An expert can assess your ductwork for leaks, check your HVAC system’s filter sizing, and recommend a dedicated HEPA air purifier to complement your floor cleaning routine.
FAQs
Why did my vacuum suddenly lose suction?
A sudden loss of suction almost always points to an acute blockage. You likely sucked up a large item, such as a sock, a piece of cardboard, or a dense clump of pet hair that is now lodged in the wand or the flexible hose.
Can a dirty HEPA filter cause low suction?
Yes. A heavily soiled HEPA filter severely restricts the amount of air the motor can push out of the machine. When exhaust air is blocked, the intake suction drops dramatically. Replacing the filter often restores power immediately.
How often should I replace my vacuum filters?
For the best indoor air quality, wash reusable foam filters once a month. Non-washable HEPA exhaust filters should generally be replaced every 6 to 12 months, depending on how often you vacuum and whether you have pets in the home.
Is it worth repairing an older vacuum?
If the fix requires a simple part like a new belt, a fresh filter, or a replacement hose, it is absolutely worth repairing. However, if the motor is failing or emitting a burning electrical smell, replacing the entire unit is usually safer and more cost-effective.
Does vacuum suction affect indoor air quality?
Directly. A vacuum with strong suction and a sealed filtration system permanently removes allergens from your environment. A vacuum with poor suction or air leaks simply stirs up dust and dander, making your indoor air quality worse.
How do I unclog a vacuum hose without damaging it?
Detach the hose entirely and push a blunt, rigid object, like a broom handle, gently through the tubing. Never use wire hangers or sharp tools, as they can easily puncture the flexible plastic and create an unrepairable air leak.
Conclusion
Understanding how to fix vacuum suction is an essential skill for any homeowner looking to maintain a clean home and protect their indoor air quality. By routinely checking your dustbin, replacing dirty HEPA filters, clearing hose blockages, and removing tangled hair from the brush roll, you can keep your vacuum operating at peak performance for years to come.
Remember that a well-maintained vacuum doesn’t just make your carpets look nicer—it stops harmful allergens from circulating through the air your family breathes. Take ten minutes today to inspect your vacuum’s filters and hose. If your filters look dark and heavily soiled, take the best next step and order high-quality replacements right away to keep your home’s air fresh, clean, and healthy.
