How to Clean Vacuum Wheels: A Step-by-Step Guide for Better Indoor Air

You invested in a high-quality HEPA vacuum cleaner to protect your family from dust, pet dander, and allergens. But if you are dragging a machine with locked, dirty wheels across your floors, you might be doing more harm than good. Learning how to clean vacuum wheels is an often-overlooked part of home maintenance that directly impacts your indoor air quality.
When vacuum wheels get wrapped in hair, coated in sticky residue, and jammed with debris, they stop rolling smoothly. Instead of gliding, they scrape. This friction damages hardwood floors and forcefully kicks settled dust and allergens back into the air you breathe.
In this guide, we will walk you through exactly how to clean your vacuum cleaner wheels, restore their smooth glide, and ensure your weekly cleaning routine is actually improving your home’s air quality, not hurting it.
Quick Answer
To clean vacuum wheels, unplug the machine and lay it flat. Use scissors or tweezers to cut away tangled hair and string from the wheel axles. Wipe the wheels down with a damp microfiber cloth and mild soapy water. For sticky grime, use rubbing alcohol. Dry the wheels completely before vacuuming.
Why Cleaning Your Vacuum Wheels Matters for Home Air Quality
It is easy to focus entirely on replacing your HEPA filters or emptying the dust canister. However, the exterior mechanics of your vacuum play a surprisingly large role in keeping your home hygienic.
When your vacuum wheels are caked in grime, they act like tiny stamps, tracking dirt from high-traffic areas into clean rooms. If you roll over a damp spill in the kitchen and then move to the living room carpet, you are transferring mold spores and bacteria directly into the carpet fibers.
Furthermore, jammed wheels create friction. As noted in the EPA’s comprehensive guide to improving indoor air quality, reducing the introduction and spread of pollutants (known as source control) is the most effective way to improve the air you breathe. Dragging a stuck plastic wheel across a floor physically agitates settled dust, launching micro-particles back into your breathing zone before the vacuum suction can capture them.
Signs It’s Time to Clean Your Vacuum Wheels
Not sure if your vacuum needs a tune-up? Look out for these common warning signs:
- You feel resistance: The vacuum feels noticeably heavier and harder to push across carpets or bare floors.
- Squeaking or grinding noises: Hair and debris wrapped tightly around the metal axle will cause high-pitched squeaks.
- Visible floor scratches: Hardwood or laminate floors are showing unexplained scuffs or micro-scratches.
- Wobbling or uneven rolling: Caked-on dirt on one side of a wheel makes the vacuum vibrate or pull to one side.
- The front caster wheel is frozen: The small, multi-directional front wheel on upright vacuums refuses to spin, forcing you to drag it during turns.
What You Need to Clean Vacuum Cleaner Wheels
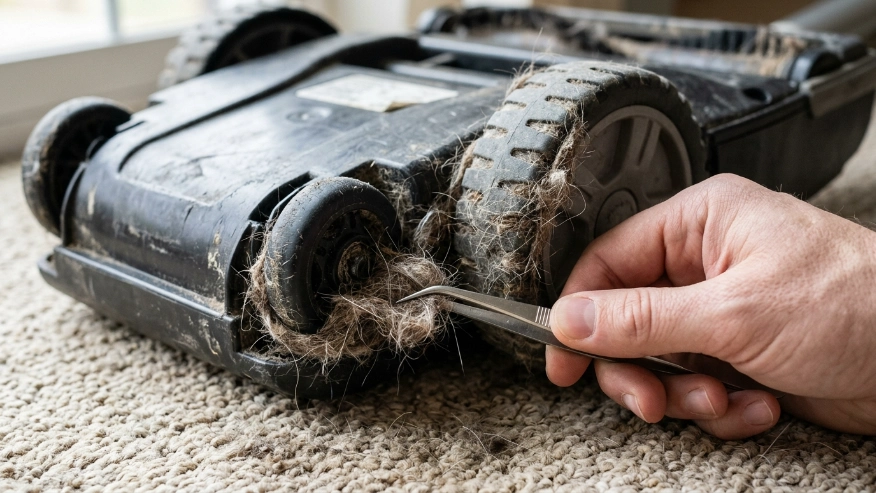
You do not need specialized tools or harsh chemicals to get your vacuum rolling smoothly again. Gather these simple household items before you begin:
- Small scissors or a seam ripper: Essential for cutting tightly wound hair.
- Tweezers or needle-nose pliers: For pulling out stubborn debris from the axles.
- Microfiber cloths: To wipe away dirt without leaving lint behind.
- Mild dish soap and warm water: For general cleaning.
- Rubbing alcohol (isopropyl): To cut through sticky, stubborn residue.
- A flathead screwdriver: (Optional) To gently pry off removable wheels.
Step-by-Step: How to Clean Vacuum Wheels
Set aside 15 minutes in a well-lit area. If your vacuum is particularly dusty, you may want to do this outside or on top of an old newspaper to avoid spreading allergens inside your home.
Step 1: Unplug and Prep the Vacuum
Safety first. Always unplug your vacuum cleaner before performing any maintenance. If you have a cordless stick vacuum, remove the battery to prevent accidental power-ons. Lay the vacuum gently on its front or side so you have clear, comfortable access to the bottom wheels and the brush roll area.
Step 2: Attack the Hair and String
The biggest culprits behind stuck wheels are human hair, pet fur, and stray threads. Over time, these wrap so tightly around the wheel axles that they become as hard as wire.
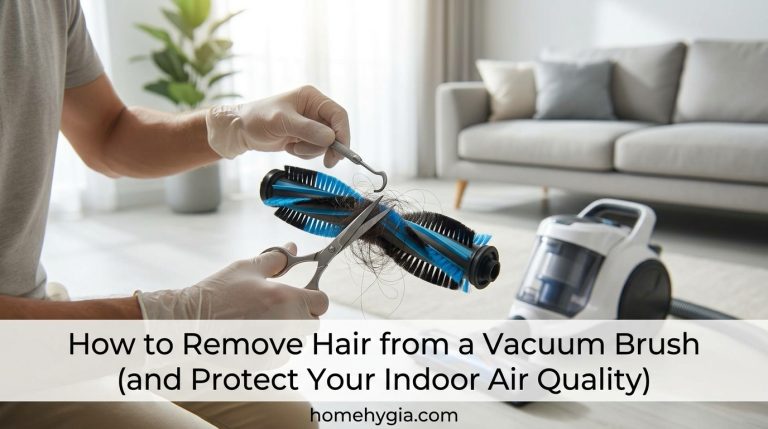
- Slip the pointed edge of a seam ripper or small scissors underneath the tangled hair.
- Carefully snip the hair in a straight line across the wheel axle.
- Use your tweezers to grab the cut bundle and pull it completely free.
- Rotate the wheel manually and repeat the process until all visible hair is removed.
Step 3: Remove the Wheels (If Applicable)
Some vacuum models, especially high-end HEPA canister vacuums and robotic vacuums, have front caster wheels that easily pop out of their housing. Check your manufacturer’s manual. If the wheel is designed to be removed, gently pry it straight up with your fingers or a flathead screwdriver. Taking the wheel out makes it much easier to clean the hidden metal axle and the plastic cavity housing it.
Step 4: Wash and Disinfect the Wheels
Once the hair is gone, you need to address the sticky grime.
- Dip a microfiber cloth in warm, soapy water and wring it out until it is only slightly damp.
- Scrub the rubber or plastic treads of the wheels to remove caked-on dirt.
- If you encounter a sticky patch (like dried spilled juice or tree sap from shoes), apply a small amount of rubbing alcohol to the cloth and scrub the spot. The alcohol evaporates quickly and won’t damage hard plastic.
According to the Asthma and Allergy Foundation of America’s guidance on indoor allergens, managing pet dander and dust mites requires thorough surface cleaning. Washing your vacuum’s contact points ensures you aren’t dragging these allergens from room to room.
Step 5: Clean the Wheel Housing
If you were able to remove the wheels, use a cotton swab lightly dipped in rubbing alcohol to clean inside the empty wheel cavity. This area collects a massive amount of hidden fine dust and pet dander. Wipe the metal axles completely clean of any black, greasy residue.
Step 6: Dry and Reassemble
Never put wet wheels back onto your vacuum. Moisture trapped in the wheel housing will quickly cause metal axles to rust and will attract new dust like a magnet. Dry the wheels and axles thoroughly with a clean towel, then let them air-dry for 30 minutes. Once completely dry, snap the wheels back into place and give them a spin to test their mobility.
Expert Tip
Expert Tip: Never use WD-40 or heavy lubricating oils on plastic vacuum wheels. While it might temporarily stop a squeak, wet lubricants act like a magnet for dirt, dust, and pet hair. Within a week, your wheels will be clogged worse than before. If an axle is completely clean but still squeaks, use a tiny puff of dry graphite powder instead.
How Often Should You Clean Vacuum Wheels?
Keeping your home’s air clean requires a consistent maintenance schedule. A vacuum is only as effective as the sum of its clean parts. Use this table as a baseline for your home air quality maintenance routine:
| Vacuum Component | Maintenance Frequency | Primary Impact on Air Quality |
|---|---|---|
| Dust Canister / Bag | After every use | Prevents odors and loss of suction power. |
| Brush Roll | Every 2-4 weeks | Ensures proper agitation of carpet to lift embedded dust. |
| Vacuum Wheels | Every 1-2 months | Prevents tracking allergens and limits floor friction. |
| Pre-Motor Filter | Every 3 months (Wash/Replace) | Protects the vacuum motor from burning dust. |
| HEPA Exhaust Filter | Every 6-12 months | Captures 99.97% of micro-particles before air returns to the room. |
Common Mistakes Homeowners Should Avoid
When learning how to clean vacuum wheels, avoid these frequent pitfalls that can damage your machine or degrade your indoor air quality:
- Ignoring the front caster wheel: People often clean the large back wheels but forget the tiny front wheel. The front wheel dictates steering; if it’s jammed, you are dragging the vacuum.
- Using too much water: Vacuums and water do not mix. A dripping wet cloth can allow moisture to seep into the motor housing, causing electrical damage or dangerous mold growth.
- Cutting the rubber tread: When using a knife or scissors to cut away hair, be incredibly careful not to slice into the rubber wheel tread. A gouged wheel will bump and rattle across your hard floors forever.
- Assuming HEPA filters do all the work: A fresh HEPA filter is useless if your dirty vacuum wheels are mechanically grinding allergens deep into your hardwood floor crevices.
When to Consult an Air Quality or HVAC Professional
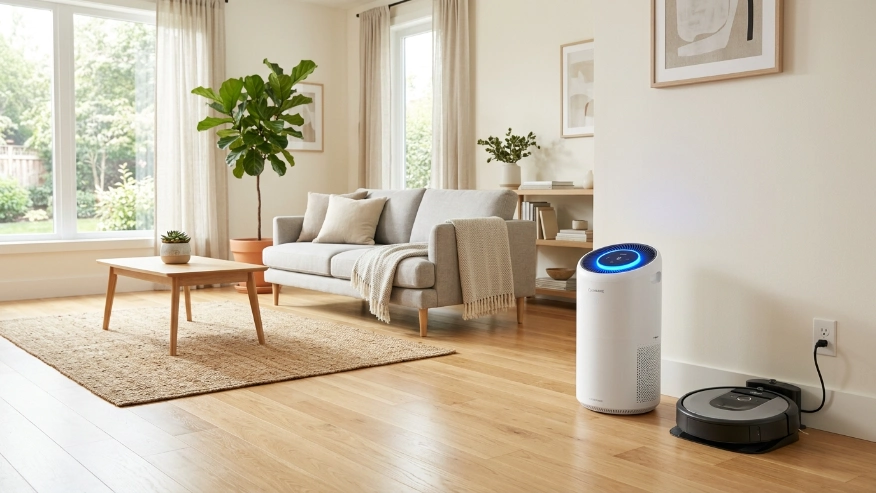
Cleaning your vacuum wheels and replacing your HEPA filters are excellent DIY steps for homeowner health protection. However, vacuums are only designed to clean settled dust and debris. They cannot pull suspended volatile organic compounds (VOCs), lingering smoke, or airborne viruses out of your room’s atmosphere.
If you have thoroughly cleaned your home, maintained your vacuum, and run standalone room air purifiers, but you still experience severe allergies, asthma flare-ups, or rapid dust buildup, it is time to look at the bigger picture.
You may need to consult a professional HVAC technician to assess your home’s central ventilation system. They can inspect your ductwork for leaks, evaluate your home’s humidity levels, and determine if your central furnace filter needs an upgrade. Sometimes, persistent indoor air quality issues indicate that your home lacks proper fresh air exchange, and professional intervention—such as installing a whole-home mechanical ventilation system or a higher-MERV central filter—is the only effective solution.
FAQs
Can I put my removable vacuum wheels in the dishwasher?
No. The high heat of a dishwasher can warp the plastic and melt the rubber treads on your vacuum wheels. The harsh detergents can also degrade the materials. Always wash them by hand using warm water and mild dish soap.
Why does my vacuum cleaner scratch my hardwood floors?
Vacuums scratch hard floors when the wheels are jammed with debris and cannot rotate, forcing you to drag hard plastic across the wood. Scratches can also occur if gravel or sand becomes embedded in the soft rubber tread of the wheels.
How do I get dog hair out of my vacuum wheels?
The best way to remove dog hair is to use a seam ripper or small cuticle scissors. Slide the pointed tip under the tightly wound hair, snip it across the metal axle, and use tweezers to pull the hair clump away.
Do dirty vacuum wheels really affect my home’s air quality?
Yes. Dirty, jammed wheels create unnecessary friction on your floors, which kicks settled dust mites, pet dander, and pollen back into the air before the vacuum can suck them up. They also track dirt from dirty rooms into clean rooms.
Can I use WD-40 if my vacuum wheels are squeaking?
You should avoid using WD-40 or wet oils on vacuum wheels. Wet lubricants attract dust and pet hair, which will quickly create a sticky, muddy clog. If the wheel squeaks after being thoroughly cleaned, apply a tiny amount of dry graphite powder instead.
How often should I check my vacuum wheels for tangles?
If you have pets with long hair or a busy household, you should quickly inspect your vacuum wheels and brush roll once a month. Catching hair tangles early makes them much easier to remove.
Conclusion
Understanding how to clean vacuum wheels is a simple but highly effective way to protect your floors and improve your indoor air quality. When your vacuum rolls smoothly, it does its job efficiently—capturing dust, dander, and allergens without kicking them back into your breathing space or tracking them across the house.
By taking just 15 minutes every few months to snip away tangled hair, wipe down sticky grime, and clear the wheel axles, you ensure that your HEPA vacuum remains a powerful tool for homeowner health protection. Don’t let a dirty machine defeat your hard work. Take a moment today to flip your vacuum over, check those wheels, and get your home one step closer to truly pristine air.