How to Clean Vacuum Sensors Safely and Correctly

Quick Answer
To clean vacuum sensors, turn the vacuum off, locate each sensor window, and gently wipe it with a clean, dry microfiber cloth. Avoid spraying water or cleaner onto sensors, and check your model’s instructions before using any moisture; Samsung’s robot vacuum sensor guidance specifically recommends a soft cloth and warns against cleaning liquids.
Quick Cleaning Steps
- Power it off: Stop the vacuum and disconnect the dock from power when its contacts need cleaning.
- Find the sensors: Check the underside, front bumper, sides, top navigation module, and docking area.
- Use microfiber: Wipe each visible sensor window gently with a clean, dry, lint-free cloth.
- Clear loose debris: Remove hair and dust around sensor openings without pushing debris farther inside.
- Test the vacuum: Return it to the floor and run a short cleaning or docking cycle.
Before You Start
- Check your manual because sensor location and approved cleaning methods differ between models.
Learning how to clean vacuum sensors is one of the simplest ways to keep a robot vacuum navigating normally. Dust, pet hair, fingerprints, and floor debris can cover the small windows that help the machine understand its surroundings.
I’ve found sensor cleaning works best as a gentle maintenance job, not a deep scrub. This guide shows you where the common sensors are, how I clean them, and what to check when wiping them doesn’t fix the problem.
In This Guide
What Are Vacuum Sensors and Why Do They Need Cleaning?
A vacuum sensor is an electronic sensing component that helps a smart or robot vacuum detect its surroundings or operating conditions. Depending on the model, sensors can identify floor edges, obstacles, walls, carpets, docking signals, or navigation points.
Robot vacuums rely on several sensor types rather than one universal sensor. Newer machines may combine infrared sensors, cameras, LiDAR, bump switches, and other navigation hardware.
- Cliff sensors look downward and help the robot detect stairs or sudden drops.
- Obstacle sensors help identify furniture, walls, and objects in the cleaning path.
- LiDAR sensors scan the surrounding area to support mapping and navigation on equipped models.
- Camera sensors provide visual information on models with camera-based navigation.
- Docking sensors help the vacuum find or communicate with its charging station.
- Carpet or floor sensors help compatible machines recognize changes in floor surfaces.
- Dirt sensors on some vacuums detect areas that may need extra cleaning.
These sensors often sit close to the floor. That location exposes them to fine dust, hair, crumbs, and residue every time the machine runs.
A dusty sensor window can interfere with the information reaching the sensor. You may then notice strange navigation, docking trouble, repeated stopping, or a sensor-related error message.
That does not automatically mean the sensor has failed. Cleaning is the sensible first check before assuming an electronic component needs replacement.
How Do You Clean Vacuum Sensors Step by Step?
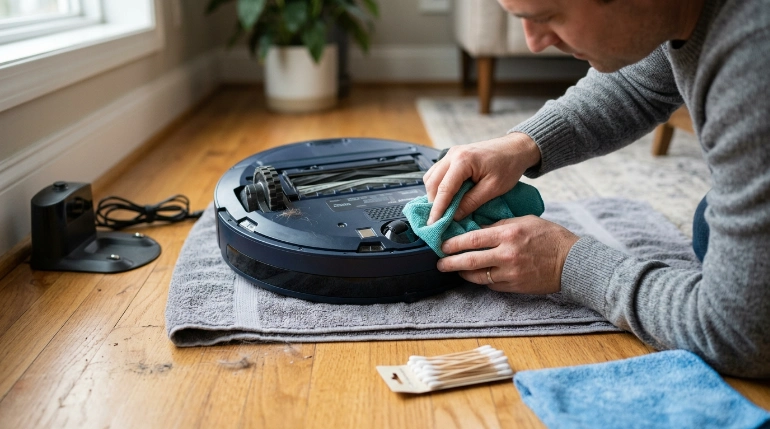
The safest general method is to power the vacuum down and wipe accessible sensor windows with a clean, dry microfiber cloth. Roborock’s maintenance instructions, for example, tell owners to wipe sensors with a dry, lint-free cloth.
1. Stop and power down the vacuum
Pause the cleaning cycle and turn the robot off according to its manual. If you’re cleaning sensors or contacts on a powered docking station, disconnect the station when the manufacturer instructs you to do so.
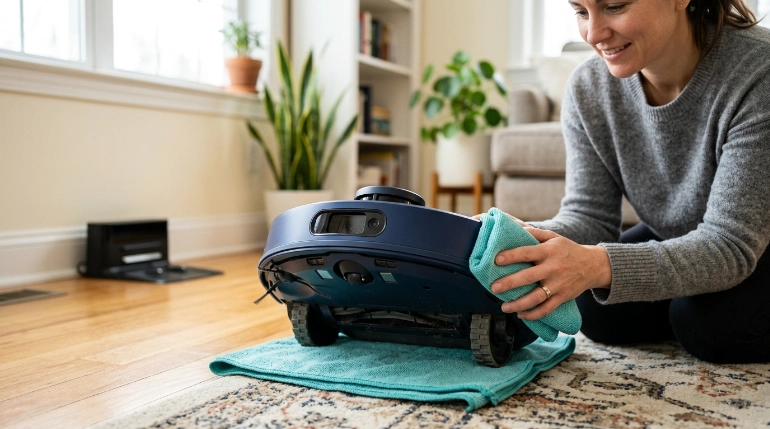
Place the vacuum on a clean, stable surface. I like to put a folded towel underneath it before turning it upside down.
2. Locate every visible sensor
Don’t clean only the first shiny window you see. Sensor placement varies significantly between brands and models.
Check these common areas:
- Along the bottom edge
- Behind or around the front bumper
- On the sides of the body
- Inside a raised LiDAR turret
- Near front-facing cameras
- Near the wheels or brush area
- On the charging dock
Your owner’s manual should show the exact locations. That’s especially useful on machines with several small infrared windows that are easy to overlook.
3. Wipe with a dry microfiber cloth
Use light pressure and wipe across the sensor window. The goal is to lift dust rather than polish the surface aggressively.
Fold the cloth to expose a clean section as you move between sensors. This stops you from spreading oily residue from one area to another.
4. Use a cotton swab for tight areas
A clean, dry cotton swab can help around recessed sensor openings or narrow edges. Move it gently so fibers do not snag inside a gap.
Do not push tools deeply into the vacuum. Visible external cleaning is different from disassembling the sensor assembly.
5. Inspect the bumper and surrounding openings
If your robot uses a moving bumper, check whether hair or debris is preventing normal movement. The bumper should move without obvious obstruction.
Clean only the accessible surfaces and gaps recommended in your manual. Avoid forcing the bumper away from the body.
6. Clean the dock’s exposed sensors and contacts
Docking problems are not always caused by the robot itself. Dust can collect on exposed charging contacts or signal areas on the base.
Shark’s maintenance guidance also recommends using a dry cloth or cotton swab for sensors and contacts on supported models.
7. Test before doing anything more invasive
Put the vacuum upright and return it to its normal floor. Start a short cleaning run and watch its movement for several minutes.
Then test docking if docking was the original problem. This simple test helps separate surface contamination from a deeper hardware or software issue.
Section Takeaway: Clean visible vacuum sensors gently with dry, lint-free materials first. Test the machine before attempting resets, disassembly, or parts replacement.
How Should You Clean Different Vacuum Sensor Types?
Different sensors perform different jobs, but most external sensor windows need similar gentle care. The table below gives you a practical starting point.
| Sensor Type | Common Location | Possible Dirty-Sensor Clue | Safe Starting Method |
|---|---|---|---|
| Cliff sensor | Underside near outer edge | Stops unexpectedly or reports a cliff-related error | Dry microfiber or soft cotton cloth |
| Obstacle / infrared sensor | Front or sides | Unusual bumping or poor obstacle detection | Soft, dry cloth |
| LiDAR sensor | Top turret or front module | Mapping or navigation problems | Gently wipe accessible exterior surfaces |
| Camera | Front or top | Poor visual navigation on equipped models | Clean, lint-free cloth with minimal pressure |
| Docking / signal sensor | Robot front and charging base | Trouble finding or aligning with dock | Dry cloth on accessible windows |
| Carpet / floor sensor | Underside | Incorrect floor response on supported models | Dry microfiber cloth |
How do you clean cliff sensors?
Cliff sensors deserve special attention because they’re positioned underneath the machine. Fine dust can settle across their windows quickly.
iRobot recommends regularly wiping Roomba cliff-sensor openings with a clean, dry microfiber or soft cotton cloth. That is a good default approach unless your own manual specifies another method.
How do you clean LiDAR and camera sensors?
Treat optical navigation hardware like a lens rather than a dirty plastic body panel. Use a clean cloth and little pressure.
Don’t dismantle a LiDAR turret simply because dust appears around it. Internal optical components are not part of normal surface maintenance.
What about charging contacts?
Charging contacts aren’t navigation sensors, but owners often clean them during the same maintenance session. Dust and residue on exposed contacts can contribute to charging problems.
Use only the method approved for your model. Keep liquids away from powered electrical areas unless the manufacturer explicitly directs otherwise.
Section Takeaway: The cleaning tool is usually similar across sensor types, but the location and function change. Identify the sensor first, then follow the model-specific manual.
What Should You Avoid When Cleaning Vacuum Sensors?
A sensor window does not need the same cleaning treatment as a dirty dustbin. More liquid or pressure can create a bigger problem than the dust you’re trying to remove.
- Don’t spray cleaner directly: Liquid can enter sensor openings or nearby electronic areas.
- Don’t soak the cloth: A dripping cloth gives you little control around seams and openings.
- Don’t scrub aggressively: Optical surfaces need gentle wiping.
- Don’t scrape with sharp tools: Metal blades or pins can scratch windows and damage surrounding parts.
- Don’t dismantle sensors casually: Internal cleaning may require professional service.
- Don’t assume alcohol is safe: Use it only when your manufacturer’s instructions specifically allow it.
- Don’t use compressed air by default: Some models may permit it in certain areas, but follow your exact manual rather than treating it as universal advice.
Samsung’s current Jet Bot guidance says not to use cleaning liquids because they may damage the sensors. That makes dry cleaning the safer general rule for an unknown model.
Expert Alert: If cleaning requires opening the vacuum’s electronic housing, disconnecting internal wiring, or accessing a sealed sensor module, stop and use qualified repair support.
Why Is the Vacuum Still Having Sensor Problems After Cleaning?
A clean sensor does not guarantee that every sensor-related error disappears. The problem may come from the floor, bumper, software, calibration, damage, or another component.
Check the floor surface
Some cliff-sensor systems can react unexpectedly to certain dark surfaces. Roborock specifically tells users troubleshooting Error 4 to check whether the robot is on dark or shag carpet.
Move the robot to a plain, well-lit hard floor and test again. If the error disappears, the surface itself may be part of the problem.
Check for trapped debris
Look around moving bumpers, wheels, and brush areas. Hair or small objects can change the robot’s movement even when the optical sensors are clean.
- Remove visible hair around wheels.
- Check that the front bumper can move normally.
- Clear objects from the robot’s path.
- Inspect the docking area for obstructions.
Restart the vacuum correctly
Follow your manual’s normal restart procedure if the error remains. Avoid random button combinations from guides written for another model.
If your robot uses an app, also check for a model-specific diagnostic message. The wording can point you toward a particular sensor or mechanical component.
Inspect for physical damage
Look for a cracked sensor window, loose bumper, damaged wheel, or obviously displaced component. Cleaning cannot correct physical damage.
A persistent error on a clean, correctly positioned vacuum may require manufacturer support. This is especially true when the machine repeatedly approaches stairs incorrectly.
Expert Alert: Stop using a robot vacuum near stairs or elevated edges if its cliff detection appears unreliable. Have the sensor system checked before relying on it around a drop.
Section Takeaway: If cleaning doesn’t solve the problem, test the vacuum on a simple floor and inspect nearby mechanical parts. Persistent safety-sensor errors deserve proper troubleshooting rather than repeated wiping.
Frequently Asked Questions
How often should I clean robot vacuum sensors?
Check the sensors during routine vacuum maintenance and clean them whenever you see visible dust or navigation problems. Homes with pets, fine dust, or frequent robot-vacuum use may need more frequent checks.
Can I clean vacuum sensors with water?
Do not use water unless your exact manufacturer’s instructions permit it for that sensor. A clean, dry microfiber cloth is the safer general starting point because many sensor assemblies sit beside electronic components or openings.
Can I use alcohol to clean robot vacuum sensors?
Don’t assume rubbing alcohol is safe for every sensor window. Plastics, coatings, camera lenses, and adhesives vary between models, so use alcohol only when the manufacturer’s maintenance instructions specifically approve it.
Can dirty sensors stop a robot vacuum from docking?
Dirty signal areas or contacts can be one cause of docking trouble. Clean accessible sensor windows and dock contacts according to the manual, then check that nothing blocks the dock or the robot’s approach path.
Why does my robot vacuum say the cliff sensor is dirty after I cleaned it?
The sensor may still be obstructed, or the floor surface may be confusing it. Test the vacuum on a plain hard floor and check the manufacturer’s troubleshooting instructions before assuming the sensor has failed.
Where are the sensors on a robot vacuum?
Common locations include the underside, front bumper, sides, top navigation turret, front camera area, and docking system. The exact number and position vary by model, so the owner’s manual is the best location guide.
Should I clean the LiDAR sensor on a robot vacuum?
Yes, you can gently clean the accessible exterior sensor surface when your manual allows it. Avoid opening the LiDAR assembly or pushing tools into its moving or optical components unless the manufacturer provides specific service instructions.
Final Takeaway: Cleaning vacuum sensors should be simple: power down, identify the sensor, wipe gently with a dry microfiber cloth, and test the machine. Start with the least invasive method and let your model’s manual override generic cleaning advice.
Adding this small check to your regular vacuum-cleaner maintenance can make troubleshooting much easier. If cleaning doesn’t resolve repeated navigation or safety errors, contact the manufacturer or a qualified appliance technician instead of opening sealed electronic components.