
How to Clean Robot Vacuum Sensors Safely and Correctly

Quick Answer
To clean robot vacuum sensors, turn the robot off, place it on a stable surface, and gently wipe each sensor window with a clean, dry microfiber or lint-free cloth. Avoid spraying cleaner directly onto the robot, and follow your model’s manual because sensor locations differ. This matches iRobot’s cliff sensor cleaning guidance.
Quick Cleaning Steps
- Power it down: Stop the cleaning cycle and switch off the robot if your model has a power switch.
- Find the sensors: Check underneath, around the bumper, near the dock receiver, and around any LiDAR tower or camera.
- Use dry microfiber: Wipe dust, fingerprints, and film away with light pressure.
- Check the bumper: Remove trapped dust around bumper openings without forcing moving parts.
- Test the robot: Put it on a clear floor and run a short cleaning cycle.
One Important Rule
- Check the manual first: Some manufacturers give different instructions for sensor windows, charging contacts, bumpers, and docking hardware.
I rely on robot vacuums for everyday home hygiene because they keep dust, crumbs, and pet hair from building up between deeper vacuuming sessions. But even a good robot can start behaving strangely when its sensors collect dust.
Cleaning those sensors takes only a few minutes. In this 2026 guide, I’ll show you how I do it without soaking sensitive parts or guessing which cleaner to use.
In This Guide
- Why do robot vacuum sensors need cleaning?
- What should you use to clean robot vacuum sensors?
- How do you clean robot vacuum sensors step by step?
- How should different robot vacuum sensors be cleaned?
- What if the robot still acts strangely after cleaning?
- How often should robot vacuum sensors be cleaned?
- Frequently asked questions
- Final takeaway
Why Do Robot Vacuum Sensors Need Cleaning?
Robot vacuum sensors help the machine detect drop-offs, obstacles, docking areas, dirt, walls, or its position in a room. Dust or grime over a sensor window can interfere with the information the robot receives.
A robot vacuum sensor is an electronic component that helps the vacuum detect or measure something around it, such as a stair edge, wall, obstacle, dock, or position.
Dirty cliff sensors are a good example. iRobot lists dirty cliff sensors as one possible cause of certain drop-off detection errors.
eufy’s guidance also tells owners to clean bottom and bumper sensors when a RoboVac develops abnormal movement or travel behavior.
- Cliff sensors help detect stairs and other sudden floor drops.
- Bumper sensors help the robot react to physical obstacles.
- LiDAR sensors measure surroundings for navigation on equipped models.
- Camera or optical sensors may support mapping or object detection.
- Docking sensors help the robot locate or align with its charging base.
- Bin sensors on some models help determine whether the dustbin is full.
In my experience, sensor cleaning is one of the first maintenance checks worth doing when a robot suddenly spins, avoids open floor space, bumps more than usual, or struggles to dock.
It won’t solve every navigation problem. However, it is quick, inexpensive, and manufacturer-recommended maintenance on many models.
What Should You Use to Clean Robot Vacuum Sensors?
A clean, dry microfiber or lint-free cloth is the safest starting point for most exposed robot vacuum sensor windows. Several major manufacturers give similar dry-cleaning instructions.
Roborock, for example, tells owners of certain models to wipe sensors using a dry, lint-free cloth in its official general maintenance guidance.
What I keep nearby
- A clean microfiber cloth
- A second dry lint-free cloth for final wiping
- A soft cleaning brush for loose debris around openings
- The manufacturer’s manual or support page
- A bright light so small sensor windows are easy to see
What should you avoid?
Don’t spray household cleaner, glass cleaner, disinfectant, or water directly onto a sensor opening unless the manufacturer specifically instructs you to do so.
Dreame warns that a damp cloth can damage sensitive elements on models covered by its robot maintenance guidance and recommends a dry cloth for several sensors.
- Avoid soaking sensor windows.
- Don’t scrape them with metal tools.
- Don’t push cotton swabs deep into openings.
- Don’t polish optical windows with abrasive pads.
- Don’t assume compressed air is safe for every sensor.
That last point matters. iRobot recommends compressed air for cleaning certain light-touch bumper sensor areas, but that doesn’t make compressed air a universal sensor-cleaning method.
How Do You Clean Robot Vacuum Sensors Step by Step?
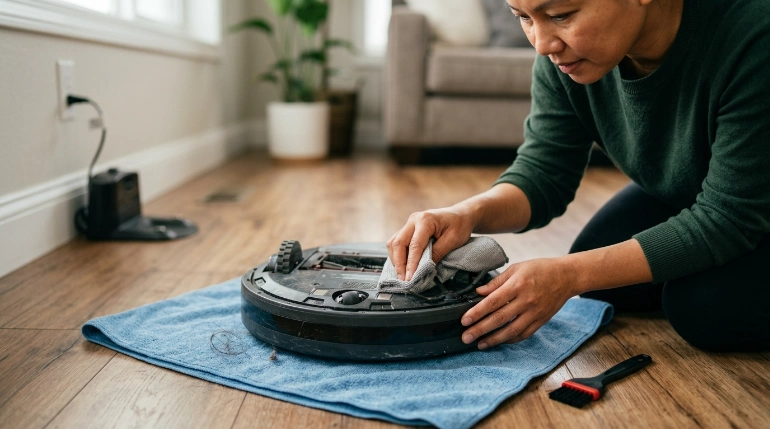
Start with the robot stopped and on a stable, well-lit surface. Then clean each visible sensor gently instead of treating the entire underside like one washable surface.
- Stop the robot. End the cleaning cycle and switch off the main power if your model provides that option.
- Remove loose debris. Brush away hair and dust that could fall across the sensors while you’re working.
- Turn the robot over carefully. Place it on a soft towel so the top housing isn’t scratched.
- Locate the cliff sensors. Look for small dark or clear sensor windows along the underside near the perimeter.
- Wipe each window. Use a clean, dry microfiber cloth and light pressure.
- Inspect the front bumper. Wipe exposed sensor areas and remove debris around the bumper without forcing it.
- Clean navigation hardware. If your model has an exposed LiDAR window, camera, or return-to-base sensor, follow its manual and wipe only accessible surfaces.
- Check the dock. Wipe its signaling window or sensor area according to the dock’s maintenance instructions.
- Return the robot upright. Place it on an open floor away from stairs.
- Run a short test. Watch its first few minutes of movement before returning to normal scheduled cleaning.
Be extra careful near stairs
If you’re cleaning the robot because it has behaved unpredictably near a staircase, don’t test it beside the drop. Use a flat, open area first.
A robot that still ignores edges after its cliff sensors are clean needs further troubleshooting. Don’t depend on a sensor system that appears unreliable.
Expert Alert: If a sensor housing is cracked, loose, electrically damaged, or still fails after approved cleaning and troubleshooting, contact the manufacturer or a qualified appliance technician rather than opening sensitive electronics yourself.
How Should Different Robot Vacuum Sensors Be Cleaned?
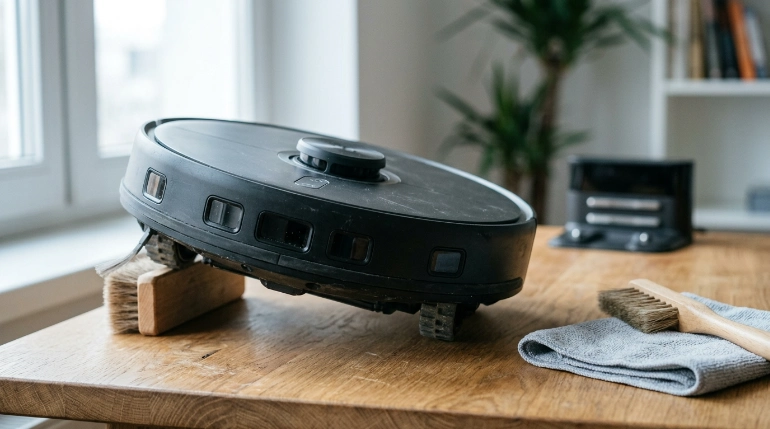
Different sensors do different jobs, so the safest cleaning method depends on the component and the manufacturer. This table gives a practical starting point rather than replacing your model’s manual.
| Sensor or Area | Common Location | Typical Cleaning Approach | Main Caution |
|---|---|---|---|
| Cliff sensors | Underside near outer edge | Dry microfiber or soft lint-free cloth | Keep windows free from residue |
| Bumper sensors | Behind or around front bumper | Wipe accessible areas; use model-specific procedure | Don’t force the bumper mechanism |
| LiDAR/LDS | Top turret or front navigation area | Soft dry cloth or brush on accessible surfaces | Don’t add liquid to the optical assembly |
| Dock/return sensor | Front or top of robot and dock | Soft, dry cloth | Don’t confuse it with charging contacts |
| Full-bin optical sensors | Bin compartment or dustbin | Follow manufacturer-specific instructions | Some designs use several sensor ports |
Dreame’s robot vacuum maintenance instructions separately address laser distance sensors, cliff sensors, return-to-base sensors, and charging contacts. That separation is a useful reminder not to clean every component the same way.
What If the Robot Still Acts Strangely After Cleaning?
Clean sensors don’t guarantee perfect navigation. A robot may still have trouble because of a stuck bumper, blocked wheel, unusual floor surface, mapping problem, firmware issue, or sensor hardware fault.
Check for a physical obstruction
Press the bumper gently and confirm it moves normally. Then inspect the wheels for hair, thread, or debris that could change the robot’s movement.
Check the floor and lighting conditions
Some sensor systems can react differently to challenging surfaces or environmental conditions. If the problem happens in only one spot, move the robot elsewhere and compare its behavior.
Restart and test again
eufy’s official RoboVac guidance recommends cleaning bottom and bumper sensors and restarting the unit when movement becomes abnormal.
You can review that troubleshooting advice on the eufy RoboVac 11S support information.
Check LiDAR movement when applicable
If your robot reports an LDS or LiDAR error, inspect the exposed navigation assembly for debris without dismantling it.
Dreame advises checking whether the LDS component can move normally and whether its emission or receiving openings are blocked on affected models.
- Clean only what the manufacturer says is user-serviceable.
- Restart the robot after basic maintenance.
- Update firmware if the manufacturer’s troubleshooting procedure calls for it.
- Contact support if the same sensor error returns.
How Often Should Robot Vacuum Sensors Be Cleaned?
There isn’t one universal schedule for every robot vacuum. Cleaning frequency depends on the model, dust level, pets, floor type, and manufacturer guidance.
As a useful real-world example, iRobot’s current care schedule for its Roomba 100/1000 series lists cliff-sensor cleaning once per month or as needed.
| Roomba 100/1000 Component | iRobot Example Care Frequency |
|---|---|
| Cliff sensors | Once per month or as needed |
| Charging contacts | Every 2 weeks or as needed |
| Dock sensors | Once per month |
| Dock infrared window | Once per month |
You can see those model-specific intervals in iRobot’s official care-frequency chart. Don’t automatically apply those intervals to a different brand or series.
I also check sensors sooner whenever the underside looks dusty or the robot begins navigating differently. Homes with shedding pets or fine dust may need visual checks more often.
- Inspect sensor windows during routine brush cleaning.
- Clean visible dust before it forms a film.
- Recheck sensors after the robot travels through a dusty area.
- Use your app’s maintenance reminders when available.
- Follow your exact model’s manual over generic schedules.
Frequently Asked Questions
Can I clean robot vacuum sensors with alcohol?
I wouldn’t use alcohol unless your robot’s manufacturer specifically approves it for that sensor. A clean, dry microfiber or lint-free cloth is the safer default because several manufacturers explicitly recommend dry cleaning for optical sensors.
Can I use a wet cloth on robot vacuum sensors?
Avoid a wet cloth unless your manual says otherwise. Some manufacturers specifically warn against moisture around sensitive sensor components, while other parts such as charging contacts may have different cleaning procedures.
Where are the sensors on a robot vacuum?
Common locations include the underside, front bumper, top LiDAR turret, front navigation panel, dustbin area, and docking system. The exact number and position vary by brand and model, so check your manual before cleaning.
Why does my robot vacuum keep spinning after I cleaned the sensors?
Spinning can also come from a stuck bumper, jammed wheel, mapping problem, floor condition, or hardware fault. Inspect moving parts, restart the robot, and follow the error-specific troubleshooting instructions for your exact model.
Can dirty sensors stop a robot vacuum from docking?
Dirty navigation or return-to-base sensor areas may contribute to docking trouble on some designs. Clean the robot’s accessible docking sensor area and the dock’s signaling window according to the manufacturer’s instructions before assuming the dock has failed.
Should I use compressed air on robot vacuum sensors?
Only when your manufacturer recommends it for the specific area. iRobot uses compressed air in troubleshooting for certain light-touch bumper sensors, but many ordinary sensor-cleaning instructions call for a dry cloth instead.
How do I know when a sensor needs professional repair?
Get help when cleaning and approved troubleshooting don’t clear repeated sensor errors, or when a sensor window, LiDAR assembly, wiring area, or housing appears physically damaged. Avoid opening electronic modules unless the manufacturer identifies them as user-serviceable.
Final Takeaway: Keep the Sensors Clean and the Method Simple
The safest way to clean robot vacuum sensors is usually the simplest: remove loose dust and gently wipe accessible sensor windows with a clean, dry microfiber or lint-free cloth.
Pay special attention to cliff sensors, bumper areas, navigation sensors, and docking hardware. Then test the vacuum on a clear, flat floor.
- Use a dry, soft cloth as your default sensor-cleaning tool.
- Never spray cleaner directly into sensor openings.
- Follow model-specific guidance for LiDAR, cameras, bumpers, and charging contacts.
- Clean sooner when behavior changes rather than waiting for a fixed date.
- Seek service for persistent faults instead of opening sensitive electronics.
I treat sensor cleaning as part of normal robot vacuum maintenance, just like clearing hair from brushes and checking the wheels. A few careful minutes can rule out one of the easiest causes of navigation trouble before you start deeper troubleshooting.