How to Clean a Wet Dry Vacuum: Complete Step-by-Step Guide

Quick Answer
To clean a wet dry vacuum, disconnect the power, empty the tank, remove the correct filter, wash or wipe only the parts your manual allows, clean the hose and attachments, then let every washable component dry completely before reassembly. Filter designs vary widely, so check an official wet/dry vacuum filter guide or your model’s manual before putting any filter in water.
Quick cleaning steps
- Disconnect power: Unplug the vacuum or remove its battery before opening the tank.
- Empty the tank: Dispose of dry debris or drain collected liquid in a suitable place.
- Check the filter: Remove it and clean it only by the method approved for that exact filter.
- Wash the tank: Remove residue with warm water and mild detergent when the manufacturer permits it.
- Clean the airflow path: Check the hose, inlet, attachments, float mechanism, and exhaust openings for debris.
- Dry completely: Reassemble washable parts only after trapped moisture has evaporated.
Before the next use
- Install the filter, bag, or wet-pickup setup specified for the material you plan to vacuum.
A wet dry vacuum can handle messes that would damage many ordinary household vacuums, but that versatility also makes cleaning it more important. Learning how to clean a wet dry vacuum correctly helps keep old liquid, fine dust, hair, and workshop debris from building up inside the machine.
I treat wet cleanup differently from ordinary vacuum maintenance. Once dirty water has been inside the tank, I don’t put the machine away until the tank and wet-contact parts are clean and dry.
This guide covers the tank, filter, hose, accessories, odor control, drying, and routine maintenance. The most important rule is simple: your model’s manual wins whenever its instructions differ from general advice.
In This Guide
- What Should You Do Before Cleaning a Wet Dry Vacuum?
- How Do You Clean a Wet Dry Vacuum Step by Step?
- How Do You Clean a Wet Dry Vacuum Filter?
- How Do You Clean the Hose and Attachments?
- How Do You Prevent Odors and Mold After Wet Pickup?
- How Often Should You Clean a Wet Dry Vacuum?
- Frequently Asked Questions
What Should You Do Before Cleaning a Wet Dry Vacuum?
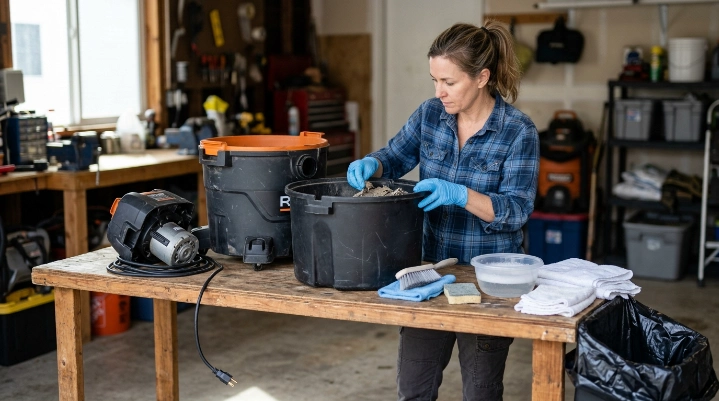
Start by disconnecting the machine from every power source. A corded model should be unplugged, while a cordless model should be switched off and have its removable battery disconnected when the manufacturer instructs you to do so.
A wet dry vacuum is a vacuum designed to collect suitable dry debris and liquids when configured according to its manufacturer’s instructions. It may also be called a wet/dry vac or shop vacuum.
Let the machine stop completely
Don’t open the tank while the motor is running. Wait until moving parts and airflow have stopped before releasing the latches or removing the powerhead.
Keep the motor head away from pooled water while you work. The tank may tolerate liquid, but that doesn’t mean the electrical portion should be washed or immersed.
Check what you vacuumed up
The contents determine how cautiously you should clean the machine. Ordinary sawdust is different from dirty floodwater, unknown chemicals, mold-contaminated debris, or hazardous dust.
- Normal dry debris: Empty it carefully while limiting unnecessary dust clouds.
- Plain household liquid: Drain the tank and wash wet-contact surfaces as permitted.
- Food or organic spills: Clean promptly because residue can create odors.
- Mold-contaminated material: Use appropriate personal protection and avoid spreading contaminated dust.
- Unknown chemicals: Don’t casually pour them into a household drain or yard.
- Hazardous dust: Follow the material-specific cleanup rules and your vacuum’s certification or limitations.
*Expert Alert: If the vacuum contains sewage, significant mold contamination, hazardous chemicals, lead-contaminated dust, asbestos-containing material, or other regulated debris, ordinary household cleaning instructions may not be adequate. Use qualified remediation or hazardous-material guidance instead of improvising.*
Gather simple cleaning supplies
You usually don’t need aggressive chemicals. Mild cleaning methods are easier on seals, plastics, hoses, and filters.
- Disposable gloves when the contents are dirty
- Trash bag or approved disposal container
- Soft cloth or non-abrasive sponge
- Soft cleaning brush
- Warm water
- Mild dish detergent when allowed
- Dry towels
- A clear area for air-drying washable components
Avoid soaking the motor housing, electrical connectors, battery, switch, or power cord. Those components are not part of routine wet washing.
Section Takeaway: Disconnect power first, identify what is inside the tank, and keep water away from electrical components. The debris type should determine how you dispose of and clean the contents.
How Do You Clean a Wet Dry Vacuum Step by Step?
The safest general method is to work from the dirty tank outward. Empty the machine first, then clean removable wet-contact parts before checking the filtration and airflow system.
Step 1: Remove the powerhead
Release the side latches or locking system and lift the motor head according to your manual. Set it on a stable, dry surface where the electrical side won’t contact water.
Look at the underside before doing anything else. This helps you see whether debris has reached the filter cage, float, gasket, or other areas.
Step 2: Remove the filter or collection bag as required
Filter arrangements vary more than many owners expect. Some vacuums use a foam sleeve for wet pickup, while others use a moisture-resistant cartridge or wet/dry filter.
Remove disposable collection bags before washing the tank unless your model uses a bag specifically designed for the material collected. Don’t assume a paper dust bag can remain installed during wet cleaning.
Step 3: Empty dry debris carefully
If the tank contains dry dirt, carry it to your disposal area before tipping it. Dumping fine debris too quickly can create a cloud that settles back onto nearby surfaces.
- Keep the tank close to the trash container.
- Tip it slowly.
- Dislodge stuck debris with a soft brush.
- Don’t strike the plastic drum against a hard surface.
- Check the bottom for screws, stones, glass, or sharp objects before reaching inside.
Step 4: Drain collected liquid
Many larger wet/dry vacuums include a tank drain, while smaller models may require you to tip the tank. Use whichever method your manufacturer provides.
Dispose of the liquid according to what it contains. Water mixed with chemicals, oils, paint, sewage, or hazardous debris shouldn’t automatically go down a household drain.
Step 5: Wash or wipe the tank
For an ordinary washable drum, remove remaining residue with warm water and a small amount of mild detergent. Use a cloth or soft brush around corners where dirty water leaves a film.
Rinse away soap residue when appropriate. Avoid abrasive tools that can deeply scratch plastic tanks and create places for grime to collect.
Step 6: Inspect the float mechanism
Many wet/dry vacuums use a float or similar mechanism that reacts when liquid reaches a certain level. Debris around this area can interfere with movement.
Remove visible dirt gently without forcing or modifying the mechanism. If the float is damaged or doesn’t move as the manual describes, replace or service the appropriate part.
Step 7: Wipe the powerhead carefully
Use a dry or lightly damp cloth on exterior plastic surfaces when permitted. Never rinse the motor head under a faucet or submerge it.
Inspect intake and exhaust openings for lint and debris. Clear only accessible contamination without pushing tools deep into the motor assembly.
Step 8: Dry the tank before storage
Leave the tank open in a ventilated area until moisture has evaporated. Drying matters most after wet pickup because a closed damp container can develop stale odors.
I usually leave the drum open rather than immediately clipping the powerhead back onto a freshly washed tank. That simple habit gives trapped moisture somewhere to go.
Section Takeaway: Empty first, clean the drum and wet-contact components second, then dry everything before closing the machine. Never treat the motor head like a washable tank.
How Do You Clean a Wet Dry Vacuum Filter?
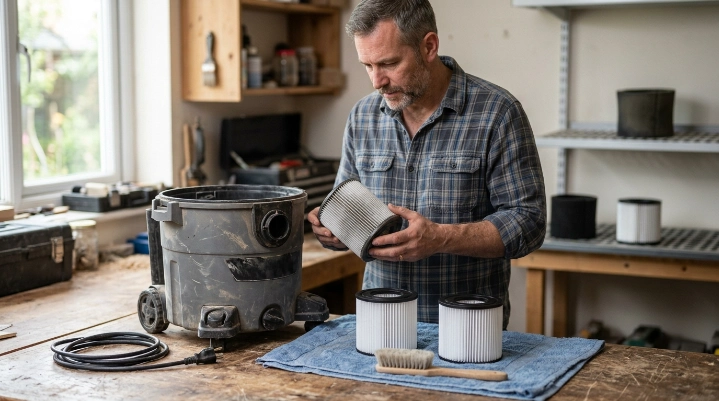
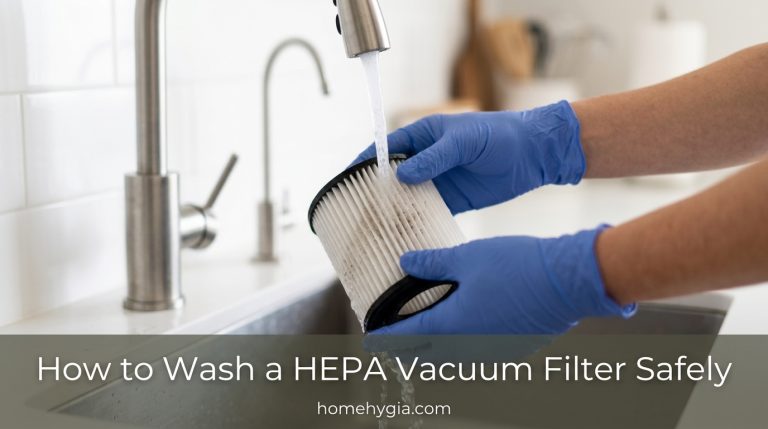
First identify the exact filter. Some wet/dry filters are washable and reusable, while other pleated, paper, cartridge, HEPA, or specialized filters have different maintenance instructions.
Never decide that a filter is washable simply because another filter looks similar. Official guidance differs even among wet/dry vacuums from the same product category.
Wet/dry vacuum filter types compared
| Filter example | Verified manufacturer guidance | What it means when cleaning |
|---|---|---|
| Shop-Vac foam sleeve | Shop-Vac identifies a foam sleeve as an ideal option for wet pickup on compatible models. | Don’t assume the same wet-pickup setup applies to another brand or model. |
| RIDGID wet application filter | RIDGID offers washable wet filters for compatible wet/dry vacuums and instructs users to let them dry. | Wash only a filter specifically approved for washing. |
| DEWALT wet/dry HEPA filter | Certain DEWALT wet/dry replacement filters are specified as washable and reusable. | The words HEPA or pleated do not automatically tell you whether another filter can be washed. |
| Kärcher moisture-resistant filter | Some Kärcher wet/dry models use moisture-resistant filters designed for both wet and dry work. | Some machines don’t require the traditional foam-filter changeover used by other designs. |
This variation is why the owner’s manual is the safest filter-cleaning reference. The RIDGID wet/dry filtration guide and Shop-Vac filter guide also show how filtration changes with the pickup material.
If the filter is washable
Remove loose surface debris first using the approved method. Then rinse or wash it exactly as the manufacturer directs.
- Disconnect the vacuum from power.
- Remove the filter without tearing or crushing it.
- Knock off or brush away loose debris only if approved.
- Rinse with clean water when the filter is specifically washable.
- Avoid aggressive scrubbing of delicate pleats.
- Let the filter dry for the period required by the manufacturer.
- Inspect it for tears, deformation, damaged seals, or remaining blockage.
- Reinstall it securely before the appropriate type of pickup.
Don’t speed drying with high heat unless the manufacturer specifically allows it. Heat can distort filter media, foam, adhesives, or plastic support structures.
If the filter is not washable
Keep water away from it. Use the approved dry-cleaning method or replace the filter when it becomes too dirty or damaged to function correctly.
A filter can look simple while using materials that lose their intended structure when soaked. Guessing here can create a more expensive problem than replacing a dirty filter.
What about HEPA filtration?
HEPA means high-efficiency particulate air. The U.S. Environmental Protection Agency’s HEPA guidance describes the HEPA filtration standard for fine particles.
A vacuum labeled for HEPA filtration should still be operated with the correct compatible filter and seals. A filter’s performance depends on the complete system using it as designed.
Section Takeaway: Filter material and model design determine the correct cleaning method. Never wash a wet/dry vacuum filter unless its manufacturer says that exact filter is washable.
How Do You Clean the Hose and Attachments?
A clean tank won’t solve poor airflow if the hose still contains wet sludge, sawdust, hair, or compacted debris. Check the full path from the floor tool to the tank inlet.
Inspect the hose before washing it
Disconnect the hose and look through both ends. Bent hose sections and molded elbows are common places for debris to stop moving.
- Look for hair clumps and lint.
- Check for leaves, paper, stones, and wood chips.
- Inspect the hose cuff for cracks.
- Check locking tabs or friction-fit connectors.
- Look for cuts that can create air leaks.
Avoid stabbing a blockage with knives or screwdrivers. A sharp tool can puncture a flexible hose and turn a simple clog into an air leak.
Can you rinse a wet dry vacuum hose?
Many simple plastic wet/dry hoses can be rinsed after messy liquid pickup, but you should verify your model’s instructions first. Hoses with powered electrical connections need different care.
If rinsing is allowed, run clean water through the hose and move it gently to release residue. Drain it thoroughly afterward.
Dry the hose completely
Hang or position the hose so trapped water can drain from both ends. Curves and corrugations can hold more moisture than the outside appearance suggests.
Don’t coil a wet hose tightly inside a closed tank. Give the inside surface time to dry.
Wash compatible accessories separately
Plain plastic utility nozzles, crevice tools, and floor attachments can often be wiped or rinsed when the manufacturer permits it. Remove hair from bristles and wheels before washing.
Powered brushes, motorized heads, switches, and electrical connectors should never be treated like simple plastic tools. Follow their separate cleaning instructions.
Section Takeaway: A wet/dry vacuum’s hose is part of its airflow system, so inspect it for both residue and blockages. Dry rinsed hoses and tools before storing them inside the tank.
How Do You Prevent Odors and Mold After Wet Pickup?
The best odor-control method is removing the source instead of masking the smell. Empty dirty liquid promptly, wash compatible wet-contact surfaces, and let the tank dry before closing it.
Don’t store dirty water in the tank
Organic material, food residue, mud, and dirty household water can leave a film after the liquid is drained. That residue may become the source of a stale or unpleasant smell.
- Empty liquid after the cleanup.
- Rinse visible sediment away.
- Wash compatible tank surfaces with mild detergent.
- Clean the hose if dirty liquid passed through it.
- Dry the tank and hose before closed storage.
What if the vacuum was used around mold?
Mold cleanup requires more care because disturbing contaminated material can spread particles. The CDC’s mold cleanup guidance recommends choosing cleanup practices based on the amount of water damage and contamination involved.
The EPA’s mold resources also emphasize moisture control. Cleaning the vacuum doesn’t solve a household mold problem if the underlying leak or damp material remains.
*Expert Alert: Large mold problems, contaminated floodwater, sewage, or extensive porous-material damage can require professional remediation. Don’t rely on an ordinary wet/dry vacuum as a substitute for appropriate containment, protective equipment, and remediation procedures.*
Don’t use strong chemicals casually
A harsh disinfectant isn’t automatically better for the machine. Some chemicals can affect plastics, seals, filter media, or metal parts.
Never mix household cleaning chemicals. If disinfection is necessary, use a product and concentration appropriate for the contamination and compatible with the equipment.
Store the vacuum open until it is dry
Air circulation is one of the easiest ways to prevent musty storage odors. A tank that feels dry on the upper wall may still hold moisture around the drain, seams, filter cage, or hose.
Once everything is completely dry, reinstall the correct filter setup and store the vacuum where it stays protected from weather and standing moisture.
Section Takeaway: Odor prevention starts with prompt emptying, residue removal, and complete drying. If mold or contaminated water is involved, focus on safe remediation of the original contamination as well as the vacuum itself.
How Often Should You Clean a Wet Dry Vacuum?
There isn’t one cleaning interval that fits every wet/dry vacuum. The mess you collect is more useful than a calendar when deciding whether the machine needs immediate cleaning.
As of 2026, filter and wet-pickup designs still differ significantly among major manufacturers. Use the schedule below as an inspection routine, not a replacement for your manual.
| Situation | Recommended action | Main reason |
|---|---|---|
| After liquid pickup | Empty promptly and clean wet-contact areas as needed. | Prevents stored dirty water and residue. |
| After food, mud, or organic spills | Wash compatible tank, hose, and tools. | Helps prevent lingering residue and odors. |
| After heavy dry debris | Empty tank and inspect filter and airflow path. | Catches dust buildup and clogs early. |
| When suction drops | Check filter, hose, inlet, tank level, and attachments. | Restricted airflow is a common maintenance issue. |
| Before long-term storage | Empty, inspect, clean, and fully dry the machine. | Avoids storing moisture and old debris. |
Watch for signs that cleaning is overdue
Don’t wait for a maintenance date when the vacuum is already behaving differently. Performance changes often tell you where to look.
- Weak suction: Inspect the filter, hose, inlet, and tank level.
- Unusual odor: Check for wet residue, dirty filters, or material trapped in the hose.
- Debris at the exhaust: Stop and check the filtration setup and filter condition.
- Unexpected shutdown: Disconnect power and investigate possible airflow restriction or another manufacturer-listed cause.
- Rattling: Look for hard objects in the tank, hose, or inlet.
- Damaged cord or plug: Stop using the machine until it is safely repaired.
You can also pair this routine with a broader vacuum-care schedule. Keeping the tank, filtration system, and airflow path clean makes later troubleshooting much easier.
Section Takeaway: Clean immediately after messy liquid pickup and inspect the machine whenever performance changes. Manufacturer maintenance intervals should always take priority over a generic schedule.
Frequently Asked Questions
Can I wash the inside of a wet dry vacuum?
You can often wash the removable tank of a wet/dry vacuum when the manufacturer permits it. Do not hose down, rinse, or immerse the motor head, power switch, battery contacts, electrical connectors, or other powered components.
Can I hose out a wet dry vacuum?
Don’t hose down the complete assembled vacuum. A washable tank may tolerate rinsing after the powerhead and sensitive components are removed, but follow your model’s instructions before using running water.
Can you wash a wet dry vacuum filter?
Only if that exact filter is specified as washable. Some foam, cartridge, or wet/dry filters can be rinsed, while other filters require dry cleaning or replacement.
Should I remove the filter when vacuuming water?
That depends on the vacuum. Some models use a foam wet filter, some use a wet/dry cartridge filter, and others specify a different configuration, so follow the manufacturer’s wet-pickup instructions.
Why does my wet dry vacuum smell bad?
Common causes include dirty water left in the tank, damp filters, organic residue, or moisture trapped in the hose. Empty the tank, clean compatible components, inspect the filter, and let washed parts dry completely.
How do I dry a wet dry vacuum hose?
Drain as much water as possible and position the hose so air can move through it and both ends can drain. Avoid sealing a damp hose inside the vacuum tank.
Can I use bleach to clean my wet dry vacuum?
Don’t assume bleach is safe for the vacuum’s plastic, seals, hose, or filter. Check the manufacturer’s cleaning instructions first, and never mix bleach with ammonia or other household cleaners.
Final Takeaway: Cleaning a wet dry vacuum is mostly about controlling residue, protecting the filtration system, and removing moisture before storage. Disconnect power, empty the drum, clean only washable components, inspect the hose and filter, then give everything enough time to dry.
Make the cleanup part of the job rather than something you postpone until the next spill. A few minutes of care after wet pickup can leave the vacuum clean, dry, and ready when you need it again.