How to Clean a Vacuum Dustbin Safely and Thoroughly

Quick Answer
To clean a vacuum dustbin, empty all loose debris first, remove the bin if your model allows it, and wipe away fine dust. Rinse the bin only when the manufacturer says that part is washable, then let it dry completely before putting it back. Keeping dust contained matters because cleaning and vacuuming can stir settled particles back into the air, as explained in the EPA guidance on indoor particulate matter.
Quick cleaning steps
- Step 1 — Unplug it: Turn off the vacuum and disconnect it from power before removing parts.
- Step 2 — Empty debris: Hold the bin low inside a trash can or bag and release the dirt slowly.
- Step 3 — Remove residue: Use a dry microfiber cloth or soft brush for fine dust stuck inside.
- Step 4 — Check washability: Read the manual before putting the dustbin, cyclone, or filter near water.
- Step 5 — Wash if allowed: Rinse only removable parts that the manufacturer identifies as washable.
- Step 6 — Dry fully: Reassemble the vacuum only after every washed part is completely dry.
One rule I never skip
- Never rinse a motor housing, electrical connection, or non-washable cyclone assembly.
Learning how to clean a vacuum dustbin sounds simple until fine dust, hair, and stale smells start sticking inside it. I have found that emptying the bin and actually cleaning it are two different jobs.
The safest approach is also simple. Work slowly, keep dust contained, and never assume a removable-looking part is washable.
In This Guide
- What Does Cleaning a Vacuum Dustbin Actually Mean?
- How Do You Clean a Vacuum Dustbin Step by Step?
- Can You Wash a Vacuum Dustbin With Water?
- How Should You Clean Fine Dust, Pet Hair, and Odors?
- How Often Should You Clean a Vacuum Dustbin?
- What Mistakes Should You Avoid?
- Frequently Asked Questions About Cleaning a Vacuum Dustbin
What Does Cleaning a Vacuum Dustbin Actually Mean?
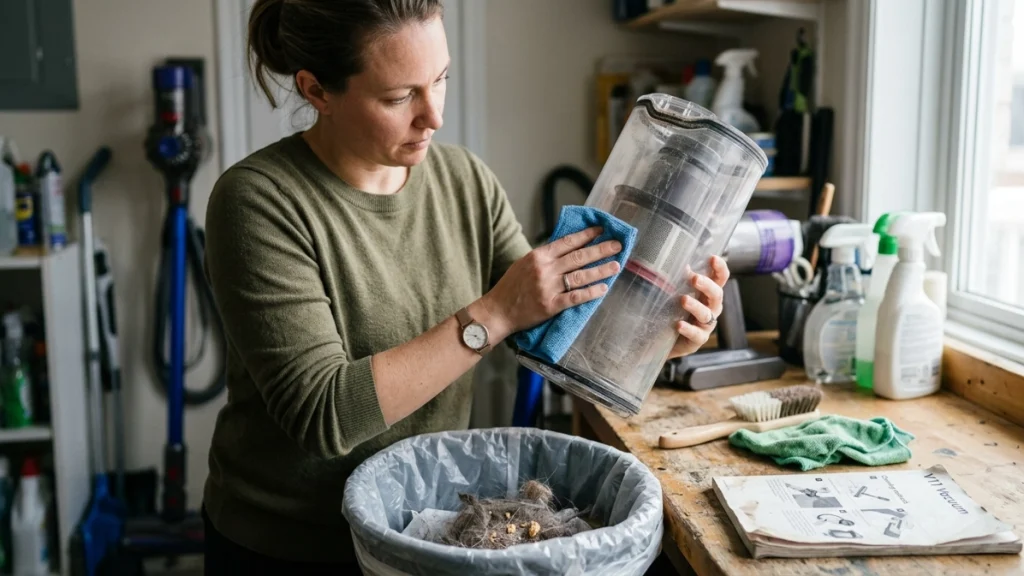
Cleaning a vacuum dustbin means removing both the collected debris and the residue left on the bin’s surfaces. It can include dry brushing, wiping, or rinsing when the manufacturer permits water.
A vacuum dustbin is the reusable container that collects dirt in a bagless vacuum. You may also see it called a dust cup, dirt cup, dirt container, or collection bin.
Emptying and cleaning are not the same job
Emptying removes loose material such as crumbs, hair, lint, and visible dirt. Cleaning deals with the fine layer that stays behind.
I notice this most after vacuuming fine household dust. The large debris falls out immediately, while a gray film often remains along the clear plastic walls.
- Emptying: Removes loose collected debris.
- Dry cleaning: Removes powdery dust without adding moisture.
- Damp wiping: Lifts residue from surfaces that can tolerate light moisture.
- Washing: Uses water only on parts specifically identified as washable.
Why does dustbin maintenance matter?
A packed or dirty bin can interfere with normal airflow, especially when debris blocks openings near the cyclone or filter. Hair can also collect around seals and release mechanisms.
Dust handling deserves attention too. The EPA notes that activities including vacuuming can stir settled dust into indoor air.
This matters more when a household member reacts to dust or allergens. The CDC’s asthma guidance recommends regular vacuuming and discusses HEPA-filter vacuums as part of reducing exposure to dust-mite triggers.
Check the manual before starting
Two dustbins can look almost identical but have different cleaning rules. One may be washable while another stays attached to a cyclone assembly that must remain dry.
As of 2026, I still treat the manufacturer’s instructions as the deciding source. Generic cleaning advice should never override model-specific maintenance instructions.
How Do You Clean a Vacuum Dustbin Step by Step?
Start by disconnecting power, emptying the bin carefully, and removing only the components designed for routine maintenance. Then clean the bin using the least moisture necessary.
1. Turn the vacuum off and disconnect power
For a corded vacuum, unplug it from the outlet. For a cordless model, switch it off and remove the battery if the manual instructs you to do so.
Do not clean a vacuum while it can accidentally start. This becomes especially important when your hands may become damp.
2. Take the dustbin to a suitable disposal area
I prefer an outdoor trash bin when the vacuum contains lots of fine dust. Otherwise, I lower the dust cup deep into a large trash can before opening it.
This reduces the distance debris falls. It also helps contain the small dust cloud that can appear when a full bin opens.
3. Empty the loose dirt slowly
- Position the dustbin over the trash.
- Open the release door or remove the container as instructed.
- Allow loose debris to fall without aggressive shaking.
- Tap the bin gently if a small amount of dry debris remains.
- Close or remove the bin before moving back indoors.
I avoid banging plastic bins against the trash can. Thin latches, hinges, and clear plastic edges are easier to damage than they look.
4. Remove stuck debris
Use a soft, dry brush or microfiber cloth to loosen dust from corners. A dry method is the safest starting point when you are unsure about washability.
Keep tools away from delicate seals and cyclone openings. Do not push debris deeper into narrow air channels.
5. Wipe or rinse only when permitted
If the manual permits damp cleaning, wipe the inside with a clean cloth. If it explicitly says the removable bin can be rinsed, separate it from non-washable components first.
Avoid adding soap, disinfectant, fragrance, or other cleaners unless the instructions allow them. Residue can remain on surfaces or affect seals.
6. Let every washed part dry completely
This is where I refuse to rush. A dustbin that looks dry around the sides can still hold droplets inside corners, seams, or latch areas.
Place the washed part in a ventilated area and wait until no moisture remains. Follow the manufacturer’s stated drying period whenever one is provided.
7. Reassemble and inspect the seals
- Check that the bin is fully seated.
- Confirm that the bottom door is latched.
- Look for hair around rubber seals.
- Make sure filters are installed correctly.
- Confirm that all washed components are completely dry.
After assembly, run the vacuum briefly and listen for unusual air leaks. Stop if the bin will not lock properly or the machine sounds different from normal.
Section Takeaway: Empty first, clean with the least moisture needed, and never reinstall damp components. The model manual always has the final say.
Can You Wash a Vacuum Dustbin With Water?
You can wash some vacuum dustbins with water, but not all of them. Only rinse a bin when the manufacturer’s instructions identify that specific part as washable.
The word removable does not automatically mean washable. That distinction has saved me from treating several vacuum parts too aggressively.
| Cleaning method | Water contact | Best use | Before reassembly |
|---|---|---|---|
| Dry microfiber cloth | None | Loose fine dust and light residue | Remove remaining debris |
| Soft dry brush | None | Corners and dry dust buildup | Brush out loosened dust |
| Damp cloth | Limited | Wash-safe plastic surfaces | Allow all moisture to evaporate |
| Full rinse | Yes | Only manufacturer-approved washable bins | Dry completely for the stated period |
What should never be rinsed casually?
- Motor housings
- Battery compartments
- Electrical contacts
- Powered floor-head connections
- Non-washable cyclone assemblies
- Non-washable filters
Do not assume that a HEPA filter can be washed either. HEPA describes a filtration standard, not whether a specific filter tolerates water.
The EPA’s HEPA filter explanation defines HEPA filtration by particle-capture performance. Washability still depends on the filter’s manufacturer.
Expert Alert: If water has entered a vacuum’s motor housing, battery area, charger connection, or other electrical section, do not power it on to “test” it. Follow the manufacturer’s service instructions or have the appliance inspected by a qualified repair professional.
How Should You Clean Fine Dust, Pet Hair, and Odors?
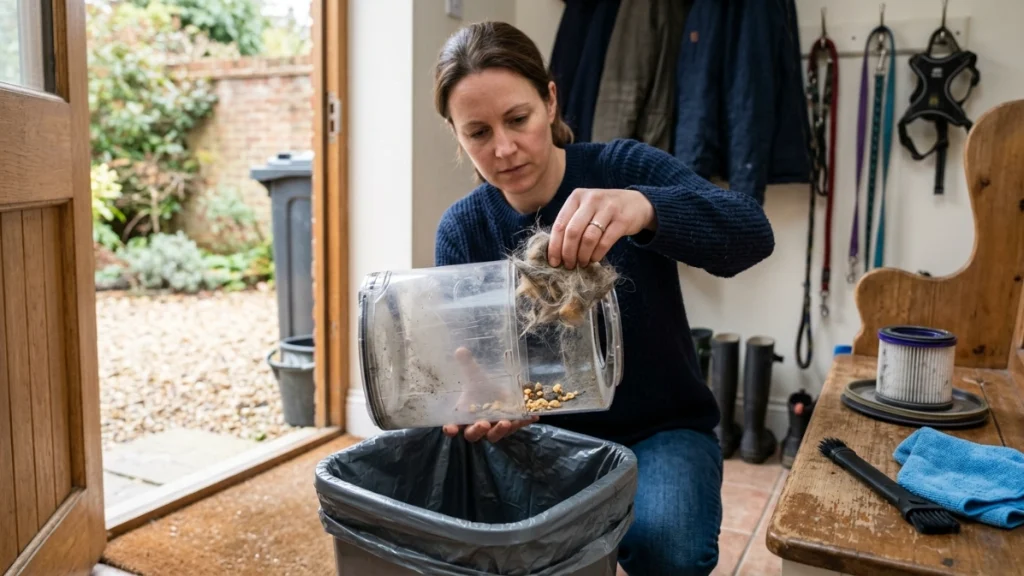
Fine dust, hair, and odors need slightly different approaches. I start with dry debris removal, because adding water too early can turn fine dust into sticky residue.
Fine household dust
Fine powder tends to coat clear bin walls and settle around small ledges. Empty it gently before wiping the remaining film.
- Keep the bin low inside the trash container.
- Allow dust to fall before tapping.
- Use a dry microfiber cloth for residue.
- Clean outdoors when heavy dust exposure bothers you.
The EPA recommends considering HEPA-filter vacuums to help reduce dust buildup and limit some captured dust from escaping through the vacuum’s exhaust.
Pet hair and long human hair
Hair often forms a bridge across the bin instead of falling out. It can also wrap around the bin door or catch near a cyclone opening.
Turn the vacuum off before pulling accessible hair away. Never insert fingers into powered or sharp areas.
- Remove loose clumps by hand when safely accessible.
- Use a soft cleaning tool for narrow corners.
- Inspect the door hinge and seal.
- Check the intake separately if the bin keeps filling unevenly.
Dust mite and allergen concerns
Household dust can contain biological material, including dust-mite allergens and pet dander. The National Institute of Environmental Health Sciences recommends measures such as HEPA-filter vacuuming and damp dust removal for households concerned about dust-mite allergens.
If someone in my home were particularly sensitive to airborne dust, I would empty the bin outdoors when practical. I would also avoid shaking it aggressively.
What about a smelly dustbin?
Start by removing the source instead of covering the smell with fragrance. Pet hair, food crumbs, damp debris, and dirty filters can all create stale odors.
- Empty the bin completely.
- Remove hair and trapped debris.
- Clean the bin using its approved method.
- Inspect washable or replaceable filters according to the manual.
- Allow every cleaned part to dry fully.
If a burnt or electrical smell appears, stop using the vacuum. That is different from ordinary dustbin odor and deserves inspection.
Section Takeaway: Treat the source of the mess instead of masking it. Fine dust needs containment, hair needs physical removal, and persistent burning smells need investigation.
How Often Should You Clean a Vacuum Dustbin?
Empty the dustbin before it reaches the manufacturer’s maximum fill line. Deep cleaning frequency depends on what you vacuum, how often you clean, and what the manual recommends.
I prefer condition-based cleaning over an arbitrary calendar rule. A vacuum used daily for pets will dirty its bin faster than one used weekly in a small apartment.
Empty the bin when these signs appear
- Debris approaches the maximum fill marker.
- Hair is packed against the cyclone area.
- Dirt no longer falls freely when the bin opens.
- You have finished a particularly dusty cleaning job.
- Pet hair quickly fills most of the container.
Deep clean when residue builds up
- A thick film covers the inside walls.
- The bin smells stale after emptying.
- Dust collects around seals or the release door.
- Sticky debris remains after normal emptying.
- The manufacturer’s maintenance schedule calls for cleaning.
Do not confuse bin maintenance with filter maintenance. Filters often have their own cleaning or replacement schedule.
Checking both matters because airflow passes through more than the collection container. A perfectly clean dustbin cannot compensate for a blocked hose or heavily clogged filter.
What Mistakes Should You Avoid?
The biggest mistakes are washing non-washable components, reassembling damp parts, and allowing fine dust to escape unnecessarily. Most are easy to prevent with a slower routine.
Do not wash every removable part
A part coming off the vacuum does not prove it belongs under a faucet. Cyclones, filters, and electronics vary widely between designs.
Check the model instructions first. When the manual says dry cleaning only, keep that part dry.
Do not reinstall a damp bin
Moisture and collected dust make an unpleasant combination. Damp residue can stick to surfaces instead of moving freely into the bin.
Wait until seams, corners, latches, and hidden recesses are dry. Visual checking is more useful than guessing from a generic drying time.
Do not use harsh chemicals by default
Bleach, solvents, strong fragrances, and concentrated cleaners are unnecessary for routine dust removal unless the manufacturer specifically approves them. They may affect plastic, seals, or leave residue.
Plain mechanical cleaning is often enough. Use additional cleaning agents only when the appliance instructions support them.
Do not bang the dustbin against hard surfaces
Gentle tapping may loosen dry debris. Hard impacts can damage clear plastic, hinges, seals, or locking tabs.
Do not ignore damaged seals
Check the sealing surfaces while the bin is already removed. Hair or grit trapped along a seal can prevent a clean fit.
Replace damaged components according to the manufacturer’s guidance rather than forcing the bin closed.
Do not treat hazardous dust like normal household dirt
Ordinary dustbin cleaning advice is not a safe procedure for hazardous contamination. Lead dust, asbestos-containing debris, significant mold contamination, or unknown hazardous material needs different controls.
Expert Alert: If the vacuum has collected potentially hazardous material, do not shake out and wash the dustbin using routine household methods. Follow the relevant safety guidance or contact a qualified remediation professional.
Section Takeaway: Water, harsh cleaners, and force are not shortcuts. Correct maintenance depends on knowing which components are washable and keeping electrical parts dry.
Frequently Asked Questions About Cleaning a Vacuum Dustbin
Can I wash my vacuum dustbin with soap and water?
Only if the manufacturer’s instructions allow both washing and the cleaning product you plan to use. Some bins can be rinsed, while attached cyclone assemblies or other components must stay dry. When unsure, start with dry cleaning and check the manual.
Should I clean the vacuum dustbin after every use?
You do not always need to wash it after every use. Empty it when required by the fill line or debris level, then deep clean it when residue, odors, or the manufacturer’s maintenance schedule indicate it needs attention.
Can I put a vacuum dustbin back while it is slightly damp?
No. A washed dustbin should be completely dry before reassembly. Check seams, corners, door hinges, and recessed areas because water can remain there after the large visible surfaces look dry.
How do I clean dust stuck to the inside of a vacuum bin?
Empty loose debris first, then use a soft dry brush or microfiber cloth. If the bin is approved for washing, you can use the permitted wet-cleaning method afterward. Avoid pushing dust into cyclone openings or other narrow air passages.
Why does my vacuum dustbin smell even after I empty it?
Odor can remain when pet hair, food particles, fine residue, or dirty filters stay inside the vacuum. Clean approved components, check filters according to the manual, remove trapped debris, and let washed pieces dry completely before reuse.
Does cleaning the dustbin improve vacuum suction?
Cleaning can help when packed debris or buildup is restricting airflow around the bin. However, weak suction can also come from a clogged filter, blocked hose, tangled brush roll, damaged seal, or another problem.
Should people with allergies empty the vacuum outdoors?
Outdoor emptying can reduce the amount of released dust that stays inside the home. It is especially practical with fine, dusty loads, although personal allergy or asthma management should follow appropriate medical and environmental guidance.
The easiest routine is also the safest: empty early, clean gently, check the manual before using water, and wait for every washed component to dry completely.
A clean vacuum dustbin takes only a small amount of maintenance, but it prevents old debris from becoming a bigger mess. Once I made these checks part of my normal vacuum routine, cleaning the bin became much simpler and less dusty.