How to Change a Vacuum Brush Roll to Protect Your Home’s Air Quality

If you suffer from indoor allergies, asthma, or simply want to breathe clean air, vacuuming is your first line of defense. However, if your vacuum cleaner seems to be pushing dirt around rather than picking it up, your brush roll might be to blame. A worn or tangled brush roll leaves pet dander, dust mites, and pollen trapped deep within your carpet fibers. Every time someone walks across the room, those trapped pollutants are kicked up into the air you breathe.
Learning how to change a vacuum brush roll is one of the easiest ways to restore your vacuum’s deep-cleaning power. By replacing this simple part, you ensure your vacuum actually removes allergens rather than just stirring them up. In this guide, we will walk you through the simple steps to replace your brush roll, recognize the warning signs of a failing part, and keep your home’s air fresh and clean.
Quick Answer
To change a vacuum brush roll, first unplug the vacuum and flip it over. Remove the screws holding the bottom base plate and take the plate off. Slide the old brush roll out of the belt and lift it away. Loop the belt around the new brush roll, snap it into place, and reattach the base plate.
Why Your Vacuum’s Brush Roll Matters for Indoor Air Quality
You might wonder why an air quality website is talking about vacuum parts. The truth is, your floors are the largest filter in your home. Carpets and rugs act like giant sponges, trapping particulate matter, pet hair, and even volatile organic compounds (VOCs) that settle out of the air.
When your vacuum’s brush roll (also called a beater bar) is working correctly, its stiff bristles agitate the carpet fibers. This vibration loosens the microscopic particles so the vacuum’s suction can pull them into the HEPA filter.
If the bristles are worn down or the roll is jammed with hair, the vacuum loses its ability to agitate the fibers. Instead of being safely contained inside a sealed dirt bin, allergens are left in the carpet. According to the EPA’s guidelines on improving indoor air quality, frequent cleaning and source control are essential steps for reducing indoor pollutants. A functioning brush roll is non-negotiable for effective source control.
Signs It’s Time to Change Your Vacuum Brush Roll
Homeowners often blame their vacuum’s motor when it stops picking up dirt, but the issue is usually at the floor level. Look for these common warning signs that your brush roll needs to be replaced:
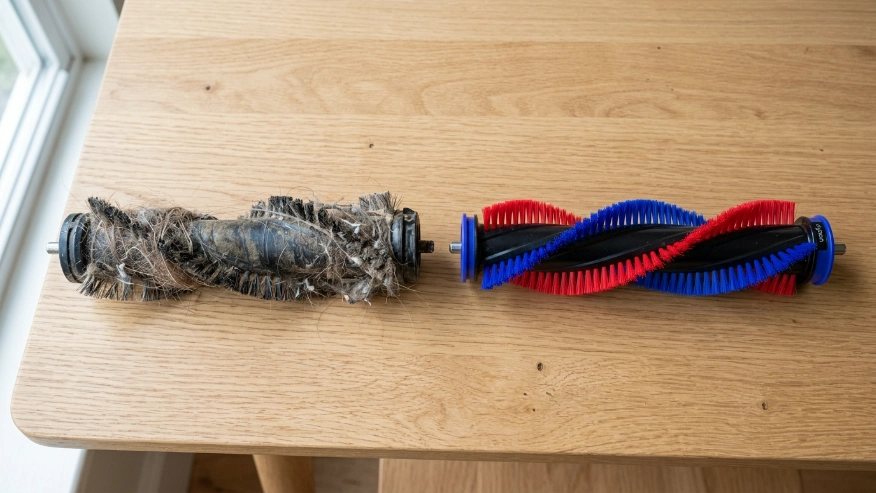
- Worn or Soft Bristles: Run your hand over the brush roll. If the bristles feel soft, frayed, or are shorter than the plastic cylinder, they can no longer reach into the carpet.
- Excessive Vibration or Noise: A loud rattling sound often means the bearings inside the brush roll are worn out or broken.
- A Burning Smell: If the brush roll is jammed with debris but the motor keeps turning, the rubber belt will grind against it. This creates friction and a distinct burning rubber smell.
- Visible Cracks: The plastic or wood cylinder of the brush roll can crack over time, which throws the roll off balance.
- Leftover Pet Hair: If you are finding clumps of pet hair on your rugs immediately after vacuuming, your brush roll is no longer doing its job.
Tools You Will Need
Replacing this part requires very little technical skill and only a few basic household tools. Before you begin, gather the following:
- A New Brush Roll: Make sure you purchase the exact replacement part for your vacuum’s model number.
- A Replacement Belt (Optional but Recommended): Vacuum belts stretch over time. It is a smart practice to change the belt whenever you change the brush roll.
- A Screwdriver: Most vacuums require a standard Phillips-head screwdriver to remove the bottom plate.
- Scissors or a Seam Ripper: You will need these to cut away trapped hair and string from the vacuum housing.
- A Damp Microfiber Cloth: For wiping away trapped dust and allergens from the brush housing.
Step-by-Step: How to Change a Vacuum Brush Roll
Follow these simple instructions to swap out your old brush roll and restore your vacuum’s allergy-fighting capabilities.
Step 1: Prioritize Safety and Preparation
Never work on a plugged-in vacuum. Unplug the machine from the wall to eliminate any risk of electric shock or the motor accidentally turning on.
Once unplugged, lay the vacuum flat on the floor or carefully lift it onto a sturdy workbench. Flip the vacuum over so the bottom base plate is facing up toward you.
Step 2: Remove the Base Plate
Locate the screws holding the bottom plastic or metal base plate in place. Most vacuums have between four and six screws.
Carefully unscrew them and place them in a small bowl so they do not get lost in your carpet. Once the screws are out, lift the base plate off the vacuum. You may need to use a flathead screwdriver to gently pry it up if it is clipped into place.
Step 3: Detach the Belt and Old Brush Roll
With the base plate removed, you will see the brush roll and the rubber belt connecting it to the motor shaft.
Grasp the brush roll firmly on both ends and pull it straight up and out of its side slots. As you lift it, the rubber belt will slide off the brush roll. Leave the other end of the belt looped around the metal motor shaft if you are not replacing it.
Expert Tip: Before installing the new brush roll, take a damp microfiber cloth and wipe out the plastic housing where the old brush roll sat. This area collects a massive amount of hidden dust mites, skin cells, and pet dander. Cleaning it out prevents these pollutants from being blown back into your room’s air.
Step 4: Install the New Brush Roll
Take your new brush roll and slide it through the loop of the rubber belt. Make sure the belt sits naturally in the designated groove on the brush roll (usually located near the middle or one end).
Once the belt is in place, stretch the brush roll down and align the end caps with the slots in the vacuum housing. Push down firmly until the brush roll clicks or seats securely into the side grooves.
Step 5: Check the Belt Tension
Give the newly installed brush roll a manual spin with your hand. It should feel slightly stiff but spin smoothly.
If the roll spins too freely with zero resistance, your rubber belt is stretched out and must be replaced. If the belt is twisted, pull the roll back out, untwist the belt, and reinstall.
Step 6: Reattach the Base Plate
Place the bottom base plate back over the brush roll housing. Make sure it lines up perfectly with the screw holes. Insert the screws and tighten them securely, but do not overtighten, as you could crack the plastic housing.
Turn the vacuum upright, plug it in, and test it on a small patch of carpet. You should immediately hear a deeper hum and feel the vacuum pulling itself forward as the fresh bristles grip the carpet.
Common Mistakes Homeowners Should Avoid
When maintaining a vacuum for better air quality, small errors can lead to big problems. Avoid these common pitfalls:
- Forgetting to clean the filters: Changing the brush roll agitates more dust. If your HEPA filter is clogged, that dust will bypass the filter and shoot straight back into your breathing air.
- Reusing a stretched belt: A new brush roll won’t spin at the correct speed if the belt is loose. Always inspect the belt during this process.
- Buying cheap, off-brand replacement parts: Generic brush rolls often have softer bristles that do not agitate carpets properly, leaving allergens behind.
- Using scissors blindly: When cutting hair off an old brush roll (or clearing jams), be careful not to snip the rubber belt or the vacuum’s base bristles.
Vacuum Maintenance for Optimal Air Quality
To keep your home’s air clean, you must treat your vacuum like an air purification device. Here is a simple maintenance schedule to ensure your vacuum is actually improving your indoor air quality.
| Maintenance Task | Recommended Frequency | Impact on Indoor Air Quality |
|---|---|---|
| Empty the Dirt Bin / Change Bag | After every use | Prevents odors and bacteria growth; maintains strong suction for allergen removal. |
| Cut Hair from Brush Roll | Once a month | Ensures bristles can reach deep into carpet fibers to remove dust mites and dander. |
| Wash/Replace Pre-Motor Filter | Every 1-3 months | Protects the motor and ensures steady airflow to capture heavy particulate matter. |
| Replace HEPA Exhaust Filter | Every 6-12 months | Crucial for trapping microscopic PM2.5 particles, pollen, and pet allergens. |
| Change Brush Roll and Belt | Every 1-2 years | Restores carpet agitation, ensuring pollutants are lifted out of rugs and floors. |
When your vacuum is properly maintained, it works in tandem with your home’s HVAC system and standalone air purifiers. In fact, the Asthma and Allergy Foundation of America notes that controlling indoor allergens requires a multi-step approach, including using certified asthma and allergy-friendly vacuums and HEPA air cleaners.
When to Consult an Air Quality or HVAC Professional
While changing a vacuum brush roll is a simple DIY task, vacuuming alone cannot solve severe indoor air quality issues. You should seek professional advice if you experience the following:
Lingering Musty Odors: If your home smells dusty or musty even after deep vacuuming with a new brush roll, you may have mold or mildew hidden in your ductwork or crawlspaces.
Constant Allergy Flare-ups: If you or your children are waking up with congested noses, coughing, or itchy eyes despite frequent vacuuming, your home’s baseline air quality needs assessment. A professional can test for elevated VOCs, severe PM2.5 levels, or hidden allergens.
HVAC Filter Overload: If you find that you have to change your home’s central AC filter every few weeks because it is caked in dust and pet hair, your vacuuming routine is not keeping up. You may need an HVAC technician to assess your home’s ventilation. They might recommend installing a whole-home media filter or upgrading your system’s filtration capabilities.
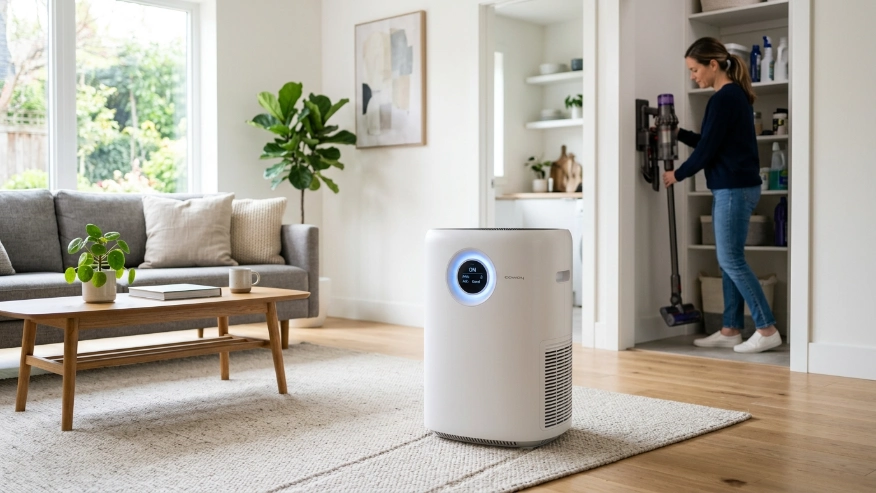
For homeowners looking to supplement their floor cleaning, adding a standalone HEPA air purifier to high-traffic rooms is highly recommended. When selecting an air purifier, always check ENERGY STAR’s room air cleaner guidelines to ensure you choose a unit that is both effective and energy-efficient for your specific room size.
FAQs
How often should I change my vacuum brush roll?
For the average home, you should replace your vacuum brush roll every 1 to 2 years. If you have multiple heavily shedding pets or thick wall-to-wall carpeting, you may need to replace it every 8 to 12 months to maintain maximum cleaning efficiency.
Why does my vacuum smell like burning rubber?
A burning rubber smell usually means the brush roll is jammed with hair, string, or debris, preventing it from spinning. The motor continues to turn the rubber belt, which grinds against the stationary brush roll, causing friction and a burning odor. Turn the vacuum off immediately to prevent breaking the belt.
Does a worn brush roll affect my indoor air quality?
Yes. A worn brush roll cannot agitate carpet fibers. Instead of lifting dust, pet dander, and pollen into the vacuum’s HEPA filter, these allergens remain in the carpet. When people walk on the carpet, the allergens are disturbed and become airborne, lowering your indoor air quality.
Do I have to change the belt when I change the brush roll?
While it is not strictly mandatory, it is highly recommended. Vacuum belts stretch and lose their elasticity over time. A new brush roll will perform much better when driven by a tight, brand-new belt.
How do I know if my vacuum belt is broken?
If you turn on your vacuum and the motor sounds normal but the brush roll is not spinning, the belt is likely snapped or stretched out. You will also notice a significant drop in how well the vacuum picks up hair and debris from carpets.
Can I clean my brush roll instead of replacing it?
You should clean your brush roll monthly by cutting away tangled hair and string. However, cleaning cannot fix worn-down, frayed, or shortened bristles. Once the bristles are soft or shorter than the roller cylinder, the part must be replaced.
Conclusion
Maintaining healthy indoor air requires a proactive approach to cleaning, and your floors play a massive role in trapping household pollutants. By taking a few minutes to learn how to change a vacuum brush roll, you are ensuring that your vacuum operates at peak performance, actively pulling asthma triggers, pet dander, and dust mites out of your home.
Don’t let a $20 replacement part stand between you and cleaner, fresher air. Take a moment today to flip your vacuum over and inspect the bristles. If they are worn, soft, or damaged, order a replacement brush roll and belt. Combine your newly restored vacuum with a high-quality HEPA air purifier, and you will create a safer, healthier breathing environment for your entire family.