
How Often Should You Check Vacuum Seals?

Quick Answer
For most household vacuums, check accessible seals and gaskets about once a month as part of routine maintenance. Inspect them sooner whenever suction drops, you hear unusual whistling, dust appears around a connection, or a dust bin stops closing tightly. Your vacuum’s manual should always override a generic schedule, especially for sealed or HEPA-filtered machines; the EPA’s indoor air quality guidance also explains why effective filtration matters when controlling household particles.
A Practical Seal-Check Schedule
- Monthly: Inspect visible rubber seals, gaskets, dust-bin edges, filter housings, and hose connections.
- After reassembly: Check seals whenever you remove a filter, bin, hose, or other sealed component.
- After heavy cleaning: Look for dust, hair, or grit trapped on sealing surfaces.
- When suction changes: Inspect immediately for loose connections, damaged gaskets, and air leaks.
- When damaged: Replace cracked, torn, hardened, distorted, or missing seals with model-compatible parts.
Most Important Rule
- Don’t replace a seal just because a calendar says so. Condition, performance, and your manufacturer’s instructions matter more than age alone.
Vacuum cleaner seals are easy to overlook because they rarely look like major components. Yet these small rubber or foam parts help keep the machine’s airflow moving through the intended path.
I’ve learned to include them in my regular home-hygiene checks, especially when a vacuum suddenly feels weaker. This 2026 guide explains how often to inspect vacuum seals, what damage looks like, and when a simple cleaning becomes a replacement job.
In This Guide
- How often should you check vacuum seals?
- What are vacuum seals and why do they matter?
- How do you check vacuum seals properly?
- What signs mean a vacuum seal needs attention?
- Do different vacuum types need different seal checks?
- Can bad seals affect HEPA filtration and indoor air quality?
- Frequently Asked Questions
How Often Should You Check Vacuum Seals?
For an ordinary household vacuum, I use about once a month as a practical inspection baseline. That means looking at accessible seals rather than dismantling the machine.
This isn’t a universal manufacturer requirement. Vacuum designs differ, so your model’s manual should take priority over any general maintenance schedule.
- Light household use: Check visible seals during your monthly vacuum-cleaner inspection.
- Frequent use: Inspect every two to four weeks, especially around removable bins and filters.
- Pets or long hair: Check sooner because hair can become trapped across sealing surfaces.
- Fine dust: Inspect after demanding cleanup jobs because powdery debris can coat gasket surfaces.
- Sudden suction loss: Check immediately rather than waiting for your next maintenance day.
I also check the seals every time I reinstall a dust bin or filter housing. A perfectly healthy gasket can’t work correctly if the component sits crooked or doesn’t click fully into place.
Think of the monthly interval as a reminder, not a replacement date. A good seal may last far longer if it stays clean, flexible, undamaged, and properly seated.
Section Takeaway: Inspect accessible vacuum seals about monthly, but check immediately after performance changes or component reassembly.
What Are Vacuum Seals and Why Do They Matter?
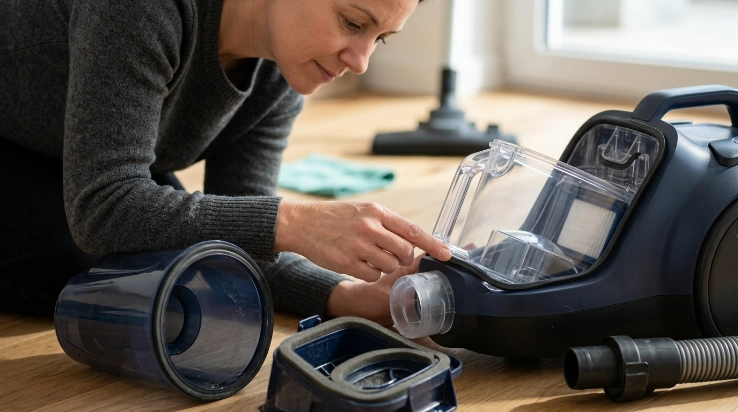
A vacuum seal is a flexible gasket, O-ring, foam strip, molded rubber edge, or mating surface designed to limit unwanted air leakage between vacuum components.
These seals help create a controlled airflow path. Air should enter where the vacuum is designed to collect debris, travel through the machine, and leave through its intended filtration and exhaust system.
Where are vacuum seals located?
Exact locations vary by model. However, several areas deserve attention during routine maintenance.
- Dust bin: Rubber edges may seal the bin against the vacuum body or bin door.
- Filter housing: A gasket can help air travel through the installed filter rather than around it.
- Hose connections: Fitted joints help prevent air from entering through connection gaps.
- Wand connections: Removable sections often rely on close-fitting connections or small seals.
- Floor head: Some designs use seals around ducts, joints, or removable access panels.
- Canister or wet/dry lid: A larger gasket may seal the collection chamber against its lid.
Why does a small leak matter?
A vacuum depends on controlled airflow. An unintended opening can allow some air to enter somewhere other than the cleaner head or attachment you’re using.
That doesn’t mean every weak vacuum has a bad gasket. A full bin, loaded filter, clogged hose, blocked floor head, or brush problem can produce similar symptoms.
That’s why I treat seals as one part of the entire airflow system. Checking them alongside filters, hoses, and connections prevents unnecessary replacement of good parts.
Sites such as Consumer Reports also emphasize following model-specific maintenance instructions because vacuum designs and service requirements vary considerably.
Section Takeaway: Vacuum seals support the intended airflow path, but diagnose the whole machine before blaming a gasket for weak suction.
How Do You Check Vacuum Seals Properly?
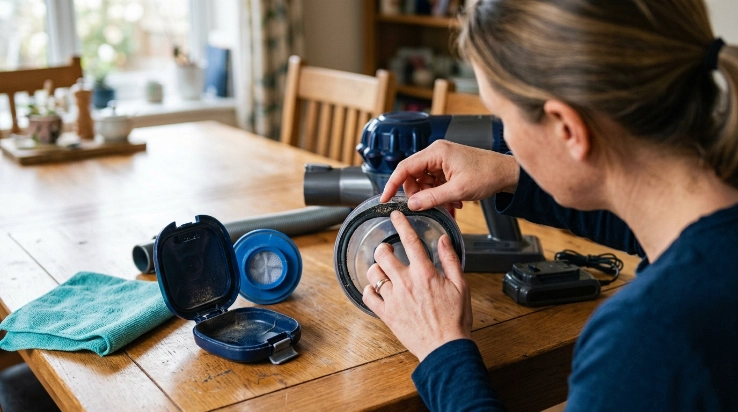
You can inspect most accessible vacuum seals without special equipment. The safest approach starts with the machine turned off and disconnected from power.
- Unplug or power down the vacuum. Remove the battery when your manufacturer’s instructions recommend doing so for maintenance.
- Empty the bin or check the bag. This removes one common cause of reduced airflow before you diagnose a seal.
- Remove accessible components. Take out the bin, approved filters, hose, or removable covers according to the manual.
- Locate visible gaskets. Look around mating surfaces where two airflow components join.
- Inspect for debris. Hair, string, fine grit, and packed dust can stop two surfaces from closing evenly.
- Look for damage. Check for tears, missing sections, cracking, distortion, or obvious permanent flattening.
- Clean approved surfaces. Use the method specified by the manufacturer and keep moisture away from electrical areas.
- Reinstall everything carefully. Make sure bins, filters, hoses, and covers sit in their correct positions.
- Test normal operation. Check whether pickup, sound, and airflow return to normal.
What should a healthy gasket look like?
A healthy flexible seal should normally sit evenly in its designed position. It shouldn’t have obvious gaps, tears, missing pieces, or foreign material running across the sealing surface.
Don’t stretch or pry a gasket just to test it. Some seals are permanently mounted and can be damaged by unnecessary removal.
Should you lubricate vacuum seals?
Not unless your manufacturer specifically tells you to. Oils, grease, sprays, solvents, and household cleaners can affect some rubber or plastic materials.
I stick to the cleaning instructions for the exact model. Guessing with a chemical treatment can turn a dirty but usable seal into a damaged one.
Expert Alert: If reaching a suspected seal requires opening the motor housing, exposing wiring, or dismantling an electrical assembly, stop and use an authorized or qualified appliance repair professional.
Section Takeaway: Check accessible seals visually, clean only as directed, reinstall components carefully, and leave internal electrical disassembly to a qualified technician.
What Signs Mean a Vacuum Seal Needs Attention?
A damaged seal doesn’t always produce one obvious symptom. Look for a pattern rather than relying on a single sign.
- Unexpected suction loss: Pickup remains poor even after the bin, filter, and obvious clogs are checked.
- Whistling sound: Air moving through an unintended gap can sometimes create a new high-pitched noise.
- Dust around joints: Fine debris appears near the bin, filter housing, or another sealed connection.
- Loose dust bin: The bin no longer sits evenly or closes as securely as before.
- Visible gasket damage: The seal is cracked, torn, warped, missing, or displaced.
- Recurring performance problems: Suction improves after reseating a component but quickly becomes weak again.
How do you separate a seal problem from a clog?
Start with the simplest airflow checks. Empty the bin or change the bag when required, maintain filters correctly, and check the hose, wand, and cleaner head for obstructions.
Then inspect seals and removable joints. This order matters because blockages and dirty filters are common reasons for reduced vacuum performance.
| Symptom | Possible Seal Issue | Check First |
|---|---|---|
| Weak suction | Loose or damaged gasket | Bin, bag, filters, hose, and intake |
| New whistle | Air entering through a gap | Connections and blockages |
| Dust near bin | Bin seal may be dirty or damaged | Bin seating and sealing edge |
| Poor pickup at floor head | Possible joint or duct leak | Brush roll, intake, head, and wand |
Never assume a failing motor just because suction feels weaker. I prefer working through the complete airflow path before considering an expensive repair.
Section Takeaway: Suction loss can come from seals, filters, clogs, bins, or cleaner heads, so use symptoms to guide a complete airflow inspection.
Do Different Vacuum Types Need Different Seal Checks?
Yes. The monthly baseline works as a reminder, but different vacuum designs put their most important seals in different locations.
Usage matters too. A robot running every day can accumulate far more dust between inspections than a canister vacuum used twice a month.
| Vacuum Type | Practical Baseline | Main Areas to Inspect | Check Sooner When |
|---|---|---|---|
| Upright | About monthly | Bin or bag compartment, hose, filter housing | Suction falls or connections loosen |
| Canister | About monthly | Canister lid, hose inlet, filter compartment | Lid does not close evenly |
| Cordless stick | Every 2–4 weeks with frequent use | Dust bin, filter assembly, wand joints | Bin is removed frequently or suction changes |
| Robot | During monthly deep maintenance | Dust-bin seating, filter frame, intake connections | Daily cleaning creates heavy dust buildup |
| Wet/dry vacuum | Inspect during routine maintenance | Tank lid gasket, hose connection, filter seating | After messy wet pickup or lid removal |
These intervals are inspection reminders, not mandatory replacement schedules. Replace a gasket according to its actual condition and your manufacturer’s service instructions.
Pet homes may need quicker checks. Hair is surprisingly good at landing across the edge of a removable dust bin and preventing an otherwise healthy seal from sitting cleanly.
Section Takeaway: Match the inspection routine to your vacuum design, cleaning frequency, and household conditions instead of following one rigid calendar.
Can Bad Seals Affect HEPA Filtration and Indoor Air Quality?
They can matter in a vacuum designed as a sealed filtration system. A filter works as intended only when the machine directs the relevant airflow through the filtration path designed by its manufacturer.
The EPA specifically distinguishes a HEPA vacuum from simply adding HEPA media to an unsuitable machine. Its guidance notes that a HEPA vacuum must be designed so collected airflow passes through the HEPA filtration stage without bypass leakage.
Does every vacuum with a HEPA filter have a sealed system?
No. A HEPA filter describes filtration media and performance, while the complete vacuum’s construction determines how air travels around that filter.
That distinction matters when comparing products. Don’t assume the words “HEPA filter” automatically describe every connection, housing, and exhaust path in the machine.
Why does this matter in homes with allergens?
Household dust can contain pollen, pet dander, dust-mite material, mold particles, and other debris. The National Institute of Environmental Health Sciences recommends HEPA-filtered or double-layer microfilter vacuum approaches as part of reducing dust-mite exposure.
The Asthma and Allergy Foundation of America also provides household guidance for reducing common indoor allergens. Vacuum maintenance is only one part of a broader cleaning and exposure-control routine.
Don’t turn this into a reason to repeatedly dismantle a vacuum. Regular visual checks, correct filter installation, clean sealing surfaces, and prompt attention to obvious damage are enough for routine household maintenance.
Section Takeaway: In a sealed filtration vacuum, intact seals help keep airflow on its intended path, so gasket condition and correct filter installation both deserve routine attention.
Frequently Asked Questions
How often should I inspect my vacuum’s rubber seals?
About once a month is a useful household baseline for visible rubber seals and gaskets. Check sooner after heavy use, filter or bin removal, sudden suction loss, unusual whistling, or visible dust around a connection.
How often should vacuum seals be replaced?
There is no universal replacement interval. Replace a seal when the manufacturer specifies it or when inspection shows damage, distortion, missing material, or another defect that prevents the component from sealing correctly.
Can a dirty vacuum seal reduce suction?
Yes, debris trapped across a sealing surface can keep two parts from mating correctly. However, dirty filters, full bins, clogged hoses, and blocked cleaner heads can also cause weak suction, so check the entire airflow path.
Can I repair a torn vacuum gasket with glue?
I wouldn’t improvise unless the manufacturer provides an approved repair method. Adhesives may attack certain gasket materials or alter their shape, and a model-compatible replacement part is usually a more dependable solution.
Why does my vacuum whistle after I cleaned it?
A new whistle can appear when a bin, filter, hose, or cover hasn’t been seated correctly after maintenance. Turn the machine off, follow its manual, and check each component before assuming a seal itself has failed.
Should I check seals every time I empty the dust bin?
You don’t need a detailed inspection every time, but a quick glance at the bin edge is useful. Remove obvious hair or debris and make sure the bin closes fully before returning the vacuum to service.
Are vacuum seals important if I have a HEPA filter?
Yes, especially when the manufacturer describes the vacuum as a sealed filtration system. Effective filtration depends on both suitable filter media and a machine designed to send airflow through the intended filter and exhaust pathway.
Final Takeaway: You don’t need to obsess over vacuum seals. Add a quick inspection to your monthly maintenance routine, check them immediately when suction or sound changes, and let your owner’s manual determine model-specific care.
A minute spent checking a dusty gasket or poorly seated bin can sometimes save a much longer troubleshooting session. Keep the airflow path clean, maintain the filters correctly, and replace damaged seals with the right parts for your machine.
“`
