Brush For Cleaning Refrigerator Coils: Essential Guide
A brush for cleaning refrigerator coils is crucial for maintaining your fridge’s efficiency and longevity, preventing energy waste and potential breakdowns by removing dust and debris that hinder airflow.
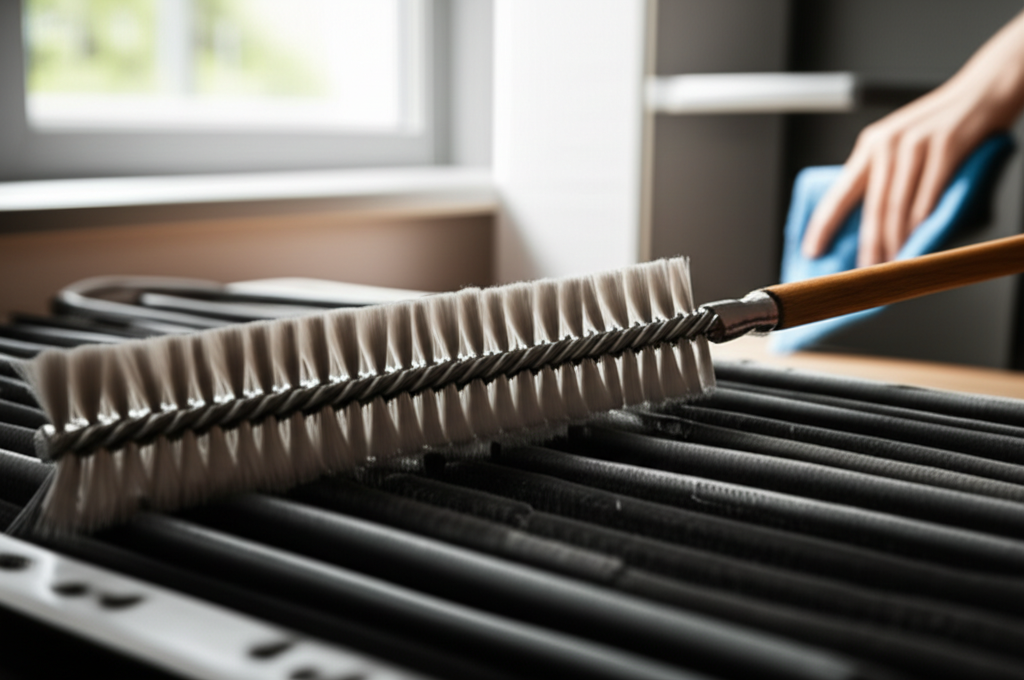
Your refrigerator works hard to keep your food fresh. But over time, dust and grime can build up on its coils. This build-up makes your fridge work harder, use more energy, and can even shorten its life. A special brush designed for cleaning refrigerator coils is your best friend for this job. It’s a simple tool that can make a big difference in your home’s hygiene and your energy bills.
Why Cleaning Refrigerator Coils Matters So Much
Refrigerator coils are the unsung heroes of your kitchen appliance. They are usually found at the bottom or back of your fridge. Their job is to release heat from the refrigerant. When dust and pet hair clog these coils, they can’t release heat efficiently. This forces the compressor to run longer and more often. It’s like trying to breathe through a thick blanket; it’s hard work!
The Impact of Dirty Coils on Your Fridge and Energy Bills
Dirty coils are a common reason why refrigerators become less efficient. This inefficiency leads to higher electricity consumption. The U.S. Department of Energy estimates that refrigerators can account for a significant portion of a home’s energy use. Keeping the coils clean can reduce this energy waste. It also prevents the compressor from overheating, which can lead to costly repairs or a premature end to your appliance’s life.
Understanding Different Types of Refrigerator Coil Brushes
Not all brushes are created equal when it comes to cleaning fridge coils. You need a brush that is long, flexible, and made of materials that won’t damage the delicate fins on the coils.
Flexible Brushes for Reaching Tight Spots
Many refrigerator coil brushes are designed to be flexible. This flexibility allows them to bend and reach into the tight, often awkward spaces where coils are located. A flexible brush can navigate around obstacles and get to all the dusty areas.
Stiff Bristle Brushes for Tough Grime
For stubborn dust and grime, a brush with slightly stiffer bristles might be necessary. However, it’s important to use these with caution. You don’t want to bend or damage the coil fins. The goal is to loosen dirt, not to scrub aggressively.
Specialty Coil Cleaning Kits
Some kits come with both a brush and a cleaning solution. These can be very effective for tackling more entrenched dirt. Always ensure any cleaning solution is safe for use around your refrigerator and food storage areas.
How to Choose the Best Brush for Your Refrigerator Coils
Selecting the right brush involves considering a few key factors. You want a tool that is effective, safe, and easy to use.
Size and Length Considerations
Measure the space where your refrigerator coils are located. Your brush needs to be long enough to reach the back of the coils. It should also be slim enough to fit between the coils without forcing.
Bristle Material and Stiffness
Look for brushes with bristles made from materials like nylon or synthetic fibers. These are generally safe for coil fins. Avoid brushes with metal bristles, as they can easily damage the coils. A medium stiffness is usually ideal for general cleaning.
Handle Comfort and Grip
Since you might be working in an awkward position, a comfortable handle is important. A non-slip grip will give you better control, especially if your hands are a little damp.
Step-by-Step Guide: Cleaning Your Refrigerator Coils Effectively
Cleaning your refrigerator coils is a straightforward process. Following these steps will help you do it safely and effectively.
Step 1: Safety First – Unplug Your Refrigerator
Before you do anything, always unplug your refrigerator from the wall outlet. This is a crucial safety step to prevent electrical shock. It also ensures the appliance is not running while you are cleaning.
Step 2: Locate Your Refrigerator Coils
Most refrigerators have coils either on the back or underneath the unit. For coils located underneath, you might need to gently pull the fridge away from the wall. Some refrigerators have a kick plate or panel at the bottom that needs to be removed first.
Step 3: Gently Remove Loose Debris
Use your chosen brush to gently sweep away any loose dust, pet hair, or debris from the coils. Work from top to bottom. Avoid pushing the dirt further into the coils.
Step 4: Use a Vacuum Cleaner (Optional)
If you have a vacuum with a hose attachment, you can use it to suck up the loosened debris. This is especially helpful for removing finer dust particles. Be careful not to bump the coils with the vacuum nozzle.
Step 5: Deep Cleaning (If Necessary)
For heavily soiled coils, you might need a cleaning solution. Use a commercially available coil cleaner or a mild solution of dish soap and water. Apply it sparingly and wipe away any excess.
Step 6: Reassemble and Plug In
Once the coils are clean and dry, reattach any panels you removed. Gently push your refrigerator back into place. Plug it back into the electrical outlet.
Tools and Accessories to Enhance Coil Cleaning
While a good brush is the main tool, a few accessories can make the job even easier.
Vacuum with Hose Attachments
A vacuum cleaner with a crevice tool or brush attachment is invaluable. It helps to remove dust and debris effectively after brushing.
Gloves and Mask
Wearing gloves can keep your hands clean. A mask can prevent you from inhaling dust, especially if you have allergies.
Flashlight
A flashlight is useful for seeing into dark corners and ensuring you’ve cleaned all the areas.
Common Mistakes to Avoid When Cleaning Fridge Coils
Even with the best intentions, it’s possible to make mistakes. Knowing these common pitfalls can help you avoid them.
Forcing the Brush
Never force a brush or any tool into the coils. This can bend or break the delicate fins. Gentle is always better.
Using Harsh Chemicals
Avoid using harsh chemical cleaners or abrasive materials. These can damage the coils or leave behind residues.
Forgetting to Unplug
This is a critical safety error. Always unplug the refrigerator before cleaning.
Not Cleaning Regularly
Coil cleaning isn’t a one-time task. Regular cleaning ensures consistent efficiency.
How Often Should You Clean Refrigerator Coils?
The frequency of cleaning depends on your living environment. For most homes, cleaning the coils once or twice a year is sufficient. However, if you have pets that shed a lot, or if your home tends to collect dust quickly, you might need to clean them more often.
The Benefits of Clean Refrigerator Coils: A Summary
Keeping your refrigerator coils clean offers several significant advantages. These benefits contribute to a more efficient, longer-lasting, and cost-effective appliance.
Improved Energy Efficiency
Clean coils allow your refrigerator to release heat more effectively. This means the compressor doesn’t have to work as hard, leading to lower energy consumption. According to the EPA, keeping your fridge coils clean can improve efficiency by 15% or more.
Extended Appliance Lifespan
When the compressor runs less frequently, it experiences less wear and tear. This can significantly extend the overall lifespan of your refrigerator. A well-maintained fridge can last 10-20 years.
Reduced Risk of Costly Repairs
Overworked components due to clogged coils are a common cause of refrigerator breakdowns. Regular cleaning helps prevent these issues, saving you from potentially expensive repair bills.
Quieter Operation
A refrigerator with clean coils often runs more quietly. When the compressor isn’t struggling, the appliance typically operates more smoothly and with less noise.
Expert Tips for Maintaining Your Refrigerator
Beyond just cleaning the coils, a few other practices can help keep your refrigerator in top shape.
Check Door Seals: Ensure your refrigerator door seals are clean and intact. Leaky seals let cold air escape, making the appliance work harder.
Proper Temperature Settings: Set your refrigerator to the recommended temperature (around 37-40°F or 3-4°C) and your freezer to 0°F (-18°C).
Avoid Overfilling: Don’t pack your refrigerator too tightly. Good airflow inside the unit is essential for consistent cooling.
Regular Interior Cleaning: Keep the inside of your fridge clean to prevent odors and maintain hygiene.
Frequently Asked Questions About Cleaning Refrigerator Coils
Q1: What is the best type of brush for cleaning refrigerator coils?
The best brush is long, flexible, and has soft to medium-stiff bristles, like nylon. It should be able to reach behind the coils without damaging them.
Q2: Can I use a regular household brush to clean my fridge coils?
A regular scrub brush might be too stiff or too short. You need a specialized coil brush that is designed for the delicate fins and tight spaces.
Q3: How do I know if my refrigerator coils are dirty?
If your refrigerator seems to be running constantly, is warmer than usual, or your energy bills have increased, dirty coils could be the culprit. You can also visually inspect them.
Q4: Is it safe to clean refrigerator coils while the fridge is plugged in?
No, it is never safe to clean refrigerator coils while the appliance is plugged in. Always unplug it first to avoid electrical shock.
Q5: Can I use a vacuum cleaner to clean refrigerator coils?
Yes, a vacuum cleaner with a brush or crevice attachment can be used to remove loose dust after brushing. Be gentle to avoid damaging the coils.
Q6: What should I do if my coils are very dirty and dusty?
For very dirty coils, use a specialized coil cleaner or a mild soap and water solution after brushing and vacuuming. Ensure you rinse thoroughly and allow them to dry completely.
Conclusion: Invest in a Brush for a Healthier, More Efficient Fridge
A simple brush for cleaning refrigerator coils is an essential tool for any homeowner. It’s an inexpensive way to improve your refrigerator’s performance, reduce energy waste, and extend its life. By dedicating a little time each year to this maintenance task, you ensure your fridge operates at its best, keeping your food safe and your energy bills lower. Make cleaning your refrigerator coils a regular part of your home hygiene routine for optimal results.

