
Annual Vacuum Maintenance Checklist: Complete 2026 Guide

Quick Answer
An annual vacuum maintenance checklist should cover the filters, brush roll, hose, airflow passages, seals, wheels, attachments, power cord or battery, and visible wear. The yearly check supplements regular cleaning rather than replacing it, and your owner’s manual should always set the exact maintenance schedule. For broader maintenance and reliability information, see the Consumer Reports vacuum cleaner section.
Your annual vacuum checklist
- Inspect filters: Check their condition and clean or replace them only as the manufacturer directs.
- Clean the brush: Remove hair, thread, and fibers from the roller and its end areas.
- Check airflow: Inspect the hose, wand, intake, floorhead, and connections for hidden obstructions.
- Inspect wear parts: Look at belts, seals, wheels, hoses, and attachments for cracks or excessive wear.
- Check the power system: Examine cords and plugs for damage, or check cordless batteries for swelling and abnormal heat.
- Test performance: After reassembly, listen for unusual noises and check whether normal suction has returned.
Most important rule
- Don’t wait until the yearly check to empty bins, replace full bags, remove brush-roll hair, or investigate sudden suction loss.
I like using one yearly vacuum check as a reset point for all the little jobs that are easy to overlook. It gives me a chance to inspect parts that don’t get much attention during ordinary cleaning.
The important distinction is simple. Annual maintenance is a deeper inspection, while bins, bags, filters, and brush rolls may need attention throughout the year.
In This Guide
- What Does Annual Vacuum Maintenance Include?
- What Should Be on an Annual Vacuum Maintenance Checklist?
- Which Vacuum Tasks Are Annual and Which Need More Frequent Attention?
- Does Annual Maintenance Change by Vacuum Type?
- How Do Filters and Vacuum Maintenance Affect Household Dust?
- When Should You Repair or Replace a Vacuum Instead?
- Annual Vacuum Maintenance FAQ
What Does Annual Vacuum Maintenance Include?
Annual vacuum maintenance is a once-a-year inspection of the machine’s cleaning, airflow, filtration, wear, and power-related components. It complements the smaller maintenance jobs you should already perform during normal use.
Definition: An annual vacuum maintenance check is a scheduled inspection and deeper cleaning of accessible vacuum components to catch wear, blockage, damage, or overdue maintenance.
Why bother with a yearly inspection?
A vacuum can continue running even when several small problems are developing. A partially clogged passage, wrapped brush roll, loose seal, or aging hose may reduce performance gradually.
That slow decline is easy to overlook. I usually notice it only after comparing the machine with how it performed after a thorough cleanup.
- Hidden hair buildup: Hair can collect near brush-roll ends where it isn’t obvious during quick cleaning.
- Hose damage: Small splits or loose connections may reduce airflow.
- Filter neglect: A filter can look overdue even when the bin is cleaned regularly.
- Seal wear: Damaged gaskets or poorly seated parts may allow air to bypass the intended path.
- Attachment buildup: Upholstery and crevice tools can collect hair, lint, and debris.
Annual maintenance does not replace routine care
This distinction matters. Waiting 12 months to clean everything would be too long for many household vacuums.
A bag, bin, roller, or filter can need attention much sooner. Homes with pets, long hair, carpets, or frequent vacuum use may need more frequent inspections.
Your owner’s manual remains the best source for exact filter cleaning, filter replacement, belt, battery, and service intervals. Vacuum designs vary too much for one calendar to fit every machine.
Section Takeaway: Annual maintenance is a deeper inspection, not a once-a-year substitute for normal vacuum care. Use it to find neglected wear and combine it with the model-specific schedule in your owner’s manual.
What Should Be on an Annual Vacuum Maintenance Checklist?
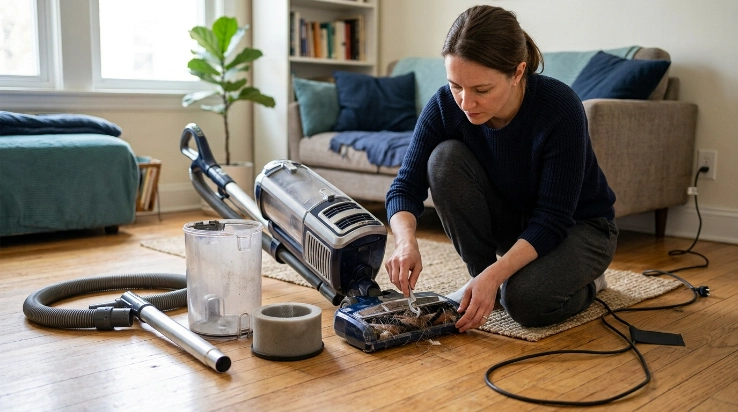
Start with the components that affect airflow and cleaning performance, then work outward to wear and safety checks. Disconnect the vacuum from its power source before opening removable parts.
1. Empty and inspect the dust collection system
Empty a bagless bin and inspect the inside for compacted debris. Check hinges, latches, seals, and the area where the bin connects to the vacuum.
For a bagged machine, remove the old bag if it is due for replacement. Inspect the bag collar and compartment for escaped dust.
- Check for cracked plastic.
- Inspect rubber seals for deformation or damage.
- Remove debris around the bin or bag connection.
- Confirm that doors and latches close securely.
Don’t wash a dust container unless its manufacturer allows it. Any approved washable part should dry completely before reassembly.
2. Inspect every filter
Find each user-serviceable filter listed in the manual. Some vacuums have a pre-motor filter, post-motor filter, HEPA filter, or several filtration stages.
Never assume a dirty filter is washable. Washing a filter that was designed for dry replacement can damage it.
- Washable filter: Follow the manufacturer’s washing and drying directions.
- Disposable filter: Replace it at the specified interval or when its condition requires it.
- Damaged filter: Replace torn, deformed, or poorly fitting media with a compatible part.
- Filter housing: Remove loose dust without pushing dirt deeper into the machine.
Pay attention to fit during reassembly. A filter that isn’t seated correctly may not work as the vacuum was designed to work.
3. Deep-clean the brush roll
The brush roll deserves more than a quick haircut once a year. Remove it when your model allows and inspect the roller ends, bristles, bearings, and surrounding housing.
Wrapped fibers can hide near the ends. Those are the areas I check most carefully after removing the obvious hair from the center.
- Disconnect the vacuum from power.
- Open or remove the floorhead cover as the manual directs.
- Cut away wrapped hair and thread carefully.
- Remove debris around the roller ends.
- Check that the roller turns normally.
- Reinstall it correctly before testing the vacuum.
Avoid cutting into belts, wiring, soft roller material, or bristles. Stop if the head contains components you aren’t meant to service.
4. Inspect the belt or drive system
Some upright and canister floorheads use accessible belts, while many newer machines use different drive systems. Follow your manual before opening any cover.
Look for obvious cracking, stretching, fraying, or slipping where inspection is permitted. Don’t replace a belt simply because a generic yearly checklist says so.
The correct replacement interval depends on the vacuum. Some belts are maintenance items, while others aren’t intended for routine owner replacement.
5. Check the entire airflow path
A deep yearly check is a good time to inspect sections that don’t usually get opened. Work from the floorhead toward the collection chamber.
- Floorhead inlet
- Vacuum neck
- Extension wand
- Flexible hose
- Internal accessible ducts
- Bin or bag inlet
- Attachment openings
Don’t use sharp metal objects to force a clog through a hose. They can puncture flexible material or damage internal components.
6. Clean and inspect attachments
Look closely at tools you use on sofas, stairs, mattresses, and tight spaces. Lint and hair can collect around small openings and moving brushes.
- Remove trapped hair from upholstery tools.
- Clear crevice tool openings.
- Check extension tubes for lodged objects.
- Inspect powered attachments for damaged wiring or connectors.
- Wash only tools specifically approved for washing.
7. Inspect wheels, seals, and exterior parts
Check wheels for wrapped hair and confirm they move freely. Remove abrasive grit that could scratch hard floors.
Look for cracked housings, loose handles, damaged latches, missing seals, or parts that no longer fit properly.
8. Check the cord, plug, or battery
A corded vacuum deserves a full visual inspection from the plug to where the cord enters the machine. Cuts, exposed conductors, melted areas, or damaged plugs are not routine cleaning problems.
For cordless vacuums, inspect the battery housing and connections. Stop using a battery that is swollen, physically damaged, leaking, or producing unusual heat.
Expert Alert: Don’t open a vacuum’s motor housing, battery pack, charger, or electrical wiring unless you’re qualified to repair that equipment. Damaged electrical parts should be inspected by an appropriate repair professional.
9. Reassemble and test the vacuum
Make sure every washed part is fully dry first. Reinstall the filters, bin, bag, brush roll, hose, and attachments correctly.
Run the vacuum briefly on a normal surface and pay attention to performance.
- Does suction feel normal?
- Does the brush roll operate correctly?
- Are there new rattles or grinding sounds?
- Does the machine smell unusually hot?
- Is dust escaping around a connection?
Section Takeaway: Work through the vacuum from dirt collection to filters, brush roll, airflow path, wear parts, and power system. The goal is to catch overlooked problems without opening components the manufacturer reserves for technicians.
Which Vacuum Tasks Are Annual and Which Need More Frequent Attention?
Most important vacuum maintenance isn’t truly annual. The yearly checklist should be viewed as a comprehensive reset layered on top of smaller checks.
The table below is a practical household framework. It is not a manufacturer replacement schedule.
| Vacuum Component | Routine Check | Annual Deep Check | Check Sooner When |
|---|---|---|---|
| Dust bin | During regular use | Inspect seals, latch, inlet, and cracks | Debris reaches the fill limit or airflow falls |
| Vacuum bag | Check during use | Inspect compartment and bag connection | Bag indicator activates or suction changes |
| Brush roll | Weekly to monthly as needed | Remove and inspect ends where allowed | Pets, long hair, thread, or poor rotation |
| Filters | Follow the owner’s manual | Review condition and replacement history | Heavy dust, odors, alerts, or restricted airflow |
| Hose and wand | Inspect when suction drops | Check full length for blockage and damage | Sudden suction loss or rattling debris |
| Cord or battery | Watch during normal use | Complete visual condition inspection | Damage, abnormal heat, swelling, or charging problems |
| Attachments | Clean as needed | Inspect every tool and connector | Hair or debris blocks an opening |
Use condition instead of the calendar when necessary
A calendar reminder is helpful because it prevents forgotten maintenance. It should never make you ignore an obvious problem for several months.
If suction suddenly falls in March, don’t wait for your annual maintenance date in December. Check the simple causes right away.
- Full bin or bag
- Blocked hose
- Dirty filter
- Tangled brush roll
- Loose connection
- Incorrectly fitted component
Heavy-use homes need shorter intervals
Pet hair, long human hair, wall-to-wall carpet, frequent vacuuming, and fine household dust can increase maintenance demands. Renovation debris can be even harder on a machine.
Don’t use an ordinary household vacuum for construction dust, liquids, fireplace ash, or other material unless its manufacturer specifically allows that use.
Section Takeaway: Use the annual checklist to catch neglected areas, but service high-debris components according to use and the manufacturer’s directions. Performance symptoms always outrank the calendar.
Does Annual Maintenance Change by Vacuum Type?
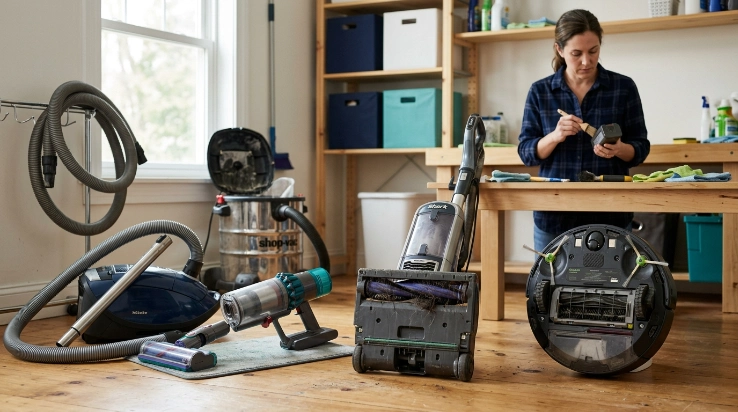
Yes. The core ideas stay the same, but upright, canister, cordless, robot, and wet/dry vacuums have different parts that deserve extra attention.
Upright vacuums
- Inspect the brush roll and floorhead carefully.
- Check accessible belts when the design uses them.
- Inspect the hose for cracks and hidden clogs.
- Check height-adjustment and wheel movement.
- Inspect bag or bin seals.
Uprights often collect hair around the roller. That makes the floorhead an important part of the yearly inspection.
Canister vacuums
- Inspect the long flexible hose carefully.
- Check wand connections for leaks or looseness.
- Examine powered floorhead connectors.
- Inspect canister wheels and casters.
- Review filter and bag maintenance history.
A canister’s long hose gives debris more places to lodge. I like checking it in sections rather than assuming strong airflow at the handle means the whole path is clear.
Cordless stick vacuums
- Inspect battery condition.
- Clean charging contacts if the manual permits it.
- Check filter maintenance requirements.
- Remove hair from compact brush heads.
- Inspect small air passages for packed debris.
Battery care matters as the vacuum ages. Reduced runtime can be normal over time, but swelling, leaking, physical damage, or unusual heat deserves immediate attention.
Robot vacuums
- Clean the main brush.
- Remove hair from side brushes.
- Inspect drive wheels and caster wheels.
- Clean sensors according to the manual.
- Inspect charging contacts.
- Check the dust bin and filter.
Robot vacuums have more small wheels and sensors than traditional machines. Those parts can collect dust and hair even when the bin is emptied frequently.
Wet/dry vacuums
Wet/dry machines need extra attention after liquid pickup. Tanks, hoses, and approved washable components should not be stored with moisture trapped inside.
- Inspect the tank for residue.
- Check the hose for damp debris.
- Inspect the wet-pickup float where accessible.
- Verify the correct filter setup for intended use.
- Allow appropriate washable parts to dry fully.
Section Takeaway: The yearly checklist should match the vacuum’s design. Cordless models add battery checks, robots add sensors and drive components, while wet/dry machines need extra attention to moisture and tank cleanliness.
How Do Filters and Vacuum Maintenance Affect Household Dust?
Vacuum maintenance matters because household dust doesn’t disappear when it enters the floorhead. The machine must contain collected material and move exhaust through its intended filtration path.
The U.S. Environmental Protection Agency notes that household dust can contain particles and biological contaminants such as pollen, mold spores, pet dander, and dust-mite material. Its indoor particulate matter guidance also recommends routine cleaning and says HEPA filtration can help reduce some vacuumed dust escaping back into the room.
What is a HEPA vacuum filter?
HEPA stands for high-efficiency particulate air. In a vacuum, a HEPA filter is part of the machine’s filtration system, but overall dust containment also depends on the design and sealing of the vacuum.
Don’t assume that adding an aftermarket filter automatically turns any vacuum into a tightly sealed HEPA system. Use filters approved for your exact model.
Why filter condition matters
A filter cannot be maintained correctly if its cleaning instructions are ignored. Some filters are washable, while others must remain dry and be replaced.
- Follow the specified cleaning method.
- Use the correct replacement filter.
- Install it in the correct orientation.
- Let washable filters dry fully.
- Replace damaged filters rather than trying to repair them.
What if someone in the home has dust-mite allergies?
The Asthma and Allergy Foundation of America recommends environmental measures beyond vacuuming alone. Its dust mite guidance includes regular HEPA-filter vacuuming while noting that vacuuming alone does not remove all mites and their waste from soft furnishings.
That is an important expectation to set. A well-maintained vacuum is one part of household allergen control, not a medical treatment or a complete solution.
The EPA’s guidance on biological contaminants and indoor air quality also emphasizes routine vacuuming, damp dusting, and moisture control.
Don’t use vacuuming as a mold-remediation shortcut
Visible mold caused by an ongoing moisture problem needs the moisture source addressed. Simply vacuuming a moldy area doesn’t solve the underlying problem.
Expert Alert: For extensive mold contamination, recurring water damage, sewage exposure, or material that requires specialized remediation, use qualified professional guidance rather than relying on a household vacuum.
Section Takeaway: Good vacuum maintenance supports dust containment, but it is only one part of household air-quality and allergen management. Correct filtration, cleaning habits, and moisture control all matter.
When Should You Repair or Replace a Vacuum Instead?
A yearly inspection sometimes reveals a problem that cleaning cannot fix. Stop troubleshooting when the issue moves beyond accessible maintenance.
Signs professional repair may be needed
- Persistent suction loss: Airflow remains poor after checking the bag, bin, filters, hose, and accessible passages.
- Repeated overheating: The vacuum shuts down or becomes abnormally hot after obvious blockages are cleared.
- Grinding noises: Internal mechanical noise continues after the brush area has been checked.
- Electrical damage: The cord, plug, switch, charger, or wiring appears damaged.
- Burning smell: A persistent electrical or motor-like odor remains after the vacuum is stopped and inspected.
- Battery damage: A cordless battery is swollen, leaking, physically damaged, or unusually hot.
Don’t repeatedly restart a machine that overheats or smells burned. Continuing to run it can make diagnosis harder and may create a safety hazard.
When replacement may make more sense
Age alone isn’t enough reason to discard a vacuum. Compare its overall condition, repair needs, performance, and parts availability.
Replacement becomes easier to justify when several problems appear together.
- Major motor or electrical repair is needed.
- Important replacement parts are unavailable.
- The housing and hose are badly damaged.
- The battery and powered floorhead both need replacement.
- Performance remains poor after proper maintenance.
- Multiple failures keep recurring.
As of 2026, vacuum designs still vary widely across uprights, canisters, cordless sticks, and robots. That makes model-specific troubleshooting more useful than a universal age limit.
Keep a simple annual maintenance record
A short record makes next year’s inspection easier. I find this especially helpful with filters because it’s easy to forget when a non-washable filter was last replaced.
- Date of annual inspection
- Filter cleaned or replaced
- Bag or bin seal condition
- Brush roll condition
- Belt condition if applicable
- Battery condition
- Parts replaced
- New noises or performance changes
Section Takeaway: Routine maintenance should end where electrical, battery, motor, or inaccessible mechanical repair begins. Use the annual check to identify problems early, then choose professional repair or replacement when basic maintenance cannot resolve them.
Annual Vacuum Maintenance FAQ
Do vacuum cleaners need maintenance every year?
Yes, a yearly comprehensive inspection is a useful habit for most household vacuums. However, many tasks need attention sooner. Emptying bins, replacing bags, removing hair, and maintaining filters should follow actual use and the manufacturer’s instructions.
Should I replace my vacuum filter every year?
Not automatically. Filter replacement schedules vary by filter design and vacuum model. Some filters are washable, some are disposable, and others have different service intervals. Follow the instructions for your exact vacuum rather than using a universal 12-month replacement rule.
Should I replace a vacuum belt once a year?
Only if your vacuum manufacturer recommends that schedule or the belt shows wear. Belt designs differ substantially. Some are owner-serviceable wear items, while other drive systems aren’t intended for routine yearly replacement.
How often should I clean the vacuum brush roll?
Inspect it whenever hair, string, or fibers begin wrapping around it. Homes with shedding pets or long hair may need brush-roll cleaning weekly, while lighter-use homes may need it less often.
Can I wash every vacuum filter?
No. Wash only filters that the manufacturer specifically identifies as washable. Water can damage filters designed for dry cleaning or replacement, and reinstalling a damp filter can cause additional problems inside the vacuum.
Is professional vacuum servicing needed every year?
Not necessarily for every household vacuum. If the machine works correctly and the manufacturer doesn’t require annual professional service, routine owner maintenance may be enough. Seek professional help when electrical, motor, battery, or persistent performance problems remain.
What month is best for annual vacuum maintenance?
Any month works. Choose a date you’ll remember, such as the start of spring cleaning or the anniversary of buying the vacuum. The exact month matters less than performing the inspection consistently and handling urgent maintenance problems sooner.
Your annual vacuum maintenance checklist is most useful as a reset, not a repair deadline. Inspect the machine thoroughly once a year, maintain high-use components throughout the year, and let your owner’s manual override generic schedules.
Ten or fifteen minutes spent checking neglected areas can reveal hair, blocked passages, damaged seals, worn accessories, or overdue filter care before those problems become harder to diagnose.
