How Do I Replace a Vacuum Battery? A Safe Step-by-Step Guide

Quick Answer
To replace a vacuum battery, turn the vacuum off, unplug its charger, confirm the exact replacement battery, release or unscrew the old pack, and install the new one in the same position. Never open, crush, or continue using a swollen or damaged lithium-ion battery; review the CPSC battery safety guidance if the pack shows signs of damage.
Quick replacement steps
- Identify the model: Find the vacuum model and battery part number before ordering anything.
- Disconnect power: Switch off the vacuum and remove it from its charger or dock.
- Release the battery: Use the latch, button, screws, or manufacturer-approved removal method.
- Install the replacement: Align the contacts and lock or screw the new pack securely into place.
- Charge and test: Follow the new battery’s charging instructions before a normal cleaning session.
Stop instead of DIY-ing when:
- The pack is damaged: Swelling, leaking, unusual heat, cracking, or a strange odor needs special handling.
- The housing is sealed: Don’t force open a vacuum that the manufacturer identifies as service-only.
Replacing a vacuum battery is often easier than replacing the entire cleaner. The important part is knowing whether your battery was designed for user replacement.
I also like to rule out simple maintenance problems first. A clogged filter, packed dustbin, tangled brush roll, or blocked wand can sometimes make a healthy cordless vacuum behave like its battery is failing.
In This Guide
How Do I Know If My Vacuum Battery Is Replaceable?
Many cordless vacuum batteries can be replaced, but the procedure depends on the design. A removable pack may take seconds to release, while an internal battery may require manufacturer service.
A vacuum battery is a rechargeable power pack that supplies electricity to the vacuum’s motor, electronics, lights, and powered cleaning head. Lithium-ion batteries are common in modern cordless stick vacuums.
Look for a battery release button first
Inspect the handle, rear housing, and underside of the vacuum. A button, sliding latch, or clearly separate battery pack usually indicates a user-removable design.
Press only the controls intended for battery removal. Don’t pry around the battery seam with a screwdriver.
- Quick-release pack: Usually slides or pulls away after pressing a release button.
- Screw-mounted pack: Uses visible screws that the manufacturer may allow the owner to remove.
- Internal pack: Sits inside the main body and may require partial disassembly.
- Sealed design: Has no normal consumer access and may require professional service.
Check the manual and exact model number
The label on the vacuum is more useful than the brand name alone. Manufacturers often make several similar-looking cleaners that use different batteries.
If you own a Dyson, for example, its cordless vacuum support section lets owners identify their particular machine before looking for parts or instructions.
Practical check: Photograph the vacuum model label and old battery label before ordering the replacement. It gives you something reliable to compare with the new pack.
Make sure the battery is actually the problem
Short runtime can indicate an aging battery, but it isn’t proof by itself. Check the rest of the vacuum before spending money.
- Empty an overfilled dustbin.
- Remove hair from the brush roll.
- Inspect the wand and airway for clogs.
- Clean washable filters only as the manual directs.
- Check the charger and charging contacts for obvious damage.
- Test the vacuum outside maximum or boost mode.
A clogged pre-filter or HEPA-style exhaust filter can affect airflow on some vacuums. High-power modes can also reduce runtime dramatically compared with normal settings.
Consumer Reports includes runtime and battery performance in its vacuum testing process, which is a useful reminder that cordless runtime varies considerably between models and operating modes.
Which Replacement Vacuum Battery Do I Need?
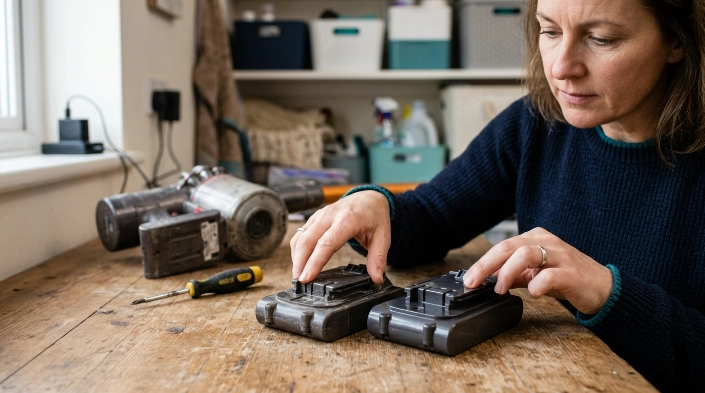
Buy a battery specifically approved or listed as compatible with your exact vacuum model. Physical appearance alone isn’t enough to establish compatibility.
The safest starting point is the manufacturer documentation. Match every identifying detail available on the original pack.
What should I match on the battery label?
- Vacuum model: Confirm the replacement lists your exact model or product series.
- Battery part number: Match the manufacturer’s battery identifier when available.
- Voltage: The specified replacement voltage must match the vacuum’s requirements.
- Connector: Electrical contacts and physical connection points must align correctly.
- Mounting design: Latches, rails, screw holes, and housing dimensions must fit.
- Charger compatibility: Confirm the battery is intended for your original charger or the recommended replacement charger.
Removable vs. internal vacuum batteries
| Battery design | Typical access | Tools commonly involved | Best approach |
|---|---|---|---|
| Quick-release pack | Button or sliding latch | Usually none | Follow normal owner replacement instructions |
| Screw-mounted pack | Visible battery screws | Correct screwdriver | DIY only when the manual permits it |
| Built-in pack | Inside main housing | May require disassembly tools | Check manufacturer service instructions |
| Sealed/service-only pack | No approved user access | Professional service tools | Use an authorized or qualified repair service |
Should I use an OEM or third-party battery?
An OEM battery comes from the vacuum manufacturer or its approved supply chain. A third-party battery comes from another manufacturer that claims compatibility.
I put compatibility ahead of price. An inexpensive pack isn’t useful if the charging system, connector, voltage, or battery-management electronics don’t match the machine.
Check the vacuum’s warranty terms before using a non-original component. Manufacturers can have different rules about approved batteries and repairs.
Section Takeaway: Identify the exact vacuum, battery part number, voltage, connector, mounting style, and charging requirements before you buy a replacement.
How Do I Replace a Vacuum Battery Step by Step?
For a battery specifically designed for owner replacement, the job is usually straightforward. The manufacturer’s instructions always take priority over generic steps.
1. Switch off and disconnect the vacuum
Turn the vacuum completely off. Remove the charging cable or lift the vacuum away from its powered charging dock.
Let the machine cool if you’ve just finished cleaning. Working on a hot battery isn’t a good idea.
2. Put the vacuum on a stable surface
Lay the vacuum where it can’t fall while you remove the battery. Keep metal objects away from exposed battery contacts.
Take another photo of the original battery position if the mounting arrangement isn’t obvious. That makes reassembly easier.
3. Release the old battery
For a quick-release design, hold the battery securely and press the approved release control. Slide the pack in the direction specified by the manufacturer.
If the pack uses screws, use the correct screwdriver size. Keep the removed screws together so none disappear into the carpet.
- Support the battery with one hand.
- Remove only the fasteners identified for battery replacement.
- Pull or slide the pack away without twisting it.
- Don’t pry, puncture, crush, or bend the battery housing.
4. Compare the old and new batteries
Before installation, place the packs side by side without allowing their contacts to touch metal objects. Compare the labels, shape, electrical contacts, latches, and screw locations.
Stop if anything important differs from the specified replacement. Don’t try to modify a battery or connector to make it fit.
5. Install the new battery
Align the battery with its mounting rails or connection point. Push it gently until the latch engages or the pack sits in its intended position.
For screw-mounted packs, reinstall the correct screws without overtightening them. Excessive force can damage plastic mounting points.
6. Check the installation before charging
- Make sure the battery sits flush.
- Confirm any release latch has locked.
- Check that no wires or contacts are pinched.
- Look for unexpected gaps around the housing.
- Verify that the pack doesn’t wobble.
If everything looks correct, reconnect the approved charger. Follow the manufacturer’s initial charging instructions for the replacement battery.
Section Takeaway: A normal owner-replaceable battery should fit without cutting, forcing, rewiring, or modifying the vacuum. If it doesn’t fit correctly, stop and recheck compatibility.
What If the Battery Is Built In or Damaged?
A built-in battery changes the job because replacing it may require opening the vacuum body. A damaged lithium-ion pack also requires more caution than an ordinary worn battery.
Don’t force open a service-only vacuum
If the manual tells you to contact the manufacturer for battery service, I would follow that instruction. Opening sealed housings can expose electrical components and may affect warranty coverage.
Expert Alert: If battery replacement requires rewiring, soldering, opening sealed electrical assemblies, or repairing damaged power components, use a qualified appliance or electronics repair professional.
Stop using a battery with physical warning signs
A battery that is swollen, leaking, cracked, abnormally hot, or producing an unusual odor shouldn’t be treated as a routine replacement job. Disconnect the vacuum from charging if you can do so safely.
- Don’t puncture or flatten the battery.
- Don’t attempt to rebuild the battery pack.
- Don’t expose its terminals to loose metal objects.
- Don’t place a lithium-ion battery in household trash.
- Contact the manufacturer or appropriate local disposal service for damaged batteries.
How should I dispose of the old vacuum battery?
The U.S. EPA says lithium-ion batteries should not go into household garbage or ordinary curbside recycling. Its used household battery guidance recommends appropriate recycling or household hazardous-waste collection options.
For normal undamaged lithium-ion batteries, EPA guidance also recommends protecting exposed terminals from short circuits during handling. Local requirements can differ, so check the rules where you live.
Important: A damaged or recalled lithium-ion battery may need different handling from a normal depleted battery. Contact the manufacturer or your local hazardous-waste facility before transporting it.
How Do I Test and Care for the New Battery?
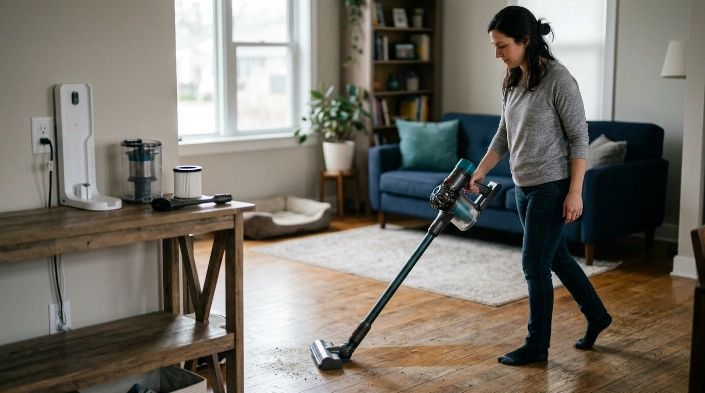
After installation, give the vacuum a short controlled test before returning to normal cleaning. You’re checking the electrical connection, charging behavior, and basic operation.
Start with the specified charging routine
Use the charger recommended for the exact vacuum and battery. Don’t substitute a charger simply because its plug seems to fit.
Watch the normal battery indicator during charging. Consult the manual if you see an unfamiliar flashing pattern or error code.
Run a short cleaning test
Once charged according to the manufacturer’s directions, run the vacuum for several minutes in a normal cleaning mode. Pay attention to power delivery and temperature.
- Does the vacuum start normally?
- Does it stay running without unexpected shutdowns?
- Does the battery remain securely attached?
- Does the charger recognize the new pack?
- Are there unusual smells, noises, or warning lights?
Don’t judge the battery only by maximum-power runtime. Boost settings can demand far more power than everyday cleaning modes.
Reduce unnecessary load on the battery
A clean airflow path helps the whole vacuum work as intended. Empty the bin, remove roller hair, check for blockages, and maintain approved filters regularly.
Keep the vacuum and its battery away from unusually hot storage areas. Follow the manufacturer’s temperature and long-term storage instructions.
What if the new battery doesn’t fix the problem?
If a correctly specified new battery doesn’t solve the issue, the battery may not have been the original cause. Charging circuitry, the charger, contacts, switches, motor electronics, or other components may need diagnosis.
Expert Alert: Stop troubleshooting at the user-serviceable level when testing requires opening live electrical circuits or bypassing safety controls. Have a qualified technician inspect the vacuum.
Frequently Asked Questions
Can I replace a cordless vacuum battery myself?
Yes, if the manufacturer designed the battery for user replacement. Quick-release and some screw-mounted packs are commonly straightforward, but built-in or service-only batteries should be handled according to the manufacturer’s repair instructions.
How do I know which battery fits my vacuum?
Find the vacuum model number and original battery label. Match the specified part number, voltage, connector, physical mounting system, charger compatibility, and the manufacturer’s compatibility information before purchasing.
Do I need to charge a new vacuum battery before using it?
Follow the instructions supplied with the battery and vacuum. Charging requirements can differ between products, so manufacturer guidance is more reliable than applying one universal first-charge rule.
Why is my vacuum still shutting off after replacing the battery?
The cause may be outside the battery. Check the filter, dustbin, wand, brush roll, charger, contacts, and manufacturer troubleshooting steps before assuming the replacement battery is defective.
Can I put an old cordless vacuum battery in the trash?
Don’t put a lithium-ion vacuum battery in ordinary household trash or curbside recycling. Use a suitable battery recycler, electronics collection program, or household hazardous-waste facility according to local requirements.
Can I replace individual cells inside a vacuum battery pack?
Battery-pack rebuilding isn’t the same as replacing a removable pack. It can expose cells and protection electronics, so I would use a qualified battery or electronics repair service rather than attempting a cell-level DIY repair.
Should I replace the battery or buy a new vacuum?
Battery replacement makes practical sense when the correct part is available and the rest of the vacuum works well. If the machine also has motor, charging, housing, or cleaning-head problems, compare the complete repair cost with replacement.
Final Takeaway: Replace the Battery Only the Way Your Vacuum Was Designed
Replacing a vacuum battery can be a simple repair when the manufacturer provides a removable or user-serviceable pack. Identify your exact model, buy the specified battery, disconnect charging power, remove the old pack correctly, and install the replacement without forcing anything.
For 2026 cordless vacuums, don’t assume two similar-looking battery packs are interchangeable. Model compatibility and manufacturer instructions matter more than appearance.
If the battery is swollen, leaking, overheated, sealed inside the machine, or connected through wiring that requires electrical repair, stop treating it as a simple DIY swap. Manufacturer support or a qualified repair technician is the safer next step.
Once the new battery is working, keep the dustbin, filters, airflow path, and brush roll maintained. Those basic home-hygiene habits help the whole vacuum work efficiently and make battery troubleshooting much easier later.
“`