
Why Is My Robot Vacuum Not Charging? Causes and Easy Fixes

Quick Answer
A robot vacuum usually stops charging because the dock has no power, the robot is sitting incorrectly, the charging contacts are dirty, or the battery has a problem. Start with the dock and contacts before assuming the battery is dead. Official robot charging troubleshooting guidance follows the same basic order.
Check These First
- Dock power: Confirm the outlet, power cord, and charging base are connected.
- Robot position: Make sure both charging contacts sit firmly against the dock contacts.
- Dirty contacts: Remove dust, oxidation, and debris using the cleaning method approved for your model.
- Battery connection: A loose, aged, or faulty battery can prevent normal charging.
- Temperature: Let an unusually hot or cold robot return to a normal indoor temperature before charging.
- Physical damage: Stop using a swollen battery, burned contact, damaged charger, or melted connector.
Best Troubleshooting Rule
- Test the simple external causes first. Only consider battery replacement after you know the dock, outlet, alignment, and charging contacts are working.
When a robot vacuum suddenly refuses to charge, I don’t start by ordering a new battery. I start with the parts that transfer power into the machine.
That approach has saved me from replacing batteries when the real problem was dust on a contact, a loose dock cable, or poor alignment. This 2026 guide walks through the same practical troubleshooting sequence.
In This Guide
What Does “Robot Vacuum Not Charging” Mean?
A robot vacuum is not charging when electrical power from its charging dock or charger is not restoring usable energy to the battery. The problem can occur anywhere between the wall outlet and the battery pack.
That distinction matters. A robot that looks completely dead does not automatically have a dead battery.
Definition: A robot vacuum charging system includes the power source, charging dock or adapter, electrical contacts, battery-management electronics, and rechargeable battery.
What does a charging problem look like?
The exact lights and error messages differ by brand. Still, charging faults tend to show several recognizable symptoms.
- No charging light: The robot shows no response when placed on the dock.
- Repeated dock attempts: It reaches the station but keeps moving away and trying again.
- Battery percentage stays flat: The app shows little or no increase after the robot sits on its dock.
- Charging error: The app or robot reports a battery, dock, or charging-contact fault.
- Very short runtime: The robot appears to charge but loses power much faster than it once did.
- Intermittent charging: Charging starts only when the robot is repositioned manually.
Charging failure vs. short battery runtime
These problems are related but different. A robot that reaches a full charge but runs for less time may have an aging battery rather than a charging failure.
Consumer Reports notes that battery-related problems are among the issues owners report with robotic vacuums. That makes battery condition worth checking, but only after simpler causes are eliminated.
Why Is My Robot Vacuum Not Charging?
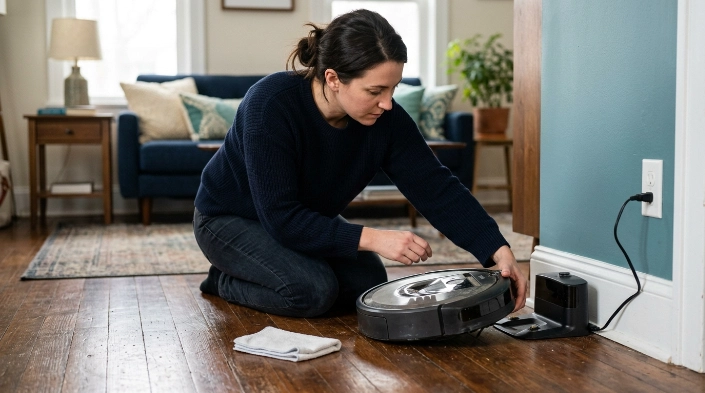
The most common reasons are loss of power to the dock, poor contact between robot and dock, dirty charging contacts, battery problems, or damaged charging hardware. I check them in that order because it moves from easy fixes toward more expensive ones.
1. The charging dock has no power
Start at the wall. A loose plug, disconnected adapter, switched-off power strip, or damaged cord can make a perfectly good robot appear dead.
- Test the wall outlet with another small appliance.
- Reconnect the dock’s power cable at both ends.
- Check whether the dock’s normal power indicator appears.
- Inspect the visible cable for cuts, crushing, or heat damage.
Don’t assume the outlet works because another outlet in the room works. I have seen cleaning problems reduced to one loose plug behind furniture.
2. The robot is not sitting correctly on the dock
Robot vacuums charge through small metal contact points. Those surfaces must line up well enough to transfer power.
A rug edge, uneven floor, moved dock, or object behind the station can prevent proper alignment.
- Place the dock on a firm, level surface.
- Remove clutter directly around the docking area.
- Manually place the robot on the station.
- Check whether the charging indicator changes when you gently reposition it.
3. The charging contacts are dirty
Dust and residue can collect on both the robot and dock contacts. That buildup can interfere with the electrical connection.
Consumer Reports’ robot-vacuum maintenance guidance also emphasizes regular cleaning because debris accumulates around robot components.
Unplug the dock before cleaning electrical contacts. Then follow your manufacturer’s approved method rather than soaking or spraying the charging area.
4. The battery connection or battery has a problem
Some models use a removable battery pack. A poorly seated battery can break the electrical path between the battery and charging system.
Battery capacity also drops with age and use. That can eventually produce short runtime, incomplete charging, or repeated charging errors.
5. Temperature is outside the robot’s normal charging range
Rechargeable batteries and their protection electronics can restrict charging when temperatures are unsuitable. Exact limits depend on the model.
If the robot feels unusually hot after cleaning, let it cool indoors before trying again. Don’t place the dock next to a heater, in direct intense sunlight, or in another temperature-extreme location.
6. A charger, contact, battery, or circuit has failed
Persistent failure after basic troubleshooting can indicate damaged hardware. Burned contacts, bent pins, internal charging-board problems, or battery faults need more than routine cleaning.
Section Takeaway: Most charging problems should be approached from the outside inward: wall outlet → dock → alignment → contacts → battery → internal hardware.
How Do You Fix a Robot Vacuum That Won’t Charge?
Use a controlled troubleshooting sequence. Changing several things at once makes it harder to identify what fixed the problem.
- Confirm wall power. Test the outlet and reconnect the charging station.
- Inspect the dock. Look for damaged cables, bent contacts, debris, or an unusual smell.
- Reposition the robot. Place it directly onto the charging contacts.
- Clean the contacts. Unplug the dock and use the method recommended for your model.
- Restart the robot. Use the normal reboot process in its manual or official app.
- Check the battery. If the battery is removable, verify installation only when the manual permits it.
- Allow charging time. Leave the robot docked and see whether the battery level rises.
- Check the app or error code. Brand-specific codes can narrow the problem further.
Should you clean the charging contacts?
Yes, when dirt or residue is visible and your manual allows cleaning. iRobot’s current support information specifically lists dirty or damaged contacts as possible causes of charging problems.
I clean both sides of the connection instead of only the robot. Cleaning one contact surface while leaving the matching dock contact dirty can leave the problem unchanged.
Should you reboot the robot?
A reboot can help when the charging system or battery indicator has stopped responding correctly. It cannot repair burned contacts, a failed adapter, or a physically damaged battery.
Use the reset procedure for your exact model. Don’t copy button combinations from a different brand.
Should you leave it on the dock overnight?
Only follow normal docking behavior allowed by the manufacturer. Most modern robot vacuums are designed to return to a powered base, but model-specific battery management still matters.
If the robot, battery, or dock becomes abnormally hot, disconnect power instead of waiting longer.
Section Takeaway: Give each troubleshooting step a chance to prove something. If the dock has power and clean contacts still won’t start charging, move to battery and hardware diagnosis.
Is the Charging Dock or Battery Causing the Problem?
The symptoms often give you a useful clue. Dock problems usually affect whether charging starts, while aging batteries often affect how long the robot runs after charging.
| What You Notice | More Likely Area | First Check |
|---|---|---|
| No response on the dock | Outlet, adapter, dock, or contacts | Confirm power and reseat the robot |
| Charges only when repositioned | Alignment or charging contacts | Clean and inspect both contact surfaces |
| Shows full charge but dies quickly | Battery capacity or heavy cleaning load | Compare runtime with past normal use |
| Charging starts and stops repeatedly | Contacts, dock, battery, or electronics | Inspect contacts and check error messages |
| Battery is swollen, leaking, or unusually hot | Unsafe battery condition | Stop using and charging the robot |
How can you test the dock without special equipment?
Keep the test simple. Confirm the outlet works, reconnect the adapter, inspect the station, and watch whether the robot reacts when placed directly onto it.
If moving the robot slightly causes charging to start and stop, contact alignment deserves attention. That pattern is less typical of a battery that has simply lost capacity.
How can you tell if the battery is wearing out?
A battery becomes more suspicious when charging appears normal but useful runtime keeps falling. Sudden shutdowns and failure to hold a charge can also point toward battery deterioration.
Don’t diagnose battery age from one poor cleaning session. Thick carpet, tangled brushes, wheel resistance, and demanding power modes can also increase energy use.
When Should You Reset, Replace the Battery, or Call Support?

Reset the robot when software or battery-status behavior appears abnormal. Consider battery replacement only after power, dock, contacts, temperature, and basic resets have been ruled out.
When a reset makes sense
- The app shows a charging state that does not match the robot.
- A temporary charging error appeared after normal use.
- The robot stopped responding even though the dock has power.
- The manufacturer specifically recommends a reboot for your error code.
A factory reset is different from a normal reboot. It may erase maps, schedules, Wi-Fi information, or other saved settings.
When battery replacement becomes reasonable
- The robot reaches a charge but runtime has become consistently poor.
- The battery repeatedly fails to hold usable charge.
- The manufacturer’s diagnostic process identifies a battery fault.
- A known-good dock and clean contacts do not resolve charging.
Use a battery specifically approved for your model. A pack that physically fits is not automatically electrically compatible.
When should you stop troubleshooting?
Stop immediately if you see swelling, leaking, melted plastic, burned terminals, sparking, smoke, or smell something burning. These are not routine maintenance problems.
Expert Alert: Do not open, puncture, rebuild, or bypass the protection circuitry of a lithium-ion battery pack. Contact the manufacturer or a qualified appliance repair professional when the fault involves internal wiring, damaged charging electronics, or a physically abnormal battery.
The U.S. Consumer Product Safety Commission’s battery information notes hazards associated with batteries and chargers, including overheating, fire, electrical shock, and burns. Treat visible battery damage as a safety issue rather than a DIY repair challenge.
Section Takeaway: Reset software problems, replace batteries only after diagnosis, and hand electrical or damaged-battery problems to qualified support.
Robot Vacuum Charging FAQ
Why does my robot vacuum say it’s charging but the battery percentage doesn’t increase?
Poor charging-contact connection, a battery fault, or an inaccurate app reading can cause this. Reseat the robot, clean approved contact surfaces, reconnect the dock, and check the battery status again before assuming the battery has failed.
Why does my robot vacuum only charge when I push it onto the dock?
This usually points toward docking alignment or electrical contact. Check that the base sits flat, nothing moves it backward, and both charging surfaces are clean and undamaged.
Can dirty charging contacts stop a robot vacuum from charging?
Yes. Dirt or residue can interfere with electrical contact between the robot and its base. Unplug the dock first and follow the manufacturer’s cleaning method for your exact model.
How long should a robot vacuum take to start showing that it’s charging?
The indicator behavior varies by model. Some respond almost immediately, while apps may update less frequently. If nothing changes after the normal period stated in your manual, begin checking dock power, alignment, and contacts.
Does a robot vacuum battery need to be completely dead before charging?
Usually no for modern lithium-ion models. Normal robot-vacuum operation commonly involves returning to the dock before the battery reaches zero, but the owner’s manual should remain your model-specific guide.
Can I use another charger if the original robot vacuum charger stops working?
Don’t use a random charger because the connector happens to fit. Voltage, current, polarity, communication, and battery-management requirements can differ. Use the manufacturer-specified charger or an explicitly approved replacement.
Why is my robot vacuum hot and not charging?
A protection system may restrict charging when the battery or electronics are too warm. Let the robot return to a normal indoor temperature. Stop using it and seek support if heat is extreme, persistent, or accompanied by odor, swelling, smoke, or damage.
Final Takeaway: If your robot vacuum is not charging, start with the outlet, dock, alignment, and charging contacts before blaming the battery. Those checks are fast, inexpensive, and often reveal the real problem.
If the robot still refuses to charge after those steps, use its exact error code and model number when contacting the manufacturer. That gives support a much better starting point than simply reporting that the vacuum is dead.
