How Do You Clean Exhaust Filters?

Quick Answer
To clean a vacuum exhaust filter, switch off and disconnect the vacuum, remove the filter, tap away loose dust, and follow the manufacturer’s cleaning method. Rinse it only if that exact filter is labeled washable, then let it dry completely before reinstalling it; the EPA’s HEPA filter guidance explains why filter construction matters for particle capture.
Quick Cleaning Steps
- Disconnect power: Unplug the vacuum or remove its battery when your model allows it.
- Remove the filter: Open the exhaust-filter compartment and note how the filter is positioned.
- Remove loose dust: Gently tap or brush away surface debris before using water.
- Check washability: Rinse the filter only when the manual specifically permits water cleaning.
- Air-dry fully: Give a washed filter enough time to become completely dry before reassembly.
- Replace damage: Replace torn, warped, crumbling, or permanently clogged filter media.
The Safest Rule
- If you cannot confirm that an exhaust filter is washable, keep it dry and check the vacuum’s manual before cleaning it further.
If you’re staring at a gray, dusty filter on the back or top of your vacuum, washing it under the faucet can seem like the obvious fix. I don’t use that shortcut because vacuum exhaust filters can look almost identical while requiring completely different care.
This guide covers safe cleaning, washable versus non-washable filters, drying, replacement, odors, and common mistakes. It focuses on household vacuum cleaners rather than automotive, industrial, or HVAC exhaust filtration.
In This Guide
What Is a Vacuum Exhaust Filter?
A vacuum exhaust filter is a filter positioned near the air outlet after air has traveled through much of the vacuum. It is also commonly called a post-motor filter.
Its job is different from the filter protecting the motor from incoming dirt. The exhaust filter helps capture particles before the vacuum’s outgoing air returns to your room.
Depending on the machine, the exhaust filter may be made from:
- Pleated HEPA media: Used in many vacuums designed for higher-efficiency particle filtration.
- Foam: Reusable on some models and often easier to rinse when approved.
- Felt or synthetic media: Cleaning instructions vary significantly by manufacturer.
- Microfilter material: Often designed for a specific replacement schedule.
- Activated-carbon layers: Used on certain appliances where odor control is part of the filtration system.
HEPA means high efficiency particulate air. The EPA defines HEPA filtration by particle-capture performance, but that definition does not mean every HEPA filter can be washed.
That distinction is important. “HEPA” describes filtration performance, while “washable” describes maintenance.
The exhaust filter also forms only one part of a vacuum’s filtration system. Many machines have a pre-motor filter, dust bag or bin, seals, cyclones, and an exhaust filter working together.
The EPA’s guide to home air filtration also makes a broader point that applies here: filtration equipment requires regular maintenance, and overloaded filters do not perform as intended.
Section Takeaway: An exhaust filter cleans air leaving the vacuum, but its location does not tell you whether it is washable. Always identify the exact filter and its approved care method first.
How Do You Clean an Exhaust Filter Step by Step?
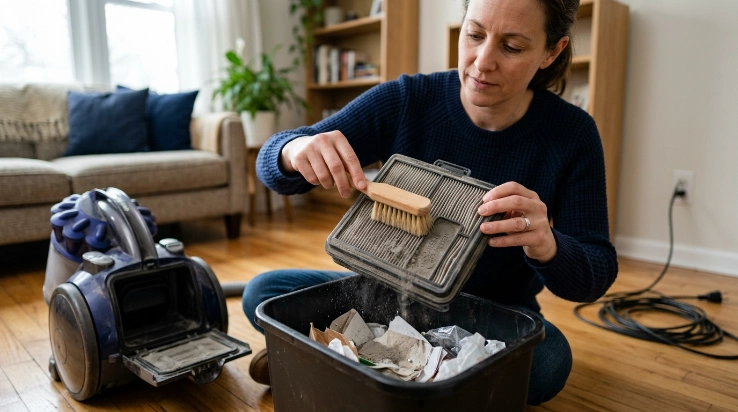
Start with the manufacturer’s instructions for your specific model. If your filter is confirmed washable, the basic process is simple.
1. Turn off and disconnect the vacuum
Switch the vacuum off before opening any filter compartment. Unplug a corded model or remove the battery when the manufacturer provides for battery removal.
Never clean a filter while it is installed in a powered machine. Keep water away from motors, electrical contacts, chargers, switches, and battery compartments.
2. Locate the exhaust filter
Look near the rear, side, top, or base of the machine. Some stick vacuums place the exhaust filter near the handle or motor housing.
Take a quick photo before removal if the orientation is confusing. That small step can make reassembly much easier.
3. Remove loose surface dust first
Take the filter to a trash can and tap it gently. A soft brush may also be appropriate if the manufacturer permits brushing.
- Don’t crush pleated filter media.
- Don’t scrape between pleats with sharp objects.
- Don’t use a hard wire brush.
- Don’t blast delicate media with high-pressure compressed air unless specifically permitted.
I prefer removing dry debris before considering water. Otherwise, loose dust can turn into a muddy layer that is harder to rinse from folds and corners.
4. Rinse only a confirmed washable filter
If the manual says the exhaust filter is washable, rinse it using the specified water temperature and direction. Plain water is the safest default unless the manufacturer specifically recommends a cleaning product.
For example, LG’s exhaust-filter cleaning instructions for a supported robot-vacuum design allow dust removal or washing in flowing water. LG then instructs owners to dry the washed filter for more than 24 hours in a ventilated location away from direct sunlight.
5. Skip detergent unless it is approved
Dish soap, laundry detergent, disinfectant, bleach, fragrance sprays, and household cleaners can leave residue or damage some filter materials. Don’t add them because a filter looks stained.
A clean filter does not necessarily need to look new. Permanent discoloration can remain after loose dust has been removed.
6. Inspect the filter while it is out
Cleaning is a good time to look for physical damage. A damaged filter may need replacement even if you can remove the dirt.
- Tears: Check pleats and edges for holes or split material.
- Warping: Look for a frame that no longer sits flat.
- Damaged seals: Inspect foam or rubber sealing surfaces.
- Crumbling media: Replace filter material that is breaking apart.
- Persistent blockage: Replace a filter that remains heavily clogged after approved cleaning.
Section Takeaway: Disconnect power, remove dry debris first, and use water only on a filter specifically designed to be washed. Cleaning cannot repair torn or degraded filter media.
Can You Wash Every Vacuum Exhaust Filter?
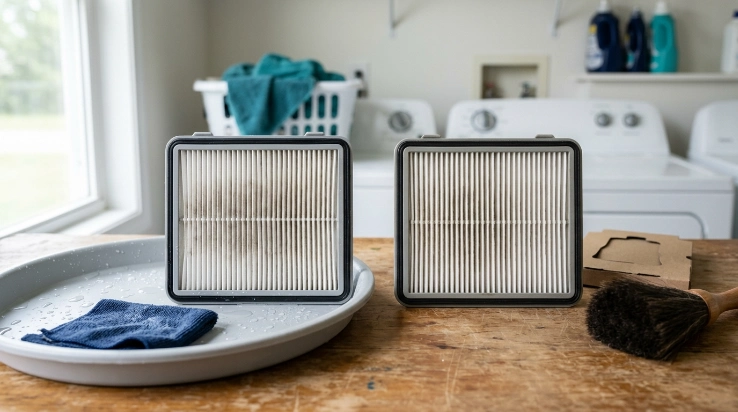
No. Some exhaust filters are washable and reusable, while others must remain dry or be replaced.
This is one of the most important parts of vacuum maintenance. Never decide based only on the filter’s color, pleated shape, foam texture, or HEPA label.
Washable and non-washable filters can look similar
A pleated HEPA exhaust filter may be washable on one vacuum and replace-only on another. Even different models from the same manufacturer can have different instructions.
Check for words such as “washable,” “rinseable,” “do not wash,” or “replace.” When those markings are absent, use the model number to locate the official manual.
| Official Example | Filter Cleaning Method | Drying Guidance | Main Lesson |
|---|---|---|---|
| LG Robot Vacuum exhaust filter | Remove dust with a vacuum or wash the supported filter in flowing water | More than 24 hours in a ventilated area away from direct sunlight | Water is acceptable only because the manufacturer permits it for that design |
| Supported Shark upright pre-motor and HEPA filters | Rinse with cold water according to Shark maintenance guidance | 24 hours before reinstalling | Follow model-specific instructions even when the filter is labeled HEPA |
| Filter marked “do not wash” or replacement-only | Dry cleaning or replacement only, according to the manual | Not applicable unless another approved cleaning method uses moisture | Never convert a replace-only filter into a washable one |
Shark’s upright-vacuum maintenance guidance, for example, tells owners of supported models to wash pre-motor and HEPA filters and dry them completely for 24 hours. That instruction should not be automatically transferred to another vacuum.
What happens if you wash a non-washable filter?
Water can alter filter media, adhesives, coatings, frames, or seals that were never intended to become saturated. A filter may look fine afterward while no longer fitting or functioning as designed.
Moisture can also create odor problems if a washable filter is reinstalled too soon. The safer approach is simple: when washability is unclear, don’t rinse.
Section Takeaway: A HEPA label does not prove that a filter is washable. The model-specific manufacturer’s instructions are the deciding source.
How Do You Dry and Reinstall an Exhaust Filter?
A washed exhaust filter must be completely dry before it goes back into the vacuum. Don’t judge dryness only by the outer surface.
Water can remain deeper in foam, folds, seams, and filter frames. Reinstalling too early can lead to odors and may expose components to unwanted moisture.
Use room-temperature air
Place the filter in a clean, well-ventilated location. Keep it away from dirty work areas where airborne dust can settle onto the damp media.
- Let air circulate around the entire filter.
- Follow any required minimum drying time in the manual.
- Avoid direct sunlight when the manufacturer tells you to use shade.
- Don’t put the filter back while any section feels damp.
Don’t rush drying with high heat
A hair dryer, clothes dryer, oven, heater, or radiator can expose the filter to temperatures its materials were not designed to handle. Unless the manufacturer approves a drying method, passive air drying is safer.
Several official vacuum-support instructions use roughly 24 hours as a minimum for supported washable filters. Treat your own manual’s drying period as the requirement, not a universal timer.
Check the seals before locking the filter in place
Once dry, reinstall the filter in the same orientation it had before removal. Make sure covers, tabs, gaskets, and locking points sit correctly.
Never run the vacuum without required filters installed. An incorrectly fitted filter can interfere with the airflow and filtration system the vacuum was designed to use.
Expert Alert: Stop using the vacuum if moisture entered the motor housing, battery compartment, wiring, or electrical contacts. Have the appliance checked by a qualified repair professional rather than opening powered components yourself.
Section Takeaway: Drying is part of cleaning, not an optional waiting period. Reinstall the filter only when it is completely dry and correctly seated.
How Often Should You Clean or Replace an Exhaust Filter?
There is no single cleaning schedule for every vacuum exhaust filter. The correct interval depends on the vacuum, filter material, household conditions, and manufacturer instructions.
As of 2026, official care schedules still vary widely between brands and models. Some manufacturers recommend routine monthly attention for certain washable filters, while other filters have replacement intervals instead.
Check it sooner when the vacuum works harder
Households with pets, lots of carpeting, frequent cleaning, renovation dust, or heavy debris may load filters more quickly. Check the filter when you notice a meaningful change in the machine rather than relying only on the calendar.
Useful warning signs include:
- Reduced suction: Check the bin, bag, hose, brush roll, and filters for restricted airflow.
- Visible buildup: A thick dust layer means the filter needs approved maintenance.
- Dusty exhaust: Inspect the filter for damage, poor seating, or excessive loading.
- Unusual heat: Turn the vacuum off and inspect the airflow path after it cools.
- Persistent odor: Check for damp filters, dirty bins, trapped debris, and contaminated attachments.
When should you replace instead of clean?
Replace the filter when the manufacturer reaches its stated service interval or when the filter is physically damaged. Cleaning is maintenance, not a way to make disposable filtration media last forever.
Replacement also makes more sense when an approved cleaning no longer restores normal condition. Deeply embedded dirt, damaged seals, torn pleats, permanent deformation, or deteriorating foam are good reasons to stop reusing the filter.
Why does exhaust filtration matter in a household?
The exhaust side matters because collected household dust can contain fine particles and allergens. The National Institute of Environmental Health Sciences recommends a HEPA-filtered vacuum or double-layer microfilter bag among its strategies for reducing exposure to dust-mite material.
That doesn’t mean vacuum filters prevent allergies or remove every contaminant. It does show why maintaining the vacuum’s intended filtration system is more sensible than running it with damaged, missing, or incorrectly serviced filters.
In my own maintenance routine, I check the filter whenever I empty and deep-clean the machine. I don’t wash it every time; I use that inspection to decide whether the approved cleaning or replacement interval is approaching.
Section Takeaway: Follow your manufacturer’s schedule, but inspect sooner when airflow, odor, visible dust, or operating temperature changes. Replace damaged filters instead of trying to rescue them with aggressive cleaning.
Frequently Asked Questions
Can I clean a vacuum exhaust filter with water?
Yes, but only if the manufacturer specifically says that exact exhaust filter is washable. If the manual says replace, dry-clean, tap, or brush the filter instead, keep it away from water.
Can I wash a HEPA exhaust filter?
Some HEPA exhaust filters are washable, while others are not. HEPA describes filtration performance rather than cleaning instructions, so check the vacuum’s manual or official support information before rinsing the filter.
Can I use soap on a vacuum exhaust filter?
Don’t use soap unless the manufacturer specifically permits it. Detergent, disinfectant, bleach, fragrance, or other cleaner residue can remain in filter media or affect materials that were designed for water-only cleaning.
How long should an exhaust filter dry?
Follow the drying period specified for your model. Several manufacturers require at least 24 hours for supported washable filters, but the filter should remain out of the vacuum longer if any part is still damp.
Why does my vacuum smell after I washed the filter?
A filter that was reinstalled while damp can develop an unpleasant odor. Remove it, check the manufacturer’s instructions, and let an approved washable filter dry completely in a well-ventilated location before trying it again.
Can I vacuum without the exhaust filter while it dries?
Don’t run the vacuum without a filter that the manufacturer requires for operation. Wait until the cleaned filter is dry or install the correct compatible replacement before using the machine.
Should I clean or replace a dirty exhaust filter?
Clean it when the manufacturer identifies it as reusable and gives an approved cleaning method. Replace it when it is disposable, has reached its service interval, remains heavily clogged, or shows tears, damaged seals, warping, or deteriorated media.
The main rule is simple: identify the filter before you clean it. Remove loose dust gently, wash only confirmed washable filters, dry them completely, and replace any filter that is damaged or designated as disposable.
That approach takes a little longer than automatically rinsing every dirty filter, but it protects both the filtration system and the vacuum. When in doubt, your model’s official manual should always win.
“`