
How Do You Clean Vacuum Air Vents?

Quick Answer
To clean vacuum air vents, switch the vacuum off, unplug it or remove its battery, and let it cool. Brush loose dust from the exterior vent openings, vacuum the loosened debris with another vacuum if available, and wipe only the outside surfaces with a barely damp microfiber cloth. Never push water, tools, or compressed air deep into the motor housing. The EPA’s indoor air quality guidance is also useful when managing household dust.
Quick Cleaning Steps
- Disconnect power: Unplug the vacuum or remove its battery.
- Let it cool: Wait until the motor housing feels cool before cleaning.
- Brush the vents: Loosen surface dust with a soft, dry brush.
- Remove debris: Lift loosened dust away instead of pushing it through the slots.
- Wipe outside: Use a dry or barely damp microfiber cloth on exterior plastic.
- Check airflow parts: Inspect the filter, bin, bag, hose, and other accessible airflow paths.
Vacuum air vents are easy to overlook because most of us focus on the dustbin, brush roll, and filter. Yet those small openings around the vacuum body help air move through or around important components.
I’ve found that vent dust is usually easiest to handle before it becomes a packed layer. This guide covers a safe cleaning method for upright, canister, stick, and similar household vacuums without telling you to dismantle electrical components.
In This Guide
What Are Vacuum Air Vents?
A vacuum air vent is an opening or grille in the vacuum’s housing that allows air to enter or leave part of the appliance. Depending on the design, you may see exhaust grilles, cooling openings, or vents near a filter compartment.
These aren’t the same thing as your home’s HVAC supply and return vents. Here, we’re talking about openings on the vacuum cleaner itself.
Why do vacuum vents collect dust?
A vacuum moves a large amount of dusty air while you clean. Filters and seals manage that airflow, but fine debris can still collect around exterior grilles and nearby surfaces.
Household dust may contain pollen, pet dander, fibers, skin particles, and other material. The EPA notes that activities such as cleaning and vacuuming can disturb settled indoor dust.
- Fine dust: Powdery debris can settle between narrow grille openings.
- Pet hair: Short hairs often cling to textured plastic around exhaust areas.
- Lint: Fibers can form a light mat over vent slots.
- Filter dust: A neglected or poorly seated filter can contribute to dirt around nearby airflow areas.
A little surface dust doesn’t automatically mean the motor is blocked. Thick buildup, however, is worth investigating along with the filters and other airflow components.
How Do You Clean Vacuum Air Vents Step by Step?
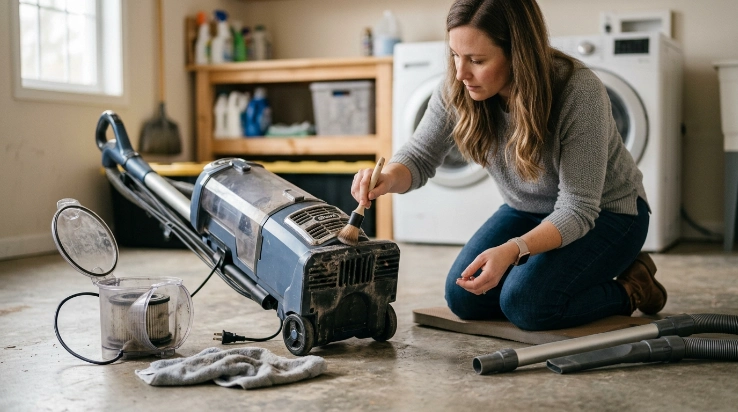
The safest approach is to clean from the outside without pushing debris farther into the machine. Don’t open the motor housing unless your manufacturer specifically describes that procedure as normal user maintenance.
1. Disconnect the vacuum from power
Unplug a corded machine. For a cordless vacuum, switch it off and remove the battery when the design allows you to do so.
Let a recently used vacuum cool before you begin. This is especially important if you noticed unusual heat.
2. Empty the bin or replace the bag if needed
A full dustbin or bag can restrict normal airflow. Emptying it also prevents loose debris from spilling while you handle the vacuum.
Do this over a trash container and avoid shaking collected dust around your room. People sensitive to dust may prefer doing this outdoors when practical.
3. Inspect the filter
Check every user-accessible filter listed in your owner’s manual. A heavily loaded filter can affect airflow even when the exterior vents look clean.
Don’t assume every filter is washable. Rinse a filter only when its manufacturer specifically identifies it as washable.
4. Loosen dust from the vent grille
Use a clean, soft brush and work across the grille gently. Brush outward so the debris comes away from the housing.
- Use a soft toothbrush reserved for appliance cleaning.
- Try a small detailing brush for narrow grille openings.
- A soft paintbrush can handle delicate plastic surfaces.
- A dry microfiber cloth works well for broad vent covers.
5. Remove the loosened debris
If you have another vacuum, its low-power dusting attachment can lift debris from the exterior grille. Keep the nozzle just above the openings rather than forcing it against them.
Otherwise, collect the dust with your brush and cloth. The goal is removal, not blowing debris into the housing.
6. Wipe the exterior
Use a dry microfiber cloth first. For stubborn grime on solid exterior plastic, a barely damp cloth may be appropriate if the manual doesn’t prohibit it.
Keep moisture away from vent openings, switches, battery contacts, charging ports, and other electrical areas.
7. Reassemble and test
Make sure all filters, covers, bins, and bags are correctly seated. Then reconnect power and run the vacuum briefly.
Listen for abnormal noises and check for unusual smells or excessive heat. Stop immediately if something seems wrong.
Section Takeaway: Clean vacuum vents from the outside inward only as far as the manufacturer intends users to reach. Clear the filter and other accessible airflow components at the same time.
What Should You Use to Clean Vacuum Vents?
A few simple tools handle most vent cleaning. You usually don’t need a special vacuum-cleaner maintenance kit.
| Cleaning Method | Best Use | Moisture | Main Precaution |
|---|---|---|---|
| Soft detailing brush | Dust inside narrow grille openings | None | Brush outward, not deep into housing |
| Dry microfiber cloth | Exterior dust and loose film | None | Don’t force cloth through slots |
| Barely damp microfiber cloth | Grime on solid exterior plastic | Minimal | Keep liquid away from openings and electronics |
| Second vacuum with brush tool | Lifting loosened surface dust | None | Don’t seal tightly against the grille |
| Compressed air | Usually unnecessary for routine cleaning | None | Can drive dust deeper into inaccessible areas |
I prefer a brush and microfiber cloth for routine maintenance. They give me more control over where the loosened dust goes.
As of 2026, following the appliance manufacturer’s maintenance instructions remains the safest default. That’s especially important for filters, powered components, batteries, and sealed motor housings.
Can You Wash Vacuum Air Vents With Water?
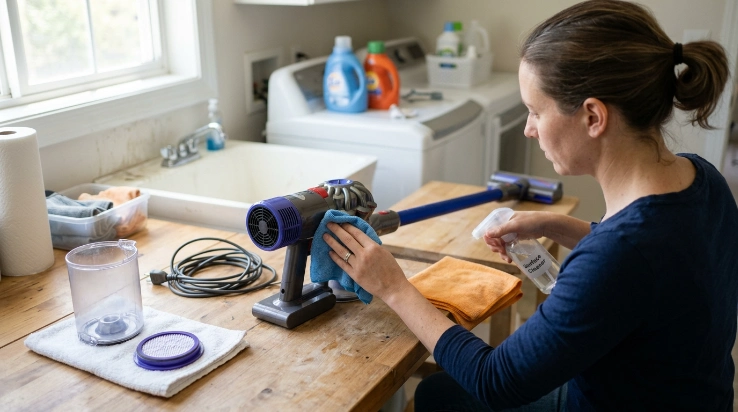
Don’t wash an assembled vacuum’s air vents by pouring, spraying, or rinsing water through the openings. Moisture can reach electrical components that aren’t designed for wet cleaning.
A removable vent cover may be different. Wash it only when your owner’s manual identifies that exact component as removable and washable.
What about disinfectant spray?
Routine dust removal usually doesn’t require disinfectant. The CDC distinguishes ordinary cleaning from sanitizing and disinfecting, and regular cleaning is sufficient for many household surfaces.
If a manufacturer permits a cleaner on the vacuum’s exterior, apply it to the cloth rather than spraying the machine. This gives you better control over moisture.
- Never soak: Don’t submerge powered vacuum components.
- Avoid direct spraying: Fine droplets can enter switches and vents.
- Follow the manual: Material and electrical designs vary by model.
- Dry completely: Reinstall a washed removable component only when fully dry.
Expert Alert: If liquid has entered the motor housing, battery compartment, wiring, or other electrical area, stop using the vacuum and contact the manufacturer or a qualified appliance technician.
How Often Should You Clean Vacuum Air Vents?
There isn’t one universal vent-cleaning interval for every vacuum. Usage, pets, carpeting, dust levels, filter design, and the manufacturer’s maintenance schedule all matter.
I find a quick visual inspection more useful than waiting for a fixed date. Look at the vents when you empty the bin or perform normal filter maintenance.
Clean them sooner when you notice:
- Visible lint covering the grille.
- Pet hair collecting around exhaust openings.
- A thick layer of fine dust.
- Reduced airflow combined with a dirty filter.
- More heat than you normally feel from the housing.
Homes with shedding pets or heavy carpeting may create more vacuum debris. The Asthma and Allergy Foundation of America also recommends regular vacuuming as part of controlling household allergens.
More cleaning isn’t always better, though. Repeatedly removing covers or washing parts that aren’t designed for it can create new problems.
Section Takeaway: Inspect vacuum vents during ordinary maintenance and clean visible buildup before it becomes packed. Let your model’s manual determine the schedule for filters and removable components.
What If the Vacuum Still Overheats or Smells?
Clean exterior vents don’t guarantee that the entire airflow path is clear. Heat, reduced suction, or a burning smell can have several causes.
Check the common airflow restrictions
- Dustbin or bag: Empty a full bin or replace a full disposable bag.
- Filters: Clean or replace them according to the manufacturer.
- Hose: Check user-accessible sections for hair, paper, or compacted debris.
- Wand: Look through detachable tubes for obvious blockages.
- Floor head: Remove hair wrapped around accessible brush-roll areas.
- Connections: Make sure covers and filters are installed correctly.
A warm exhaust stream can be normal because the motor produces heat. Rapid overheating, repeated thermal shutoffs, smoke, or a sharp electrical smell isn’t normal maintenance territory.
What does a burning smell mean?
Stop using the machine if you smell burning. Hair around a brush roll can create friction, but an electrical or melting-plastic smell may indicate a more serious problem.
Don’t keep restarting a vacuum that repeatedly shuts itself down after you’ve cleared user-serviceable airflow parts. That can turn a maintenance issue into an appliance failure.
Expert Alert: Smoke, sparking, melted plastic, damaged wiring, battery swelling, or a persistent electrical smell requires professional attention. Disconnect the vacuum and don’t attempt motor or wiring repairs unless you’re qualified.
Vacuum Air Vent Cleaning FAQs
Can I use a toothbrush to clean vacuum vents?
Yes, a clean soft-bristled toothbrush can work well on exterior vent grilles. Keep the vacuum disconnected from power and brush outward so you remove dust instead of forcing it deeper inside the housing.
Can I use compressed air on vacuum vents?
I generally avoid compressed air for routine vent maintenance because it can push surface dust farther into inaccessible areas. A soft brush followed by careful debris removal gives you more control unless your manufacturer specifically recommends compressed air.
Should I clean vacuum vents every time I empty the bin?
You don’t necessarily need to clean them every time, but emptying the bin is a convenient time to inspect them. Brush the vents when you see visible dust, lint, hair, or other buildup.
Can dirty vacuum vents reduce suction?
Severely restricted airflow can contribute to performance problems, but low suction often comes from other areas. Check the bin or bag, filters, hose, wand, floor head, and accessible airflow passages before blaming the exterior vent alone.
Can I remove the vacuum vent cover?
Only remove a cover when your owner’s manual treats it as a user-removable component. Screwed or sealed motor-housing panels may protect electrical parts and shouldn’t be opened merely for routine cleaning.
Why is dust coming out of my vacuum’s exhaust?
Check whether the filter is correctly installed, damaged, missing, or overdue for maintenance. Also inspect seals and filter covers. A properly maintained HEPA-equipped vacuum is designed to control fine exhaust particles more effectively than an unfiltered airflow path.
Is a HEPA filter the same as a vacuum air vent?
No. A HEPA filter is a filtration component, while a vent is an airflow opening or grille. Some exhaust vents sit close to a post-motor filter, so the two components can appear to be part of the same assembly.
The main takeaway is simple: unplug the vacuum, remove exterior vent dust gently, keep water away from electrical openings, and inspect the filter and other accessible airflow components at the same time.
If cleaning the vents doesn’t solve overheating, burning smells, abnormal noise, or repeated shutdowns, stop using the vacuum and investigate the underlying fault before your next cleaning session.
