
How Do You Sanitize a Vacuum Cleaner?

Quick Answer
To sanitize a vacuum cleaner, disconnect the power, empty the dirt, remove visible debris, and clean removable parts according to the manufacturer’s instructions. Wash only parts labeled as washable, let them dry completely, and treat compatible hard surfaces only when needed; the CDC’s cleaning and disinfecting guidance also recommends cleaning dirt away before sanitizing or disinfecting.
Quick sanitizing steps
- 1. Disconnect power: Unplug the vacuum or remove its battery when the design allows.
- 2. Empty the dirt: Remove the bag or empty the dust bin gently into a trash bag.
- 3. Remove debris: Cut hair from the brush roll and clear dust from attachments and air passages.
- 4. Clean approved parts: Wash only bins, filters, hoses, or tools that the manual says can get wet.
- 5. Treat hard surfaces: Sanitize compatible nonporous surfaces only with a suitable product and correct contact time.
- 6. Dry completely: Never reinstall a damp filter or wet component near the motor or electrical contacts.
The rule I never skip
- Check the manual first: Two similar-looking vacuum parts can have completely different moisture and chemical restrictions.
A vacuum collects dust, hair, pet debris, crumbs, allergens, and grime in places you rarely see. Keeping the machine itself clean is an important part of a practical home-hygiene routine.
I treat vacuum sanitizing as several small jobs rather than soaking or spraying the whole machine. That approach keeps moisture away from filters, bearings, batteries, sensors, and the motor.
In This Guide
- What does sanitizing a vacuum cleaner mean?
- What do you need to sanitize a vacuum cleaner?
- How do you sanitize a vacuum cleaner step by step?
- How should you sanitize each vacuum part?
- What should you never do when sanitizing a vacuum?
- How often should you sanitize a vacuum cleaner?
- Frequently asked questions
What Does Sanitizing a Vacuum Cleaner Mean?
Sanitizing means reducing germs on a cleaned surface to an accepted safer level. Cleaning, sanitizing, and disinfecting are related, but they are not the same process.
Definition: Sanitizing a vacuum cleaner means cleaning away dirt first, then using an appropriate sanitizing method on compatible parts without exposing electrical components or unsuitable materials to moisture or chemicals.
Routine cleaning does most of the work for a normally used household vacuum. Sanitizing or disinfecting becomes more relevant after illness, contamination, unpleasant residue, or unusually dirty use.
Cleaning vs. sanitizing vs. disinfecting
| Method | Main purpose | Vacuum example |
|---|---|---|
| Cleaning | Removes dirt, dust, hair, and other debris | Emptying a bin and wiping a washable attachment |
| Sanitizing | Reduces germs on a cleaned, suitable surface | Treating a compatible nonporous attachment as its instructions allow |
| Disinfecting | Kills remaining germs when the correct product and contact time are used | Disinfecting a compatible hard handle after cleaning |
As of 2026, public-health guidance still emphasizes cleaning surfaces before applying sanitizers or disinfectants. Dirt and residue can interfere with chemical treatment.
This distinction helps prevent overcleaning. You usually do not need strong chemicals throughout a vacuum after ordinary household use.
What Do You Need to Sanitize a Vacuum Cleaner?
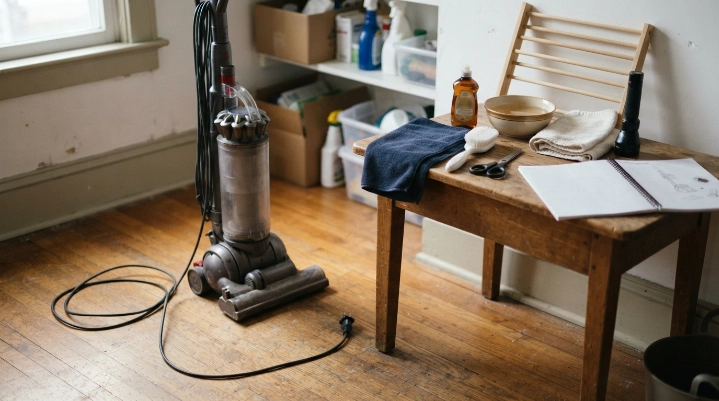
You need only a small cleaning kit. The safest supplies depend more on your vacuum’s materials than on how powerful a cleaning product sounds.
- Microfiber cloths: Useful for exterior surfaces, bins, handles, and nonpowered attachments.
- Soft cleaning brush: Helps loosen dust around seams, bristles, and vents.
- Mild dish soap: Suitable for some washable plastic parts when the manufacturer allows it.
- Warm water: Use only on parts specifically approved for washing.
- Small scissors: Helpful for removing hair and thread from brush rolls.
- Cleaning gloves: Useful when handling dirty bags, bins, or contaminated debris.
- Trash bag: Keeps loose dust contained while emptying the vacuum.
- Suitable sanitizer or disinfectant: Use only when appropriate for the surface and situation.
If chemical disinfection is needed, check the EPA’s information on registered disinfectants. Read the product label for surface compatibility, application instructions, safety precautions, and contact time.
Do you need bleach?
Bleach should not be a default vacuum-cleaning product. It may discolor plastics, affect rubber components, corrode metals, or damage parts that were never designed for chemical exposure.
Never put bleach into a vacuum hose, dust chamber, motor area, powered floorhead, filter, charging port, or battery compartment unless the manufacturer explicitly instructs you to do so.
For normal maintenance, removing debris and washing approved components with mild soap is often the more sensible starting point.
How Do You Sanitize a Vacuum Cleaner Step by Step?
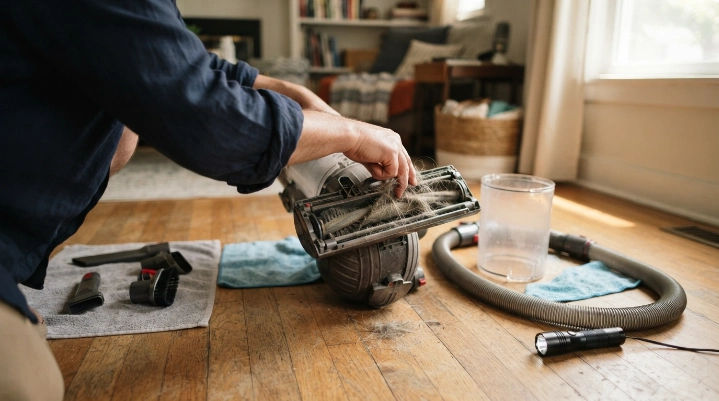
The safest sequence is power off, debris removal, cleaning, optional sanitizing, drying, and reassembly. Keeping that order prevents you from trapping dirt beneath a sanitizer or introducing moisture too early.
1. Disconnect the vacuum from power
Unplug a corded vacuum before opening it. Switch off a cordless model and remove the battery only if its design allows battery removal.
Do not clean around live charging contacts. Keep liquid away from cords, plugs, battery terminals, switches, sensors, and circuit areas.
2. Empty the bag or dust bin
Take a bagless vacuum to a well-ventilated area if the bin contains lots of fine dust. Empty it gently into a trash bag instead of striking the container and creating a dust cloud.
For a bagged vacuum, remove and dispose of the bag according to its instructions. Reusable bags require their own manufacturer-approved cleaning method.
3. Remove hair and visible debris
Cleaning should happen before sanitizing. Start by removing anything you can see.
- Cut hair and thread from the brush roll.
- Pull lint from attachment openings.
- Check the hose and wand for clogs.
- Brush dust away from seals and bin edges.
- Remove debris from wheels and floorhead channels.
I like to place removable parts on a clean towel in the order I take them off. It makes reassembly easier and helps me notice which components are still damp.
4. Wash only approved removable parts
Some dust bins and simple plastic attachments can be washed with mild soap and water. Others contain seals, bearings, electrical contacts, or bonded materials that should stay dry.
Never assume a filter is washable because it looks similar to another filter. Check the model manual or the marking on that exact component.
5. Clean the hard exterior surfaces
Wipe the handle, body, wheels, controls, and other suitable surfaces with a lightly dampened cloth. Avoid dripping liquid into seams, openings, vents, and switches.
For stubborn grime, work in small sections rather than saturating the machine. Dry the surface afterward.
6. Sanitize compatible surfaces if needed
Apply a suitable sanitizing or disinfecting product only to surfaces approved for that product. Follow the label exactly, including any stated contact time.
Spraying the product directly into the machine is usually unnecessary. Applying it to a cloth first gives you better moisture control when the product instructions allow that method.
7. Let everything dry completely
Air-dry washed components until no moisture remains. Drying time varies with material, room humidity, airflow, and manufacturer instructions.
Do not reinstall a damp filter, hose, bin, or attachment just because its outer surface feels dry. Moisture can remain inside folds, seams, foam, and enclosed channels.
8. Reassemble and inspect the vacuum
Return each component to its correct position after it is dry. Check seals, filter orientation, covers, and latches before turning the vacuum on.
- Confirm the bin or bag is seated correctly.
- Check that every required filter is installed.
- Spin a manual brush roll gently to confirm it moves freely.
- Make sure no cleaning cloth or tool remains inside.
- Reconnect the battery or power only after the inspection.
Section Takeaway: Clean first, sanitize only compatible surfaces when needed, and never reconnect power until every washed component is completely dry.
How Should You Sanitize Each Vacuum Part?
There is no single safe method for every vacuum component. The material, filter design, and presence of electrical parts determine what you can clean or sanitize.
| Vacuum part | Safe starting method | Water? | Main caution |
|---|---|---|---|
| Bagless dust bin | Empty and wipe | Only if manual permits | Dry fully before reinstalling |
| Disposable bag | Remove and replace | No | Do not wash a disposable bag |
| High-efficiency particulate air filter | Follow filter instructions | Only if labeled washable | Water can damage non-washable media |
| Brush roll | Remove hair and wipe | Model-dependent | Bearings or electrical parts may be present |
| Plain hose | Clear debris and wipe | Only if approved | Some hoses contain wiring |
| Powered floorhead | Dry clean and controlled wipe | Usually avoid immersion | Motors, sensors, and contacts may be inside |
| Simple crevice tool | Remove debris and wipe | If manual permits | Dry before storage or reuse |
What about the vacuum filter?
Filter care deserves extra caution. High-efficiency particulate air describes filtration performance, not whether a filter can safely be washed.
You can read the EPA’s explanation of high-efficiency particulate air filtration for background on what this filter type means. For cleaning instructions, your vacuum manufacturer remains the deciding source.
- Washable filter: Clean it only by the method specified in the manual.
- Disposable filter: Replace rather than rinse it.
- Foam pre-filter: Some are washable, but confirm first.
- Pleated filter: Do not assume that visible dust means it can be rinsed.
What about robot vacuums?
Robot vacuums contain sensors, charging contacts, motors, and small electrical assemblies close to exposed surfaces. Use controlled wiping rather than spraying the machine.
Remove the dust bin, brushes, and washable pieces only as the manufacturer directs. Keep liquids away from sensor windows, charging contacts, cameras, and battery areas.
Expert Alert: If liquid, mold growth, or heavy contamination has reached the motor, battery housing, wiring, or other electrical internals, stop using the vacuum and contact the manufacturer or a qualified appliance technician.
Section Takeaway: Treat every removable part according to its own construction. A part being removable does not automatically make it washable or safe to disinfect.
What Should You Never Do When Sanitizing a Vacuum?
The biggest mistakes come from using too much moisture or assuming strong chemicals make the machine cleaner. A vacuum is an electrical appliance with many materials packed into a small space.
- Do not spray into the motor: Liquid can reach electrical components and bearings.
- Do not soak powered attachments: Floorheads may contain motors, wiring, lights, or sensors.
- Do not wash an unidentified filter: Confirm that the exact filter is washable first.
- Do not mix cleaning chemicals: Chemical combinations can create dangerous reactions or fumes.
- Do not reinstall damp parts: Moisture should be fully gone before reassembly.
- Do not scrub seals aggressively: Damaged seals can create air leaks.
- Do not use abrasive pads on clear bins: They can scratch plastic surfaces.
- Do not ignore the manual: Model-specific instructions override generic cleaning advice.
Can you spray disinfectant directly into a vacuum cleaner?
Direct spraying is a poor choice for most vacuums. Mist can travel through seams and vents into parts that should remain dry.
If a compatible hard surface needs treatment, use the product exactly as its label and the vacuum manufacturer allow. More liquid does not mean better sanitation.
How Often Should You Sanitize a Vacuum Cleaner?
There is no universal sanitation schedule for every household. Usage, pets, spills, illness, flooring, and the amount of collected dust all change how quickly a vacuum gets dirty.
For most homes, routine debris removal matters more than frequent chemical sanitation. Inspect the vacuum regularly and clean components when they become visibly dirty.
A practical cleaning schedule
- After use: Check the dust bin or bag and remove obvious debris.
- Weekly when needed: Cut hair and thread from the brush roll in high-use homes.
- Monthly inspection: Check filters, hoses, seals, attachments, wheels, and air passages.
- After unusually dirty jobs: Clean affected washable parts before the residue dries or spreads.
- After illness or contamination: Consider sanitizing or disinfecting compatible high-touch surfaces after cleaning.
- Manufacturer schedule: Follow model-specific intervals for filters and other serviceable parts.
If allergens are a concern, focus on controlled dust removal rather than shaking dirty components indoors. The Asthma and Allergy Foundation of America’s indoor-allergen guidance discusses vacuuming and other household measures for reducing exposure to common indoor allergens.
Pet households may need more frequent brush-roll and bin cleaning because hair and dander accumulate quickly. Homes with long-haired occupants can have a similar problem around rotating brushes.
As of 2026, I still prefer condition-based maintenance over an arbitrary sanitation calendar. If the bin smells, the brush is packed with hair, or a tool picked up questionable debris, clean it then.
Frequently Asked Questions
Can I sanitize a vacuum cleaner with vinegar?
Vinegar can clean some household surfaces, but it should not be treated as a universal vacuum sanitizer or disinfectant. Use it only if the vacuum manufacturer permits it on that material, and never put liquid into motors, electrical contacts, filters, or powered attachments.
Can I use disinfectant wipes on my vacuum?
You may be able to use a compatible wipe on hard, nonporous exterior surfaces, such as a handle. Check both the disinfectant label and your vacuum instructions first, and prevent liquid from entering switches, vents, charging contacts, seams, or electronics.
Should I sanitize my vacuum after vacuuming pet hair?
Routine pet hair usually calls for cleaning rather than chemical sanitation. Empty the bin, remove wrapped hair, clean approved attachments, and maintain the filters as directed. Sanitize compatible surfaces when there is a specific contamination reason rather than automatically after every use.
Can you wash the inside of a vacuum cleaner?
You can wash only internal components that the manufacturer specifically identifies as washable. Never rinse the motor housing or pour water through an assembled vacuum, because many internal areas contain electrical parts, seals, bearings, filters, and materials that must remain dry.
How do I get a bad smell out of a vacuum?
Start by emptying the bin or replacing the bag, clearing trapped debris, and checking the brush roll and filters. Persistent odors can come from dirty filters, damp debris, pet material, or contamination deeper in the air path, so identify the source instead of masking it with fragrance.
Can I wash a high-efficiency particulate air vacuum filter?
Only wash it if the manufacturer specifically labels that exact filter as washable or rinseable. The filtration designation does not tell you whether the media tolerates water, and rinsing a non-washable filter can damage its structure or prevent it from working as intended.
Do I need to disinfect my vacuum every time I use it?
No. Routine cleaning is usually the priority after ordinary vacuuming. Chemical disinfection is more appropriate when there is a specific reason, such as illness or meaningful contamination, and it should be limited to compatible surfaces after visible dirt has been removed.
Final takeaway: Sanitize a vacuum by cleaning it methodically, not by soaking it in chemicals. Disconnect power, remove dirt, wash only approved parts, treat compatible surfaces when necessary, and give every washable component enough time to dry before reassembly.
A clean vacuum is easier to inspect, less unpleasant to handle, and better suited to a consistent home-hygiene routine. Make the manufacturer’s instructions your final check whenever you are unsure whether a filter, hose, bin, or attachment can get wet.
