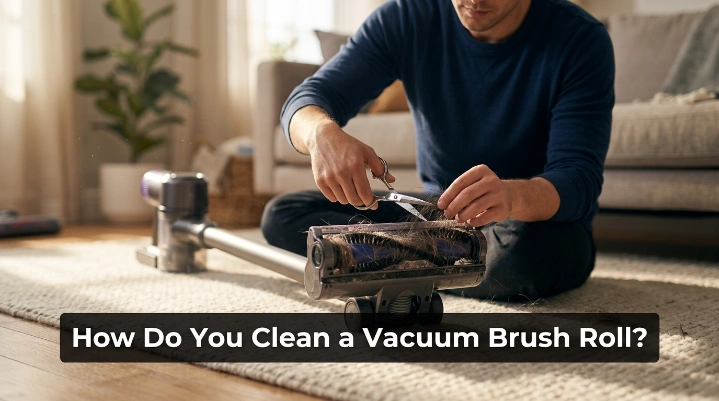
Can You Lubricate Vacuum Wheels? A Safe 2026 Guide

Quick Answer
Yes, some vacuum wheels can be lubricated, but cleaning should always come first. Only lubricate an accessible axle or bearing when the manufacturer allows it, and avoid putting oil into sealed wheel modules, motors, sensors, or electrical parts. For model-specific instructions, check a verified vacuum support and owner-manual resource before applying any product.
Before You Lubricate
- Disconnect power: Unplug a corded vacuum or switch off and remove the battery when your model allows it.
- Remove debris: Cut away hair, thread, carpet fibers, and lint wrapped around the axle.
- Clean first: Wipe accessible wheel surfaces and axle areas before deciding lubrication is necessary.
- Check the manual: Some wheels and drive modules are designed to operate without user-applied lubricant.
- Use very little: If lubrication is approved, excess product can collect dust and migrate into nearby components.
Stop Instead of Lubricating If
- The wheel is cracked, loose, badly worn, electrically driven, or still seized after visible debris has been removed.
Vacuum wheels seem simple until one starts squeaking, dragging, or refusing to turn. My rule is simple: I treat lubrication as the last maintenance step, not the first.
Most wheel problems start with hair, grit, sticky residue, or a damaged component. This guide explains when lubricant makes sense, when cleaning is enough, and when a wheel should be repaired instead.
In This Guide
Can You Lubricate Vacuum Wheels?
Yes, but only certain vacuum wheel designs benefit from lubrication. An exposed, user-serviceable axle may accept lubricant, while a sealed caster, powered robot wheel, or integrated bearing may require cleaning or replacement instead.
Definition: Vacuum wheel lubrication means placing a manufacturer-approved lubricant on an accessible axle, bushing, or bearing surface to reduce friction between moving parts.
The key phrase is manufacturer-approved. A product that works well on a metal shop cart may be unsuitable beside plastic housings, rubber tires, electrical contacts, or optical sensors.
Lubrication should not be routine maintenance
Vacuum wheels don’t normally need fresh lubricant every time you clean the appliance. In many cases, a squeak appears because hair or thread has wrapped tightly around the axle.
- Hair buildup: Creates drag around the axle and may sound like a dry bearing.
- Fine grit: Gets trapped between the wheel and housing and creates grinding noises.
- Sticky residue: Makes rubber treads grab the floor instead of rolling smoothly.
- Worn plastic: Can make a wheel wobble even when the axle is perfectly clean.
- Misalignment: May cause one edge of a wheel to rub continuously against its housing.
If cleaning restores quiet, free movement, stop there. Adding lubricant after the problem is already solved only creates another surface where dust can collect.
Robot vacuum wheels need extra caution
Robot vacuums often contain drive motors, gears, wiring, suspension parts, and sensors near their wheels. Their front caster may be removable, but the powered side-wheel modules are a different matter.
Official iRobot caster-wheel maintenance guidance focuses on removing the wheel, clearing hair and debris, wiping it clean, and reinstalling it. That is a good reminder not to assume lubrication belongs in every maintenance routine.
Section Takeaway: Lubricate only when cleaning does not solve the friction problem and your vacuum’s design permits it. Never treat lubricant as the automatic cure for every squeak.
Why Do Vacuum Wheels Squeak or Stick?
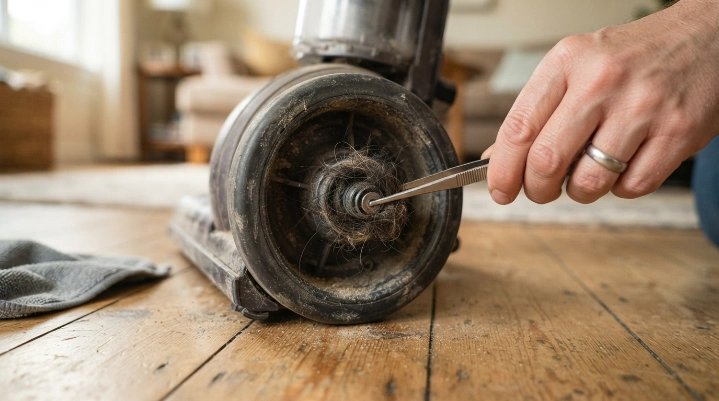
A squeaking or stiff vacuum wheel usually has contamination, friction, wear, or physical damage somewhere around its rotating parts. Lubricant solves only one of those causes.
Hair can imitate a bad bearing
Long hair, pet fur, sewing thread, and carpet fibers can wind around an axle until they form a dense ring. That ring squeezes between the wheel and housing and makes rotation harder.
When I troubleshoot a wheel, this is the first area I inspect. Bright lighting and tweezers often reveal material that looked like part of the axle at first glance.
- Rotate the wheel slowly by hand.
- Look at both sides of the axle.
- Lift wrapped hair before cutting it.
- Pull out loosened strands with tweezers.
- Check the wheel cavity for hidden lint.
Grit creates friction
Sand, crumbs, dried mud, and other hard particles can lodge beside the wheel. A small particle can create a surprisingly loud clicking or scraping sound.
Dragging a jammed wheel can also mark hard flooring. Keep the contact surfaces clean rather than forcing the vacuum across the floor.
A damaged wheel can sound dry
A cracked hub, bent axle, damaged tread, or worn bushing may squeak under load. Lubricant can briefly mask the sound without fixing the damaged part.
Push the wheel gently from side to side after cleaning. Excessive wobble or visible cracking points toward repair or replacement instead of more lubrication.
Routine vacuum maintenance also reduces the dust and debris carried through your home. The U.S. Environmental Protection Agency discusses broader source control, cleaning, ventilation, and filtration on its indoor air quality resource.
Section Takeaway: Squeaking does not prove that a wheel needs oil. Hair, grit, residue, alignment problems, and worn parts are common alternatives.
How Can You Tell Whether a Wheel Needs Cleaning or Lubrication?
Clean the wheel completely, dry it, and test its movement before reaching for lubricant. A clean wheel that still squeaks from an accessible metal-on-bushing contact is a better lubrication candidate than a dirty or damaged wheel.
Use this quick diagnosis
- Disconnect the vacuum from power. Remove a battery only when your manual provides for user removal.
- Inspect the tread. Look for sticky residue, flat spots, cracks, and embedded grit.
- Inspect the axle area. Remove hair, thread, and compacted dust.
- Turn the wheel by hand. Note whether it feels gritty, tight, loose, or smooth.
- Clean accessible surfaces. Use a barely damp cloth unless your manufacturer permits a different method.
- Dry the area completely. Never judge wheel movement while water remains around an axle.
- Test again. If the wheel now spins normally, lubrication isn’t needed.
Signs cleaning is probably enough
- The squeak disappears after removing wrapped hair.
- The wheel spins freely once grit is removed.
- Sticky tread was causing the vacuum to jerk.
- The wheel had visible debris inside its cavity.
Signs lubrication may be appropriate
- The manufacturer identifies the axle or bearing as lubricatable.
- The axle is clean, dry, accessible, and undamaged.
- The friction sound clearly comes from the rotating axle contact.
- A model-specific service procedure specifies a lubricant.
Signs you should not lubricate
- A powered drive wheel has to be opened to reach the noisy area.
- Electrical wires, motors, gears, or sensors are exposed.
- The axle is bent or visibly loose.
- The wheel or tread is cracked.
- The manual warns against disassembly.
This diagnosis prevents a common mistake: adding lubricant to contamination. Oil mixed with dust can turn into a dirty film that makes future cleaning harder.
How Do You Lubricate Vacuum Wheels Safely?
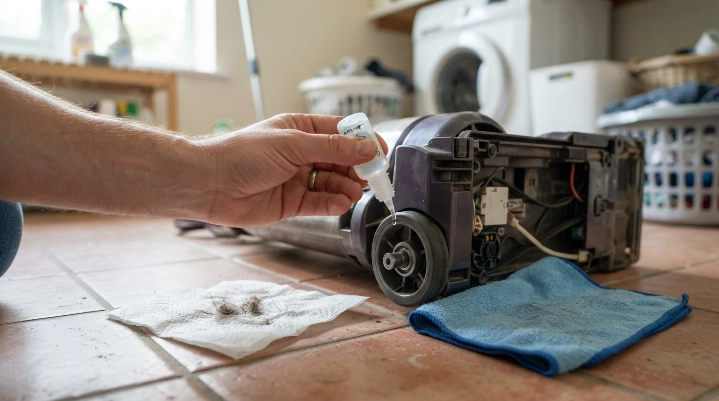
If your manufacturer allows lubrication, use the smallest practical amount on the intended friction point. Keep lubricant away from wheel treads, flooring surfaces, belts, motors, sensors, wiring, and charging contacts.
1. Disconnect the vacuum
Unplug a corded machine. For a cordless vacuum, shut it down and follow its approved battery-removal procedure when applicable.
2. Expose only user-serviceable parts
Remove a caster or wheel only when the owner manual shows that it is meant to come out. Do not force clips, pry sealed housings apart, or dismantle drive modules.
3. Clean before lubricating
Remove every visible strand of hair or thread. Wipe away dust and grit from the axle and surrounding cavity.
Let cleaned parts dry completely before applying anything. Moisture and lubricant together can hold debris against moving surfaces.
4. Apply a tiny amount
Follow the quantity and product type stated by the manufacturer. If the manual gives no lubrication procedure, don’t invent one.
A precision applicator is safer than spraying a large area. The goal is to reach the approved contact point without coating nearby parts.
5. Rotate and wipe
Rotate the wheel several times by hand to distribute an approved lubricant. Wipe away any visible excess immediately.
The tread should stay clean and dry. Lubricant on the tire can transfer to carpet, hardwood, laminate, tile, or other flooring.
6. Reassemble and test
Reinstall every part securely before reconnecting power. Test the wheel by hand first, then operate the vacuum briefly on an appropriate surface.
Expert Alert: If the repair requires opening an electrical drive-wheel module, disconnecting wiring, or dismantling internal gears, stop and contact the manufacturer or a qualified appliance repair technician.
Section Takeaway: Safe lubrication is precise and minimal. Clean first, follow the model’s instructions, apply only where approved, and keep lubricant away from electrical and floor-contact surfaces.
What Lubricant Is Safe for Vacuum Wheels?
There is no single lubricant that is safe for every vacuum. Wheel materials, bushings, bearings, seals, plastics, rubber compounds, and nearby electronics vary between models.
The safest choice is the lubricant named in your service manual. If the manufacturer doesn’t specify one, cleaning, replacement, or professional service is safer than experimenting.
| Wheel or Component | Default Approach | Lubricate? | Best Next Step |
|---|---|---|---|
| Simple removable caster | Remove hair, clean axle and housing | Only if manufacturer permits | Clean, dry, inspect, then follow manual |
| Upright vacuum rear wheel | Clear axle debris and inspect hub | Model-dependent | Check manufacturer support |
| Robot front caster | Remove debris and clean accessible axle | Usually not a routine step | Follow robot maker’s caster procedure |
| Robot powered drive wheel | Clean exterior and accessible gaps | Do not assume | Service if internal module is faulty |
| Cracked or loose wheel | Inspect for mechanical failure | No | Replace or repair the damaged part |
As a useful 2026 example, iRobot currently recommends cleaning many removable Roomba front caster wheels every two weeks. Its support guidance also lists replacement around every 12 months or as needed for applicable models.
What about silicone lubricant?
Some silicone-compatible lubricants are used on certain plastic and metal mechanisms. That does not mean any silicone spray is automatically approved for your vacuum.
Check material compatibility and the manufacturer’s instructions first. Avoid spraying broadly underneath the machine.
What about household penetrating oil?
Don’t use a general penetrating oil simply because it stops squeaks elsewhere. Some formulations can collect dust, migrate into unwanted areas, or be unsuitable for specific plastics and rubber compounds.
What about grease?
Heavy grease is unnecessary for most externally accessible vacuum wheels unless a service procedure explicitly calls for it. Thick grease also traps hair and dust easily in exposed locations.
For independent information on vacuum types and maintenance considerations, you can also consult the Consumer Reports vacuum cleaner section.
Section Takeaway: The safest lubricant is the one specified for your exact machine. If no lubricant is specified, don’t assume a generic oil, spray, or grease is compatible.
When Should You Replace or Repair a Vacuum Wheel?
Replace or service a wheel when cleaning cannot restore normal movement and you find visible mechanical damage. Lubricant cannot repair a broken hub, worn tread, bent axle, failed bearing, or damaged drive module.
Common replacement signs
- Cracked wheel: The wheel splits, flexes, or catches as it rotates.
- Damaged tread: Rubber is torn, missing, severely flattened, or separating.
- Excessive wobble: The wheel moves sideways because the hub or axle has worn.
- Persistent seizure: A clean wheel still will not rotate normally.
- Repeated robot error: Wheel faults return after accessible debris is cleared.
- Grinding inside a module: The sound appears to come from gears or a motor rather than the exposed axle.
Check model-specific support before ordering parts
Manufacturers often use different wheel assemblies across product generations. Search using the exact model or serial number instead of buying a part that merely looks similar.
For example, Dyson’s support portal lets owners identify their machine, open troubleshooting information, find manuals, and locate service options. Other major manufacturers offer similar model-specific resources.
Don’t keep forcing a stuck wheel
Dragging a seized wheel can wear the tread and scratch some floors. On a robot vacuum, a jammed wheel can also prevent correct navigation or docking.
Stop using the machine if a wheel is visibly failing. Replacing a serviceable wheel is usually better than repeatedly masking the symptom with lubricant.
Vacuum Wheel Lubrication FAQ
Can I use WD-40 on vacuum wheels?
Don’t assume a general-purpose penetrating product is suitable for your vacuum. Check the owner’s manual because plastics, rubber, bushings, bearings, and nearby electrical components differ between machines.
Should I lubricate a squeaky robot vacuum wheel?
Not automatically. Clean hair and debris from accessible caster and wheel areas first, and use lubricant only if the robot manufacturer specifically recommends it for that component.
Can hair around the axle cause squeaking?
Yes. Hair and thread can tighten around an axle, restrict movement, and create squeaking or rubbing sounds that resemble a dry bearing.
How much lubricant should I use on a vacuum wheel?
Use only the amount stated in your model’s service instructions. Excess lubricant can spread onto wheel treads or collect dust around an exposed axle.
Can I lubricate a vacuum wheel without removing it?
Only when the manufacturer provides an accessible lubrication point and instructions for doing so. Spraying lubricant blindly into wheel gaps risks contaminating belts, electronics, sensors, or flooring surfaces.
Why is my vacuum wheel still squeaking after cleaning?
The axle, bushing, bearing, wheel hub, or surrounding housing may be worn or misaligned. If lubrication is not specified for the model, inspect the wheel for damage or seek repair instead.
How often should vacuum wheels be checked?
Inspect them whenever movement becomes stiff, noisy, or uneven, and include them in routine vacuum maintenance. Homes with long hair or shedding pets may need wheel and axle checks more often.
Final Takeaway: You can lubricate some vacuum wheels, but the safest order is always disconnect, inspect, clean, dry, and test first. If the wheel still needs help, use only a manufacturer-approved lubricant and keep it away from powered or sealed assemblies.
A few minutes spent removing hair and grit often solves the problem without adding anything at all. When a clean wheel remains damaged, loose, or seized, replacement or professional repair is the better fix.