How to Prepare Your Vacuum for Long-Term Storage

Quick Answer
To prepare your vacuum for long-term storage, empty it, remove trapped debris, clean the brush roll, check the filters, and let every washed part dry completely. Then protect the cord, hose, attachments, and battery before storing the vacuum somewhere clean and dry. The EPA also recommends keeping homes clean and controlling dust, with HEPA-filter vacuuming among its dust-control suggestions.
Quick storage steps
- Empty it: Remove the dust, debris, dirty water, or disposable bag as appropriate.
- Clear blockages: Check the hose, wand, intake path, and floor head.
- Clean moving parts: Cut hair and thread away from the brush roll and wheels.
- Service filters: Clean or replace them only as your vacuum’s manual allows.
- Dry everything: Never seal damp washable parts inside the vacuum for storage.
- Choose a dry spot: Avoid areas with leaks, condensation, high heat, or major temperature swings.
If I know a vacuum will sit unused for months, I don’t just wrap the cord and push it into a closet. Dust, damp filters, tangled brush rolls, and neglected batteries can turn storage into a maintenance problem.
I treat long-term vacuum storage as a small deep-cleaning job. That approach keeps the machine cleaner and makes the first use after storage much easier.
In This Guide
- What does long-term vacuum storage mean?
- How do you clean a vacuum before long-term storage?
- How should you prepare filters, bags, and batteries?
- How should you store cords, hoses, and attachments?
- Where is the best place to store a vacuum?
- Does storage preparation change by vacuum type?
- Frequently asked questions
What Does Long-Term Vacuum Storage Mean?
Long-term vacuum storage means preparing a vacuum to remain unused for an extended period while protecting it from moisture, dirt, heat, pests, and physical damage. The goal is to store a clean, dry machine rather than simply hide a dirty one.
Definition: Preparing a vacuum for long-term storage is the process of cleaning, drying, inspecting, protecting, and correctly positioning the appliance before months of non-use.
There isn’t one universal number of days that turns normal storage into long-term storage. I use the more careful routine whenever I expect a machine to sit for several months.
This often happens before moving, seasonal travel, home renovations, or putting a spare vacuum away.
Why cleaning before storage matters
A vacuum collects more than visible crumbs. Its bin, bag, filters, hose, and brush roll can hold fine dust, hair, allergens, and other household debris.
Leaving that material inside for months can create stale odors. It can also make blockages and maintenance harder to deal with later.
- Old dust stays trapped: A full bin or bag remains loaded with household debris.
- Hair stays wound around brushes: Long strands can remain tight around the brush roll and bearings.
- Damp parts stay enclosed: Moisture becomes a bigger concern when airflow stops.
- Cords stay stressed: Tight wrapping can leave sharp bends near plugs or strain-relief points.
- Batteries sit neglected: Cordless models may need manufacturer-specific storage care.
HEPA stands for high-efficiency particulate air. If your vacuum uses a HEPA filter, treat it according to the manufacturer’s cleaning and replacement instructions.
CADR, or clean air delivery rate, is mainly an air-cleaner performance metric. It isn’t a useful measurement for preparing a vacuum for storage.
Section Takeaway: Long-term storage starts with removing dirt and moisture before you protect the appliance itself.
How Do You Clean a Vacuum Before Long-Term Storage?
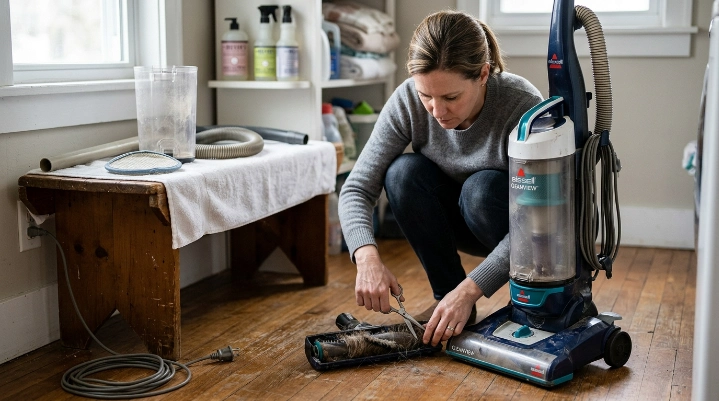
Clean the parts that hold or contact debris, then inspect the airflow path. I do this before washing anything because dry debris is easier to remove first.
1. Unplug or power down the vacuum
Unplug a corded vacuum before opening covers or removing parts. For cordless machines, switch the machine off and follow its manual before removing the battery.
Expert Alert: Stop using a vacuum with a damaged cord, scorched plug, exposed wiring, burning smell, or obvious electrical damage. Have it inspected by a qualified repair professional rather than opening electrical components yourself.
2. Empty the dust container or remove the bag
Empty a bagless dustbin outdoors when practical, especially if fine dust bothers you. Avoid shaking dust toward your face.
For a bagged vacuum, check the bag before storage. I prefer not to leave a heavily loaded bag sitting inside a machine for months.
- Bagless vacuum: Empty the bin and wipe or wash it only if the manual permits.
- Bagged vacuum: Remove a full or dirty bag and install a fresh one later if appropriate.
- Wet/dry vacuum: Empty all liquid and debris from the tank.
- Vacuum-mop: Drain dirty water and cleaning-solution tanks completely.
3. Clear the brush roll and intake
Hair around a brush roll becomes easy to forget once the vacuum disappears into storage. I remove it now rather than discovering a hardened tangle months later.
- Remove the floor head or brush cover if your manual allows it.
- Cut long hair and thread carefully without damaging bristles.
- Pull debris away from the ends of the roller.
- Check the intake opening for compacted lint.
- Spin the roller by hand only when the vacuum is safely disconnected.
4. Inspect the hose and wand
Look through removable hoses and wands for paper, hair clumps, pet fur, or other blockages. Don’t force sharp tools through flexible hoses.
If something is firmly lodged, use the removal method recommended for your model.
5. Let washed parts dry completely
This is the step I take most seriously. A washable bin or filter can feel dry outside while retaining moisture in folds, foam, seams, or corners.
Let washable components air-dry fully for the period specified by the manufacturer. Never put a damp filter back into the machine just because you’re finished cleaning.
The EPA’s mold and moisture guidance emphasizes moisture control and keeping indoor areas dry.
Section Takeaway: Empty first, clear blockages second, wash only approved parts, and don’t reassemble the vacuum until every washable component is dry.
How Should You Prepare Filters, Bags, and Batteries?
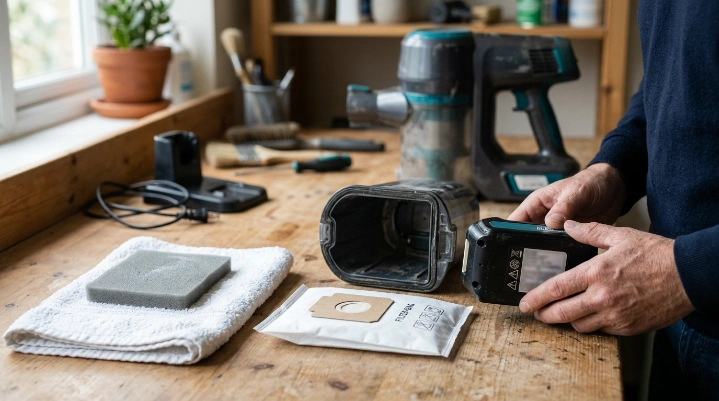
Filters, collection systems, and batteries need different treatment. Your owner’s manual should override any general storage rule.
Check each filter separately
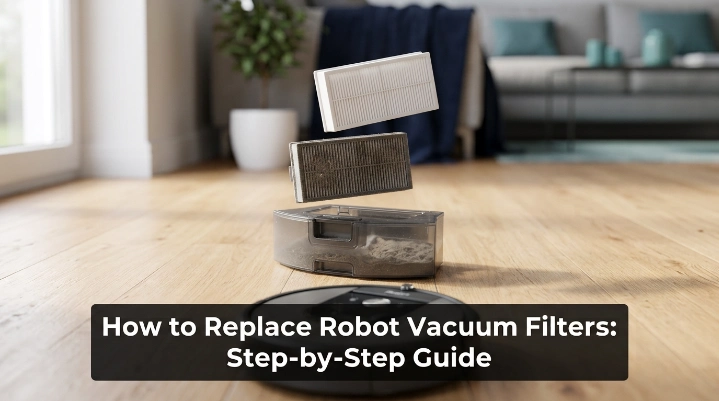
Don’t assume a filter is washable because another filter in the same vacuum is washable. A vacuum may combine foam, pre-motor, post-motor, HEPA, or odor-control filters with different care requirements.
- Washable filter: Clean it only as directed, then dry it completely.
- Non-washable filter: Don’t rinse it unless the manufacturer explicitly permits washing.
- Damaged filter: Replace it if required rather than storing a torn or degraded filter.
- Activated carbon filter: Follow the model’s replacement instructions because care varies by design.
The CDC’s mold cleanup guidance also stresses drying cleaned materials and controlling moisture. That principle makes a dry storage environment especially important.
Don’t guess about cordless battery storage
Lithium-ion battery recommendations vary by manufacturer and model. I don’t use a universal percentage or charging interval unless the manual specifies one.
Check your Dyson, Shark, robot vacuum, stick vacuum, or other cordless model’s manual for long-term battery instructions.
- Check charge guidance: Follow the specified storage state rather than guessing.
- Avoid extreme heat: Don’t leave the battery beside heaters or in a hot vehicle.
- Inspect for damage: Don’t store a swollen, leaking, cracked, or unusually hot battery.
- Use the approved charger: Keep the correct charger with the vacuum when practical.
Expert Alert: A damaged, swollen, leaking, or overheating lithium-ion battery needs appropriate professional or local disposal guidance. Don’t puncture, crush, open, or attempt an internal repair.
How Should You Store Cords, Hoses, and Attachments?
Protect flexible and removable parts from sharp bends, crushing, and loss. The machine should come out of storage in the same shape it went in.
Wrap the power cord loosely
Use the vacuum’s cord hooks or automatic rewind system as intended. Avoid pulling the cable tight around the body.
Pay special attention to the cord where it enters the machine and where it meets the plug.
Keep hoses in a natural shape
Don’t place heavy boxes on a flexible hose. Long-term compression can leave it flattened or kinked.
If the hose detaches, store it in a relaxed curve rather than forcing a tight fold.
Keep attachments together
Small tools disappear easily during a move or long storage period. I group them in a labeled bag or container beside the vacuum.
- Crevice tool
- Dusting brush
- Upholstery tool
- Pet-hair attachment
- Extension wand
- Charging adapter or dock hardware
- Spare approved bags or filters
Don’t seal damp tools in an airtight plastic bag. Everything should be clean and dry first.
Where Is the Best Place to Store a Vacuum?
The best storage location is clean, dry, reasonably temperature-stable, and protected from leaks or physical damage. An indoor utility closet often works better than an exposed garage or damp basement.
As of 2026, EPA household guidance continues to recommend indoor relative humidity around 30% to 50% where practical. Its broader indoor air quality guidance also emphasizes keeping areas clean and dry.
| Storage location | Long-term suitability | Main concern | What I would check |
|---|---|---|---|
| Indoor closet | Usually good | Crowding | No heavy items pressing on hose or body |
| Climate-controlled storage room | Good | Dust buildup | Cover loosely and keep off dirty flooring |
| Basement | Conditional | Humidity or leaks | Watch humidity and water-entry risks |
| Garage | Conditional | Heat, cold, humidity, pests | Check appliance and battery temperature limits |
| Outdoor shed | Often poor | Large temperature and moisture changes | Use only if conditions meet manufacturer limits |
Should you cover the vacuum?
A clean dust cover can help keep settled dust off the machine. I avoid wrapping a vacuum tightly in plastic if there’s any chance moisture remains inside.
Never store a vacuum directly beside leaking plumbing, wet walls, or known mold growth.
If a storage area already has a significant mold problem, address that problem first.
Section Takeaway: Dry indoor storage is the safest default. Moisture, leaks, high heat, and extreme temperature changes deserve more attention than cosmetic dust.
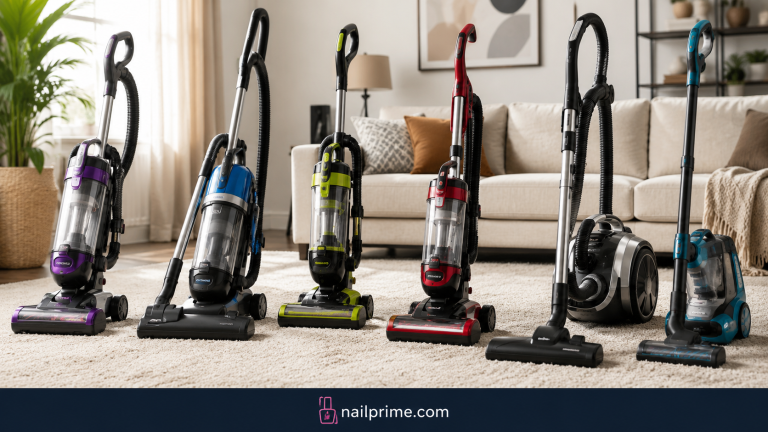
Does Storage Preparation Change by Vacuum Type?
Yes. The basic clean-and-dry rule stays the same, but each vacuum design has different parts that deserve attention.
| Vacuum type | Before storage | Main storage concern |
|---|---|---|
| Upright | Clear brush roll, check bag/bin and filters | Cord strain and brush-roll debris |
| Canister | Empty container, clear hose, protect wand | Crushed or sharply bent hose |
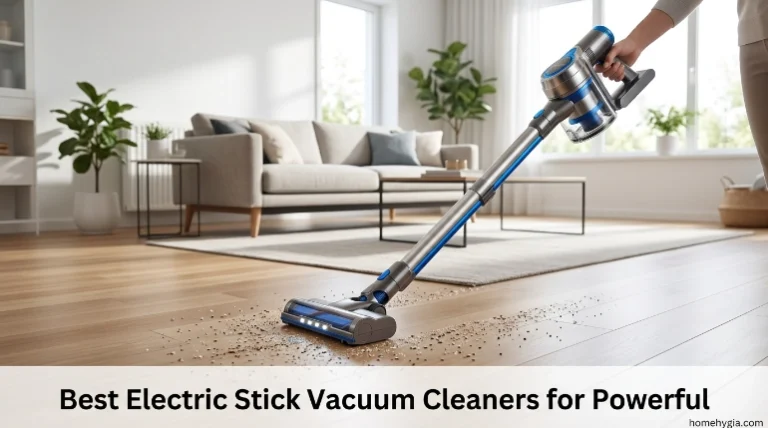
| Cordless stick | Clean bin and head, follow battery instructions | Battery temperature and charge guidance |
| Robot | Empty bin, clean brushes and sensors, check manual | Battery and dock storage |
| Wet/dry vacuum | Empty tank and dry wet-use components completely | Residual moisture and odor |
| Vacuum-mop | Drain tanks, clean roller, dry water-contact parts | Standing water in tanks or channels |
What should you do when taking it back out?
Give the vacuum a quick inspection before plugging it in or charging it. Months of storage can hide pest damage, cord problems, dust, or forgotten moisture issues.
- Inspect the plug, cord, battery, hose, and body.
- Make sure filters are correctly installed.
- Check the dustbin, bag, and airflow path.
- Confirm the brush roll turns freely when appropriate.
- Check the battery and charger for visible damage.
- Run the vacuum briefly and listen for unusual sounds.
If you notice a burning smell, electrical sparking, overheating, or an unusual motor noise, switch the machine off.
Expert Alert: Persistent electrical or motor problems should be diagnosed by a qualified appliance repair professional rather than handled through internal DIY repairs.
Section Takeaway: Match the storage routine to the vacuum design, especially when batteries, liquid tanks, or long flexible hoses are involved.
Frequently Asked Questions
Should I empty my vacuum before storing it?
Yes. Empty a bagless bin and avoid leaving a heavily loaded disposable bag inside for months. Wet/dry vacuums and vacuum-mops should have all collected liquid and dirty water removed before storage.
Should I wash the vacuum filter before long-term storage?
Only wash a filter if the manufacturer says it is washable. If you wash one, let it dry completely before reinstalling it because some vacuum filters must remain dry and should never be rinsed.
Can I store a vacuum in the garage?
You can only if the garage stays within the storage conditions allowed for your model. Heat, freezing temperatures, humidity, leaks, and battery temperature limits can make garages less suitable than an indoor closet.
Can I store a vacuum in a plastic bag?
A loose protective cover can keep dust off a clean vacuum. I wouldn’t tightly seal the machine in plastic unless every part is completely dry, because trapped moisture is exactly what you want to avoid.
What should I do with a cordless vacuum battery?
Follow the manufacturer’s long-term battery storage instructions for your exact model. Battery chemistry and charging systems vary, so don’t assume one charge percentage or charging schedule works for every Dyson, Shark, stick, or robot vacuum.
How do I keep my stored vacuum from smelling?
Remove collected debris, clean approved components, clear hair from the brush roll, and let washable parts dry completely. A stale smell after storage often points to dirt or moisture that remained somewhere in the machine.
Should I remove the HEPA filter during storage?
Not automatically. HEPA filter design varies between vacuums, so check your manual. Make sure the filter is serviceable, correctly installed, and completely dry if the manufacturer allows it to be washed.
My takeaway: The best way to prepare your vacuum for long-term storage is simple: store it empty, clean, dry, protected, and according to its manual.
Spend a little time on the brush roll, filters, hose, cord, and battery now. When you need the vacuum again, you’ll have far less maintenance waiting for you.