
How to Map Rooms With a Robot Vacuum: Step-by-Step Guide

Quick Answer
To map rooms with a robot vacuum, place the charging dock in its permanent location, clear loose floor obstacles, open every room you want mapped, and start the vacuum’s mapping or first whole-home run from its app. Let the robot finish without moving it or the dock, then use the app to split, merge, and name rooms. Xiaomi’s official quick-mapping guidance follows the same basic process.
Map your rooms in this order
- Place the dock: Put it where you plan to keep it during normal cleaning.
- Prepare the floor: Pick up cords, toys, clothing, lightweight mats, and other temporary obstacles.
- Open the rooms: Fully open doors to every area you want included.
- Start mapping: Select quick mapping, create map, mapping run, or the equivalent option in your app.
- Leave it alone: Don’t carry the vacuum, move its dock, or follow closely while it maps.
- Edit the map: Correct room boundaries, add names, and create no-go zones after the map saves.
If you’re setting up a mapping robot vacuum for the first time, the map matters almost as much as the cleaning settings. A clean map lets the robot understand where rooms begin, which areas to avoid, and where you want targeted cleaning.
When I set up a mapping-capable vacuum, I treat the first run as a survey rather than a cleaning session. A few minutes preparing the floor usually saves far more time fixing strange room divisions later.
In This Guide
- How Does Robot Vacuum Room Mapping Work?
- How Do You Map Rooms With a Robot Vacuum?
- How Do You Edit, Split, and Name Rooms?
- How Do You Map Multiple Floors?
- Why Is My Robot Vacuum Map Wrong or Incomplete?
- What Else Should You Know About Robot Vacuum Mapping?
- What Should You Do After the Map Is Finished?
How Does Robot Vacuum Room Mapping Work?
A robot vacuum creates a digital layout while estimating its own position inside your home. Mapping-capable models can then use that saved layout to plan routes, recognize rooms, and clean selected areas.
Definition: Robot vacuum mapping is the process of scanning or observing a home’s layout while tracking the robot’s location. Many navigation systems use a concept called SLAM, short for simultaneous localization and mapping.
LiDAR mapping
LiDAR-based robots send laser signals around the room and measure distance to surrounding surfaces. Those measurements help the vacuum build walls, openings, furniture boundaries, and navigation paths.
This approach does not depend on a visible room image in the same way a camera-based system does. That can make LiDAR useful when cleaning in dim rooms.
Camera or vSLAM mapping
Camera-based systems observe visual features while calculating how the robot moves through the home. The software uses those observations to estimate location and create a floor layout.
For example, iRobot explains how compatible Roomba models learn and customize home layouts through Imprint Smart Maps.
Hybrid navigation
Some newer robots combine laser navigation with cameras or other obstacle sensors. One system can handle general positioning while another helps detect objects close to the robot.
| Mapping system | Main input | Low-light use | Typical strength |
|---|---|---|---|
| LiDAR | Laser distance measurements | Usually works without bright ambient light | Fast layout and wall detection |
| Camera/vSLAM | Camera images plus movement data | Can depend more on available light | Visual localization |
| Hybrid | Laser, cameras, or extra proximity sensors | Depends on the model and sensors used | Navigation plus obstacle awareness |
The app features matter too. Two robots can both create good maps while offering very different controls for room splitting, floor plans, furniture, no-go zones, and cleaning sequences.
Section Takeaway: Good room mapping combines accurate navigation hardware with useful map-editing software. Check both when judging how capable a robot vacuum really is.
How Do You Map Rooms With a Robot Vacuum?
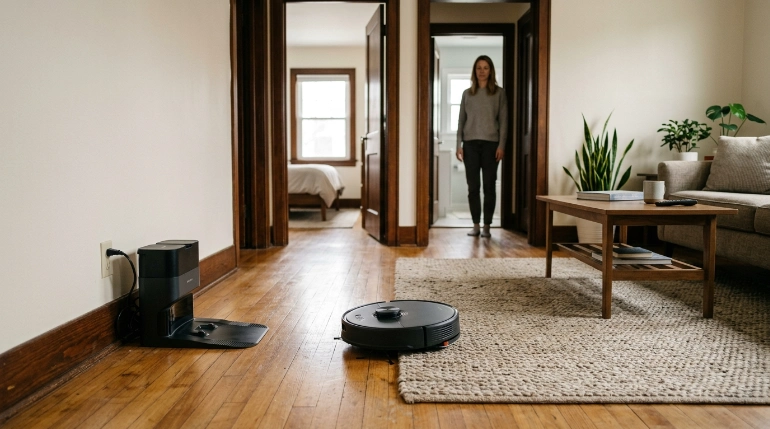
Start with a prepared home and let the robot complete one uninterrupted mapping cycle. The exact button name varies, but the basic procedure is similar across many modern mapping vacuums.
1. Put the charging dock in its permanent location
Choose the dock location before creating the map. Moving the dock afterward can force some robots to relocate themselves or rebuild part of their saved layout.
Give the robot a straightforward path to enter and leave the dock. Avoid squeezing the base behind furniture or surrounding it with temporary clutter.
2. Charge the robot before the mapping run
Begin with enough battery power to explore the complete floor. A robot that stops before reaching every room may leave the map unfinished.
- Dock the robot first: Begin the mapping session from its normal charging position.
- Connect the app: Complete Wi-Fi pairing and any required setup before mapping.
- Install updates: Check for current firmware if the manufacturer recommends it.
3. Clear temporary floor clutter
You don’t need an empty house. You do want to remove objects that temporarily change where the robot can travel.
- Charging cables and extension cords
- Clothing and towels
- Small children’s toys
- Pet toys and lightweight bowls
- Plastic bags
- Loose shoelaces
- Unstable lightweight items
- Rug tassels that may tangle in the brush
Consumer Reports also recommends providing a clear path for a robot vacuum and keeping the area around its charging station accessible during robot vacuum setup.
4. Open every room you want mapped
Open doors fully rather than leaving them partly closed. A narrow opening can hide part of a doorway from the robot or physically prevent it from entering.
Close doors to spaces you deliberately want excluded. That might include a storage room filled with cables or another area that isn’t ready for robot cleaning.
5. Handle stairs and unsafe areas
Most modern robots have drop sensors, but you should still follow the manufacturer’s placement and safety instructions. Don’t deliberately test a robot at an unsafe ledge.
Block any area where the robot could become trapped before beginning the first map.
6. Start the correct mapping mode
Look in your vacuum’s app for wording such as Quick Map, Create Map, Mapping Run, or New Map. Some robots can also build their initial map during a normal whole-home clean.
A dedicated quick-map function may explore without vacuuming. On compatible Xiaomi models, official support documentation says quick mapping creates the floor map without performing the cleaning task.
7. Don’t interrupt the robot
Let it explore naturally. Avoid picking it up, carrying it into another room, manually returning it to the dock, or moving the dock halfway through the run.
Don’t walk directly behind the robot for the entire session either. Your body can become another moving obstacle around its sensors.
8. Wait for the map to save
Let the mapping cycle finish according to the app’s instructions. Many robots save or finalize the map after completing exploration and returning to their starting point or dock.
Then inspect the result before scheduling automatic cleaning.
Section Takeaway: The best first map usually comes from an uninterrupted run with open doors, a clear floor, a stable dock, and no manual repositioning.
How Do You Edit, Split, and Name Rooms?
Automatic room detection is a starting point, not something you must accept permanently. Most higher-level mapping apps provide editing controls after the floor plan has been saved.
Fix room divisions first
Open-plan homes are often the hardest layouts for automatic room detection. A kitchen flowing directly into a dining or living area may appear as one large room.
Look for an option named Split, Divide Room, or something similar. Position the divider at the real transition between the spaces.
Merge areas that belong together
The opposite problem also happens. Furniture, narrow passages, or unusual wall shapes can cause the app to divide one room into two sections.
Use the merge control when both map sections belong to the same real room. Roborock, for example, provides official instructions for merging and dividing mapped rooms.
Name each room
Use simple labels such as Kitchen, Bedroom, Office, Hallway, and Living Room. Clear names become more useful once you start room-specific schedules or voice commands.
- Kitchen: Useful for frequent crumb cleanup.
- Dining room: Helpful for cleaning after meals.
- Entryway: Good for targeting tracked-in dirt.
- Bedroom: Easy to schedule separately from daytime living areas.
- Office: Useful when you want cleaning outside working hours.
Add no-go and no-mop areas
Once the room boundaries look correct, mark places the robot shouldn’t enter. Common examples include cable-heavy corners, delicate rugs, pet feeding areas, or furniture where the vacuum repeatedly becomes trapped.
For a vacuum-mop combination, use no-mop zones where supported. This becomes especially useful around rugs that the robot cannot reliably avoid while mopping.
Section Takeaway: Correct room boundaries before building schedules. A clean room structure makes targeted cleaning, no-go zones, and automation much easier to manage.
How Do You Map Multiple Floors?
A multi-story home requires separate maps if your robot supports multi-floor mapping. Don’t assume every mapping vacuum can store the same number of floor plans.
Check your model before creating another map
Open the app’s map settings and look for Multi-Level Maps, Map List, Create New Map, or similar wording. The number of maps and setup process can differ even between models from the same brand.
Some Roborock models, for example, support creating separate floor maps by enabling the multi-floor feature and starting a new map for another level.
Prepare the second floor like the first
Open the doors, remove temporary clutter, and block troublesome areas. Then start the new-map procedure required by your vacuum.
- Create or select a new floor map in the app.
- Move the robot as directed by its manufacturer.
- Start the mapping run from the correct location.
- Let the floor exploration finish without carrying the robot around.
- Name the finished map, such as Upstairs or Basement.
- Edit and label the rooms on that floor.
Don’t assume the dock must move
Dock requirements differ between products. Some multi-floor robots can map another level without moving the charging base, while others work better when the dock is present.
Follow the instructions for your exact model instead of copying another brand’s procedure.
Section Takeaway: Treat every floor as its own mapping project, and confirm how your specific robot handles docks and stored floor plans before starting.
Why Is My Robot Vacuum Map Wrong or Incomplete?
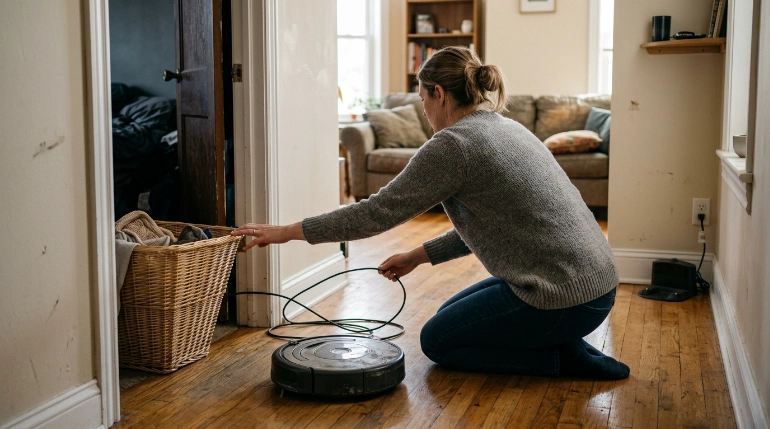
An incomplete map usually means the robot could not see, reach, or correctly identify part of the floor during mapping. Fix the environment first before assuming the vacuum is defective.
A room is missing
Check the doorway first. A closed or partly closed door can keep the robot from discovering the room.
- Fully open the missing room’s door.
- Remove objects narrowing the entrance.
- Make sure the threshold is within your robot’s climbing ability.
- Check for a no-go zone covering the doorway.
- Run another mapping or whole-home cycle if your app updates existing maps.
The map has strange extra rooms
Open spaces can confuse automatic partitioning. Large furniture or narrow passages may also create boundaries that don’t match how you use the home.
Don’t rebuild immediately if the physical layout looks accurate. Try merging and splitting rooms manually first.
Rooms appear merged together
This is common in open-plan kitchens, living rooms, and dining areas. The robot may correctly see one uninterrupted physical space even though you think of it as several rooms.
Add manual room dividers where your app allows it. Place them at logical transitions such as a doorway line, counter opening, or flooring change.
The robot mapped only part of the house
Several simple setup problems can cause partial mapping. Check them systematically.
- Closed doors: The robot could not enter every room.
- Low battery: The mapping session ended before exploration finished.
- Blocked passages: Temporary clutter prevented access.
- Manual interruption: Someone lifted or stopped the robot.
- Dock movement: The robot’s reference position changed during setup.
- Restricted zones: Existing map controls kept it away from an area.
Xiaomi’s support guidance specifically warns that partially open doors, low battery, and following too closely can contribute to incomplete quick maps on supported models.
The robot suddenly created a second map
This can happen when the vacuum fails to recognize its location or believes it has entered a new environment. Check whether the dock moved, the robot was carried elsewhere, or a major layout change occurred.
If your app offers map recovery or backup maps, check those options before deleting everything.
The map is rotated or oddly angled
An angled map doesn’t always mean the robot cleaned incorrectly. Dock orientation and the geometry detected during the first run can affect how the app displays the floor plan.
Remapping may help when the map orientation creates real navigation problems. If cleaning works normally, a purely cosmetic angle may not justify rebuilding the entire setup.
Should you delete the map and start again?
Remapping should be the later option, not the first response to every bad room boundary. Editing one divider takes much less work than rebuilding zones, room names, and schedules.
Consider a fresh map when the basic geometry itself is wrong.
- A major section of the floor never appears.
- Walls or hallways are badly misplaced.
- The robot repeatedly cannot locate itself.
- The dock has permanently moved to another location.
- Large home-layout changes make the old map obsolete.
Section Takeaway: Fix doors, clutter, access, dock placement, and room dividers before deleting a saved map. Remap when the underlying floor geometry is genuinely wrong.
What Else Should You Know About Robot Vacuum Mapping?
How long does it take a robot vacuum to map a house?
Mapping time depends on floor size, layout, navigation technology, and the robot’s operating mode. Dedicated quick-map modes are generally faster than completing a full cleaning cycle while creating the first map.
Should I move furniture before mapping?
Keep normal furniture in its usual position so the map represents your everyday home. Remove temporary clutter and small objects that could block the robot, but you don’t need to empty the rooms.
Should I leave all doors open when mapping?
Yes, fully open the doors to rooms you want included on that floor. Close doors only when you intentionally want an area excluded from the initial map.
Can I add a room after the first map is finished?
Many mapping robots can discover new accessible areas during later whole-home runs, but behavior varies by model. If the missing room never appears, check your app for map updating or create a fresh map with that doorway open.
Can I pick up my robot vacuum while it is mapping?
Avoid moving it unless you need to stop the robot for safety. Carrying the vacuum during mapping can interfere with its estimate of where it is and may cause mapping or docking problems.
Do robot vacuums remember different rooms?
Mapping models with saved-room features can divide the floor plan into named areas. That lets you select individual rooms for cleaning, although the exact controls depend on the vacuum and its app.
Do I need to remap after moving furniture?
Usually not for ordinary changes such as moving chairs or a small table. Consider remapping after major structural or layout changes if the robot repeatedly navigates poorly or its saved walls no longer represent the home.
What Should You Do After the Map Is Finished?
Don’t jump straight into complicated automation. First confirm that the map matches the real floor and that the robot can travel between the important rooms.
- Inspect room boundaries: Split or merge areas that were detected incorrectly.
- Name rooms: Choose short, clear labels you’ll recognize in schedules.
- Add restricted areas: Create no-go or no-mop zones where needed.
- Run a test clean: Send the robot to one specific room and watch whether it reaches the correct area.
- Check trouble spots: Look for cables, rug tassels, thresholds, and furniture where it gets trapped.
- Create schedules last: Automate cleaning only after the map works reliably.
As of 2026, room mapping has become a central control feature on many higher-level robot vacuums, but the app and navigation system still vary considerably between models. A good map is useful because it turns whole-house automation into predictable room-by-room cleaning.
The main rule is simple: prepare once, map carefully, and edit before automating. That gives your robot the best starting point for reliable everyday cleaning.