How to Vacuum After Renovation: A Complete Dust-Cleanup Guide

Quick Answer
To vacuum after renovation, remove large debris first, clean high surfaces, then vacuum slowly from the room edges toward the exit. For fine construction dust, use a vacuum designed for fine particles with proper filtration; the EPA’s explanation of HEPA filtration is a useful reference when comparing filters.
Quick post-renovation vacuuming steps
- 1. Remove debris: Pick up screws, wood pieces, plaster chunks, and other items that could damage the vacuum.
- 2. Clean from high to low: Dust shelves, trim, walls, doors, and window ledges before starting the floor.
- 3. Use fine-dust filtration: Choose a HEPA-filtered vacuum or suitable construction dust extractor when the job produced significant fine dust.
- 4. Vacuum slowly: Make overlapping passes instead of rushing across the floor once.
- 5. Repeat after settling: Let airborne dust settle, then vacuum again if a visible film returns.
- 6. Finish damp: Damp-wipe washable hard surfaces after most loose dust has been captured.
One important exception
- If renovation disturbed suspected lead paint, mold, asbestos-containing material, or large amounts of concrete or masonry dust, don’t treat it as ordinary housekeeping dust.
Renovation dust has a talent for appearing again after you think the room is clean. I’ve seen a floor look finished at night, then show a pale film along the baseboards the next morning.
The fix is usually better sequencing, not faster vacuuming. This guide covers post-renovation cleaning, construction dust, HEPA vacuums, carpets, hard floors, HVAC filters, air purifiers, and situations that need professional help.
In This Guide
- Why Is Renovation Dust Harder to Vacuum?
- What Vacuum Should You Use After Renovation?
- How Do You Vacuum After Renovation Step by Step?
- How Should You Vacuum Different Surfaces?
- How Do You Stop Renovation Dust From Coming Back?
- When Is Renovation Dust Not a DIY Cleanup Job?
- Frequently Asked Questions
Why Is Renovation Dust Harder to Vacuum?
Renovation dust is harder to remove because it can contain particles from drywall, plaster, wood, paint, grout, concrete, insulation, and ordinary household dirt. Some particles are light enough to become airborne again while you’re cleaning.
Post-renovation vacuuming is the controlled removal of construction debris and settled fine dust after building, sanding, drilling, painting, or remodeling work. The goal is to capture the dust instead of repeatedly moving it around the house.
Fine dust travels farther than you expect
Large sawdust is easy to spot. Fine drywall or sanding dust can settle on door tops, outlet covers, cabinet hinges, window tracks, lamps, and furniture far from the work area.
Walking through the room can disturb that dust again. Strong airflow from a vacuum exhaust can do the same if filtration or sealing is poor.
- Drywall sanding: Often leaves a soft, powdery film across horizontal surfaces.
- Woodworking: Produces both visible chips and finer sanding dust.
- Tile and masonry work: Can produce mineral dust that deserves greater care.
- Painting and refinishing: May leave sanding debris plus lingering odors or volatile organic compounds, commonly called VOCs.
- Demolition: Can mix several dust types with nails, splinters, plaster, and sharp debris.
This is why I don’t start by running a vacuum across the middle of the floor. That gets the obvious mess but leaves dust reservoirs around the rest of the room.
Airborne dust and settled dust need different approaches
A vacuum handles dust that has reached a surface. An air purifier or HVAC filter handles some particles that remain airborne.
Neither replaces source removal. The EPA notes that portable air cleaners and HVAC filtration can reduce indoor pollutants but cannot remove every pollutant or replace controlling the source.
Practical rule: capture settled material first, then use ventilation and filtration as supporting tools rather than expecting an air purifier to clean construction debris from the room.
What Vacuum Should You Use After Renovation?

For significant fine renovation dust, I prefer equipment intended for fine-dust collection rather than assuming any household vacuum will cope with it. A HEPA-filtered dust extractor or appropriately configured wet/dry vacuum is usually the better starting point.
For a light final cleanup after contractors already removed the construction dust, a well-sealed household vacuum may be enough. Check the manufacturer’s instructions before using it on construction debris.
| Vacuum setup | Fine-dust filtration | Best use after renovation | Main caution |
|---|---|---|---|
| HEPA-filtered dust extractor | HEPA final filter; HEPA is defined as at least 99.97% efficient at 0.3 µm under its test definition | Heavy fine dust from sanding, drilling, or construction cleanup | Filter rating does not replace correct machine setup and maintenance |
| Wet/dry shop vacuum with compatible HEPA setup | Depends on installed filter, collection bag, and machine design | Debris plus fine-dust cleanup when the manufacturer supports that use | A basic cartridge alone should not be assumed to provide HEPA-level capture |
| Sealed household HEPA vacuum | Model-specific HEPA filtration | Final cleaning once heavy construction material is gone | Fine construction dust can overload filters or fall outside intended use |
| Standard household vacuum | Varies by model; no HEPA performance should be assumed | Normal household dust after the renovation cleanup is complete | May clog quickly or redistribute fine particles |
HEPA filter versus a sealed HEPA vacuum
A HEPA filter is a high-efficiency particulate air filter. The filter specification matters, but the rest of the machine matters too.
Dust can bypass good filter media if a vacuum has leaks around its housing, bag, connections, or exhaust path. For dusty work, I look for a machine specifically designed around controlled fine-particle collection.
Should you use a bag?
For fine dust, a compatible disposable collection bag can make emptying much cleaner. It can also help protect the main filter from becoming loaded as quickly.
A pre-filter or cyclone separator can serve a similar protective role in some systems. NIOSH describes HEPA filtration and dust-control vacuum systems as tools for controlling dust during work involving silica-containing materials.
NIOSH silica safe-work guidance is worth reviewing if concrete, mortar, stone, or similar materials were cut or ground during the renovation.
How Do You Vacuum After Renovation Step by Step?
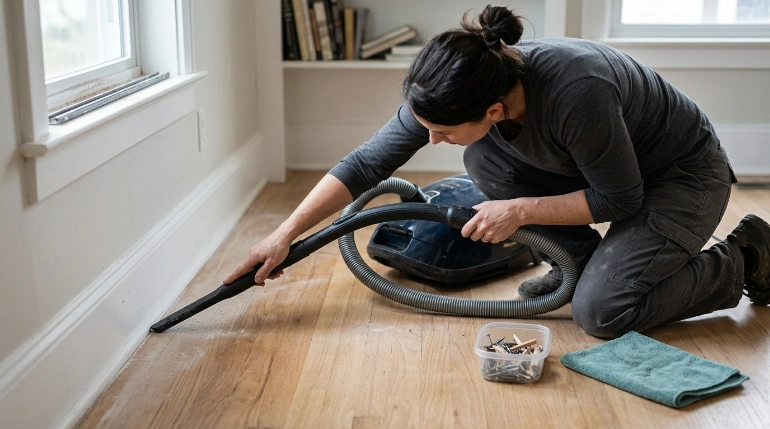
The best order is high to low, clean area toward dirty area, then toward the exit. That prevents you from walking through a cleaned floor while dust continues dropping from surfaces above it.
1. Let the active work finish
Don’t deep-clean while someone is still sanding drywall in the next room. You’ll keep collecting new dust and may spread it through foot traffic.
Wait until cutting, sanding, drilling, and demolition have stopped. Remove tools and building materials that don’t need to remain indoors.
2. Pick up large debris by hand
Put on suitable gloves and remove anything that could damage the hose or floor head. Don’t vacuum screws, long splinters, nails, chunks of plaster, or sharp tile pieces unless the machine is explicitly intended for them.
- Wood scraps
- Drywall chunks
- Screws and nails
- Plastic packaging
- Wire pieces
- Large plaster or grout fragments
3. Dust high surfaces first
Start with the tops of cabinets, shelves, doors, window frames, trim, and other ledges. Use the vacuum’s soft dusting tool where the surface allows it.
Work downward. Baseboards and flooring should come near the end.
4. Vacuum edges before open floor areas
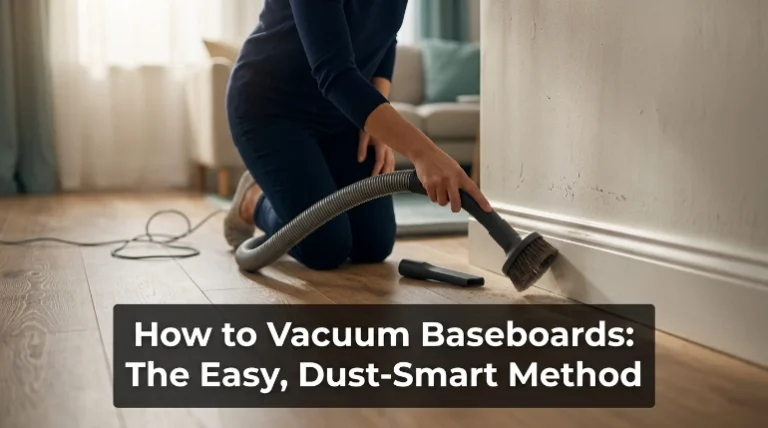
Fine dust collects where normal floor heads don’t reach. I usually make a slow perimeter pass with a crevice tool before doing the main floor.
- Baseboard edges
- Room corners
- Window tracks
- Closet edges
- Under radiators
- Cabinet toe kicks
- Thresholds and transitions
5. Make slow, overlapping floor passes
Speed is the common mistake. Move slowly enough for the vacuum head to collect settled material rather than pushing a cloud ahead of it.
Overlap each pass slightly. On dusty rooms, vacuum in one direction and then make a second set of passes across the first.
6. Check the filter and collection system
Renovation dust can load filters much faster than ordinary household dirt. Loss of suction is often a signal to inspect the bag, bin, pre-filter, or filter according to the manufacturer’s instructions.
Don’t beat or blow a dusty filter clean indoors. That can put captured material straight back into the room.
7. Damp-wipe after vacuuming
Once most loose dust is gone, use a slightly damp microfiber cloth or suitable mop on washable surfaces. Avoid turning piles of dry construction dust into wet paste before vacuuming.
Rinse or replace the cloth frequently. A dirty cloth can simply move the fine film from one surface to another.
8. Inspect again after dust settles
Give the room time to settle, then look across hard surfaces in side lighting. Fine dust is often easiest to see when light hits the floor at a low angle.
A second vacuuming is normal after messy renovation work. It doesn’t mean the first pass failed.
How Should You Vacuum Different Surfaces?
The same vacuum technique isn’t ideal for every surface. Adjust the floor head, suction, and follow-up cleaning method to what you’re cleaning.
Hardwood and laminate
Use a hard-floor head or soft brush that won’t scratch the finish. Vacuum seams and perimeter gaps carefully because fine dust can collect between boards.
Afterward, damp-clean only as the flooring manufacturer recommends. Avoid soaking wood or laminate.
Tile and stone floors
Vacuum the open floor first, then concentrate on grout lines and edges. Powdery renovation residue can remain in textured grout after the tile looks clean.
For natural stone, use cleaners approved for that material. Renovation cleanup isn’t the time to experiment with strong acids or unknown chemicals.
Carpet and rugs
Vacuum carpet slowly in multiple directions after all overhead dusting is complete. A powered brush roll may help lift settled household debris, but always follow the carpet and vacuum manufacturers’ instructions.
If a large amount of construction dust entered deep carpet, normal vacuuming may not be enough. Professional carpet cleaning may be more practical after the dry dust has been thoroughly extracted.
Upholstered furniture
Use an upholstery attachment and work across seams, piping, cushions, and crevices. Renovation dust often hides between cushions even when the fabric surface looks clean.
Wash removable covers only if the care label allows it. Don’t wet-clean unknown upholstery just to chase dust.
Walls, ceilings, and trim
Don’t scrape a heavy floor head across painted drywall. Use a soft brush attachment with controlled suction where the finish can tolerate it.
Newly painted surfaces may need curing time before cleaning. Check the paint manufacturer’s instructions first.
My check: run a clean fingertip across a hidden ledge after vacuuming. If it leaves a clear line through powder, I know the room needs another controlled pass.
How Do You Stop Renovation Dust From Coming Back?
Dust usually seems to “come back” because some remained airborne, sat on overlooked surfaces, or entered nearby rooms and air pathways. Repeated floor vacuuming alone won’t solve those reservoirs.
Check your HVAC system
If a forced-air heating or cooling system operated during dusty work, inspect its filter according to the system manufacturer’s directions. Replace a loaded disposable filter when appropriate.
Don’t automatically install the highest-efficiency HVAC filter you can find. Your system has to support the filter’s airflow resistance.
The EPA’s home air cleaner and HVAC filter guidance explains how portable air cleaners and central filtration fit into an indoor-air strategy.
Can an air purifier help after renovation?
Yes, a suitable air purifier can help reduce some airborne particles after the main source has been removed. It should support physical cleaning, not replace it.
For particle removal, HEPA filtration is the relevant feature. Clean air delivery rate, or CADR, describes an air cleaner’s delivery of filtered air and can help when matching a unit to a room.
If odors from paint, adhesives, or finishes remain, a unit with substantial activated carbon may help with some gases. Particle filters such as HEPA and gas-phase filters such as activated carbon perform different jobs.
Ventilation also matters when outdoor conditions allow it. Follow the product instructions for paints, coatings, adhesives, and other renovation materials.
Clean fabrics and overlooked surfaces
Dust can settle on curtains, bedding, washable rugs, and other textiles. Clean them according to their care labels after the dust-producing work ends.
The Asthma and Allergy Foundation of America also recommends regular surface cleaning and effective vacuuming as part of controlling indoor allergens. Its indoor allergen guidance offers broader cleaning advice for homes where allergy triggers matter.
- Wipe door tops and frames.
- Vacuum window tracks.
- Clean vent grilles.
- Check cabinet interiors.
- Vacuum beneath furniture.
- Wash appropriate curtains and covers.
- Inspect adjoining hallways and rooms.
As of 2026, I still treat source removal as the foundation of post-renovation cleaning. Air filtration becomes much more useful after the room stops actively producing dust.
When Is Renovation Dust Not a DIY Cleanup Job?
Ordinary wood or drywall dust from a small project can often be handled with careful housekeeping. Suspected hazardous materials need a different decision.
Older painted surfaces and lead dust
Renovation in older buildings deserves extra caution if painted surfaces were disturbed. In the United States, EPA guidance specifically highlights lead-based paint concerns in pre-1978 housing.
Don’t assume an ordinary vacuum makes suspected lead dust safe. The EPA’s lead-safe renovation guidance for DIYers explains testing and lead-safe work considerations.
Expert Alert: If you suspect renovation dust contains lead, stop ordinary cleanup and use qualified lead-safe guidance or a certified professional rather than improvising.
Concrete, mortar, brick, and stone dust
Cutting or grinding certain stone, concrete, brick, and mortar materials can generate respirable crystalline silica dust. That is different from normal household dust.
For substantial contamination, I would not rely on a standard household vacuum. Appropriate dust controls and professional assessment may be needed.
Possible asbestos-containing material
Older flooring, insulation, textured materials, cement products, and other building components may contain asbestos depending on the building and material. You can’t reliably identify asbestos simply by looking at a dusty surface.
Expert Alert: If renovation may have disturbed asbestos-containing material, stop cleaning and contact a qualified asbestos professional for assessment.
Mold discovered during renovation
Vacuuming visible construction dust doesn’t fix an active moisture or mold problem. You first need to identify and correct the moisture source.
Expert Alert: Extensive mold growth, contaminated building materials, recurring moisture, or mold inside HVAC components calls for qualified remediation help rather than routine vacuuming.
When the contractor should handle it
If dust escaped because containment failed during professional renovation work, document the condition before undertaking a major cleanup yourself. Ask what cleanup standard and dust-control process were included in the contract.
That matters even more when the job involved old paint, masonry grinding, major demolition, or another potentially hazardous material.
Frequently Asked Questions
Can I use a normal vacuum for renovation dust?
You can use a normal vacuum for a light final cleanup if its manufacturer allows that use. For significant drywall, sanding, concrete, or construction dust, a suitable fine-dust vacuum or HEPA-equipped extractor is generally a better choice because ordinary machines may clog or redistribute fine particles.
How many times should I vacuum after renovation?
There isn’t one fixed number. After dusty work, I usually make one detailed high-to-low cleaning pass, let remaining airborne dust settle, inspect the surfaces, and vacuum again where a film returns.
Should I vacuum or mop renovation dust first?
Vacuum loose dry dust first. Mopping a floor covered with fine construction powder can turn the material into paste and spread it into seams, grout, and textured surfaces.
How long does renovation dust stay in the air?
There is no universal settling time because particle size, ventilation, airflow, room layout, and ongoing activity all matter. Rather than relying on a fixed number of hours, stop the dust-producing work, use suitable ventilation or filtration, and reinspect surfaces after settling.
Does a HEPA air purifier remove renovation dust?
A HEPA air purifier can capture some airborne particles that pass through the unit. It cannot remove dust already sitting on floors, shelves, walls, furniture, or inside construction debris, so physical source removal and vacuuming remain necessary.
Should I change my HVAC filter after renovation?
Inspect the filter if your HVAC system operated while dust was being produced. Replace a dirty disposable filter when appropriate, but use only filter types your HVAC system can accommodate without creating excessive airflow restriction.
Can I vacuum drywall dust with a shop vac?
Only if the shop vacuum is configured and approved for that type of fine dust. Use the manufacturer’s recommended filter and collection system, and consider a compatible fine-dust bag or HEPA setup rather than using a basic wet/dry vacuum configuration by default.
Final takeaway: The cleanest result comes from working high to low, capturing large debris first, using suitable fine-dust filtration, vacuuming slowly, and inspecting again after dust settles. If the renovation involved suspected lead, asbestos, major mold, or hazardous masonry dust, treat it as a contamination issue rather than ordinary housekeeping.
Once the fine dust is under control, clean filters, tools, washable fabrics, and overlooked ledges so you aren’t reintroducing the same material. That last inspection is what usually turns a room from “looks clean” into genuinely finished.