How to Sanitize a Vacuum Cleaner: A Safe Step-by-Step Guide

Quick Answer
To sanitize a vacuum cleaner, unplug it first, empty the dirt container, remove loose debris, and clean each removable part according to the manufacturer’s instructions. Wash only parts marked as washable, let them dry fully, and wipe suitable hard surfaces with a cleaner or disinfectant that is safe for the material. The CDC’s cleaning and disinfecting guidance also recommends cleaning away dirt before sanitizing or disinfecting.
Quick Sanitizing Steps
- Unplug it: Disconnect a corded vacuum or switch off and remove the battery when the design allows.
- Empty the dirt: Remove the bag or empty the dust bin without shaking debris around the room.
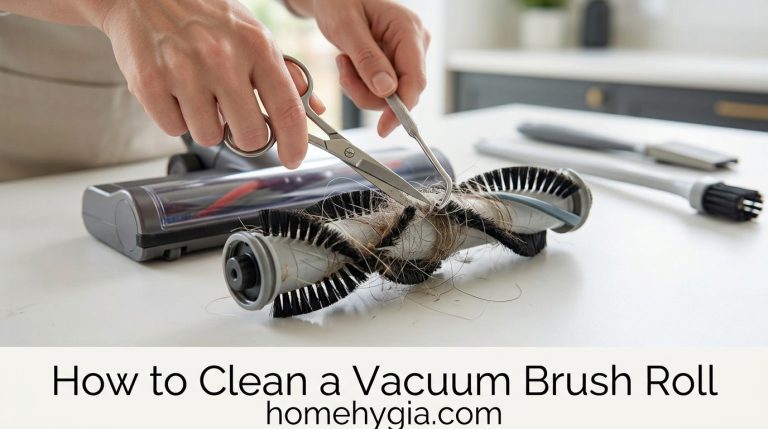
- Remove hair: Cut tangled hair and fibers away from the brush roll.
- Clean washable parts: Wash only bins, filters, or attachments the manual identifies as washable.
- Wipe hard surfaces: Clean handles, tools, and other compatible nonporous surfaces.
- Dry completely: Never reinstall a damp filter or wet component near the motor.
Most Important Rule
- Check the manual first: Filters and electrical parts vary greatly between upright, canister, stick, and robot vacuums.
A dirty vacuum can undermine your whole home hygiene routine. Dust, hair, pet debris, odors, and grime collect inside the same machine you use to clean everything else.
I treat vacuum cleaning as two jobs: removing trapped debris and safely cleaning the parts I touch or reuse. That approach has saved me from soaking filters or spraying areas that should stay completely dry.
In This Guide
What Does Sanitizing a Vacuum Cleaner Mean?
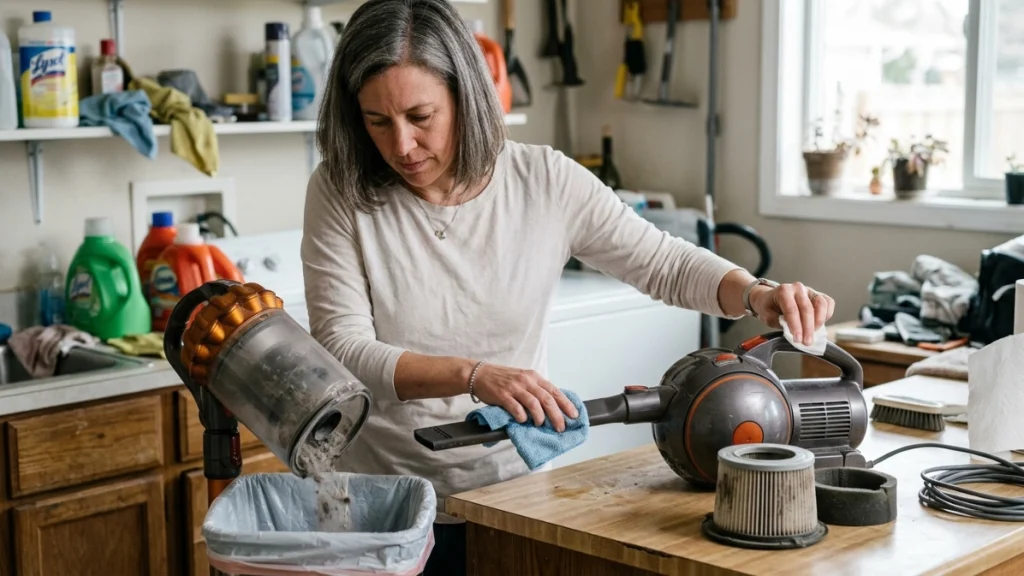
Sanitizing a vacuum means reducing contamination on suitable components after dirt has been removed. It does not mean soaking the whole machine in disinfectant.
The distinction matters. A vacuum contains electrical parts, filters, seals, bearings, and materials that may react badly to moisture or chemicals.
Cleaning vs. sanitizing vs. disinfecting
The CDC separates these three terms. Cleaning removes dirt and many germs, sanitizing reduces germs to safer levels, and disinfecting uses chemicals to kill remaining germs on suitable surfaces.
| Method | Main Purpose | Vacuum Example |
|---|---|---|
| Cleaning | Removes dust, grime, hair, and other debris | Emptying the bin and washing a washable dust container |
| Sanitizing | Reduces germs on a cleaned, compatible surface | Treating a suitable removable hard attachment as its instructions allow |
| Disinfecting | Kills remaining germs when the correct product and contact time are used | Disinfecting a compatible nonporous handle after cleaning it |
For routine vacuum maintenance, thorough cleaning is often the main job. Chemical disinfection should be limited to compatible surfaces and situations where it makes sense.
As of 2026, the CDC’s home-cleaning guidance says routine cleaning is generally enough in many household situations. Extra disinfection becomes more relevant when illness or higher contamination risk is involved.
What Do You Need to Sanitize a Vacuum?
You don’t need a cabinet full of strong chemicals. I get better results by using a few simple tools and checking the vacuum manual before adding moisture.
- Disposable gloves: Useful when handling dirty bins, pet debris, or contaminated attachments.
- Trash bag: Keeps loose dust contained while you empty the machine.
- Microfiber cloths: Good for wiping exterior plastic and other compatible surfaces.
- Soft brush: Helps loosen dry dust around vents and crevices.
- Scissors or seam ripper: Useful for cutting hair from a brush roll while the machine is powered off.
- Mild soap: Suitable for washable parts when the manufacturer permits it.
- Suitable disinfectant: Use only on materials allowed by both the vacuum maker and product label.
Avoid assuming that bleach, alcohol, vinegar, or another household product is safe for every vacuum component. Plastics, rubber seals, coatings, filters, and adhesives vary between machines.
If you use a disinfectant, follow its label exactly. The EPA stresses that disinfectants should be used according to their directions rather than mixed or improvised.
How Do You Sanitize a Vacuum Cleaner Step by Step?
Start with dry debris removal before using any moisture. This makes the process cleaner and reduces the chance of creating muddy dust inside the machine.
1. Disconnect all power
Unplug a corded vacuum before opening it. With a cordless model, switch it off and remove the battery if the manufacturer designed it for user removal.
Don’t clean around electrical contacts while the machine is powered.
2. Empty the bag or dust bin
Take a bagless vacuum to a trash can and empty it carefully. I prefer doing this outdoors when the bin contains lots of fine dust.
For a bagged model, remove the bag according to its instructions. Don’t shake a disposable bag to reuse it unless the manufacturer specifically designed it for that purpose.
3. Remove trapped hair and debris
Check the brush roll, intake opening, wand, hose, and attachments. Hair wrapped around the brush roll can trap more dust and restrict normal movement.
- Cut hair along the brush roll’s cleaning groove if it has one.
- Pull fibers away without damaging bristles.
- Check hose openings for visible clogs.
- Remove crumbs and dirt from attachment joints.
4. Wash only washable components
Some dust bins, foam filters, and attachments can be washed. Others cannot.
I always look for the word washable in the manual before putting a filter under water. A filter’s appearance alone doesn’t tell you whether washing is safe.
5. Clean high-touch surfaces
Wipe the handle, switches, wand, exterior shell, and attachment grips with a lightly damp cloth when their materials allow it. Keep liquid away from vents, electrical contacts, charging ports, and motor openings.
If disinfection is warranted, apply a compatible product according to its label. Don’t spray liquid directly into the vacuum.
6. Let every washable part dry fully
This is the step I never rush. A filter can feel dry on the surface while moisture remains deeper inside it.
Follow your vacuum’s drying instructions before reassembly. Many manufacturers require extended air drying, so use the manual’s stated time rather than guessing.
7. Reassemble and inspect
Put each component back only after it is clean and dry. Check that filters, seals, covers, and the dust bin sit correctly.
Run the vacuum only after everything is secure.
Section Takeaway: Remove dry debris first, wash only approved components, and never put damp parts back near the vacuum’s motor or electrical system.
How Should You Clean Each Vacuum Part?
Different vacuum parts need different treatment. The biggest mistake is treating the whole appliance like one washable object.
| Vacuum Part | Safer Cleaning Approach | Main Caution |
|---|---|---|
| Dust bin | Empty, wipe, or wash if the manual permits | Dry fully before installation |
| Washable filter | Follow the exact manufacturer washing method | Never reinstall damp |
| Non-washable filter | Clean or replace only as directed | Water can damage filter media |
| Brush roll | Remove hair, string, and surface debris | Protect bearings and powered sections from water |
| Hose and wand | Remove clogs; wash only if specifically approved | Powered hoses may contain wiring |
| Exterior housing | Wipe with a lightly damp compatible cloth | Keep moisture outside vents and electronics |
What about HEPA filters?
HEPA means high efficiency particulate air. EPA describes HEPA as a pleated mechanical filtration standard designed to capture fine particles.
That doesn’t mean every HEPA vacuum filter is washable. Some are washable, while others must stay dry and eventually be replaced.
EPA also notes that a properly designed HEPA vacuum routes the machine’s exhaust through its HEPA filtration system. Maintenance still needs to follow the manufacturer’s directions.
You can read more about the filtration standard on the EPA’s HEPA filter information page.
How Often Should You Sanitize a Vacuum Cleaner?
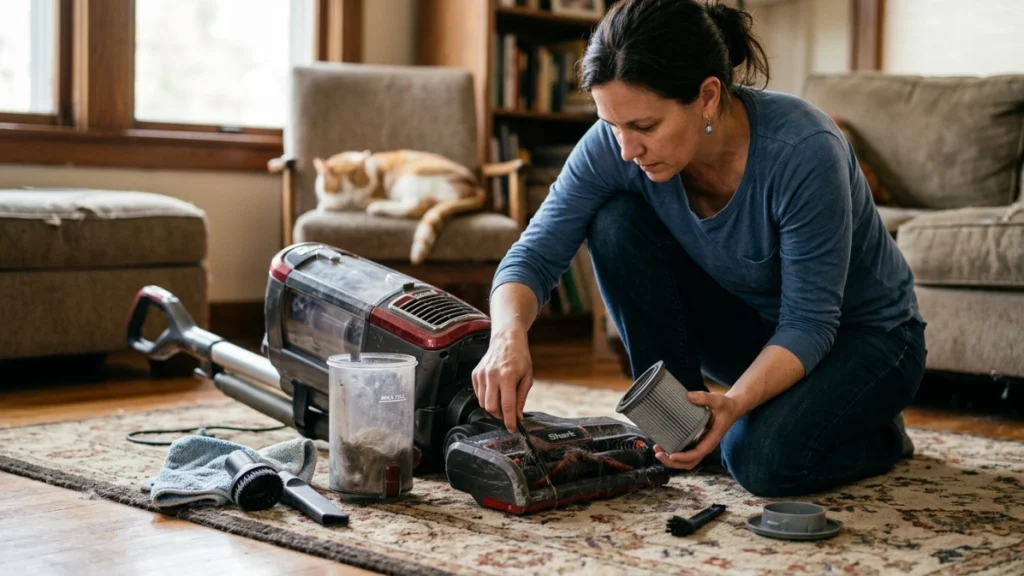
There isn’t one correct calendar schedule for every vacuum. Usage, pets, flooring, allergies, spills, and the manufacturer’s maintenance schedule all change the answer.
I use visible condition as my first trigger.
- Empty the bin: Before it exceeds the manufacturer’s fill line.
- Check the brush roll: Whenever hair or string begins wrapping around it.
- Inspect filters: On the schedule stated in the manual and sooner if airflow seems restricted.
- Wipe handles and attachments: When visibly dirty or after cleaning an unusually dirty area.
- Deep-clean removable parts: When buildup, odor, or the manufacturer’s schedule indicates it.
Homes with pets may need more frequent debris removal because hair and dander build up quickly. Heavy carpet use can also load the bin and filters faster.
The EPA says indoor dust can include pollen, mold spores, pet dander, dust-mite material, and other particles. It also notes that activities such as vacuuming can temporarily stir some settled dust into the air.
For households focused on allergens, see the EPA’s guidance on indoor particulate matter.
What Vacuum Sanitizing Mistakes Should You Avoid?
The safest cleaning routine is often the least dramatic one. Stronger chemicals and more water don’t automatically make a vacuum cleaner cleaner or safer.
- Don’t spray the motor: Keep cleaners away from vents, circuit boards, battery contacts, and charging ports.
- Don’t wash every filter: Confirm that the filter is washable first.
- Don’t reinstall damp parts: Wait until washed components are fully dry.
- Don’t mix chemicals: Use one product exactly as its label directs.
- Don’t ignore contact time: A disinfectant must stay on a compatible surface for the label’s required time to perform as claimed.
- Don’t soak powered tools: Motorized heads and hoses may contain electrical components.
- Don’t scrape filters aggressively: Rough cleaning can damage delicate filter material.
If you use an EPA-registered disinfectant, follow its product label. EPA emphasizes that disinfecting products are surface products and should be used only as directed.
You can check the EPA’s disinfectant information for an example of its label-first approach to disinfectant safety.
Expert Alert: Stop using the vacuum if you see damaged wiring, liquid inside electrical areas, a swollen battery, burning marks, or another electrical fault. Have the appliance checked by a qualified repair professional rather than opening powered components yourself.
Expert Alert: If the vacuum has been used around widespread mold or major water-damage contamination, don’t treat ordinary vacuum sanitizing as remediation. A qualified mold or restoration professional may be needed.
Section Takeaway: Keep liquids away from electrical systems, follow the vacuum manual, and use disinfectants only on compatible surfaces according to their labels.
Frequently Asked Questions
Can I spray disinfectant inside my vacuum cleaner?
Usually, you should not spray disinfectant into the vacuum body, motor, vents, filters, or electrical system. For compatible hard surfaces, apply the product as its label and the vacuum manufacturer allow, while protecting openings and electrical parts.
Can I use alcohol to sanitize a vacuum cleaner?
Don’t assume alcohol is safe for every vacuum. It can affect some plastics, coatings, seals, adhesives, screens, or printed markings, so check the appliance instructions before using it on any component.
Can I wash a vacuum HEPA filter?
Only if the manufacturer specifically calls that filter washable. HEPA describes a filtration standard, not a washing method, so one HEPA filter may be washable while another can be damaged by water.
How do I sanitize a bagless vacuum cleaner?
Empty the bin, remove trapped hair and dust, clean washable parts according to the manual, and wipe compatible exterior surfaces. Let every washed component dry completely before putting the vacuum back together.
How do I sanitize a vacuum after cleaning pet messes?
Dispose of contaminated debris carefully and clean any removable tools that contacted the mess according to their instructions. If disinfection is appropriate, use a product labeled for the surface and keep it away from motors and electrical components.
Why does my vacuum smell even after I empty it?
Odor can remain in filters, brush rolls, hoses, bins, or trapped hair. Check each area for buildup and follow the manufacturer’s cleaning or filter-replacement instructions rather than masking the smell with fragrance inside the machine.
Can I use bleach to sanitize my vacuum?
Don’t use bleach unless both the vacuum manufacturer and the chemical label make that use appropriate for the specific removable surface. Never put bleach into filters, motors, powered hoses, batteries, or other electrical components.
The main lesson is simple: a sanitized vacuum starts with careful cleaning, not stronger chemicals.
Unplug the machine, remove the dirt, clean each component according to its design, and give washable parts enough time to dry. That routine keeps the process practical while protecting the appliance you depend on for everyday home hygiene.
“`
—
SEO METADATA (for WordPress SEO plugin — do not paste into content):
Meta Title: How to Sanitize a Vacuum Cleaner Safely
Meta Description: Learn how to sanitize a vacuum cleaner safely, including the bin, filters, brush roll, attachments, and exterior without damaging your machine.
URL Slug: how-to-sanitize-a-vacuum-cleaner
Focus Keyword: how to sanitize a vacuum cleaner
Secondary Keywords: sanitize vacuum cleaner, clean vacuum filter, disinfect vacuum cleaner, vacuum cleaner maintenance, clean vacuum dust bin
Internal links placed from sitemap:
* Internal links skipped — sitemap not fetchable in this browsing session. No HomeHygia URLs were invented or substituted.
Links to manually verify before publishing:
* None of the outbound authority links above were guessed; the referenced CDC and EPA pages were accessible during research.