How to Lubricate Vacuum Wheels to Protect Your Floors and Indoor Air

If you have ever tried to drag a stubborn, heavy vacuum cleaner across your living room floor, you know how frustrating sticking wheels can be. Instead of gliding smoothly, the vacuum fights you every step of the way, risking nasty scratches on your expensive hardwood or luxury vinyl planks.
More importantly, a malfunctioning vacuum directly impacts your home’s indoor air quality. Your HEPA-equipped vacuum is your first line of defense against dust mites, pet dander, and settled allergens. If vacuuming becomes a physically exhausting chore, you are less likely to do it regularly. This allows airborne pollutants to accumulate, triggering allergies and respiratory sensitivities.
Learning exactly how to lubricate vacuum wheels is a fast, simple maintenance task that protects your floors, extends the life of your appliance, and keeps your home’s air fresh. In this guide, we will walk you through the exact steps, the best types of lubricants to use, and common maintenance mistakes you should avoid.
Quick Answer
To fix squeaky or stuck wheels, unplug the vacuum and remove any tangled hair from the wheel axles using tweezers. Apply one small drop of dry silicone spray or a PTFE-based dry lubricant directly to the metal axle. Avoid traditional oil-based sprays like standard WD-40, as they act as a magnet for dust and pet hair. Wipe away any excess lubricant with a microfiber cloth and spin the wheel manually to distribute the spray.
The Hidden Link Between Vacuum Maintenance and Indoor Air
For most homeowners, a vacuum cleaner is just a floor-cleaning tool. However, in the home hygiene space, a vacuum is actually an essential piece of air quality equipment.
When you walk across a carpet, you kick up microscopic particles into your breathing zone. According to the Environmental Protection Agency’s guidance on indoor particulate matter, keeping floors clean is a primary strategy for reducing airborne dust and improving overall indoor air quality.
If your vacuum’s wheels are seized up, you end up lifting or dragging the unit. This jarring motion violently kicks up settled dust before the vacuum’s suction can capture it. Keeping the wheels rolling smoothly ensures that the machine gently glides over the surface, pulling pet dander, pollen, and allergens safely into its HEPA filter rather than launching them into the air you breathe.
Choosing the Right Lubricant for Vacuum Wheels
Not all lubricants are created equal. Because vacuums operate in the dustiest environments possible, choosing the wrong spray will actually make your wheel problem worse over time.
Here is a quick breakdown of what to use and what to avoid:
| Lubricant Type | Best For | Why It Works (or Fails) | Recommendation |
|---|---|---|---|
| Dry Silicone Spray | Plastic wheels, caster wheels, metal axles | Dries quickly and creates a slick barrier. Does not attract dust, dirt, or pet hair. | Highly Recommended |
| PTFE (Teflon) Dry Lube | High-friction metal axles | Leaves a dry powder film that heavily reduces friction without staying sticky. | Highly Recommended |
| Standard WD-40 | Loosening rusted bolts | It is a solvent, not a true lubricant. It stays wet and acts as a magnet for dust and carpet fibers. | Avoid |
| White Lithium Grease | Garage doors, heavy machinery | Far too thick for small vacuum wheels. Will clump up with pet hair instantly. | Avoid |
| Cooking Oils / Olive Oil | Cooking | Turns rancid, becomes incredibly sticky, and attracts household pests. | Never Use |
Expert Tip: If you only have standard WD-40 in your garage, do not use it on your vacuum. Instead, look for “WD-40 Specialist Dirt & Dust Resistant Dry Lube.” The “Dry Lube” variation contains PTFE and is perfectly safe for home appliances, whereas the classic blue-can formula will quickly jam your wheels with dust.
Step-by-Step Guide: How to Lubricate Vacuum Wheels
Taking care of your vacuum wheels should only take about ten minutes. Gather a pair of tweezers, a seam ripper or small scissors, a microfiber cloth, and your dry silicone spray before you begin.
Step 1: Unplug and Prep Your Workspace
Always unplug your vacuum cleaner before performing any maintenance. Lay down an old towel or a flattened cardboard box on a sturdy table or countertop. Carefully lay the vacuum on its back or side so you have clear, comfortable access to the bottom wheels.
Step 2: Remove Tangled Hair and Debris
Before you can lubricate the wheels, you must clear the axles. Hair, carpet fibers, and thread naturally wrap around the wheel bases over time.
- Use tweezers to pull out loose clumps of hair.
- For tightly wrapped strings, carefully slide a seam ripper or small scissors beneath the tangle to snap the threads.
- Pull all the debris away until you can clearly see the metal or plastic axle housing.
Step 3: Access the Wheel Axle
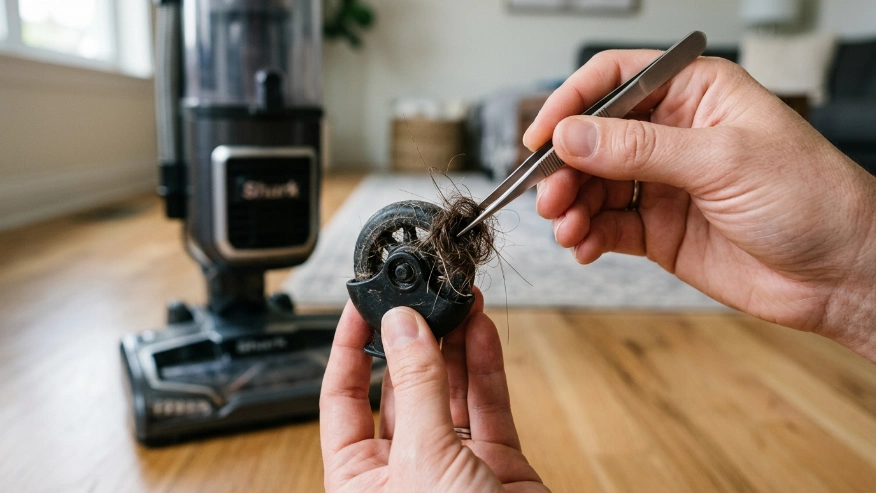
Depending on your vacuum model, you may have large fixed back wheels and small rotating front caster wheels.
- Front Caster Wheels: These often pop straight out of their sockets if you pull firmly. If they do, remove them for easier cleaning.
- Large Rear Wheels: These are usually bolted or snapped into the chassis. Do not force them off unless your manufacturer’s manual explicitly says they are removable. You can easily lubricate them while they are still attached.
Step 4: Apply the Dry Lubricant
Shake your can of dry silicone or PTFE spray well. Attach the small red precision straw to the nozzle to control the spray.
- Aim the straw directly at the small gap between the wheel and the vacuum body (the axle).
- Apply a very short, half-second burst of spray.
- Less is more. Flooding the wheel well will only make a mess on your floors.
Step 5: Spin and Wipe
Immediately spin the wheel rapidly with your fingers. This draws the liquid lubricant deep into the axle mechanism before it dries. Spin it in both directions for about ten seconds.
Finally, take your microfiber cloth and thoroughly wipe down the outside of the wheel and the surrounding plastic casing. You want the lubricant inside the axle, not on the part of the wheel that touches your hardwood floors.
Maintaining Your Vacuum for Better Indoor Air Quality
Fixing a squeaky wheel is a great time to evaluate the rest of your vacuum’s health. The mechanical mobility of your unit goes hand-in-hand with its filtration capabilities.
If your vacuum is easy to push but smells like a wet dog or blows dusty air out the back, it is failing its primary job. To maintain top-tier indoor air quality, follow these routine checks:
- Wash or Replace the HEPA Filter: True HEPA filters capture 99.97% of particles down to 0.3 microns. Check your manual; some filters are washable, while others must be replaced every 6–12 months.
- Check the Brush Roll: Just like the wheels, the main brush roll gets clogged with hair. Cut away tangled fibers so the bristles can effectively agitate carpet fibers to release trapped allergens.
- Empty the Canister Safely: Always empty your bagless vacuum outside, directly into an outdoor trash can. Emptying it inside your kitchen simply releases millions of dust mites and mold spores back into the air you just cleaned.
Following the Asthma and Allergy Foundation of America’s recommendations for controlling dust mites, frequent and effective vacuuming with a well-maintained HEPA unit is one of the most powerful steps a homeowner can take to reduce allergic reactions indoors.
Common Mistakes Homeowners Should Avoid
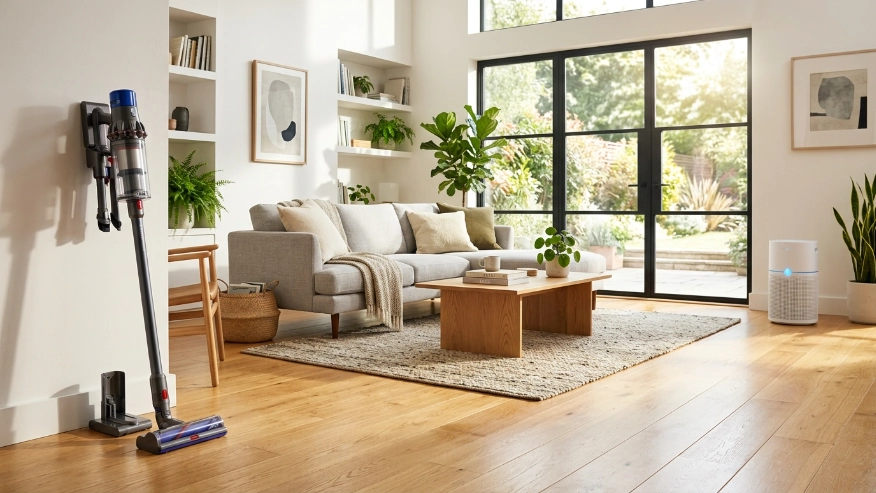
When trying to fix a sticky vacuum cleaner wheel, homeowners often make a few well-intentioned errors that can ruin their vacuum or damage their home.
- Using wet, oily lubricants: As mentioned, WD-40, motor oil, or cooking spray will turn the dust inside your vacuum into a thick, sticky sludge that permanently locks the wheel.
- Ignoring the front caster wheels: Most people focus on the large back wheels, but the small front wheels (which pivot 360 degrees) handle the most friction and require the most frequent cleaning and lubrication.
- Prying wheels with screwdrivers: Unless you are certain the wheel is designed to pop off, do not force a flathead screwdriver under the plastic. You will likely snap the plastic retaining clip, forcing you to buy a whole new vacuum base.
- Forgetting to wipe the excess: If you leave silicone spray on the rubber treads of your vacuum, it will transfer to your hard floors, creating incredibly slippery and dangerous patches in your home.
When to Consult an Air Quality or HVAC Professional
A smoothly running vacuum is excellent for floor-level allergens, but it cannot solve every air quality issue on its own.
You should consider consulting a professional HVAC technician or investing in a dedicated whole-home air purification system if you notice the following:
- You vacuum multiple times a week but still see heavy dust accumulating on your furniture within a day or two.
- You or your family members experience persistent morning congestion, coughing, or asthma flare-ups regardless of how clean the floors are.
- You notice lingering musty odors or strong VOC (Volatile Organic Compound) smells that vacuuming and basic ventilation cannot remove.
In these instances, your home’s air circulation system may be compromised. Following the Centers for Disease Control and Prevention (CDC) guidelines on managing asthma triggers, addressing persistent airborne allergens often requires a multi-layered approach. A professional can assess whether you need higher-rated MERV filters in your HVAC unit, increased mechanical ventilation, or strategically placed standalone HEPA air purifiers to supplement your daily vacuuming routine.
FAQs
Can I use WD-40 on my vacuum wheels?
Standard WD-40 is not recommended for vacuum wheels. It leaves a wet, oily residue that quickly attracts dust, dirt, and pet hair, which will cause the wheels to jam up again. Instead, use a dry silicone spray or a PTFE dry lubricant.
How often should I lubricate my vacuum?
You typically only need to lubricate vacuum wheels once or twice a year. However, you should check the wheel axles for tangled hair and string every month to prevent them from locking up in the first place.
Why is my vacuum scratching my hardwood floors?
Your vacuum is likely scratching your floors because the wheels are completely jammed with debris, causing them to drag instead of roll. Alternatively, heavy grit or small rocks may be embedded in the rubber treads of the wheels.
Does a broken vacuum wheel affect suction?
Yes, indirectly. If a wheel breaks or falls off, the vacuum head will no longer sit level against the floor. This breaks the seal between the vacuum and the carpet, drastically reducing suction power and leaving dirt and allergens behind.
What is the best lubricant for plastic vacuum wheels?
Dry silicone spray is the best and safest option for plastic wheels and components. It will not degrade the plastic, dries almost instantly, and creates a slippery surface that repels dust.
Can stuck wheels damage my vacuum motor?
Stuck wheels will not directly burn out the suction motor, but they can damage the brush roll motor. If the vacuum is bogged down and difficult to push, the brush roll may struggle to spin against the stationary carpet, leading to belt wear or motor strain over time.
Conclusion
Knowing how to lubricate vacuum wheels is a small but highly effective trick that saves your floors, preserves your energy, and maximizes your home’s cleanliness. By removing trapped debris and applying a quick burst of dry silicone spray, you can restore your vacuum to like-new condition in just a few minutes.
Remember, a smoothly gliding vacuum isn’t just about protecting your hardwood—it is a vital part of your home’s air quality strategy. When your vacuum is easy to use, you are much more likely to clean frequently, trapping dust mites, dander, and pollen before they can circulate into the air you breathe.
Take ten minutes this weekend to flip your vacuum over and give those wheels some attention. Once your floors are truly clean, consider exploring our guides on choosing the right HEPA air purifier to capture the microscopic airborne allergens your vacuum leaves behind.