Brush For Cleaning Computer Keyboard: Genius Essential
A brush for cleaning your computer keyboard is a genius essential for maintaining a hygienic workspace and ensuring your device functions smoothly, removing dust, crumbs, and debris that can cause issues.
Is your computer keyboard looking a bit grimy? Do you worry about the crumbs and dust hiding between the keys? You’re not alone. Many of us spend hours at our computers, and over time, our keyboards become a breeding ground for all sorts of unwanted guests. This can not only look unsightly but also affect how well your keyboard works.
Don’t worry! Keeping your keyboard clean doesn’t have to be a chore. We’ll explore why a simple brush is a must-have tool for your home hygiene arsenal. You’ll learn what makes a good keyboard brush, how to use it effectively, and why it’s a smart addition to your cleaning routine. Let’s make your typing experience cleaner and more pleasant.
Why Your Keyboard Needs a Regular Cleaning Brush
A keyboard brush is more than just a duster; it’s a targeted tool for a common problem. Think about what happens when you eat at your desk or simply use your computer throughout the day. Dust particles float in the air and settle on surfaces, including your keyboard. Crumbs from snacks can easily fall between the keys. Even dead skin cells and oil from your fingertips contribute to the mess.
Without regular cleaning, this buildup can lead to several issues. It can make your keys sticky, causing them to not register presses properly. Over time, this debris can get pushed deeper into the keyboard mechanism, potentially causing permanent damage. A dedicated brush helps prevent this by easily reaching those tight spaces.
The Tiny Terrors: What’s Really Hiding in Your Keyboard?
Let’s get a little more specific about what you’re cleaning out. Studies have shown that computer keyboards can harbor more bacteria than a toilet seat. For example, one study by eLife found significant levels of bacteria on frequently touched surfaces, including keyboards. These microscopic invaders can include E. coli, Salmonella, and Staphylococcus.
Beyond bacteria, there are the visible offenders: dust bunnies, hair, food crumbs (think cookie bits or popcorn kernels), and even small office supplies like paper clips or staples. These foreign objects can interfere with key mechanisms. They can also become compressed over time, creating stubborn grime that’s hard to remove.
Your Keyboard Brush: A Genius Essential for Home Hygiene
A specialized brush for cleaning computer keyboards is a genius essential because it’s designed for the task. Unlike a regular duster that just pushes dirt around, a good keyboard brush has the right bristles and shape to get into those narrow gaps. It effectively lifts and removes debris without damaging delicate electronic components. It’s a simple yet powerful tool for maintaining a clean and healthy workspace.
This small gadget contributes significantly to your overall home hygiene. A clean keyboard means less exposure to germs and a more pleasant user experience. It’s an affordable and easy way to upgrade your desk setup and protect your tech investment.
Types of Keyboard Cleaning Brushes: Finding Your Perfect Match
Not all keyboard brushes are created equal. Understanding the different types can help you choose the best one for your needs. Most brushes fall into a few main categories based on their design and bristle material.
Bristle Materials: Soft vs. Stiff

The bristles are the most important part of your cleaning brush. They can be made from various materials, each with its own advantages.
Soft synthetic bristles: These are often made from nylon or similar plastics. They are gentle and won’t scratch your keycaps. They are great for dusting and removing loose debris.
Natural animal hair bristles: Sometimes, brushes use softer animal hairs like goat or horse hair. These are exceptionally gentle and good for very delicate surfaces.
Stiffer synthetic bristles: Some brushes have slightly firmer synthetic bristles. These can be more effective at dislodging slightly more stubborn grime or sticky residue.
Key Takeaway: For general keyboard cleaning, soft synthetic bristles are usually the safest and most effective choice.
Brush Shapes and Designs
The shape of the brush also matters for reaching different areas of your keyboard.
Flat brushes: These have a wide, flat head and are good for sweeping across the surface of the keys.
Tapered or pointed brushes: These have a more concentrated tip, allowing them to get into very narrow gaps between keys.
Dual-ended tools: Some cleaning tools combine a brush on one end with a different cleaning implement on the other, like a small scraper or a microfiber pad.
* Retractable brushes: These are convenient for storage and travel, protecting the bristles when not in use.
Key Takeaway: A brush with a tapered tip is often best for getting deep between keys, while a wider brush can clear the surface quickly.
How to Choose the Best Brush for Your Computer Keyboard
When you’re looking for a brush for cleaning your computer keyboard, consider these factors. Your goal is to find a tool that is effective, safe for your keyboard, and easy to use.
Bristle Softness and Density
Ensure the bristles are soft enough not to scratch your keyboard caps. They should also be dense enough to effectively capture and lift dust and debris. A good brush will have many fine bristles packed closely together.
Handle Comfort and Grip
You’ll be holding the brush, so a comfortable handle is important. Look for an ergonomic design that feels good in your hand. A non-slip grip can also be helpful, especially if your hands get a little sweaty.
Size and Portability
Consider where you’ll be using the brush. If it’s for your main desktop setup, a larger brush might be fine. If you plan to take it with you to clean your laptop on the go, a smaller, more portable option might be better. Retractable brushes are excellent for this.
Durability and Material Quality
A good keyboard brush should last a long time. Look for brushes made from high-quality plastics and bristles. Check reviews to see if users report bristles falling out or the handle breaking easily.
Key Takeaway: Prioritize soft, dense bristles and a comfortable, durable handle when selecting your keyboard cleaning brush.
Step-by-Step Guide: Cleaning Your Keyboard with a Brush
Using a brush to clean your keyboard is simple, but following these steps will ensure you do it thoroughly and safely. It’s a quick process that makes a big difference.
Preparation is Key
Before you start, turn off your computer or disconnect your keyboard. For laptops, it’s best to shut down completely. This prevents accidental keystrokes and protects your device from any static electricity. You might want to gently shake your keyboard upside down first to dislodge any loose debris.
The Brushing Technique
Hold the brush at a slight angle. Gently sweep the bristles between the keys. Work in rows or sections, moving from one side of the keyboard to the other. Use short, deliberate strokes to lift the dust and crumbs.
For stubborn bits, you can use the tip of the brush to gently nudge them out. Avoid applying excessive pressure, which could damage the keys or internal components. Always brush away from the center of the keyboard.
Cleaning the Keycaps and Frame
Once you’ve cleared the gaps, use the brush to sweep across the surface of the keycaps. This removes any remaining dust or fingerprints. You can also use the brush to clean around the edges of the keyboard frame.
What to Do with the Debris
As you brush, the debris will accumulate. You can periodically tap the brush against a trash bin or a piece of paper. For very fine dust, you might want to follow up with a slightly damp microfiber cloth on the keycaps themselves.
Key Takeaway: Always turn off your device, use gentle strokes, and brush away from the keyboard’s center for effective and safe cleaning.
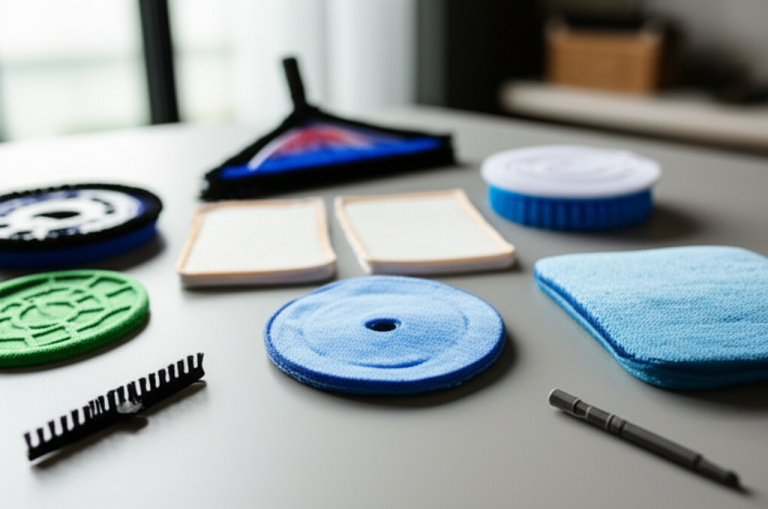
Beyond the Brush: Complementary Keyboard Cleaning Tools
While a brush is a fantastic essential, it works best when paired with other cleaning tools. These can help you tackle different types of dirt and ensure a complete clean.
Compressed Air Cans
These cans spray a powerful blast of air that can blow away loose dust and debris from hard-to-reach areas. They are excellent for getting into tight spots that even a brush might miss. Be sure to use them in short bursts and at a slight angle to avoid moisture buildup.
Microfiber Cloths
A soft microfiber cloth is perfect for wiping down the surfaces of your keycaps and the keyboard frame. They are lint-free and won’t scratch your device. You can use them dry or slightly dampened with a mild cleaning solution.
Cleaning Slime or Gel
This is a popular novelty cleaning product that can be very effective. It’s a sticky, pliable gel that you press onto your keyboard. It conforms to the keys and lifts dust, hair, and crumbs as you peel it away. Be cautious not to leave it on too long or press too hard, as it can leave residue.
Isopropyl Alcohol Wipes
For sanitizing your keyboard, specialized wipes or a cloth lightly dampened with isopropyl alcohol (70% concentration is usually recommended) can be very effective. They kill germs and also help remove greasy buildup. Ensure the keyboard is completely dry before reconnecting or powering on.
Key Takeaway: Combine your keyboard brush with compressed air, microfiber cloths, or sanitizing wipes for a comprehensive cleaning and sanitizing routine.
Maintaining a Clean Keyboard: Frequency and Best Practices
How often should you clean your keyboard? The answer depends on your usage habits and environment. For most people, a quick brush-down once a week is sufficient.
Weekly Quick Clean
Dedicate a few minutes each week to a light cleaning. This involves using your brush to sweep away dust and crumbs. It’s a preventative measure that stops buildup before it becomes a problem.
Monthly Deep Clean
Once a month, you might want to do a more thorough clean. This could involve using compressed air to blow out stubborn debris and wiping down the keycaps with a microfiber cloth. If you’re concerned about germs, use an isopropyl alcohol wipe for sanitization.
Eating and Drinking Habits at Your Desk
The best way to keep your keyboard clean is to minimize the mess in the first place. Try to avoid eating or drinking directly over your keyboard. If you must, be extra careful and clean up any spills immediately.
Environmental Factors
If you live in a dusty area or have pets that shed, you might need to clean your keyboard more frequently. Regular dusting of your entire workspace also helps reduce the amount of debris that ends up on your keyboard.
Key Takeaway: A weekly brush and monthly deep clean, coupled with mindful eating habits, will keep your keyboard pristine.
When to Upgrade: Signs Your Keyboard Needs More Than Just a Brush
Sometimes, even the best brushing routine isn’t enough. There are signs that your keyboard might be beyond a simple cleaning or that it’s time for a replacement.
Sticky Keys and Malfunctions
If certain keys are consistently sticky, unresponsive, or registering multiple presses, debris might be deeply lodged. A brush might not be able to dislodge it. This could indicate a need for more intensive cleaning or that the keyboard is nearing the end of its life.
Visible Damage or Wear
If you notice physical damage to the keycaps, such as cracks or worn-out lettering, it’s a sign of heavy use. While a brush can’t fix wear and tear, it can help maintain the surrounding areas.
Persistent Grime and Odors
If you can’t get rid of grime, or if your keyboard develops an unpleasant odor, it might be time for a replacement. This often happens with older keyboards that have absorbed spills or oils over a long period.
Outdated Technology
If your keyboard is several years old, it might lack modern features like backlighting, ergonomic designs, or quiet key switches. In such cases, a new keyboard might offer a significant upgrade in both functionality and user experience, even if the old one is still technically working.
Key Takeaway: Persistent malfunctions, visible damage, or lingering grime suggest it’s time for a deeper clean or a new keyboard.
The Environmental Impact of Keyboard Cleaning
As we focus on home hygiene and appliance care, it’s also good to consider the environmental impact. Choosing the right cleaning tools and methods can make a difference.
Reusable vs. Disposable
Brushes are generally a more sustainable choice than disposable wipes or cleaning sprays. A good quality brush can last for years, reducing waste. Compressed air cans, while effective, are single-use and contribute to landfill waste.
Material Choices
Look for brushes made from recycled materials or sustainably sourced components. Many manufacturers are now offering eco-friendly options for cleaning tools.
Proper Disposal
When your cleaning tools eventually wear out, dispose of them responsibly. Check local recycling guidelines for electronics accessories.
Key Takeaway: Opt for durable, reusable cleaning tools like brushes and consider eco-friendly materials to minimize environmental impact.
Frequently Asked Questions About Keyboard Cleaning Brushes
Here are some common questions people have about using brushes to clean their computer keyboards.
Can I use a makeup brush to clean my keyboard?
Yes, a soft, clean makeup brush can work in a pinch. However, specialized keyboard brushes are often designed with denser bristles and a shape that’s more effective for getting into tight spaces.
How do I clean a mechanical keyboard?
Mechanical keyboards can often be cleaned more thoroughly. You can carefully remove the keycaps (using a keycap puller) and then use a brush, compressed air, and a microfiber cloth to clean the plate and switches. Always consult your keyboard’s manual first.
Will a brush damage my laptop keyboard?
A soft-bristled brush used gently will not damage a laptop keyboard. Avoid using excessive force or stiff bristles that could scratch the keycaps.
How often should I sanitize my keyboard?
If you share your keyboard or are concerned about germs, sanitizing it once a week with isopropyl alcohol wipes is a good idea. For personal use in a clean environment, monthly sanitization might be sufficient.
Are cleaning gels safe for all keyboards?
Cleaning gels are generally safe, but it’s best to test a small area first. Avoid pressing too hard, and ensure you remove all residue. Some older keyboards or those with special finishes might be more sensitive.
What is the best brush for cleaning a computer keyboard?
The best brush typically has soft, dense synthetic bristles and a tapered design to reach between keys. Look for ergonomic handles and durable construction.
Conclusion: Your Keyboard Deserves a Genius Tool
Keeping your computer keyboard clean is crucial for both hygiene and device longevity. A dedicated brush for cleaning computer keyboard is a simple, effective, and genius essential that belongs in every home and office. It’s your first line of defense against dust, crumbs, and germs that can plague your typing experience.
By understanding the different types of brushes, choosing wisely, and incorporating regular cleaning into your routine, you can ensure your keyboard remains a reliable and hygienic tool. Don’t let grime get you down; invest in a good brush and enjoy a cleaner, more pleasant way to work and play. For more tips on maintaining your tech and home hygiene, explore our other guides at HomeHygia.com.