
Why Won’t My Vacuum Power Button Work? 7 Things to Check

Quick Answer
If your vacuum power button won’t work, first check the outlet, plug, cord, battery, charger, airflow path, and any removable parts that must lock into place. A vacuum may also refuse to start after overheating, while a damaged switch or internal electrical fault usually needs professional repair. Stop immediately if you notice sparks, exposed wiring, or a burning smell, and follow the CPSC electrical safety guidance.
Check these first
- Test the outlet: Plug in another small appliance to confirm the socket has power.
- Inspect the power source: Check the plug and cord on corded models, or battery and charger on cordless vacuums.
- Check for overheating: A clogged filter or blocked airflow path can trigger thermal protection on some vacuums.
- Reseat removable parts: Batteries, bins, cyclones, handles, or other components may need to click fully into position.
- Check the button: A loose, jammed, or unusually soft power button may indicate a damaged switch.
- Stop for electrical faults: Don’t open the motor housing or bypass a safety device yourself.
When a vacuum suddenly ignores its power button, I don’t assume the switch has failed. The problem is often somewhere else in the power or safety system.
In this 2026 troubleshooting guide, I’ll walk through the simple checks I use first. We’ll also cover when a dead button points to a repair rather than routine vacuum maintenance.
In This Guide
- Why won’t my vacuum power button work?
- What should I check before blaming the power switch?
- Can a clogged vacuum stop the power button from working?
- How can I tell if the vacuum power switch is faulty?
- Is troubleshooting different for corded and cordless vacuums?
- When should I stop troubleshooting and get the vacuum repaired?
- Frequently asked questions
Why Won’t My Vacuum Power Button Work?
A vacuum power button may appear dead because power never reaches the machine, a safety system prevents startup, or the switch itself has failed. The fastest approach is to rule out external power problems before suspecting internal parts.
A vacuum power button is the control that starts or stops the machine’s electrical system. On a simple corded vacuum, it may operate a mechanical switch, while many cordless machines use electronic controls.
The most common causes
- Dead wall outlet: The outlet may have lost power or a circuit breaker may have tripped.
- Damaged cord or plug: Physical damage can interrupt electricity before it reaches the vacuum.
- Flat cordless battery: A discharged or deteriorated battery may leave the machine completely unresponsive.
- Charger problem: The battery may never receive a proper charge even though the vacuum looks normal.
- Thermal shutdown: Some vacuums cut power when excessive heat develops.
- Blocked airflow: A clogged hose, filter, wand, or floorhead can contribute to overheating on certain models.
- Incorrect assembly: Some vacuums require a battery, bin, cyclone, handle, or other component to be seated correctly.
- Failed switch or electronics: The physical button, internal switch, wiring, or electronic control board can eventually fail.
Manufacturer troubleshooting supports several of these patterns. For example, vacuum support instructions commonly start with checking the outlet, power cord, battery, charger, filters, and blockages before moving to repair.
The important point is simple: a dead power button does not automatically mean the button is broken.
What Should I Check Before Blaming the Power Switch?

Start with the parts you can inspect without opening the vacuum. This keeps troubleshooting safer and often identifies the problem quickly.
1. Confirm the outlet works
For a corded vacuum, unplug it and test the same wall outlet with a lamp, phone charger, or another small appliance. If that device also fails, the vacuum probably isn’t your first problem.
Check your home’s breaker panel if you’re comfortable doing so. A repeatedly tripping circuit needs more attention than simply resetting it over and over.
2. Inspect the plug and cord
Disconnect the vacuum first. Look along the cord for cuts, crushed areas, melted insulation, exposed wire, or severe kinks.
Check the plug for discoloration, loose prongs, or heat damage. Don’t keep testing a vacuum with visible electrical damage.
Expert Alert: If the power cord, plug, switch wiring, or internal electrical parts appear damaged, stop using the vacuum and contact the manufacturer, a qualified appliance technician, or an electrician as appropriate.
3. Check a cordless vacuum’s battery
A cordless vacuum can make a perfectly good power button look dead when the battery has no usable charge. Place the machine on its approved charger and check its normal charging indicators.
If your battery is removable, make sure it’s fully seated. Never use a cracked, swollen, unusually hot, leaking, or otherwise damaged battery.
4. Make sure removable parts are seated correctly
Some machines have switches or electronic checks that depend on correct assembly. A slightly loose battery, handle, dust bin, cyclone, or other removable section can prevent normal operation on certain models.
Remove and reinstall only the components your owner’s manual describes as user-removable. Listen or feel for the normal click or locking action.
| What you notice | Possible cause | Safe first check |
|---|---|---|
| No lights or sound | No incoming power | Test outlet, plug, battery, or charger |
| Lights appear but motor will not start | Assembly, control, motor, or safety issue | Check manual and reseat user-removable parts |
| Vacuum stopped after getting hot | Possible thermal protection | Unplug it and inspect approved airflow components |
| Button sticks or feels loose | Debris or switch damage | Clean around the button dry; don’t pry it open |
| Power cuts in and out | Power, battery, connection, or internal fault | Stop use if cord or electrical damage is suspected |
For broader information about how vacuum designs and features differ, the Consumer Reports vacuum cleaner resource is a useful reference.
Can a Clogged Vacuum Stop the Power Button From Working?
Yes, on some vacuums a blockage or restricted airflow can contribute to overheating and trigger thermal protection. The machine may then appear completely dead even when you press the power button.
This often happens after the vacuum has been running rather than from the first press of the day.
Check the airflow path safely
Disconnect the vacuum from power before removing anything. For cordless units, remove the battery first if the manufacturer instructs you to do so.
- Dust bin or bag: Empty the bin or replace the bag when required.
- Filters: Inspect them for heavy dust buildup and maintain them exactly as the manual specifies.
- Hose: Look for packed hair, paper, fabric, or larger debris.
- Wand: Check both ends for an obstruction.
- Floorhead: Remove visible debris from accessible air passages.
- Brush roll: Clear hair and thread if your model allows user access.
Don’t wash a filter simply because it looks dirty. Some filters are washable, while others must stay dry and be replaced.
If the vacuum shut off because it became hot, let it remain disconnected for the period stated in its owner’s manual. Reset times differ between models.
For example, BISSELL documents a 30-minute thermal-protector reset on some specific models. That number should not be treated as a universal reset time for every vacuum.
Good vacuum upkeep also matters for controlling household dust. The EPA’s indoor air quality resources explain the broader role of source control, ventilation, and filtration in managing indoor pollutants.
Section Takeaway: If the vacuum stopped after running hot, inspect its user-serviceable airflow path before assuming the power switch failed. Always use your model’s own cooling and reset instructions.
How Can I Tell If the Vacuum Power Switch Is Faulty?
A damaged switch becomes more likely after you’ve confirmed the power source, battery or charger, assembly, and airflow checks. Button feel can provide clues, but it cannot prove what’s happening inside the machine.
Signs that make me more suspicious of the switch
- No normal click: A mechanical button suddenly feels soft or fails to move normally.
- Button stays stuck: It does not return to its usual position.
- Intermittent response: The vacuum works only after several button presses.
- Visible physical damage: The button cap is cracked, loose, or pushed inside the housing.
- Other power checks pass: The outlet, battery, charger, and accessible connections appear normal.
Dust can sometimes collect around an external button. With the vacuum unplugged, I would use a dry microfiber cloth or soft brush around its edges.
I would not spray cleaner into the switch. Liquid around electrical controls can turn a small problem into a larger one.
Why I don’t recommend opening the switch housing
The visible button may only be the outer actuator. Behind it could be a mains-voltage switch, wiring connectors, a control board, or other electrical components.
Opening the housing also creates opportunities to pinch wires, defeat insulation, or reassemble safety components incorrectly. Diagnosis beyond the user-accessible parts is better left to someone qualified.
Expert Alert: Never bypass a power switch, thermal protector, fuse, interlock, or other safety device to make a vacuum run. Internal electrical diagnosis should be handled by the manufacturer or a qualified repair technician.
Is Troubleshooting Different for Corded and Cordless Vacuums?
Yes. Corded machines depend directly on the household power supply, while cordless vacuums add a battery, charging system, and electronic battery protection to the troubleshooting path.
| Check | Corded vacuum | Cordless vacuum |
|---|---|---|
| Primary power source | Wall outlet | Rechargeable battery |
| First check | Outlet, plug, cord | Charge status, charger, battery fit |
| Common external issue | Damaged cord or dead outlet | Discharged battery or charging fault |
| Possible protection response | Thermal shutdown on applicable models | Thermal or battery-management shutdown on applicable models |
| Repair concern | Switch, wiring, motor, electronics | Battery, trigger/button, electronics, motor |
Corded vacuum
I start at the wall and work toward the machine. A working outlet followed by an undamaged cord and plug narrows the possibilities quickly.
A vacuum that works only when its cord sits in a certain position needs attention. Don’t keep bending the cord until the motor comes back on.
Cordless vacuum
I start with battery charge and charger behavior. A battery can indicate trouble through warning lights, but those codes vary by brand and model.
Use the manual for your exact vacuum rather than interpreting a flashing light from another manufacturer’s instructions. The same color can mean different things on different machines.
Dyson, for example, lists discharged batteries, battery faults, charger faults, blockages, and main-body faults among causes of no-power symptoms on different cordless models. Other brands use their own designs and diagnostics.
Section Takeaway: Corded troubleshooting begins with mains power; cordless troubleshooting begins with the charging system and battery. After that, both types still require checks for assembly, airflow, overheating, and internal faults.
When Should I Stop Troubleshooting and Get the Vacuum Repaired?
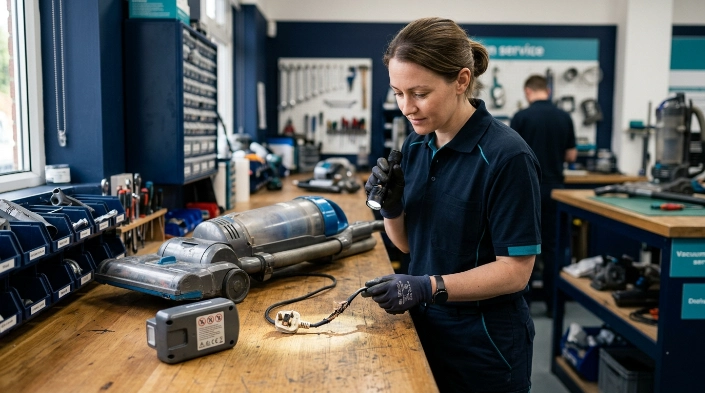
Stop once the problem moves beyond normal user maintenance. A vacuum cleaner combines a fast electric motor, electrical connections, and safety controls that shouldn’t be improvised around.
Stop using the vacuum immediately if you notice:
- Sparks: Visible arcing from the switch, plug, cord, charger, or vacuum body.
- Burning odor: An electrical or melted-plastic smell that returns when powered.
- Exposed conductors: Any visible internal wire through a damaged cord.
- Melted areas: Heat damage around the plug, switch, charger, or battery.
- Battery damage: Swelling, cracking, leaking, smoke, or abnormal heat.
- Repeated breaker trips: The vacuum repeatedly trips the household circuit.
- Liquid intrusion: Water or cleaning solution has reached an electrical area.
A machine that still shows no power after the safe checks may have a failed switch, internal connector, motor, control board, or another component. Those problems need model-specific testing.
Before paying for a repair, check the model and serial number. Then look for warranty coverage, official support instructions, replacement-part availability, or an authorized service center.
If the vacuum is relatively new, opening the housing yourself could complicate warranty service. Manufacturer support is often the better first call.
My practical troubleshooting order
- Disconnect power and inspect the machine for obvious damage.
- Confirm the outlet or battery can provide power.
- Check the cord, plug, charger, and removable connections as applicable.
- Inspect accessible airflow components for a blockage or severe dirt buildup.
- Follow the manufacturer’s reset procedure if the machine overheated.
- Test again only when safe and fully reassembled.
- Arrange repair if the machine remains dead or shows signs of electrical failure.
This sequence saves me from jumping straight to the switch. It also avoids replacing a power button when the true problem is something simpler, such as an unpowered outlet or discharged battery.
Section Takeaway: Once troubleshooting requires opening electrical housings, testing live circuits, repairing wiring, or bypassing a safety component, it’s no longer routine homeowner maintenance.
Frequently Asked Questions
Why is my vacuum power button not doing anything?
The vacuum may have no incoming power, a dead battery, a charger problem, an incorrectly fitted component, thermal shutdown, or an internal electrical fault. Start by checking the power source and visible user-serviceable parts before assuming the switch has failed.
Can a vacuum overheat and refuse to turn back on?
Yes. Some vacuum cleaners use thermal protection that shuts the machine down when it becomes too hot. Blocked airflow or dirty filters can contribute on certain models. Disconnect the vacuum, correct permitted maintenance issues, and follow your model’s stated cooling and reset procedure.
How do I know if my vacuum switch is bad?
A button that suddenly becomes loose, stuck, physically damaged, or inconsistent can point toward switch trouble. However, those symptoms are not conclusive. Rule out the outlet, cord, battery, charger, assembly, and manufacturer-listed safety conditions first.
Why does my vacuum work only when I press the button several times?
An intermittent button could result from a worn switch, debris around the control, a loose connection, or an electronic fault. Clean only around the external button with the vacuum disconnected. If the problem continues, arrange model-specific service rather than opening the switch housing.
Can I spray cleaner into a sticky vacuum power button?
No. Avoid spraying water, disinfectant, lubricant, or household cleaner into an electrical control. Disconnect the vacuum and clean only the accessible exterior with a dry cloth or soft brush unless the manufacturer specifically provides another cleaning method.
Why won’t my cordless vacuum turn on even though it was charging?
The charger, charging connection, battery, or vacuum electronics may still be faulty. Check your model’s charge indicators and make sure the battery is seated correctly. If the manufacturer identifies an error-light pattern, follow the instructions for that exact model.
Is it worth repairing a broken vacuum power switch?
It depends on the vacuum’s age, warranty, replacement-part availability, repair cost, and overall condition. A switch on an otherwise good machine may be repairable, but an older vacuum with several failing components may not justify extensive service.
The best first move is simple: don’t blame the power button until you’ve checked the vacuum’s power source, airflow, battery or cord, and basic assembly.
If those checks don’t restore power, use the exact model number to find the manufacturer’s troubleshooting instructions or arrange professional service. That is safer than guessing at an internal electrical repair.
