
Why Isn’t My Robot Vacuum Mapping Correctly?

Quick Answer
Your robot vacuum usually maps incorrectly because it cannot reliably work out where it is in your home. Common triggers include dirty navigation sensors, poor dock placement, low light on camera-based robots, moving the vacuum by hand, major furniture changes, blocked rooms, or a corrupted saved map. The iRobot navigation troubleshooting guide also recommends checking clutter, sensors, physical barriers, lighting, and the saved map when coverage becomes unreliable.
Check these first
- Clean the sensors: Dust on LiDAR windows, cameras, wall sensors, or floor-tracking sensors can affect positioning.
- Check the dock: Keep the charging station in a fixed, open location with a clear path in front.
- Stop carrying it: Picking up the robot during a run can make some models lose their position.
- Open wanted rooms: Leave doors open before a new whole-home mapping run.
- Add some light: Camera-based navigation can struggle in a dark room.
- Restore or remap: If the saved floor plan is badly distorted, restore an older map or build a fresh one.
Best first test
- Place the robot on its dock, clean its navigation sensors, clear floor clutter, open the doors, and run a full mapping or whole-home mission without moving the robot.
I know how frustrating it is to open the app and find a hallway bent sideways, two rooms merged together, or half the house missing. Robot vacuum mapping looks complicated, but most failures come from a short list of navigation and setup problems.
This guide walks through those causes in a practical order. I’ll also explain when you should repair the existing map and when starting over makes more sense.
In This Guide
Why Isn’t My Robot Vacuum Mapping Correctly?
A robot vacuum maps incorrectly when its navigation system receives incomplete information or cannot match its current position with the saved floor plan. The problem may come from the environment, sensors, dock, app, or existing map.
Definition: Robot vacuum mapping is the process of identifying walls, rooms, obstacles, routes, and the robot’s position so it can navigate a home in an organized way.
When I troubleshoot mapping trouble, I start with anything that recently changed. A robot that mapped correctly for months and suddenly gets lost probably has a different problem from a new robot that has never completed its first map.
Common causes of a bad robot vacuum map
- Dirty navigation sensors: Dust, fingerprints, or debris can interfere with cameras, LiDAR openings, wall sensors, and tracking sensors.
- Robot moved by hand: Some robots must re-localize after being picked up and placed elsewhere.
- Dock moved: A saved map may expect the charging station to remain in its original position.
- Closed doors: Rooms that are inaccessible during mapping may be missing from the floor plan.
- Floor clutter: Shoes, cables, toys, bags, and temporary obstacles can change the robot’s route.
- Dark rooms: Camera-based navigation systems may have less visual information in poor lighting.
- Large layout changes: Rearranged furniture can make localization harder until the robot updates or rebuilds its map.
- Corrupted map data: A saved floor plan can occasionally become inaccurate enough that restoring or recreating it is easier.
The important point is that an incorrect map does not automatically mean the vacuum is defective. Environmental changes cause many navigation problems.
Section Takeaway: Start with the robot’s surroundings, sensors, dock, and recent household changes before deleting the map.
How Do I Fix an Incorrect Robot Vacuum Map?
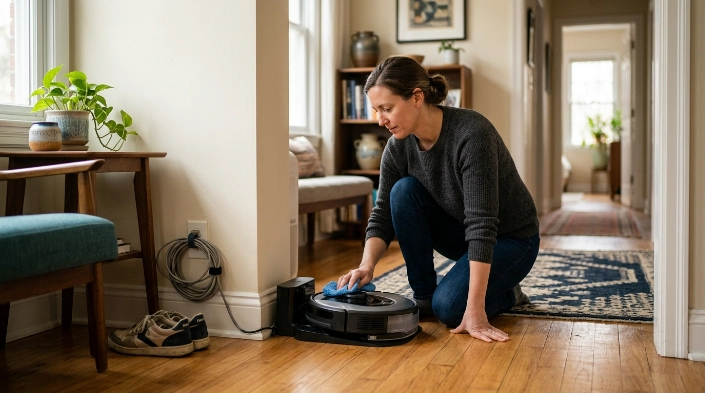
Use a simple troubleshooting order. Changing several settings at once makes it harder to identify what caused the problem.
- Return the robot to its dock. Start troubleshooting from its normal home position.
- Clean navigation sensors. Follow your model’s manual for the camera, LiDAR window, wall sensors, cliff sensors, and floor-tracking sensor.
- Clear temporary clutter. Pick up cables, shoes, lightweight mats, toys, and bags that may block routes.
- Open the correct doors. Give the robot access to every room you want included in the map.
- Turn on room lights if needed. This is especially useful with navigation systems that depend on visual landmarks.
- Check the charging dock. Make sure it has not shifted behind furniture or into a cramped corner.
- Run a whole-home mapping mission. Let the vacuum start by itself and finish without being carried to another location.
- Allow it to return automatically. Some systems use successful completion and docking as part of saving the map.
Do not edit room dividers while the basic floor shape is still wrong. First get a stable map, then add labels, zones, carpet areas, and virtual boundaries.
Clean sensors carefully
Sensor cleaning is one of the easiest fixes to overlook. A robot can still drive normally while producing poor positioning data.
- Use the cleaning method specified by your manufacturer.
- Remove loose dust before rubbing a camera window.
- Check for hair or debris around wheels and moving parts.
- Do not spray liquid directly into sensor openings.
- Inspect the LiDAR turret, if equipped, for anything blocking its movement.
If the same mapping error returns immediately after a clean mapping run, move to map restoration or recreation. Repeating ten identical runs usually does not solve a corrupted floor plan.
Expert Alert: If a sensor window is cracked, a LiDAR turret is physically jammed, or the charging station has electrical damage, stop DIY repair and contact the manufacturer or a qualified repair technician.
Section Takeaway: Fix the physical setup before changing map software. A clean, uninterrupted whole-home run gives the robot the best chance to localize correctly.
What Do LiDAR and Camera Mapping Change?
The right troubleshooting step depends partly on how your robot navigates. As of 2026, robot vacuums may use LiDAR, cameras, floor-tracking sensors, gyroscopes, or combinations of several systems.
LiDAR measures surrounding geometry with laser-based ranging. Camera-based visual simultaneous localization and mapping, often shortened to vSLAM, uses visible features to estimate position and build a map.
| Navigation approach | Main positioning clue | Mapping problem to check | First troubleshooting step |
|---|---|---|---|
| LiDAR | Measured room geometry | Blocked or dirty LiDAR area, dock relocation, major layout changes | Inspect LiDAR area and run from the dock |
| Camera / vSLAM | Visual landmarks | Poor lighting, dirty camera, featureless surroundings | Clean camera and provide normal room lighting |
| Floor tracking / gyroscope | Movement and direction estimates | Dirty tracking sensor, wheel slip, obstacles | Clean tracking areas and inspect wheels |
| Hybrid system | Multiple sensor inputs | Any sensor or localization conflict | Check all navigation sensors before remapping |
This difference explains why one troubleshooting tip does not fit every vacuum. Turning the lights on may help a camera-dependent robot but does not solve dirt blocking a LiDAR window.
Always check the manual for your exact model. The navigation hardware can vary even between products from the same brand.
Why Is My Robot Vacuum Map Distorted, Rotated, or Incomplete?
A distorted map usually means the robot became uncertain about its position while navigating. An incomplete map usually means part of the home was inaccessible or the mapping mission did not finish normally.
The map is rotated or at a strange angle
Check the charging station first. Roborock specifically advises that an angled map can be related to dock placement.
Its map-angle troubleshooting guidance recommends trying a dock location with at least 0.5 meter of clearance on each side and 1.5 meters in front for affected models.
Rooms overlap or appear twice
This can happen after a localization failure. The robot may interpret an area it has already seen as a new space.
- Return the robot to its dock.
- Check whether the dock itself appears twice on the map.
- Confirm nobody carried the robot during the run.
- Restore an earlier map if your app supports it.
- Rebuild the map if restoration does not correct the geometry.
A room is missing
First check whether the door was open throughout the mapping run. Also look for thresholds, rugs, furniture, or clutter that prevented the robot from entering.
A robot cannot map a space it cannot reach. Open the route and run the mapping procedure again from the normal dock location.
The map changed after moving furniture
Small furniture changes are normally easier for a robot to accommodate than a complete room rearrangement. Large environmental changes may cause temporary localization trouble or trigger map updates.
Section Takeaway: Map shape problems often point to localization, while missing areas usually point to access, obstacles, or an unfinished mapping run.
Should I Restore the Map or Remap From Scratch?
Restore the map when the old floor plan was accurate and the new version suddenly became distorted. Remap from scratch when the existing map is consistently wrong or your home’s layout has changed substantially.
Restore the existing map when:
- The map was correct until one recent cleaning mission.
- Rooms suddenly overlap or move.
- The robot shows an incorrect temporary map.
- Your app offers a known-good map backup.
- The dock and room layout have not materially changed.
Ecovacs recommends restoring the saved map first when a map becomes confused, overlapping, or distorted. Its map confusion troubleshooting instructions say that rebuilding with Quick Mapping is the next step when restoration fails.
Create a new map when:
- The robot repeatedly fails to identify its dock or current room.
- The same walls or rooms remain distorted after restoration.
- You permanently moved the dock.
- You remodeled or significantly rearranged the floor.
- The current map contains duplicated spaces that cannot be corrected.
- Manufacturer troubleshooting specifically recommends rebuilding it.
Before deleting anything, check whether your app lets you restore an earlier version. Deleting a map can also remove room names, dividers, schedules, zones, or other saved settings on some platforms.
How to create a cleaner replacement map
- Charge the robot sufficiently for a full mapping mission.
- Place it correctly on the charging dock.
- Clean the navigation sensors.
- Clear loose floor clutter and cables.
- Open every door you want mapped.
- Provide normal lighting for camera-dependent models.
- Start the mapping or whole-home mode from the app.
- Do not carry or manually relocate the robot.
- Let the robot complete the mission and return normally.
- Edit room names and boundaries only after the base map looks correct.
Section Takeaway: Restore first when a good map already exists. Delete and remap when the underlying floor plan remains unreliable after normal troubleshooting.
How Can I Prevent Robot Vacuum Mapping Problems?

Once you have a good map, consistency matters more than constant adjustment. Keep the robot’s environment predictable enough that it can repeatedly recognize its location.
- Keep the dock fixed: Avoid casually moving the charging station between rooms.
- Maintain open space: Do not crowd the dock with baskets, chairs, boxes, or loose cables.
- Clean sensors routinely: Include navigation sensors when you maintain brushes, wheels, and filters.
- Pick up temporary clutter: Cables and small objects can alter routes or stop a mission.
- Avoid carrying the robot: Let it navigate back whenever practical.
- Use stable boundaries: Set virtual walls and keep-out zones only after the main map is reliable.
- Update software carefully: Keep the app and robot firmware current according to the manufacturer’s instructions.
Dock setup deserves special attention. Consumer Reports’ robot vacuum setup guidance also emphasizes an open docking area, cable management, and keeping the base in a consistent location for mapping-capable robots.
I also avoid judging a new map halfway through its first run. Let the robot finish before deciding that a strange-looking temporary route is permanent.
After the map is saved, test it with a simple room-specific cleaning command. If the robot leaves the dock, reaches the correct room, cleans, and returns normally, localization is probably working as intended.
Section Takeaway: A fixed dock, clean sensors, uncluttered routes, and uninterrupted cleaning missions prevent many repeat mapping failures.
Frequently Asked Questions
Why does my robot vacuum keep changing its map?
Your robot may update its map when it detects environmental changes or struggles to match its current position with the saved floor plan. Moving the dock, carrying the robot, changing furniture, closed doors, or localization errors can all contribute.
Why did my robot vacuum suddenly lose its map?
A saved map can disappear when the robot fails to re-localize, the dock moves, the robot is manually relocated, or map data becomes corrupted. Check your app for a restore-map feature before deleting the existing map.
Should I move my robot vacuum while it is mapping?
Avoid moving it unless your manufacturer specifically instructs you to do so. Picking up the robot can interrupt its estimate of position and may force it to re-localize when placed back down.
Does a robot vacuum need Wi-Fi to map correctly?
It depends on the model. Navigation itself may occur on the robot, while app-based map saving, editing, cloud features, or software updates can require a network connection. Check the manual for your exact vacuum.
Can darkness affect robot vacuum mapping?
Yes, on some camera-based navigation systems. Cameras need enough visual information to identify useful landmarks, while LiDAR-based robots generally depend less on normal room lighting for geometric mapping.
Why is my robot vacuum missing one room?
Check whether the room’s door was open and whether a threshold, rug, obstacle, or virtual boundary blocked access. For a fresh map, open the route before starting and allow the robot to enter the room naturally.
How many times should I remap my home?
You should not need to remap routinely when the saved floor plan remains accurate. Rebuild it when restoration and basic troubleshooting fail, or after significant permanent changes to the dock position or household layout.
The simplest rule is to fix the environment before rebuilding the map. Clean the sensors, return the dock to a stable open location, clear access routes, and complete one uninterrupted whole-home run.
If the floor plan is still obviously wrong after that, restore a known-good map or create a fresh one using your manufacturer’s instructions.
