
How Do I Repair a Vacuum Hose Leak?

Quick Answer
To repair a vacuum hose leak, unplug the vacuum first, locate the damaged spot, clean and dry the hose, then seal a small puncture or short split with self-fusing silicone repair tape. Damage beside a removable hose cuff may sometimes be fixed by trimming the damaged end and reinstalling the cuff, while badly crushed, extensively split, or electrically wired hoses are better replaced. If poor pickup remains afterward, check the rest of the vacuum because vacuum performance depends on more than the hose alone.
Quick repair steps
- Disconnect power: Unplug a corded vacuum or remove the battery before inspecting the hose.
- Find the leak: Bend and inspect the hose for holes, splits, loose cuffs, or damaged seals.
- Clean the area: Remove dust and grease, then let the hose dry completely.
- Seal small damage: Wrap self-fusing silicone tape tightly around the leak with overlapping layers.
- Repair the end: If the split sits beside a removable cuff, trim only the damaged section and refit the cuff when the design allows it.
- Test suction: Reassemble the vacuum and check whether airflow and pickup have returned.
Replace instead of repair when
- The hose contains damaged electrical conductors, has several large splits, is permanently crushed, or will not stay attached to its connector.
A leaking vacuum hose can turn a normally strong cleaner into one that barely picks up crumbs. I also find hose leaks frustrating because they often feel like a motor problem at first.
The good news is that many ordinary, non-powered hose leaks are simple to diagnose. This 2026 guide explains how I approach the repair, which fixes last longest, and when replacing the hose makes more sense.
In This Guide
How can I tell whether my vacuum hose is leaking?
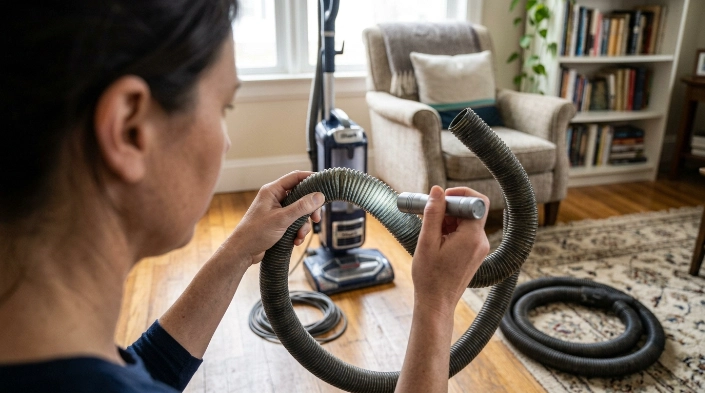
A vacuum hose leak is an unwanted opening in the hose, cuff, connector, or seal that allows outside air into the vacuum’s airflow path. That lost airflow can reduce pickup at the cleaning tool even when the motor still sounds normal.
I start by ruling out the simpler problem: a blockage. A clogged hose and a leaking hose can both make a vacuum feel weak.
Look for the common warning signs
- Weak suction at the hose end: Pickup suddenly feels poorer than normal.
- Hissing or whistling: Air may be entering through a crack or loose connection.
- Visible cracking: Corrugated hose often separates along a ridge or near a heavily flexed end.
- Loose hose cuff: The plastic connector may wobble or no longer seal firmly.
- Suction changes while bending: Moving the hose may open and close a hidden split.
Remove the hose according to the vacuum’s instructions and inspect it under bright light. Flex one short section at a time because small cracks often appear only when the hose bends.
Check for a blockage before repairing anything
Look through the hose where possible. A flashlight at one end can help reveal compacted hair, paper, or larger debris.
Use only a smooth, blunt tool if you need to dislodge a clog. A sharp screwdriver, metal rod, or knife can puncture the hose and create the very leak you’re trying to avoid.
House dust can contain allergens such as dust-mite material and other particles. The National Institute of Environmental Health Sciences’ allergen information offers useful background for households dealing with allergy triggers.
Section Takeaway: A weak vacuum does not automatically mean the motor is failing. Check the hose for both clogs and air leaks before buying parts.
What do I need to repair a vacuum hose?
For a basic non-powered hose, the tool list is short. The exact repair material depends on whether you’re dealing with a pinhole, split, or loose connector.
- Clean microfiber cloth
- Mild soap and water for exterior cleaning
- Self-fusing silicone repair tape
- Scissors or a utility cutter for tape
- Flashlight
- Replacement O-ring or gasket when the original is damaged
- Manufacturer-approved replacement hose if repair is impractical
Why I prefer self-fusing silicone tape
Self-fusing tape bonds to itself instead of depending entirely on sticky adhesive. That makes it useful on flexible corrugated hose where ordinary adhesive tape can wrinkle or lift.
Follow the tape manufacturer’s stretching and overlap instructions. I usually extend the repair beyond both ends of the damaged area rather than covering only the visible hole.
Is duct tape good enough?
Duct tape can work as a temporary emergency seal. However, its adhesive can collect dust, loosen with repeated flexing, and leave sticky residue.
Electrical tape has similar limitations on a hose that constantly bends. I would use either only as a short-term measure while arranging a stronger repair or replacement.
The U.S. Environmental Protection Agency notes that controlling indoor pollution sources and maintaining good ventilation are important parts of protecting indoor air quality. Keeping a vacuum’s airflow path intact also helps the machine collect debris as designed instead of leaking dusty air around a damaged connection.
What is the best way to repair a vacuum hose leak?
The best method depends on the type and location of the damage. A tiny puncture needs a different approach from a hose that has torn away from its plastic cuff.
| Damage | Practical fix | Expected role | Replace instead when |
|---|---|---|---|
| Small pinhole | Self-fusing silicone tape | Good DIY repair | Hose material is brittle or cracking elsewhere |
| Short flexible split | Overlapping silicone tape | Useful if the split stays stable | Split keeps growing under normal bending |
| Tear beside removable cuff | Trim damaged end and reinstall cuff | Potentially durable | Cuff is glued, crimped, wired, or non-removable |
| Leaking gasket or O-ring | Replace exact seal | Preferred repair | Connector itself is cracked |
| Large split or crushed hose | Replace hose | Most reliable option | Repair would significantly restrict airflow |
How to tape a small hole or split
- Disconnect the vacuum. Unplug it or remove the battery.
- Clean the hose exterior. Remove dust, grease, and old adhesive.
- Let it dry. Repair tape holds best on a clean, dry surface.
- Position the hose naturally. Don’t stretch a corrugated hose flat while applying the repair.
- Begin before the damage. Start wrapping on intact hose material.
- Overlap each wrap. Follow the repair tape manufacturer’s instructions for tension and overlap.
- Continue past the leak. Finish on intact material beyond the damaged section.
- Press the wrap together. Give self-fusing tape time to bond according to its instructions.
A practical repair should remain flexible without creating a bulky obstruction. If you have to build a thick rigid band around a repeatedly flexing section, replacement may be more dependable.
Should I put glue inside the vacuum hose?
I normally avoid adding glue inside the airflow path. Excess adhesive can create a ridge that catches hair, string, and dust.
Some glues also become brittle on flexible plastics. If the manufacturer specifies an adhesive for a particular cuff or hose, follow that repair method instead.
Section Takeaway: Small isolated leaks are good DIY candidates, but the repair should preserve flexibility and the hose’s internal opening. A patch that creates another airflow problem is not a successful fix.
How do I repair a leak near the hose connector?
Leaks near the plastic cuff are common because that area experiences repeated twisting and bending. It can also offer the cleanest permanent repair when the cuff is designed to come off.
Inspect the cuff before cutting anything
Look closely at how the hose enters the connector. Some cuffs screw onto the hose’s spiral ribs, while others use clips, glue, crimps, or molded fittings.
Do not force a connector simply because it looks threaded. Search the vacuum’s manual or parts diagram when the attachment method is unclear.
Trim-and-refit method
If the cuff is removable and the split sits immediately beside it, you may be able to remove the cuff and cut away only the damaged end. The shortened hose can then be reattached to the cuff.
- Mark the smallest amount of damaged hose that must be removed.
- Remove the cuff using the method specified for that design.
- Make a clean, square cut through the damaged hose end.
- Check that the remaining hose is still long enough for normal use.
- Reinstall the cuff fully and confirm that it locks or threads securely.
Don’t use this method repeatedly. Every cut shortens the hose and can eventually make normal vacuuming awkward.
What if the leak is in the seal?
A hose connection may leak even when the hose itself looks perfect. Inspect any gasket or O-ring for flattening, cracking, twisting, or missing sections.
Replace damaged seals with the correct part for your model. Improvised sealants can make the connector difficult to remove and may interfere with its locking mechanism.
Expert Alert: Some powered vacuum hoses contain electrical conductors for a motorized floor head or controls. If wiring, terminals, or electrical insulation are damaged, stop using the hose and replace it or have the appliance serviced by a qualified technician.
How do I know whether the repair worked?
Once the hose is reinstalled, run the vacuum normally and compare its pickup with how it performed before the repair. Listen for the hiss that originally helped you find the leak.
Move the repaired section gently while the vacuum runs. A repair that opens whenever the hose bends is not secure enough for regular use.
Check the complete airflow path
If suction is still weak, don’t keep adding tape. The original hose leak may have been only one problem.
- Empty the dust bin or replace a full bag.
- Clean or replace filters according to the manufacturer’s instructions.
- Check the floor head and intake for packed hair or debris.
- Inspect hose connections at both ends.
- Look for additional cracks along the full hose length.
- Confirm that removable parts are seated and latched correctly.
Consumer Reports’ vacuum cleaner buying guide also highlights how vacuum designs and cleaning performance differ across upright, canister, stick, handheld, and robotic models. That matters because airflow paths and user-serviceable parts are not identical between designs.
Pay attention to dust escaping around the repair
A repair should keep the airflow path closed. If you can feel air escaping around the patch or connector, redo the seal or replace the damaged component.
For allergy-sensitive households, reducing dust disturbance during cleaning can matter. The Asthma and Allergy Foundation of America provides guidance about cleaning and indoor allergy triggers.
Section Takeaway: Judge the repair by airflow, normal flexibility, and whether it stays sealed during movement. Persistent weak suction means you should inspect the rest of the vacuum instead of assuming the patch failed.
When should I replace the vacuum hose instead?
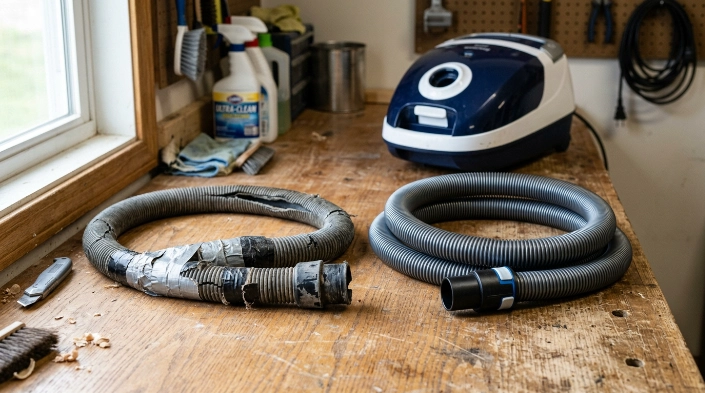
A repair makes sense when damage is small and isolated. Replacement makes more sense when the hose itself has reached the end of its useful life.
Replace the hose if you see these problems
- Several cracks: Multiple failures usually mean the hose material is aging.
- A long expanding split: Tape may not handle repeated bending reliably.
- Permanent crushing: A flattened section can restrict the airflow path.
- Broken connector: A cracked cuff or locking tab may prevent a dependable seal.
- Exposed electrical parts: Powered hoses need the correct replacement or professional service.
- Repeated failed repairs: A hose covered with old patches is usually telling you something.
I also replace a hose when a patch changes how it bends so much that normal use becomes annoying. A cheap repair stops being useful when you’re fighting the hose every time you clean.
OEM versus compatible replacement hoses
An original equipment manufacturer, or OEM, hose is made for the specific vacuum model. Compatible aftermarket hoses can cost less, but fit and features must match.
Check the model number rather than relying only on the vacuum’s brand name. Similar-looking models can use different cuff diameters, locking tabs, electrical contacts, or tool connections.
If your hose powers a brushroll, handle controls, or lighting, confirm electrical compatibility as well as physical fit. Never assume two connectors are interchangeable because they look similar.
Section Takeaway: Replace a hose when damage is widespread, structural, or electrical. A new correct-fit hose is usually better than repeatedly patching material that continues to fail.
Vacuum hose repair FAQ
Can I use duct tape to fix a vacuum hose?
Yes, duct tape can temporarily seal a small vacuum hose leak. For a longer-lasting flexible patch, I prefer self-fusing silicone repair tape because ordinary adhesive tape can loosen, collect dust, and leave residue as the hose bends.
Can a vacuum hose leak cause low suction?
Yes. A hole, split, or poorly sealed connector lets air enter before it reaches the intended cleaning opening, which can reduce useful airflow at the tool or floor head.
How do I find a tiny hole in a vacuum hose?
Disconnect the hose and inspect it under bright light while gently flexing each section. Look for cracks along corrugations, listen for hissing during normal operation, and pay special attention to areas near the hose cuffs.
Can I repair a vacuum hose with super glue?
I generally avoid super glue on flexible hose because a rigid repair may crack again when the hose bends. Glue inside the hose can also create a rough spot that catches debris.
Can I shorten a vacuum hose to remove a damaged end?
Sometimes. If the damage is directly beside a removable cuff and the design allows the cuff to be reinstalled, trimming a small damaged section can work well.
Why is my vacuum still losing suction after I repaired the hose?
Check for another blockage, a full bag or bin, dirty filters, clogged floor-head passages, loose connections, or another hidden hose crack. The first leak you find is not always the only airflow problem.
Is it safe to repair an electric vacuum hose myself?
Do not patch exposed wires or damaged electrical insulation as though they were an ordinary air leak. Replace the powered hose with the correct part or have the vacuum inspected by a qualified appliance technician.
The simplest rule is this: patch a small, isolated air leak and replace a hose with major structural or electrical damage. Start with a careful inspection before buying anything, because a clog or loose seal may be easier to fix than the hose itself.
After the repair, keep an eye on the patched area during your next few cleaning sessions. If it starts separating or suction drops again, replacing the hose is usually the cleaner long-term solution.
