
How to Vacuum Car Seats: A Complete Step-by-Step Guide

Quick Answer
To vacuum car seats, remove loose items first, fit an upholstery or crevice attachment, and vacuum from the top of each seat downward. Work slowly across seams, seat folds, and the gap between the seatback and cushion. A suitable handheld or canister model from the main vacuum cleaner categories can handle this job well when paired with the right attachment.
Quick steps
- Empty the seats: Remove bags, child-seat accessories, covers, and loose objects.
- Loosen debris: Use a soft brush to free hair, sand, and crumbs trapped in fabric.
- Vacuum the surface: Make slow, overlapping passes across the seatback and cushion.
- Clean the seams: Switch to a crevice tool for folds, stitching, rails, and narrow gaps.
- Check hidden areas: Move the seat when safe and vacuum underneath it.
- Inspect again: Brush stubborn areas and repeat your vacuum passes where needed.
I recommend treating car-seat vacuuming as a separate job from vacuuming the floor. Seats collect crumbs, body oils, pet hair, dust, sand, and other debris in places a quick floor cleanup misses.
The good news is that you don’t need complicated equipment. The right attachment and a careful vacuuming pattern make the biggest difference.
Car-seat vacuuming is the process of using controlled suction and suitable attachments to remove loose dry debris from upholstery, seams, folds, and surrounding seat areas.
In This Guide
- What Do You Need to Vacuum Car Seats?
- How Do You Vacuum Fabric Car Seats Step by Step?
- How Do You Vacuum Leather and Vinyl Car Seats?
- Which Vacuum Attachment Works Best for Car Seats?
- How Do You Handle Pet Hair, Sand, Stains, and Wet Seats?
- How Often Should You Vacuum Car Seats?
- Frequently Asked Questions
What Do You Need to Vacuum Car Seats?
You need a vacuum with a hose or compact handheld body, plus attachments that can reach seams and narrow gaps. Strong suction helps, but attachment design and technique matter just as much.
I prefer to gather everything before starting. That prevents constant trips back to the garage or house.
Basic tools for the job
- Vacuum cleaner: A handheld, cordless, canister, or suitable shop vacuum.
- Upholstery tool: Useful for broad fabric surfaces and seatbacks.
- Crevice tool: Essential for stitching, folds, seat rails, and narrow gaps.
- Soft detailing brush: Loosens dust without aggressively scraping upholstery.
- Pet-hair brush: Helpful when hair clings tightly to fabric fibers.
- Microfiber cloth: Useful for wiping hard trim after vacuuming.
If allergies or fine dust are concerns, a vacuum with effective filtration may help reduce the amount of collected dust that escapes back into the surrounding air. The Asthma & Allergy Friendly Certification Program includes performance standards for certified vacuum cleaners.
Prepare the car first
Park somewhere with enough room to open the doors fully. Good lighting makes hidden crumbs and hair much easier to see.
- Remove trash and larger loose objects by hand.
- Take out removable seat covers or mats if appropriate.
- Check pockets and cup holders near the seats.
- Slide the front seats backward to expose the front rails.
- Slide them forward later to reach the rear areas.
Don’t force powered seats past their normal travel. Keep the ignition and electrical system in the condition recommended by your vehicle manufacturer when working around powered seating.
How Do You Vacuum Fabric Car Seats Step by Step?
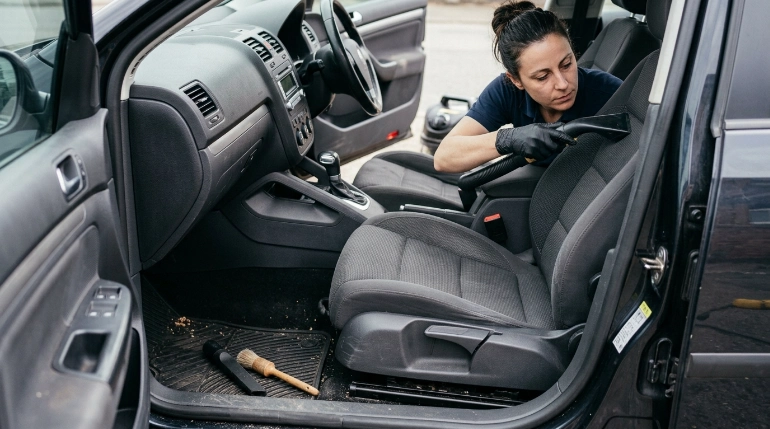
Fabric seats respond best to slow vacuum passes followed by detailed work along seams and folds. Start high on the seatback and work downward so loosened debris doesn’t fall onto an area you’ve already finished.
1. Start with the seatback
Fit the upholstery attachment and begin at the headrest area. Pull the tool slowly across the fabric instead of sweeping it quickly.
Use overlapping passes. Then change direction and repeat if the fabric still looks dusty.
2. Vacuum the seat cushion
Move from the rear of the cushion toward the front edge. Pay extra attention to the area where passengers normally sit.
Pressing the tool lightly against the fabric can improve contact. Avoid crushing delicate upholstery with excessive force.
3. Open the seams and folds
Crumbs often disappear into the joint between the cushion and seatback. This is where the crevice attachment earns its place.
- Use your fingers to open the fold slightly.
- Guide the crevice tool through the exposed gap.
- Move slowly from one side to the other.
- Repeat along decorative stitching and cushion edges.
Don’t aggressively push a rigid nozzle into stitched seams. Some modern seatbacks may contain airbag components or designated deployment seams.
4. Loosen stubborn dry debris
Fabric can hold pet hair, fibers, and fine sand even when suction is strong. A soft brush helps lift this material toward the surface.
Brush a small area, then vacuum it immediately. Working in sections keeps loosened material from spreading around the cabin.
5. Vacuum around and under the seat
Finish the visible seat before moving to rails and surrounding gaps. Use the crevice nozzle around mounting points and beneath the seat where access allows.
Be cautious around wiring and connectors under powered or heated seats. Don’t disconnect electrical components just to vacuum around them.
Section Takeaway: Work from top to bottom, vacuum slowly, and treat seams as a separate cleaning step. The crevice tool usually removes the debris that broad surface vacuuming leaves behind.
How Do You Vacuum Leather and Vinyl Car Seats?
Vacuum leather and vinyl seats with a soft attachment and light pressure. The goal is to lift debris without dragging hard plastic edges across the surface.
Leather needs a slightly different technique because loose grit can scratch the finish when it’s rubbed across the seat.
Remove gritty debris first
Look for sand, dried mud, or hard crumbs before wiping the seat. Vacuum those particles instead of rubbing them into the material.
- Use a soft brush attachment on broad surfaces.
- Keep hard nozzle edges away from visible leather.
- Use low or moderate suction if your vacuum offers adjustment.
- Open seams gently rather than forcing the nozzle into them.
Don’t forget perforated leather
Perforated seats contain many small openings that can trap fine crumbs and dust. Vacuum across them gently with the upholstery attachment.
A clean, soft detailing brush can loosen debris around the perforations. Follow immediately with the vacuum.
Vacuum before using leather cleaner
Complete the dry-debris stage before applying any leather cleaner or conditioner. This reduces the chance of grinding loose grit against the seat while wiping.
Always follow the vehicle or upholstery manufacturer’s cleaning recommendations. Leather finishes vary, so one chemical product isn’t suitable for every interior.
Which Vacuum Attachment Works Best for Car Seats?
An upholstery nozzle is best for the main seat surface, while a crevice tool is better for seams and gaps. A soft brush works well for delicate areas and dust that needs loosening first.
No single attachment handles the entire seat efficiently. Switching tools usually produces a more complete result.
| Attachment | Best Use | Fabric Seats | Leather/Vinyl | Main Caution |
|---|---|---|---|---|
| Upholstery nozzle | Large seat surfaces | Excellent | Good | Keep nozzle clean |
| Crevice tool | Seams, rails, narrow gaps | Excellent | Good | Don’t scrape surfaces |
| Soft brush | Dust and delicate trim | Good | Excellent | Use clean bristles |
| Pet-hair tool | Embedded animal hair | Excellent | Usually unnecessary | Check material compatibility |
Vacuum type matters less if the machine provides usable suction and suitable attachments. Handheld units are convenient, while canister and shop-style vacuums can offer longer hoses and easier access.
For broader vacuum-selection information, Consumer Reports’ vacuum guidance covers handheld, stick, canister, upright, and other vacuum categories.
How Do You Handle Pet Hair, Sand, Stains, and Wet Seats?
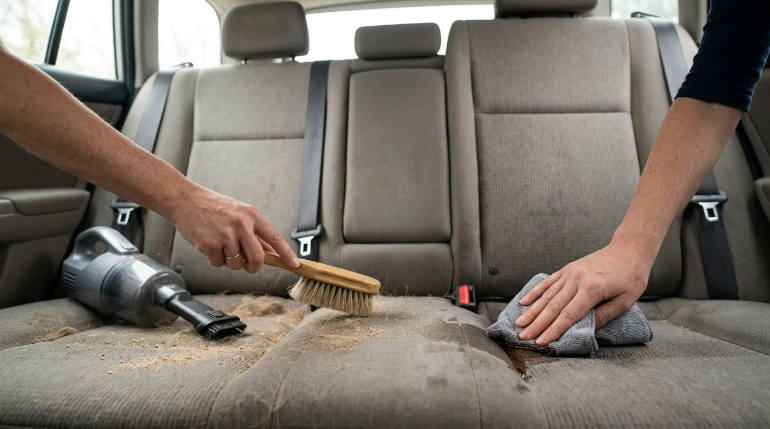
Different car-seat messes require different methods. Vacuuming works best on dry, loose debris, so identify what you’re dealing with before turning on the machine.
Pet hair
Pet hair tends to hook into fabric fibers instead of sitting loosely on top. Vacuuming alone may therefore leave a visible layer behind.
- Vacuum loose hair first.
- Agitate the remaining hair with a pet-hair or upholstery brush.
- Gather the loosened hair into a small area.
- Vacuum the area again.
- Finish the seams with a crevice tool.
If airborne allergens are a concern, filtration deserves attention. AAFA notes that suitable filtered vacuums can help limit redistribution of captured particles during cleaning.
Sand and grit
Don’t grind sand deeper into upholstery by scrubbing hard. Vacuum the loose surface layer before using a brush.
After the first pass, lightly agitate the fabric and vacuum again. Change direction to reach particles sitting between fibers.
Food crumbs
Remove large pieces by hand before vacuuming. Then inspect the seatback joint, buckle openings, rails, and edges.
A narrow crevice tool is usually more useful here than extra suction. Crumbs often survive because the nozzle simply never reaches them.
Stains
A stain is different from loose debris. Vacuum the surrounding material first, then use a cleaning method approved for your upholstery.
General cleaning guidance from the CDC distinguishes cleaning from disinfecting. For a normal dirty car seat, don’t assume that stronger disinfecting chemicals are automatically better for the material.
Wet seats and liquid spills
Don’t use an ordinary dry-only vacuum on liquid. Use equipment specifically designed for wet pickup when liquid extraction is appropriate.
Dry the upholstery thoroughly after a significant spill. Leaving padding damp can create odor and moisture problems below the visible surface.
Mold or persistent musty odor
Visible mold or a persistent musty smell after water intrusion is no longer a simple vacuuming job. Vacuuming the visible surface doesn’t correct moisture trapped deep inside the seat.
The CDC’s mold guidance notes that soaked upholstery that can’t be dried promptly may need to be removed or replaced.
Expert Alert: If a seat has widespread mold, repeated water intrusion, deep contamination, or a persistent moldy odor, consider professional automotive upholstery or remediation help instead of relying on DIY vacuuming alone.
How Often Should You Vacuum Car Seats?
For most cars, vacuuming the seats every few weeks is a practical starting point. Cars carrying children, pets, outdoor gear, or frequent passengers may need attention much sooner.
Don’t wait for the entire interior to look dirty. Small, frequent cleanups prevent debris from becoming packed into seams and fibers.
Use the condition of the car as your schedule
- Weekly or as needed: Heavy pet use, frequent food crumbs, beach sand, or muddy outdoor activity.
- Every few weeks: Regular commuting and moderate passenger use.
- Immediately: Broken food, tracked-in sand, dry soil, or another mess likely to become embedded.
- Before deep cleaning: Always vacuum before wet extraction, shampooing, or wiping leather.
Dust control can matter beyond appearance, especially for people sensitive to indoor allergens. The EPA’s indoor-air-quality resources describe source control, ventilation, and filtration as important parts of reducing exposure to indoor pollutants.
I recommend a quick inspection whenever you vacuum the vehicle floor. If crumbs are already collecting along a seat seam, spending two extra minutes on that seat is easier than tackling a heavily embedded mess later.
Frequently Asked Questions
Can I vacuum car seats with a regular household vacuum?
Yes. A household vacuum can work well if it has a hose and suitable upholstery or crevice attachments. Make sure the machine is intended for the type of debris you’re collecting and never use a dry-only vacuum for liquid spills.
Can I use a shop vacuum on car seats?
Yes, if you use an appropriate clean attachment and control the nozzle carefully. Shop vacuums are useful around deep gaps and rails, but hard nozzles can scratch leather, vinyl, plastic trim, or painted surfaces.
Should I brush car seats before or after vacuuming?
Vacuum loose debris first, then brush material that’s stuck in the fabric. Vacuum again after brushing. This two-stage method keeps you from rubbing loose grit deeper into the upholstery.
How do I vacuum between the car seat and center console?
Use a long crevice attachment and move the vehicle seat forward or backward to improve access. Don’t force the nozzle against wiring, seat controls, buckle mechanisms, or other components hidden in the gap.
Can a vacuum remove stains from car seats?
A dry vacuum removes loose debris, not stains absorbed into upholstery. Vacuum before spot cleaning because dirt and grit can interfere with cleaning and may get rubbed deeper into the material.
Can I vacuum a wet car seat?
Only use a vacuum specifically rated for wet pickup. An ordinary dry vacuum isn’t designed to collect liquid. After extraction, the seat and underlying padding still need to dry thoroughly.
What if I mean a child’s car safety seat?
Follow the child-restraint manufacturer’s cleaning instructions. Vacuuming loose crumbs is commonly practical, but washing, soaking, using chemicals, or cleaning harness components incorrectly can conflict with the manufacturer’s safety instructions.
Final Takeaway
The best way to vacuum car seats is to work slowly from the seatback downward, use an upholstery attachment on broad surfaces, and switch to a crevice tool for seams and gaps.
Brush stubborn pet hair and sand only after removing the loose layer. Keep liquids away from dry-only vacuums, and treat persistent dampness or mold as a separate problem instead of simply vacuuming over it.
Once you make the seats part of your regular interior-cleaning routine, the job becomes much faster. A few careful minutes can keep crumbs, grit, dust, and hair from becoming deeply embedded.
