
How Do I Fix Low Vacuum Suction?

Quick Answer
To fix low vacuum suction, turn the vacuum off and unplug it first. Empty the bin or replace the bag, clean or replace dirty filters as your manual allows, clear the hose and air passages, check the floor head and brush roll, then make sure every hose, bin, and cover is sealed correctly.
Try these checks in order
- Empty the vacuum: A packed dust bin or full bag can restrict airflow.
- Check the filters: Dirty filters often cause a noticeable drop in airflow.
- Clear blockages: Inspect the hose, wand, inlet, and floor head for trapped debris.
- Inspect the brush roll: Hair and string can prevent the cleaner head from working properly.
- Check every seal: A loose bin, hose, filter cover, or cracked hose can leak air.
- Test suction again: Strong suction at the machine but weak suction farther downstream usually points to a blockage or leak.
Important
- Never wash a filter unless your vacuum’s instructions say it is washable. Let washable filters dry completely before reinstalling them.
Low vacuum suction usually looks like a serious motor problem, but I’ve found that the cause is often much simpler. A packed filter, hidden hose clog, tangled brush roll, or badly seated dust bin can make an otherwise healthy vacuum feel weak.
I use the same troubleshooting sequence whenever one of my vacuums starts leaving crumbs, hair, or fine dust behind. This guide shows you how to narrow down the problem without replacing parts at random.
In This Guide
- Why does a vacuum cleaner lose suction?
- How do I fix low vacuum suction step by step?
- How can I find where the suction is being lost?
- Can filters, bags, and dust bins reduce suction?
- Can the brush roll cause weak cleaning performance?
- When does low suction need professional repair?
- Frequently asked questions
Why Does a Vacuum Cleaner Lose Suction?
A vacuum loses suction when something reduces airflow between the cleaner head and the motor, or when outside air enters through a leak. The most common causes are clogs, dirty filters, full bins or bags, damaged hoses, and poorly seated parts.
Vacuum suction is the pressure difference that pulls air, dust, hair, and debris through the vacuum’s airflow path. Good pickup also depends on airflow, cleaner-head design, brush action, and proper seals.
The most common causes of weak suction
- Full dust bin: Debris can obstruct cyclone openings, screens, or airflow passages before the bin looks completely packed.
- Full vacuum bag: Air must pass through the bag material, so an overloaded bag can restrict flow.
- Dirty pre-motor filter: Dust buildup makes it harder for air to reach the motor.
- Dirty exhaust filter: A severely restricted post-motor filter can interfere with normal airflow on some designs.
- Blocked hose: Socks, paper, hair, pet fur, and compacted dust can lodge inside bends.
- Blocked wand: Narrow rigid tubes are common places for larger objects to become trapped.
- Clogged floor head: Debris can collect behind the brush roll or inside the lower airway.
- Air leak: A split hose or loose dust-bin seal lets the vacuum pull air from the wrong place.
- Incorrect setting: An open suction-control vent or unsuitable floor-height setting can make pickup seem weak.
In my experience, filters and hidden clogs deserve attention before anything electrical. I once had a stick vacuum that sounded completely normal but could barely lift crumbs from a rug.
The visible bin was nearly empty. The problem was a dense plug of pet hair sitting where the wand entered the floor head.
That is why sound alone cannot tell you whether the motor is producing useful suction at the cleaning head.
Section Takeaway: Most low-suction problems are airflow problems. Check restrictions, seals, and removable parts before assuming the motor has failed.
How Do I Fix Low Vacuum Suction Step by Step?

Start with the easiest airflow restrictions and work toward the motor. This sequence avoids unnecessary disassembly and works for many upright, canister, stick, and bagless vacuums.
1. Turn off and unplug the vacuum
Disconnect corded vacuums from the outlet before removing the brush roll, opening air passages, or reaching into the machine. For a cordless model, switch it off and follow its manual before servicing removable parts.
2. Empty the dust bin or check the bag
Remove accumulated debris rather than waiting until the container is packed solid. Also inspect the screen, cyclone opening, and inlet around the bin for stuck hair or dust.
On a bagged vacuum, install a fresh bag when the existing one is full or airflow appears restricted. Make sure the replacement bag seats correctly.
3. Inspect the filters
Remove the accessible filters and check them under good light. A filter can look acceptable on one side while the pleats or foam are packed with fine dust on the other.
- Wash a filter only when the manufacturer identifies it as washable.
- Use the cleaning method specified for your model.
- Let a washed filter dry completely before reinstalling it.
- Replace non-washable filters when they are dirty or due for replacement.
Do not operate a vacuum without required filters unless its manufacturer specifically instructs you to perform a short diagnostic test that way.
4. Check the hose and wand
Disconnect each removable section. Look through rigid wands and inspect both ends of flexible hoses.
A flashlight makes this much easier. Pay special attention to elbows, connection points, and sections where the hose changes diameter.
5. Inspect the cleaner head
Turn the cleaner head over and remove wrapped hair, thread, fibers, and string from the brush roll. Then inspect the airway behind the brush.
Some vacuums have a short lower hose that bends sharply when the machine reclines. That small section can hide surprisingly dense clogs.
6. Reassemble everything carefully
A vacuum may still have weak suction after cleaning if the dust bin, filter housing, hose cuff, or access cover is not fully locked. Check every latch and connection you disturbed.
7. Test the vacuum
Test it on a small area you know well. Listen for abnormal whistling, pulsing, or a change in motor pitch.
If airflow returns, you have probably cleared the restriction. If it remains weak, use the isolation test in the next section.
Section Takeaway: Empty, clean, clear, reseat, then test. That simple sequence fixes many low-suction complaints without replacing the vacuum.
How Can I Find Where the Suction Is Being Lost?
The fastest diagnostic method is to test suction at different points in the airflow path. A sudden change between two points tells you which section deserves inspection.
| What you find | Likely area to check | Next action |
|---|---|---|
| Strong suction at the vacuum body but weak at the hose end | Hose | Inspect for a clog, crack, loose cuff, or damaged seal. |
| Strong suction at the hose but weak after attaching the wand | Wand or attachment | Remove the attachment and inspect its complete airway. |
| Strong hose suction but poor floor pickup | Cleaner head | Check the lower airway, brush roll, belt, and floor settings. |
| Weak suction immediately at the machine | Bin, bag, filters, internal airway, seals, or motor | Recheck normal maintenance items, then consult model-specific support. |
| Suction improves after removing an attachment | Attachment | Clear the attachment or replace it if damaged. |
This technique is more useful than randomly cleaning every component. You are dividing the air path into smaller sections until you locate the pressure loss.
Never reach into a running vacuum or expose moving parts for a suction test. Use only safe test points described in your model’s instructions.
Listen for air leaks
A high-pitched whistle may indicate air entering through a gap, loose connection, damaged gasket, or split hose. Carefully inspect flexible hose sections while the machine is switched off.
Small cracks often appear near hose cuffs because those areas bend repeatedly. Replacement is usually more reliable than trying to permanently seal a badly damaged flexible hose.
Check suction-control vents
Some canister vacuums and hose handles have a sliding vent that deliberately reduces suction. Make sure it has not been left open accidentally.
Models with electronic power controls should also be checked for a low-power or eco setting.
Section Takeaway: Test the airflow in sections. Strong suction before one component and weak suction after it points directly toward the problem area.
Can Filters, Bags, and Dust Bins Reduce Suction?
Yes. Anything that restricts air before or after the motor can affect vacuum performance, and dirty filters are among the first things I check.
Do not assume every filter is washable
Vacuum filters vary widely. Some foam filters can be rinsed, while pleated paper-like filters may require dry cleaning or replacement.
Washing the wrong filter can damage its media. Reinstalling any washable filter while damp can also create problems.
Check more than the fill line
Bagless vacuums often have screens, shrouds, cyclone inlets, and narrow channels around the dirt container. Fine dust and hair can restrict these areas before the bin reaches its maximum line.
I usually empty the bin first and inspect the places where air enters and leaves it. That takes less than a minute and often reveals the real restriction.
A poorly seated bin can imitate a clog
After cleaning, reinstall the dirt container until it fully clicks or locks into place. Check any rubber seals for debris that could prevent an airtight connection.
The same applies to bag doors and filter covers. A tiny assembly mistake can produce a surprisingly large loss of useful suction.
What does HEPA mean?
A HEPA filter is a high-efficiency particulate air filter designed for high particle-capture performance. However, putting a filter labeled HEPA into a vacuum does not automatically mean the entire machine has a fully sealed HEPA system.
For household dust control, the filtration system and the vacuum’s seals both matter. Dust can also become airborne simply because cleaning disturbs settled material.
If someone in the home has asthma or significant allergies, reducing dust exposure during cleaning deserves extra attention. A well-maintained vacuum and sensible cleaning routine can help limit unnecessary dust recirculation.
Section Takeaway: Filter maintenance is part of airflow maintenance. Follow your model’s instructions because washable and non-washable filters require different care.
Can the Brush Roll Cause Weak Cleaning Performance?
Yes, even when suction itself is normal. The brush roll helps loosen hair, fibers, crumbs, and embedded debris so airflow can carry them into the vacuum.
This distinction matters. A vacuum can have decent hose suction and still clean carpet poorly because the floor head is not agitating the surface correctly.
Look for wrapped hair and fibers
Hair tends to wind tightly around the brush roll. String and thread can also work their way toward the end caps.
With the vacuum unplugged or safely powered down, remove the material using the method recommended for your model.
Check the belt on belt-driven models
A stretched, slipping, broken, or displaced belt can stop the brush from turning correctly. Some newer designs use different drive systems, so check your manual before removing covers.
Use the correct floor setting
A cleaner head positioned incorrectly can behave as if it has poor suction. Some upright vacuums need a height adjustment for thicker carpet.
Other models automatically adjust. Stick vacuums may offer separate hard-floor and carpet modes.
Check the floor-head airway
The opening behind the brush roll is often narrower than the main hose. That makes it a common place for compacted hair, paper, and larger debris to lodge.
- Strong hose suction + poor carpet pickup: Inspect the floor head and brush system.
- Brush not spinning: Check for tangled material, a belt problem, or the model’s brush-control setting.
- Vacuum hard to push: Check the height setting and suction-control options before assuming more suction is needed.
- Debris spits back: Inspect the cleaner head for a blockage or brush-roll problem.
A clean brush roll also protects the drive system from unnecessary resistance. I make this check more often in homes with long hair or shedding pets.
When Does Low Suction Need Professional Repair?
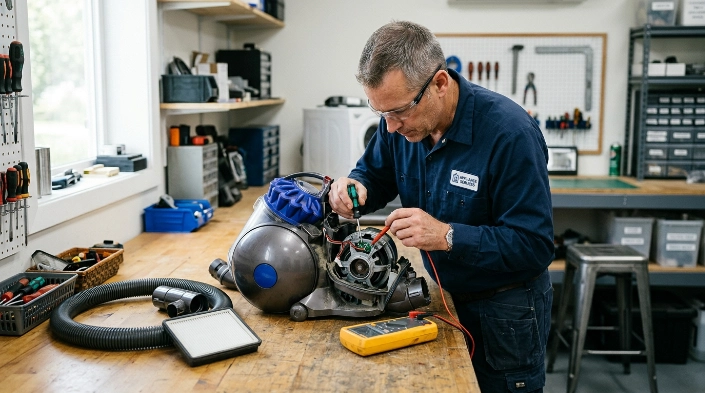
If the bag or bin is clear, filters are maintained, airways are open, and seals are intact but suction remains weak at the machine itself, the problem may require model-specific service. Stop disassembling the vacuum once the repair moves beyond normal user maintenance.
Electrical faults, damaged motors, internal wiring, and sealed motor assemblies are not good DIY experiments. Opening them can create shock, fire, injury, and warranty risks.
Expert Alert: If troubleshooting requires opening the motor housing, repairing wiring, handling damaged battery cells, or bypassing safety switches, use a qualified appliance repair technician or the manufacturer’s service channel.
Signs it is time to stop troubleshooting
- The vacuum repeatedly overheats or shuts itself off after obvious blockages are removed.
- You smell burning, melting plastic, or an electrical odor.
- You see sparks or damaged wiring.
- The motor makes grinding, screeching, or other new mechanical noises.
- Suction remains extremely weak directly at the machine after routine maintenance.
- A cordless vacuum battery becomes swollen, unusually hot, or physically damaged.
Do not keep running a machine that smells burnt or shows electrical damage. Disconnect it and have it inspected.
Repair or replace?
The decision depends on the vacuum’s age, original price, parts availability, warranty status, and the cost of repair. A replaceable hose, filter, belt, or seal is different from a failed motor on an inexpensive older machine.
As of 2026, I would still troubleshoot normal airflow parts before shopping for a replacement. A five-minute clog check can save a perfectly usable vacuum from being discarded.
Section Takeaway: Weak suction does not automatically mean a bad motor. But burning smells, electrical problems, battery damage, or persistent motor-level suction loss deserve professional attention.
Frequently Asked Questions
Why does my vacuum have suction at the hose but not the floor?
A blockage in the floor head or lower hose is likely, or the brush roll may not be operating correctly. Check the cleaner-head airway, remove wrapped hair, inspect the brush drive system, and confirm that the floor setting matches the surface.
Can a dirty filter make a vacuum lose suction?
Yes. A dirty filter can restrict airflow and noticeably reduce performance. Clean or replace it according to the vacuum manufacturer’s instructions, and never wash a filter unless it is specifically identified as washable.
Why did my vacuum suddenly lose suction?
A sudden loss often points to a newly formed blockage, disconnected hose, full bag, shifted dust bin, or something trapped in the cleaner head. Start by switching the vacuum off and checking the complete airflow path.
Why does my vacuum sound powerful but barely pick anything up?
The motor sound does not prove that strong airflow is reaching the floor. A clog, air leak, dirty filter, tangled brush roll, open suction-control vent, or floor-head problem can leave pickup weak while the motor continues running.
How can I unclog a vacuum hose?
Turn the vacuum off and unplug it, then remove the hose if your model allows. Look through both ends and follow the manufacturer’s recommended method for clearing debris without puncturing, stretching, or damaging the hose.
Can a cracked vacuum hose reduce suction?
Yes. A crack lets outside air enter before it reaches the cleaning end, reducing useful suction where you need it. Inspect flexible sections near hose cuffs and bends, where repeated movement can cause wear.
Should I replace my vacuum if suction is weak?
Not immediately. Check the dust container or bag, filters, hose, wand, cleaner head, brush roll, seals, and settings first. Consider replacement or professional service when routine maintenance does not restore motor-level suction or the machine has electrical or major mechanical damage.
Low vacuum suction is usually easier to diagnose when you think about airflow rather than individual parts. Start where air enters the cleaner, work toward the motor, and test each section until you find the restriction or leak.
Keep filters maintained, empty the vacuum regularly, clear hair before it packs into the cleaner head, and inspect hoses whenever performance changes. Those simple habits can prevent many suction problems before they interrupt your cleaning routine.
“`
